My goal has always been to integrate this into an image development software, such as darktable. For this, I think it would be better reprocess the raw images and apply a minimal number of processing steps; namely demosaicing (because the network should work with any type of sensor), exposure correction (because the various ISO shots vary in exposure, especially at insanely high ISO), and alignment (with an external tool, because no tripod/remote setup is perfect).
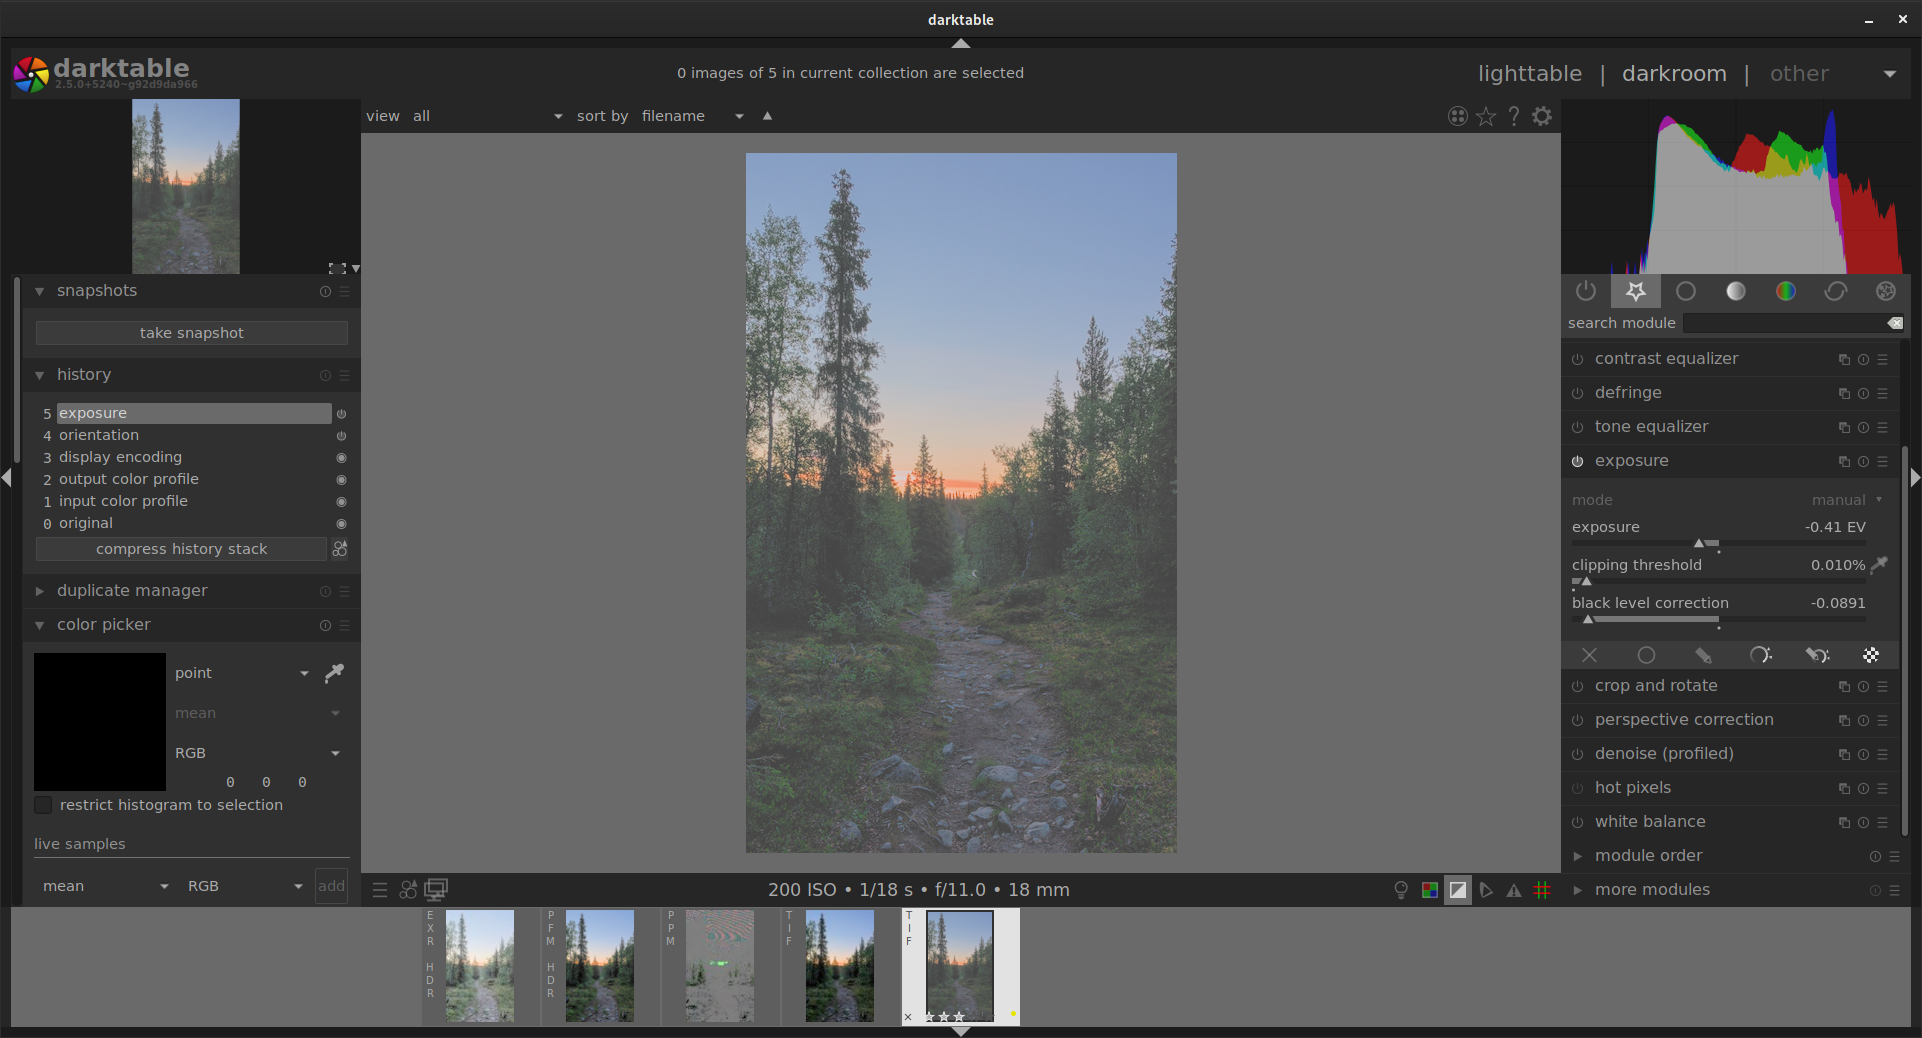
Unfortunately there doesn’t seem to be a way to export images from darktable with the full representation available and get them back exactly the same way. This would be needed as the network would be trained to take in a 32-bit floats and output corrected ones in the same format (and with less processing I would likely get more values outside of the [0,1] range unless I purposefully compress the histogram). Some 32-bit float options are available in darktable, but I can never get the same histogram I had at export. I can’t readily get the same image back with EXR and PFM, and TIFF does not seem to save negative values (clipped histogram). Maybe it’s just a matter of color profile? Otherwise I could work with other softwares since the processing steps needed are minimal (demosaic and exposure).
Thank you. “Linear prophoto RGB” does give better results. Not quite all the details I see in the RAW histogram but I don’t know if better is realistic or if the RAW histogram is even accurate.
I could also get the same result between TIFF and PFM by setting the input profile. OpenEXR differs just slightly.
I just skimmed over the paper, will have to read more. I already have a question or two.
1.Training took 48h, okay, but how fast is the denoise-network applied on a let’s say 20mpix image?
2. Comparing by IQA-metric is useful, but SSIM is…a bit simple, for the lack of a better word. Especially regarding the comments about denoise performance on skin. Do you plan to use other advanced(?) metrics to compare like GMSD, MDSI, Butteraugli or maybe even VMAF?
3. training datasets cannot be large enough to catch edge cases. how could this community help in expanding the training dataset (obviously sticking to the recipe)?
4. Have you compared your trained neural network to existing denoisers in darktable? Darktable has an NLmeans implementation…
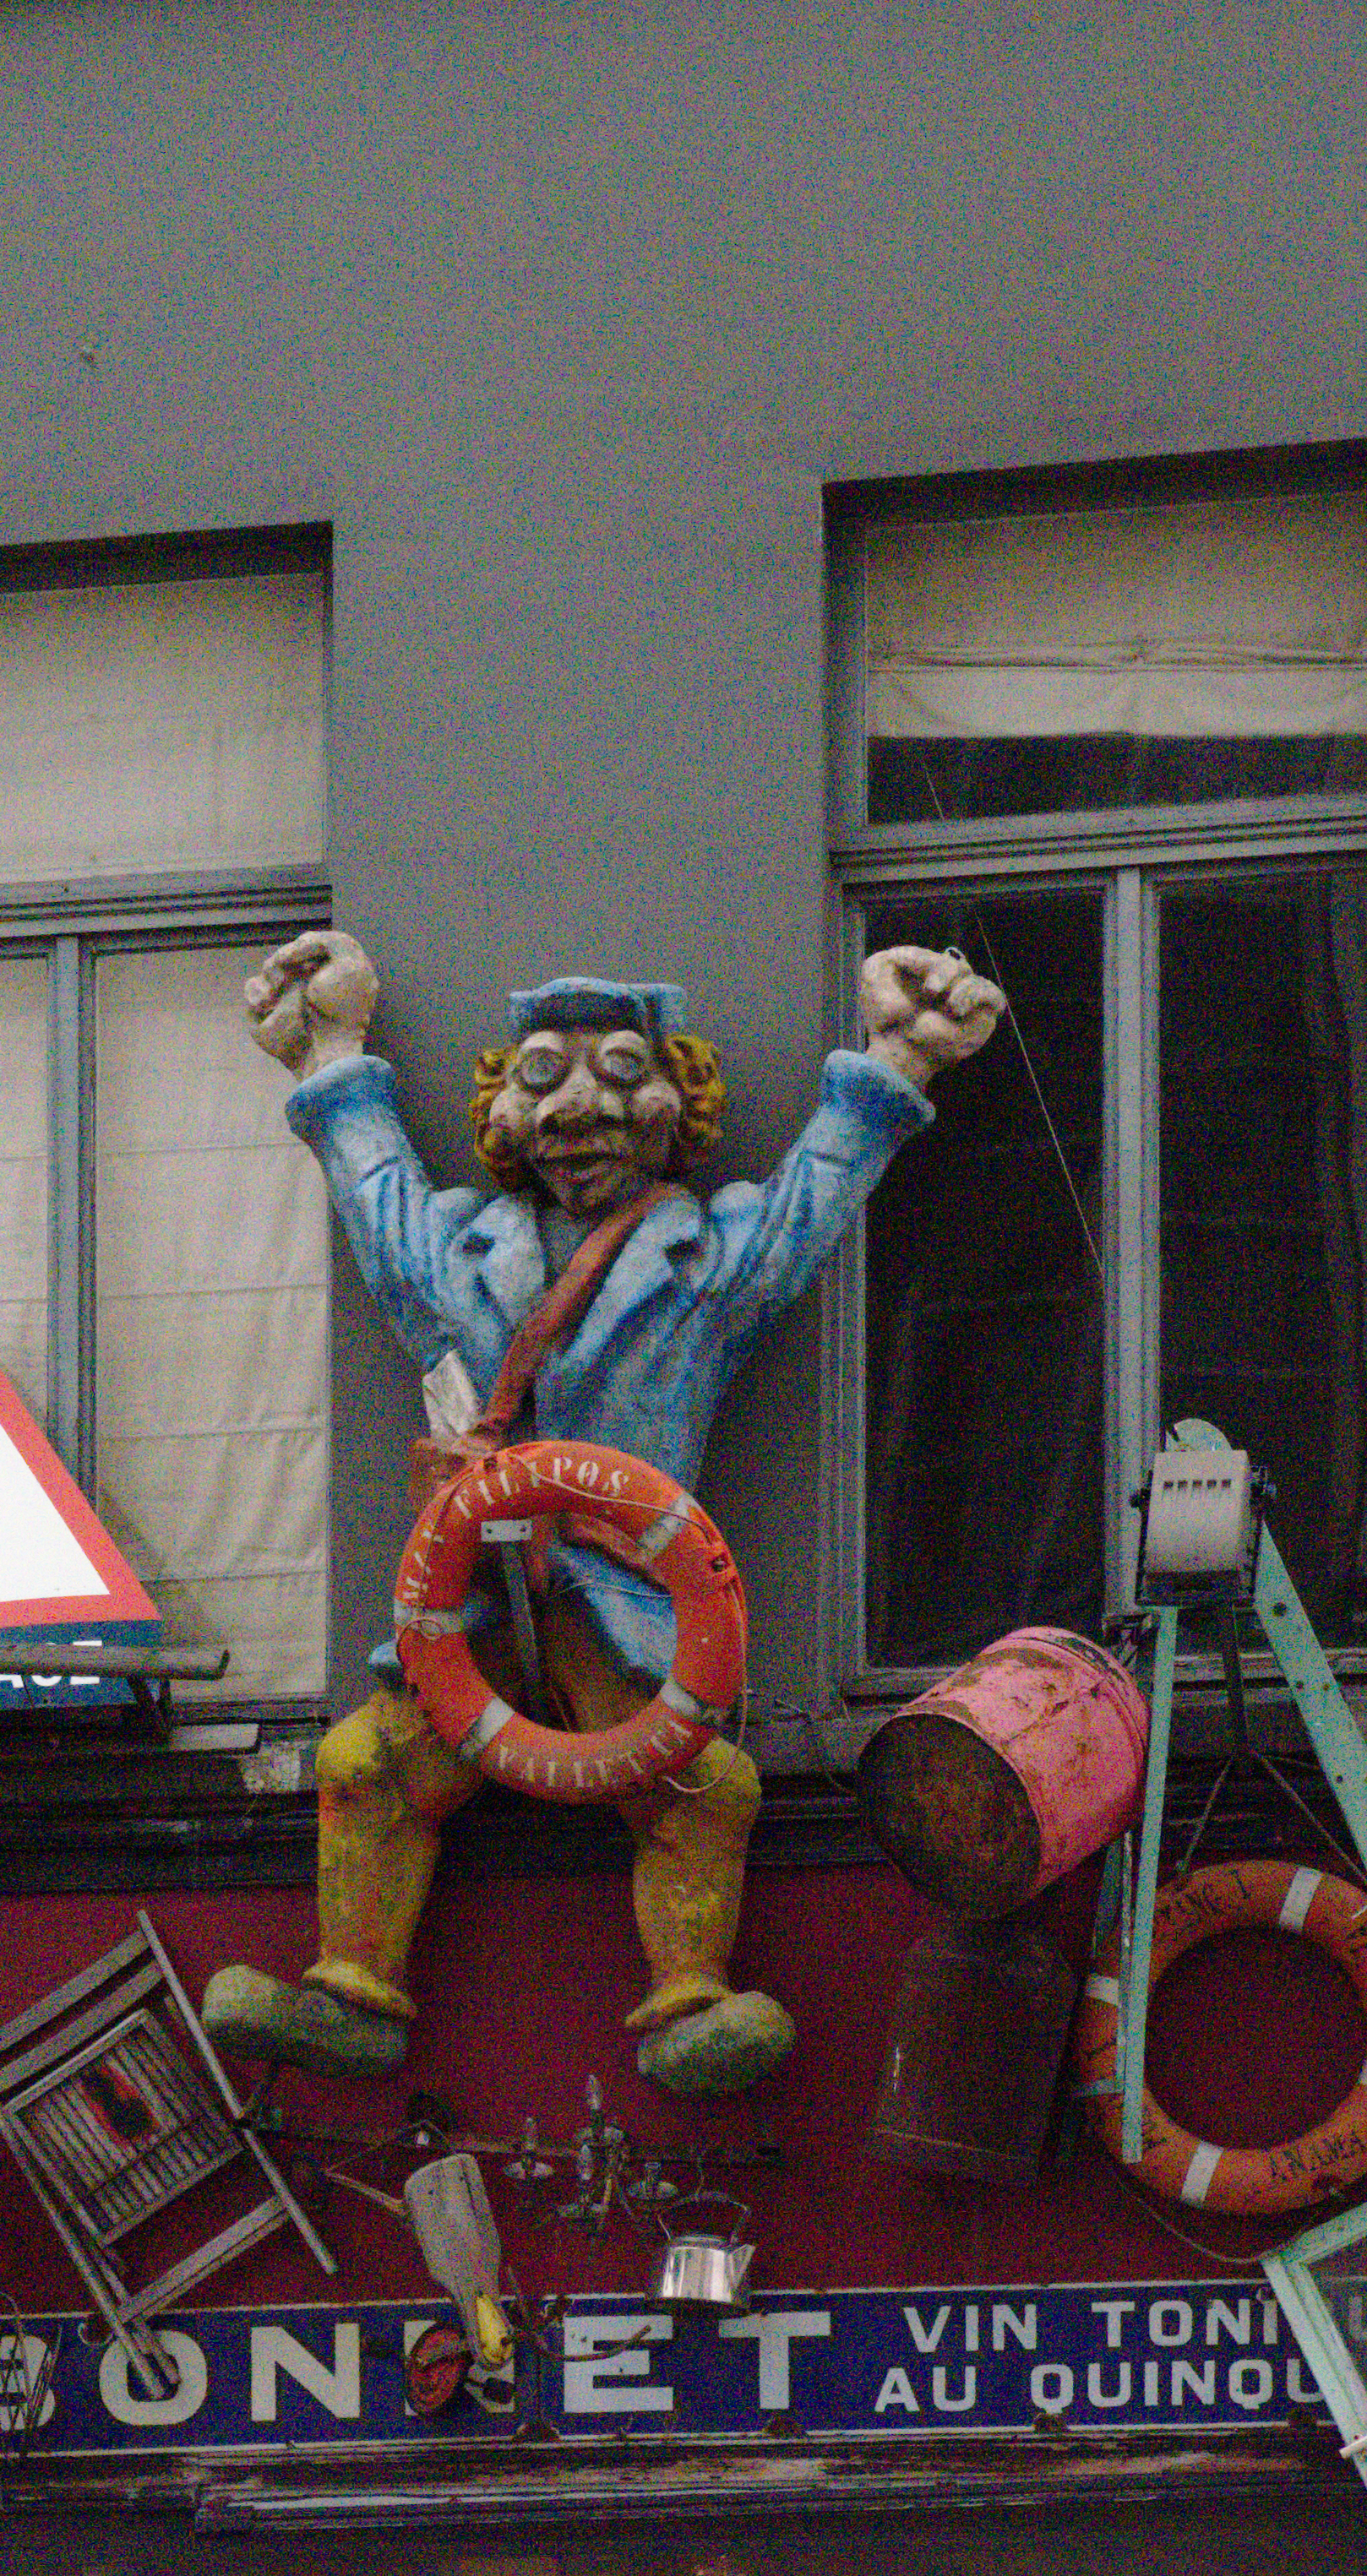
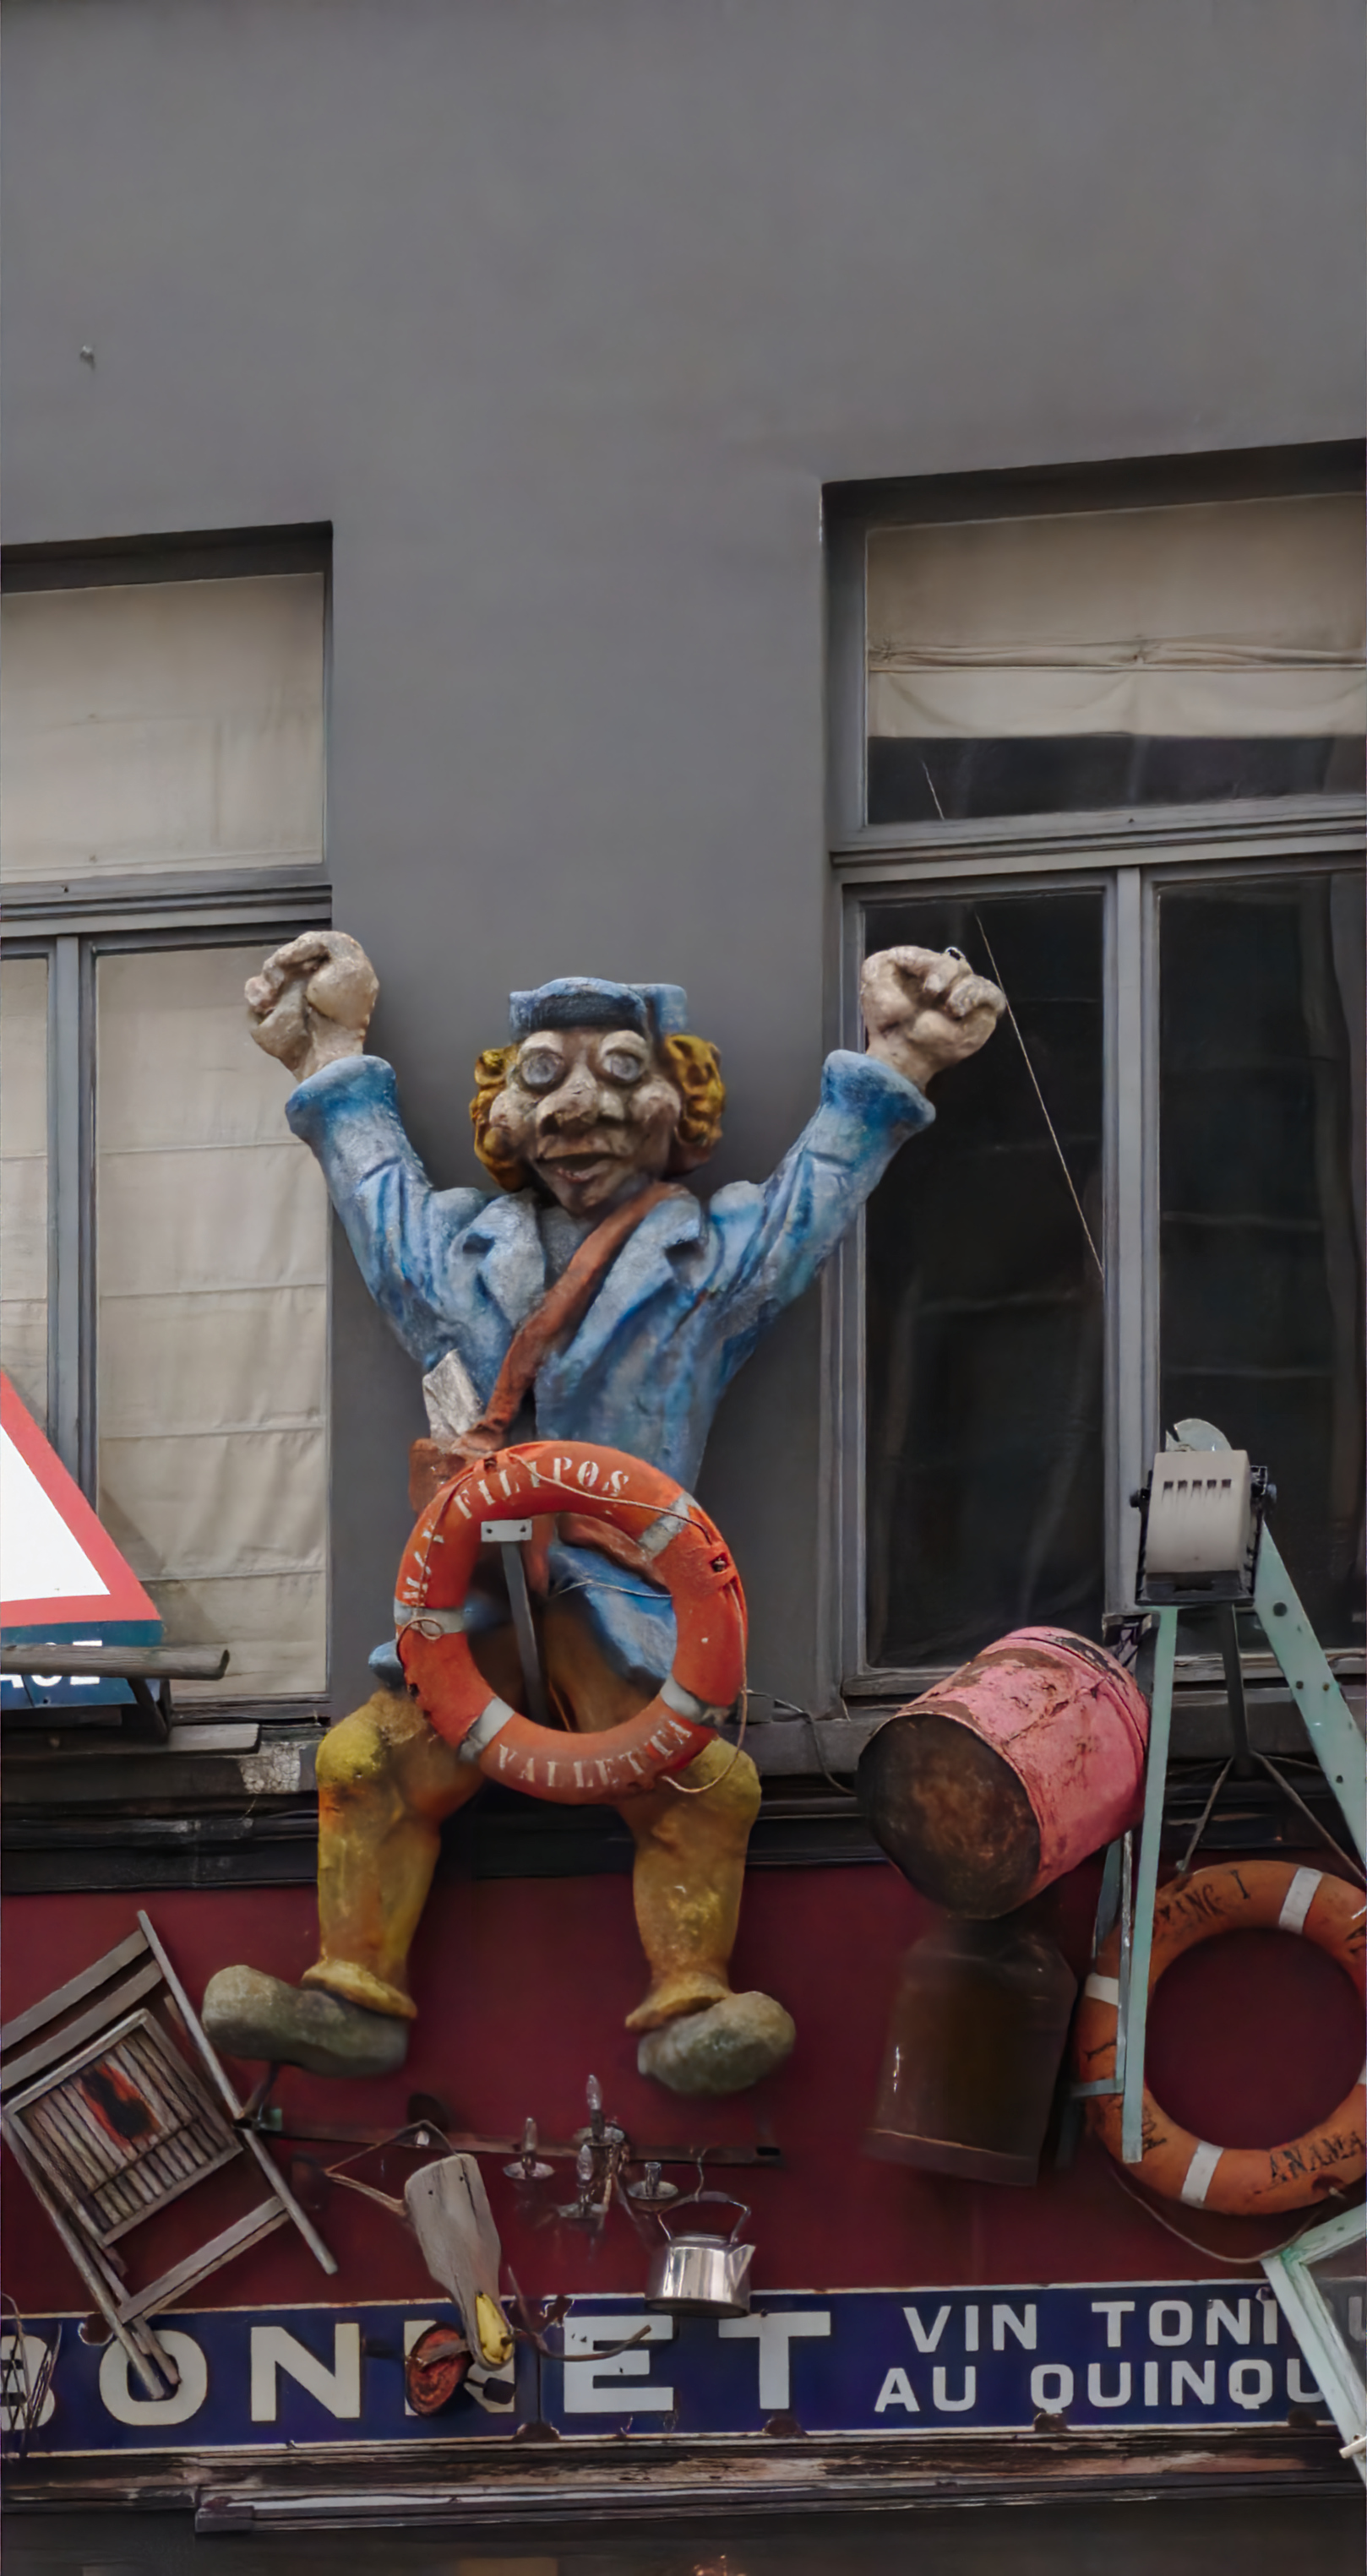
I initially compared my results to darktable (at the time the two steps NLM/wavelets profiled denoising), the numerical results were far off but it’s not a very fair comparison because darktable has far more settings and I couldn’t automatically test them all to find the best ones (like I did with BM3D where I tested all sigma values to report results). Nonetheless I consistently found the results are far better with the neural network. I’ve made the following comparison with darktable’s auto NLM and an image from the test set:
Denoising this 1.4 MP image on a GTX1070 took 4.57 seconds (note that I use patch size of 256 and “useful crop size” of 192, meaning that 1/4 of the denoised data is thrown away. This is due to the U-Net architecture handling borders poorly. Other architectures can be much more efficient, and a batch size of >1 should speed things up too. Although U-Net is pretty light in CNN standards, this is not optimized for speed.)
I did not try training or testing on other metrics (other than GANs). Any differentiable metric should work (out-of-the-box if it has a pytorch implementation, or tensorflow if I get to that implementation). I think that excludes butteraugli but not all of those you mentioned. MS-SSIM still seems to hold up well (per http://jpeg.website-eu-central-1.linodeobjects.com/documents/wg1n85013-Performance_evaluation_learning_based_image_coding.pdf section 4: Objective-Subjective Correlation Study), it did not seem to have a solid PyTorch implementation at the time but I think that has changed. Other training metrics (or combinations thereof) are definitely worth investigating (though I would personally not spend more time on it now as it’s very limited at the moment and there are other changes I think are much needed, namely a potential change of training data format, tensorflow implementation to have a C API usable by darktable, and a less wasteful architecture.)
I think the biggest factor that the community can bring is a wider variety of sensors to help the network generalize better. Anything different from what I do would help, like processing style or interest in different subjects. The more the merrier as long as the resulting files are perfectly aligned (the only way for the network to get a good score on misaligned images is to average them; blur).
I am not entirely sure how to handle the change in processing that is being discussed here (from outputting a pretty just unsharpened image to only doing demosaic, matching exposure, and alignment), but I think that the network should be able to handle a dataset made up of different types so long as each set’s members match (much like it is able to denoise base ISO as well as > max ISO).
I would also not mind posting RAW files (not to give to the denoiser, because it shouldn’t have to deal with misalignment, mismatched exposures, and different demosaic needs, but as a repository in case the images need to be processed differently), I just don’t have a large public repository where they could be stored at the moment.
Thank you, that makes a lot more sense!
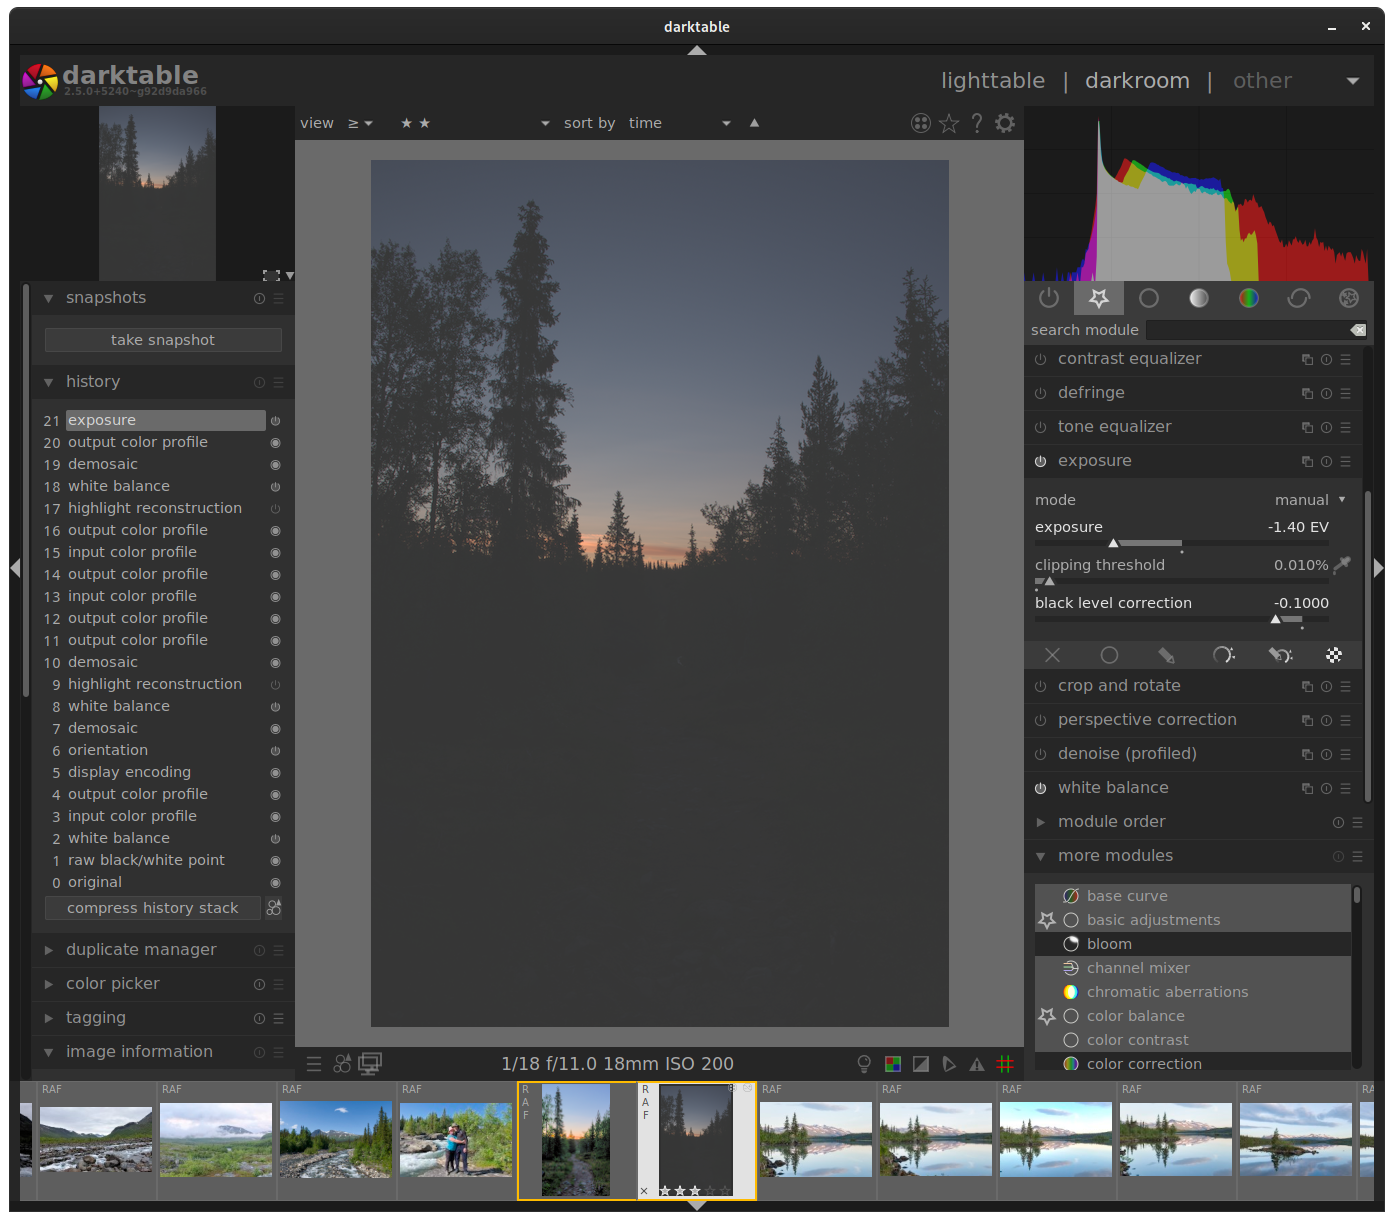
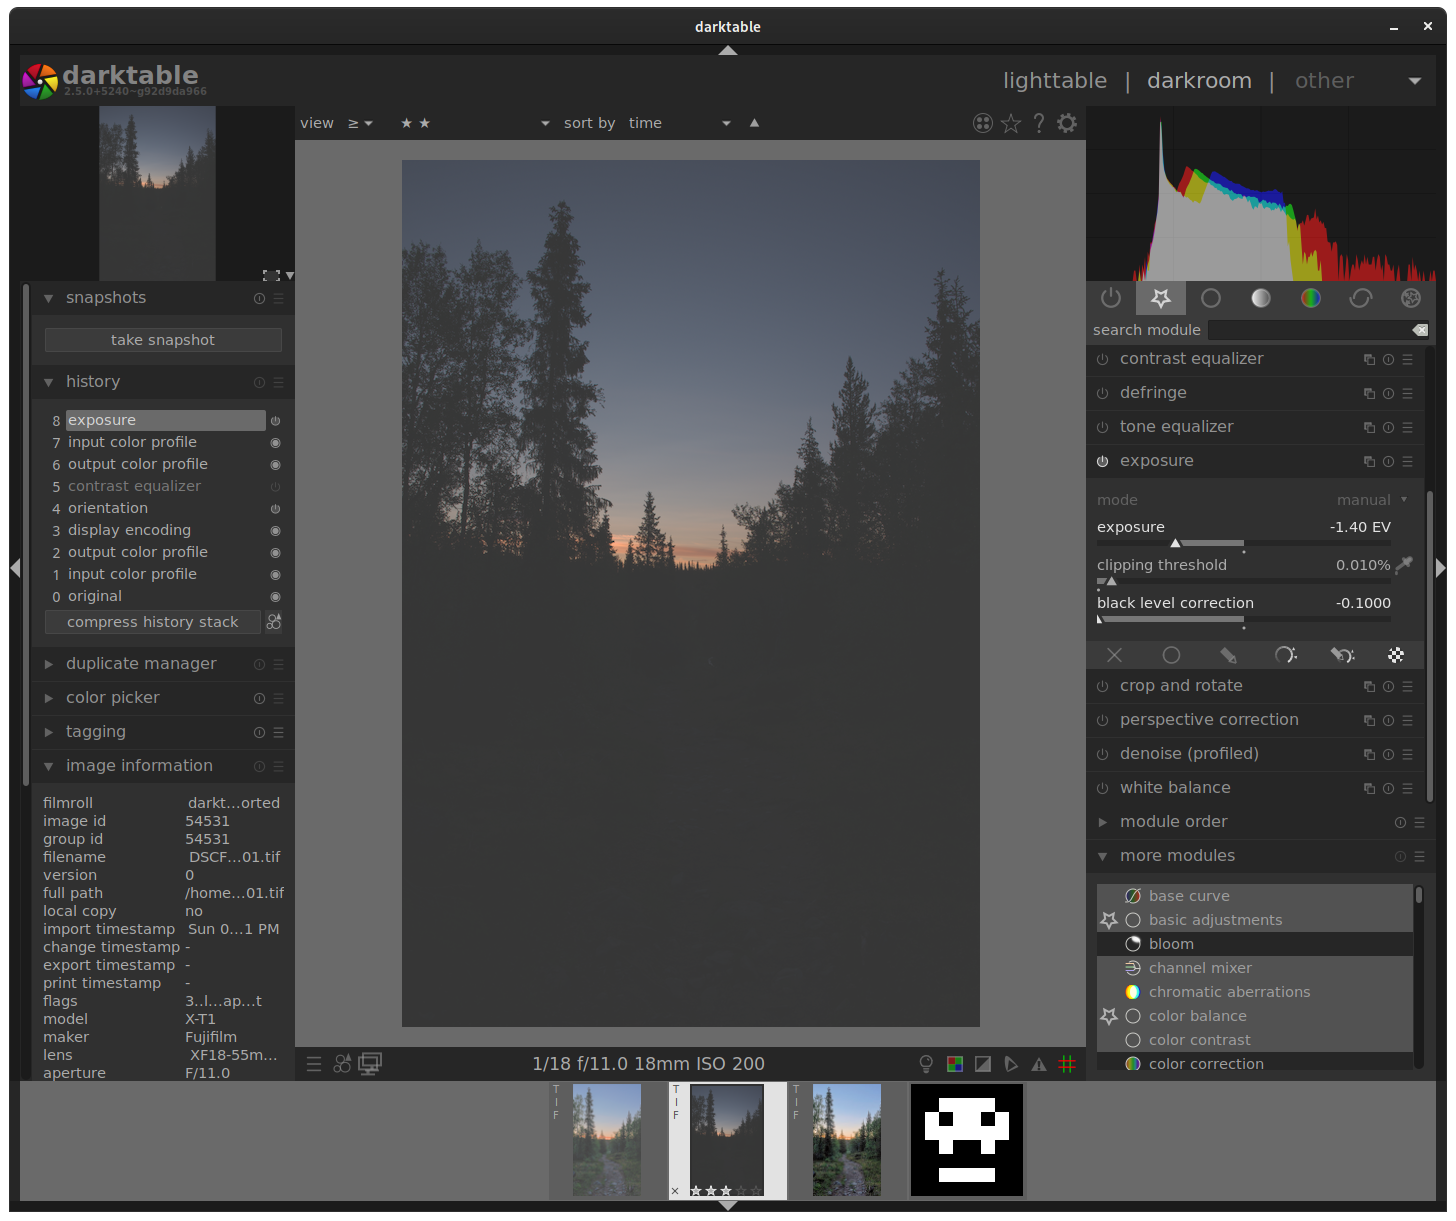
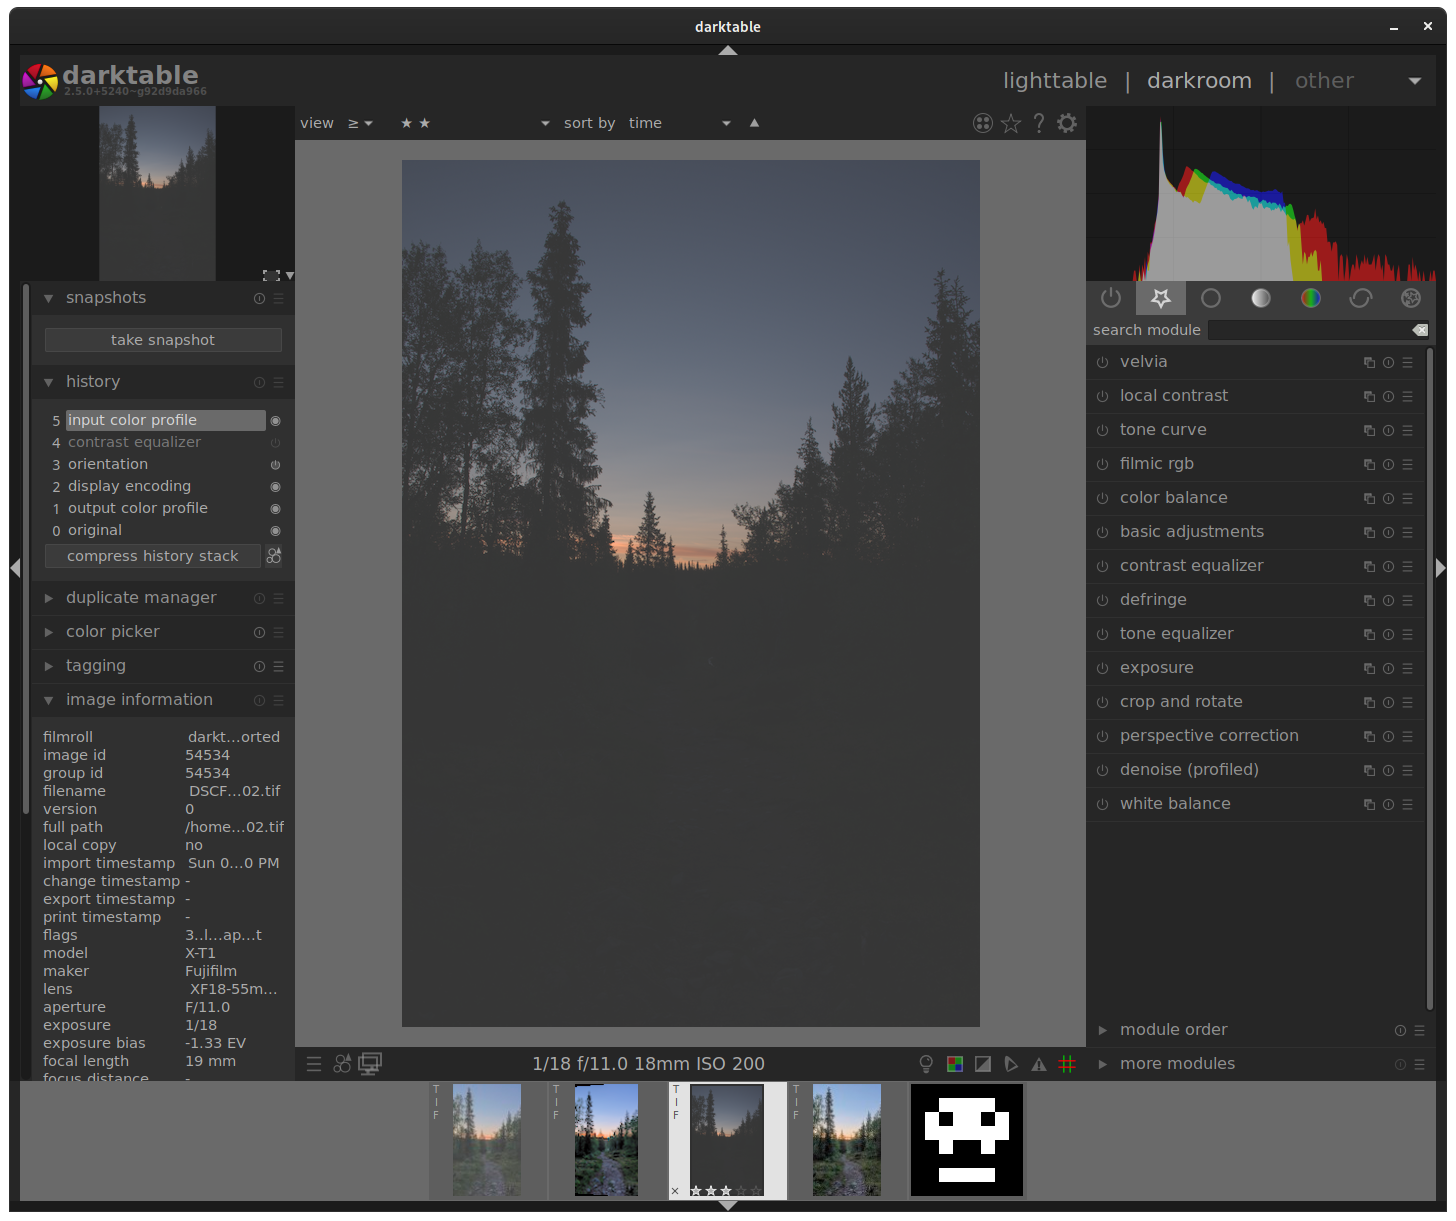
I set everything (raw: working profile, output color profile; tif/exr/pfm: input profile, working profile, output profile) to use the same “linear Rec2020 RGB” profile since that’s darktable’s default working profile.
I also simplified the example processing to nothing to minimize histogram inaccuracies.
It looks like I am able to get values beyond [0,1], however the histogram is still not quite the same and I don’t know what to make of it.
raw image with no processing whatsoever:
I only change the input profile of the exported-reimported image to make sure it matches. It makes no difference in tiff, pfm doesn’t seem to embed a color profile so it defaults to sRGB, and EXR embeds something slightly different which I suspect is not right (though I don’t know).
I tried saving the histogram-compressed raw, and upon reimporting it in one of those 3 formats I get exactly the same histogram as in the last screenshot (where I compress the histogram after import), so it looks like there is no loss associated with histogram clipping which is great.
I think that means my next step is to reprocess the whole dataset with minimally processed images (white balance - demosaic - exposure matching - alignment) using the “linear Rec2020 RGB” output color profile. I guess that what the network gets as input and outputs should then be identical to the raw data that goes in and out of darktable’s denoise module (please correct me if I’m wrong).
The most straightforward way should then be to overwrite the dataset directly on Wikimedia Commons. (All the versions are kept and the download script I made can fetch the version from a specific date, ie when the paper was released to replicate the exact results shown).
I will post back once that’s done, it should be a while.
Actually I feel like this could be wrong, wouldn’t the output color profile apply a conversion to the pixel values?
The raw image’s “input profile” is “standard color matrix”, and I have to pick a different output color profile (ie linear Rec2020 RGB) which has to match when I reimport the exported image (or it’s stored with the image and used as default in containers such as tiff).
Reimporting with a different color profile or with the “standard color matrix” as input color profile yields different results. This seems to indicate that the pixel values have changed, but I would ideally get the pixel values exactly the way they transit internally (there is no reason to do any conversion since the few modules used operate in RGB space).
I guess outputting the exact pixel values that transit in memory is not something that’s currently implemented, or I’m overthinking it/wrong because there is no actual loss involved in outputting with a different color profile? (I’m not yet too familiar with how these work.)
I don’t know why the syntax error shows there, but maybe it’s related to the brackets ? They just mean mandatory / optional argument. The command should then be: python3 denoise_image.py --cs 256 --ucs 192 --model_path "models/2019-02-18T20:10_run_nn.py_--time_limit_259200_--batch_size_94_--test_reserve_ursulines-red_stefantiek_ursulines-building_MuseeL-Bobo_CourtineDeVillersDebris_MuseeL-Bobo-C500D_--skip_sizecheck_--lr_3e-4" -i in/3200.jpg -o out/3200.tiff
Let me know if that works, unfortunately I can’t test right now because of Build fails with torch 1.8.1 and cuda 11.3 · Issue #3695 · pytorch/vision · GitHub , and/or if you need this without CUDA (on CPU).
I updated the doc and I will test the bits that are supposed to find the right model soon.
I have a few changes in the pipeline; CPU denoising (painfully slow but sometimes needed), whole image denoising (if there is an insane amount of RAM then it can yield slightly better results than stitching crops together), and 16-bit loading using opencv (PIL only supports 8-bits) are done, I want to improve the training pipeline and I will test and push it all together.
Were the images sharpened ? The current training pipeline was fed unsharpened images (because that amplifies noise) which are meant to be sharpened after denoising. That might affect the result. Otherwise it’s possible that it doesn’t generalize to very different sensors (I didn’t have access to a full-frame camera at the time).