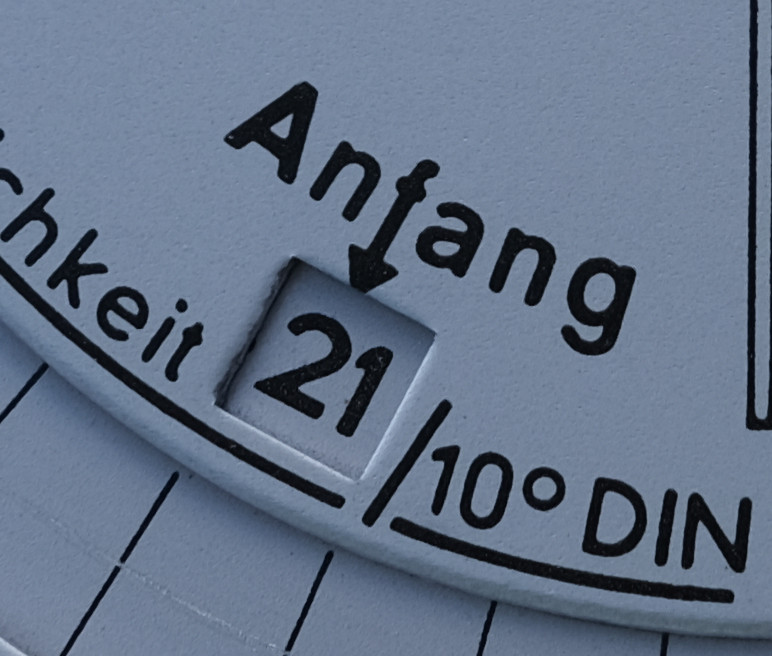
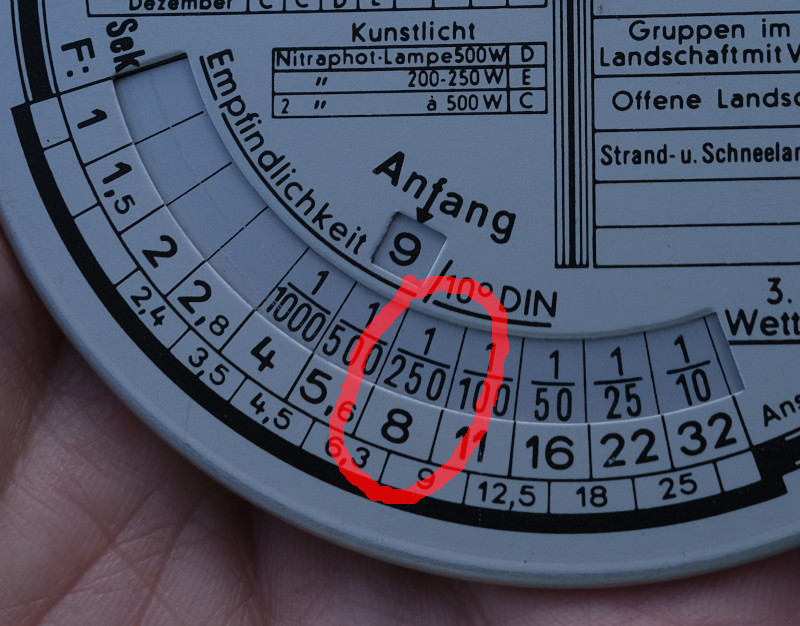
It is 21°DIN or ISO 100 in the shot, but later I noticed that my camera can’t go below ISO 200 or 24°DIN. Luckily that is just the highest possible setting and I changed to that.
This would possibly have been easier to do with the meter in the camera. But there is another feature of this disk that can’t be done in any digital camera, It can calculate the amount of flash powder needed for flash photography…
As a wannabe street photographer, I tend to just grab my camera, point the sticky-out round bit in roughly the right direction, and hope for the best. Needless to say, such a sophisticated bit of kit would be totally wasted on me — it would look great on my mantlepiece, though; what a beutiful and wonderful item! Thanks for sharing!
You might be right about that, but there might be something else at play here: This tool was made to be used shooting film and for the average/casual shooter.
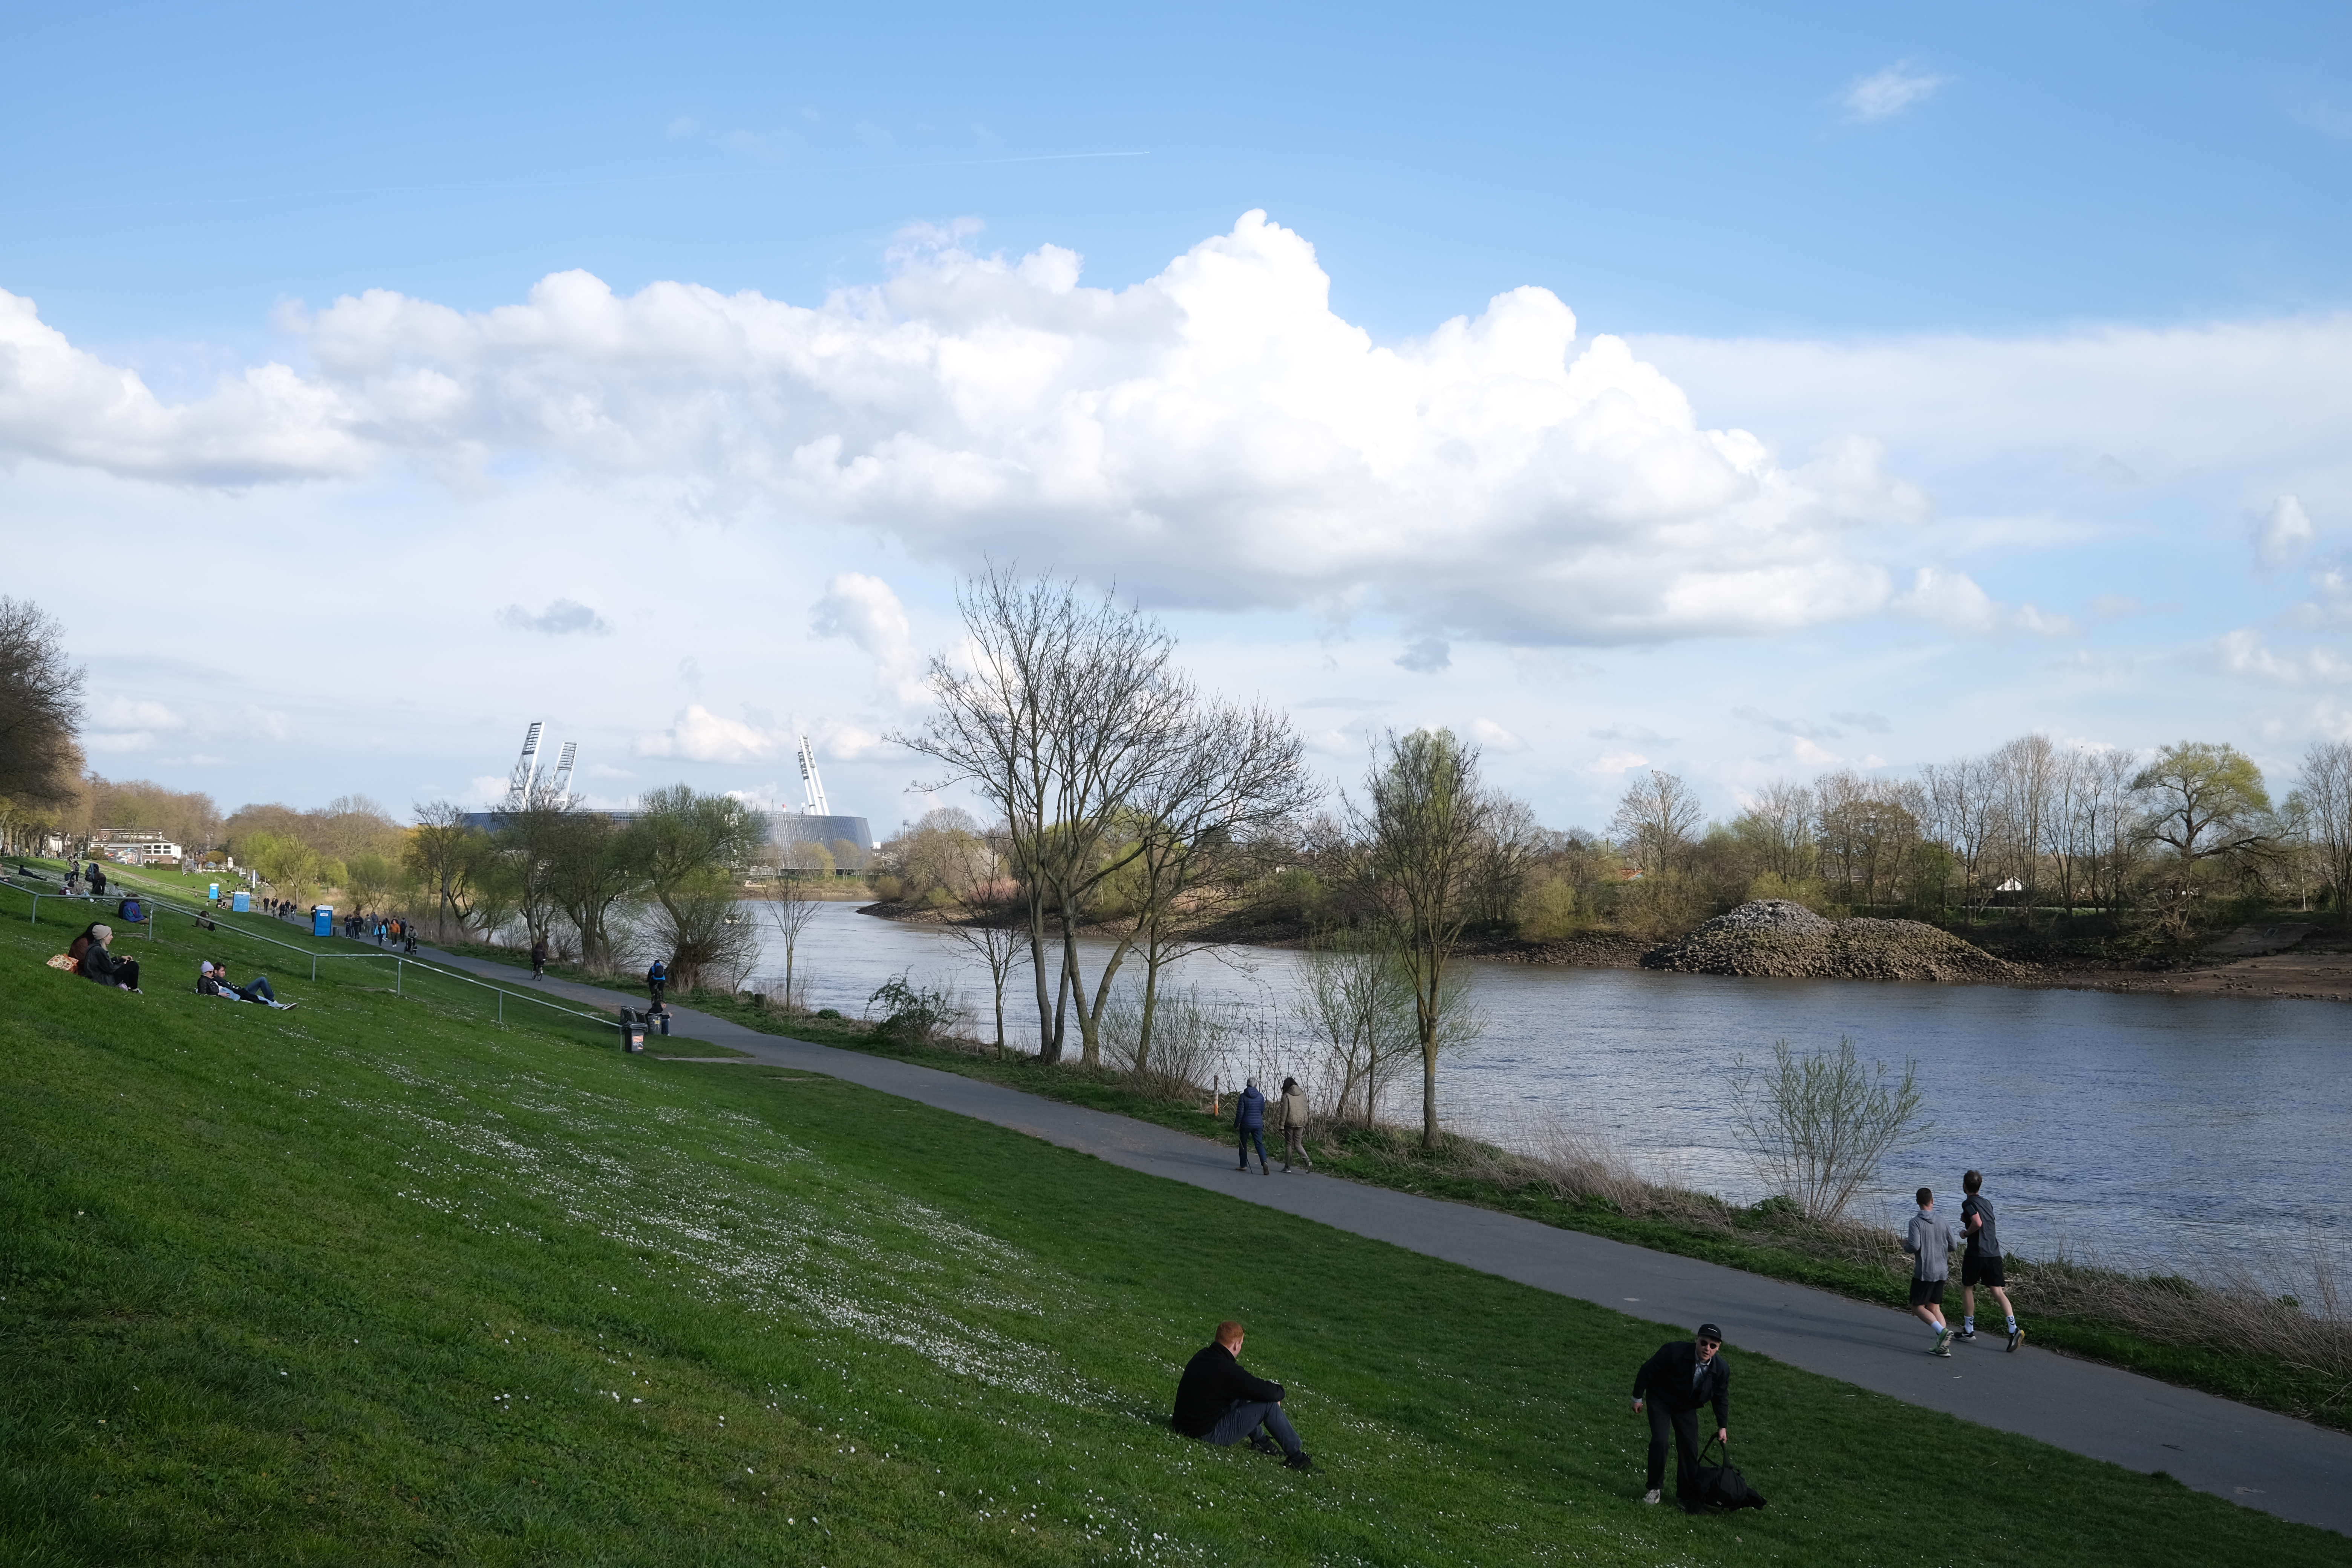
It wouldn’t surprise me one bit if this tool is intentionally biased a 1/2 stop towards overexposure and thus protecting the user. Unlike digital, when using film you need to protect the shadows. I know that Kodak colour film looked better when overexposing by 1/2 a stop (scene correctly measured with a light-meter). I don’t have any Agfa film experience, but maybe they also took their own film behaviour into consideration when making this tool.
Take that 1/2 a stop and add a slight underexposure that might be needed when shooting this scene with a modern digital camera, which can do 1/3 stops, and you end up with a 2/3 maybe even a 1 stop stop difference.
The only way to actually find out is to do some testing, but that might be taking it a bit too far. The again, this tool doesn’t use any batteries and can be easily stored away…
It was very good stored away in my box with old cameras. Got it as a fun gift some years ago.
I don’t think that is that exact to make a difference of half a stop or so. It is just an “over the thumb” informed guess of the right exposure.
Black and white film is very forgiving and as with digital you had a second chance in post. With a bit of routine you saw that the negative was too light or dark under the enlarger and modified the exposure time accordingly. And if it was a “real print”, not just for remembering the visit in the zoo, you made test strips and performed the dodge and burn dances even with perfectly exposed negatives.
BTW, this was the first time that I used this device for a photo. In my analog days and before TTL measurement I had a small hand held light meter. You used it once, set the camera accordingly and shot away with the same setting.
Love it! I’ve got a small collection of such, my dad’s old slide rule and calipers, my E6B flight planning computer from a failed attempt at military flying, but this one would be Really Cool Beans!!
Mine was a cheapo cardboard version. I was just a poor single guy learning to fly through Civil Air Patrol, so I couldn’t spring for the fancy aluminum type. Then I got married and became a poor married guy…
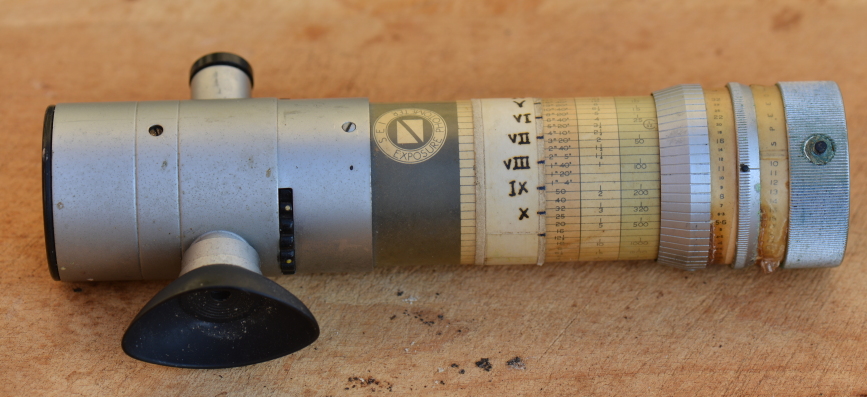
A rummage through my drawer of old photo stuff unearths my “SEI exposure photometer”, adapted by me to use the Zone system.
It is a spotmeter, using the extinction principle. The viewfinder has a central gray spot. Set the film speed, then twiddle the dial until the spot matches the grayness of the surround, and read the exposure (aperture and exposure time) off the scales.
Film speed is the British Standard, natch, which is DIN plus 10. (Aren’t standards wonderful? So many to choose from.) The aperture range is from f/1 to f/32. The exposure time is from 1/500000s to 2h 47m.
The central gray spot comes from an internal bulb powered by a battery. But the brightness of the bulb depends on how flat the battery is, of course. So it also contains a photocell and moving coil meter, and a variable resistor in the bulb circuit. It has to be calibrated first by twiddling the variable resistor until the meter hits the red mark.
So far, so simple. But it also has a dial to select one of three brightness ranges which introduces neutral density filters into the viewfinder. Select whichever of these allows the gray spot to be extinguished. When reading the exposure, use the shutter speed whose background colour corresponds to the range selector. If you get the wrong exposure scale, the exposure will be wrong by a factor of 100 (6.5 stops). And another selector is for daylight or artificial light.
The meter was good for determining what exposure would put a subject tone in zone V or zone IX or whatever I wanted. I used it for 5x4 work. It was far too clumsy to give the give the range of light values in a scene, which would determine whether to develop the sheet film for N+1, N+2, N-1 contrast or whatever. I eventually replaced it with a more flexible (Minolta) spotmeter.
The PDF is very humble (“The Ultimate In Light Measurement” and a recommendation only by Ansel Adams), informative with a write up of the principle of construction and a lot of technical drawings and has a manual of operations that needs a lot of patience.
I don’t suppose many cameras in the 1950s could do 1/500000s, but that time at f/1 is the same exposure as 1/1000s at f/22, assuming no reciprocity failure.
Video with Mr Adams using a SEI meter: Ansel Adams: Technique & Working Methods - YouTube . He didn’t do my trick of adding a zone scale. I expect he didn’t need to, and could do the required calculations in his sleep.
Today too, but it must have been technically possible at least 1900. I would take the principle of a bandsaw, speed it up from 30 to 100m/s and have a slit of 0.2mm in it. Let that run in front of the film like a back shutter of a SLR, add a leaf shutter in front of it and you have half a millionth of a second. You would need a lot of light, even like today in high speed photography.
That would be about $2000 today, reasonable for a professional tool. I found a Gossen spot meter for 2500€ and there were more with 4 digit prices. Precision is expensive.
I found the price on the manual you linked to.
The video is fascinating. And perhaps also a reminder not to fully rely on the computer in the camera. Switch to spot and have a look at the shadows from time to time.
Ofcourse nice to see the olden tricks :), but overexposure want as destructive then as its now, and likewise underexposure is far less of an issue these days compared to the film days .
So I would always extract a healthy 1ev or more then what a tool like this says. I don’t even trust the meter in my camera :).


 Movie CLIP - Cool Beans (2007) HD")