You need to adjust nind_denoise = and nind_denoise_param = in dt_nind_denoise.ini according to your paths. Something like this (using the same paths when you tested denoise_image.py manually):
Makin’ progress, it finished! The photo is denoised and processed… Thanks for helping me make it run.
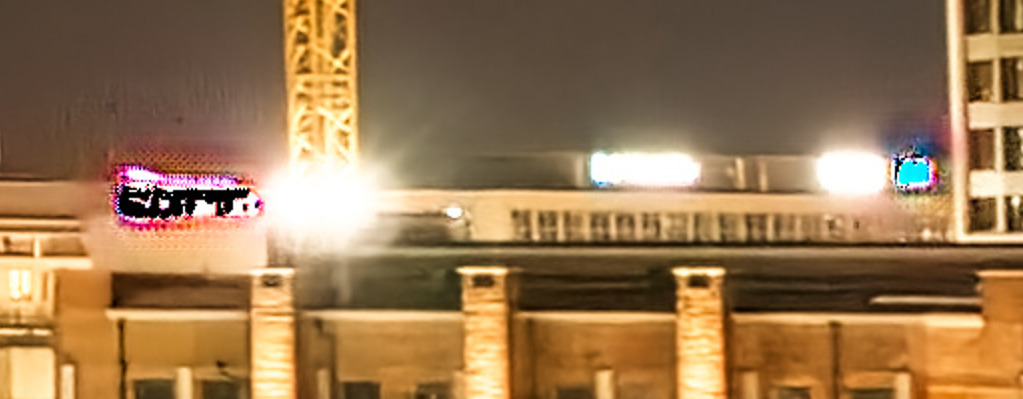
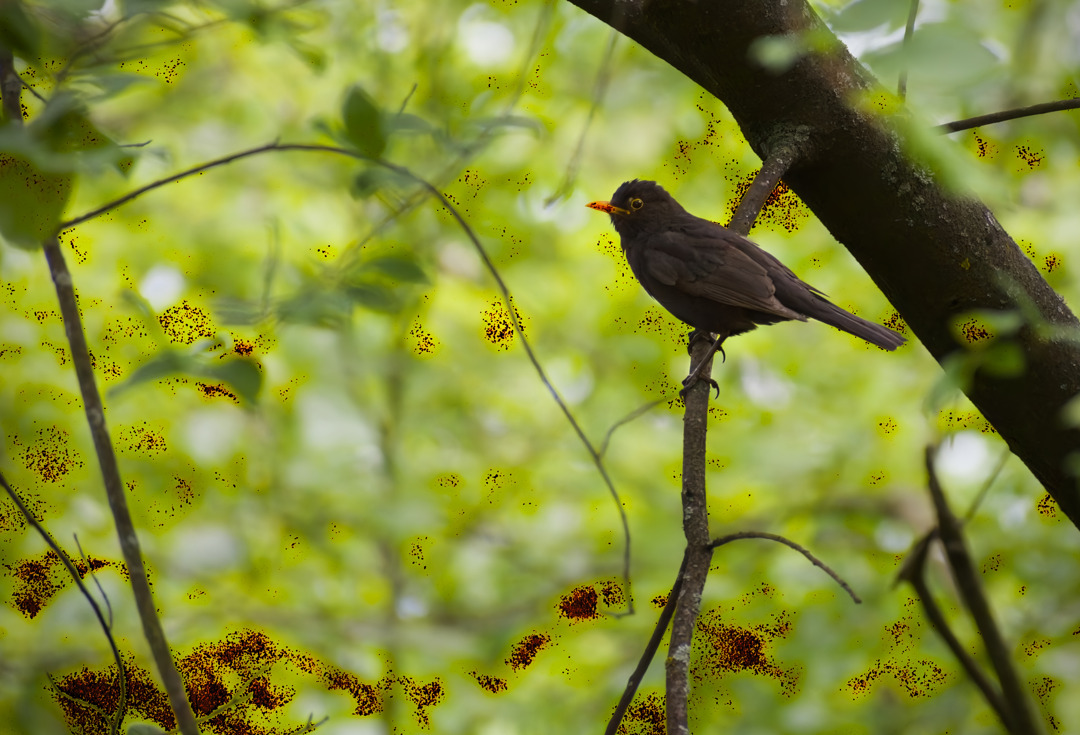
There are problems though – The exposure (as I saw someone mention) is probably applied twice as the image is quite overexposed. There are also some glitches in the image:
Also, the sharpening seems over-done compared to my original render (I think I forgot to remove it from the .xmp, oops!) This render (the noise reduction and sharpening) reminds me of my phone’s night-mode kinda look. But considering the model had so little training data, I think it did a very good job
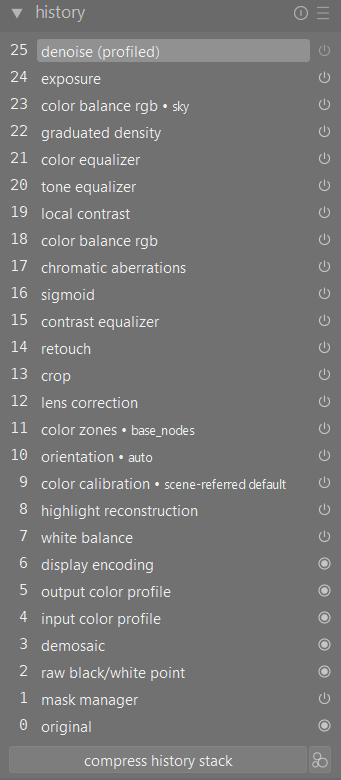
be sure to compress the history before running the script. Multiple instances of a module is unpredictable when we mess with the XMP outside darktable.
If you prefer using DT sharpening (over RL-deblur), you can run the script with --no-rldeblur flag, or disable gmic permanently by commenting out gmic in dt_nind_denoise.ini
For images too dark that you push at least +4EV in darktable, try running the script in night mode (with -n or --nightmode flag) and see if you can get better result. It basically shifts exposure and toneequal to 1st-stage to have a “normalized brightness” image before feeding to nind-denoise.
This is my history stack after compression, yet it’s still overexposed. The total compensation is only +0.950 EV though, so it should be okay. I also added the --no-rldeblur flag, but the images are 1:1 match, so I guess I’ll try commenting gmic out…
P.S. - the denoise at the top is disabled, so it’s not actually using it
EDIT:
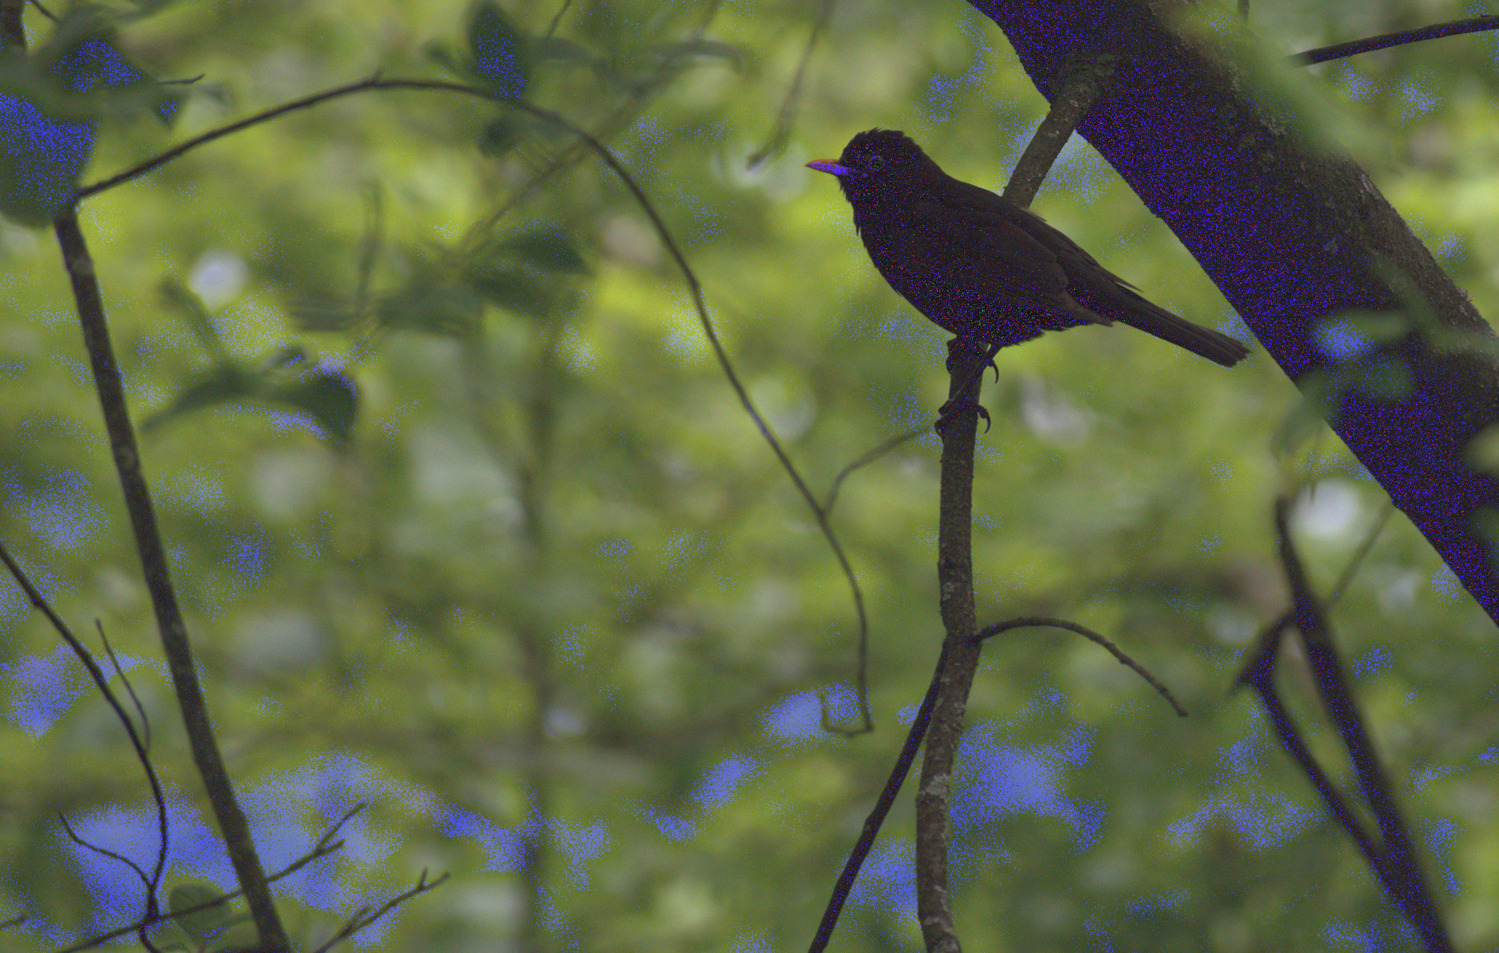
s1 image looks already overexposed, just low contrast
It’s likely “input color profile” issue, I’ve updated the code to move “colorin” right next to “demosaic”. Your NEF and XMP file works well on my darktable 5.3 now, pushed the fix to git.
Please copy your existing dt_nind_denoise.ini to somewhere else (just in case we lose your settings) and do a git pull origin
In dt_nind_denoise.ini, to specify the paths on Windows, please use either forward-slash /, or double-backslash \\, instead of single-backslash \. For example:
darktable = "C:/Program Files/darktable/bin/darktable-cli.exe"
or darktable = "C:\\Program Files\\darktable\\bin\\darktable-cli.exe"
Trying with forward-slash first (instead of double-backslash) as that can prevents many path problem.
[command]
# path to darktable-cli
darktable = "C:/Program Files/darktable/bin/darktable-cli.exe"

# path to gmic
gmic = "C:/Users/---/Documents/Programy/gmic-3.5.5-cli-win64/gmic.exe"

# command to invoke nind-denoise
nind_denoise = python "C:/Darktable_NIND/nind-denoise/src/nind_denoise/denoise_image.py"

# path and network type of the model
nind_denoise_params = --network UtNet --model_path "C:/Darktable_NIND/nind-denoise/models/generator_650.pt"
try running in debug mode (with -d flag), it’ll keep the intermediate TIFF files instead of deleting them (in the same folder as the RAW file). You can then inspect each and confirm at which stage the artifacts came in.
You can also import the TIFF files into darktable, and load the corresponding .s1.xmp and .s2.xmp files manually to see what could be the cause.
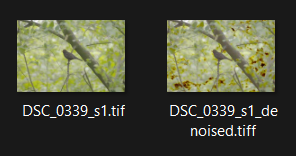
If the 1st-stage export before nind-denoise (DSC_0339_s1.tiff) doesn’t have artifacts but the denoised TIFF does, then it’s something with nind-denoise. But it could be that the 1st-stage TIFF (before denoise) has clipped data that affect nind-denoise. Maybe try upgrading to darktable 5.3 is possible.
The TIFF32 file (DSC_0339_s1.tiff before denoise) is quite large so I don’t know if you can find a way to share it temporarily (please don’t post it here, the mods will kill us both).
I ran mine again using CPU instead of GPU and it still came out clean. I checked out and recompiled darktable to release-5.2.0 tag, still clean. I’m using the exact same XMP file that you posted earlier (maybe download the XMP file you share from here and try again to be on the safe side).
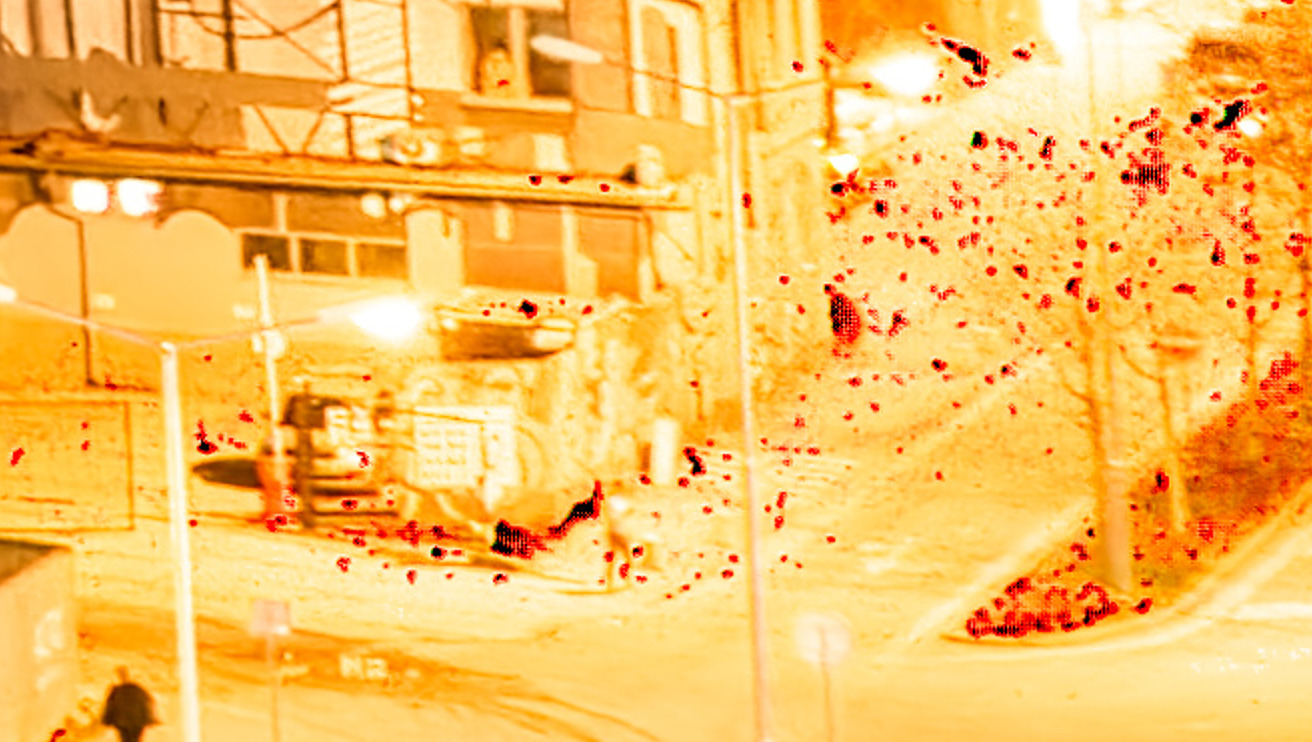
Also, my bad, the tif before denoising is already glitchy, I was only judging the thumbnail, which is wildly different. Anyways, here’s the DSC_0339_s1.tif as viewed using XNView MP: