FerrumPix: Photo/RAW-Editor, Viewer, Gallery, Immich and Nextcloud Client in one App

Last NVIDIA drivers that support GT710 are 470.xx. NVIDIA stopped supporting them a few years ago, just like the GT710. That’s why they (drivers) were removed from main repositories of main/modern distributions - 470.xx can’t work without patches on any newer kernel (>6.8). Open Nouveavu driver is fine, but only for displaying desktop.

There are three ways you can go:

  • downgrade you kernel (pointless, since there is no 470.xx in repo),
  • upgrade you gfx card,
  • try to install drivers with patches for newer kernels (6.18, 7.0, 7.2 and so on). It’s a tricky way and you have to use terminal. There’s a Github repository with scripts that somehow automate this process. All you have to do is install some packages with apt, clone repo, run install script, blacklist the Nouveau driver and… Hope it works.

You can’t run Wayland (GNOME, KDE) on these drivers though. Xubuntu with Xfce should be fine.

1 Like

Hello @bitpainter75, just tested the new version 09.42 with a series of photos I shot today, a female cycling course in and around my village.

Some remarks and questions, mainly about usability.

  • Would be nice to have a shortcut for zoom to 100%, Z for example.
  • Please center the zoom in the middle of the image, now it is on top. (Fun fact, I asked that years ago to the RawTherapee team).
  • Would be nice to be able to navigate in the 100% view with the arrow keys (fun fact, I asked that earlier to @agriggio, the maker of ART).
  • I always shoot RAW+JPG, there’s no filter in the Viewer to show JPGs or RAWs only, isn’t it? Practical for a quick review.
  • How do add a tag to all the selected photos in the gallery? If can add a tag to 1 photo, but not to all, if I’m not mistaken.
  • So I tagged these shots in Digikam (and gave 1 photo a 4-star rating and a colour label). FerrumPix doesn’t see those annotations. Perhaps something with synchronizing sidecar files? I’ll have a look in Settings.

I know you’re working very hard on FerrumPix and you’re very responsive to questions or feature requests. So please do not see my remarks as “You must do what I want” (of course not! :upside_down_face:).

I think your app has potential, already in its current state it’s very usable.

Regards, Paul.

To @bitpainter75 , @Nexis4Jersey , @Dariusz_Duma.

Thanks for explaining the problems with my very new video card (I bought it this week, new!!). I must confess I know nothing about those cards.

Some time ago I had to buy a new monitor, the old one was dead. With my old card I could not get the full resolution, so a new card was already on my wishlist. When I read that FerrumPix could use a video card for the AI denoising, I decided to buy such a card, the cheapest I could find. I have the full resolution now for my monitor and that was the main reason to buy one. That FerrumPix can’t work with this one, no problem.

The new ‘normal’ denoiser works fine, so in the end, all is well !

Regards, Paul.

Thanks for your kind words Marc, but I really don’t deserve nor need any stripes.

It’s just that this “new kid on the block” took my attention, so I had a closer look. Of course with a new application one can find things that do not work or do not correctly work (my Wacom pen for example). And when an app is fun, it’s also fun to give some feedback to the dev.

In short, @bitpainter75 needs those stripes, not me! :upside_down_face:

1 Like

Totally understandable about the GPU and computer tech in general. I really didn’t start paying attention to that stuff until a few years ago when my desktop machine died & I still run things till they break. The general rule of thumb these days is you need at least 8gb of GPU Vram for proper Photo , Video and light AI work along with gaming. My older Laptop struggles abit when I do my Ai - de-noising but my newer desktop handles it like a champ.

Hi Paul,

thanks a lot for testing FerrumPix with a real photo series and for writing all of this down.

RAW or JPG only: this already works through the gallery filters. Set the file type filter there to RAW only, everything except RAW, or a specific extension such as JPG, then open an image. The Viewer only navigates through the images left by that filter, so you can review just the RAWs or just the JPGs.

Adding a keyword to several photos: select the images in the gallery, open the Info sidebar and enter the keyword there. It will be added to every selected photo, while existing keywords remain untouched. With multiple photos selected, the list only shows keywords shared by all of them, which can make it look as if the others disappeared, they have not.

digiKam metadata: FerrumPix reads ratings and keywords from the image itself and from XMP sidecars, including digiKam-style sidecars such as photo.NEF.xmp. By default, however, digiKam often keeps this information in its own database until you explicitly write the metadata to the files/sidecars. For RAW files, the relevant options are under digiKam’s metadata/sidecar settings.

Colour labels are different: digiKam stores those in its own metadata field, which FerrumPix does not currently read.

Zoom: the Viewer already has a 100% button in the bottom bar, but there is no keyboard shortcut for it yet. The arrow keys currently move between images, which is why they do not pan a zoomed image. Your three suggestions: a 100% shortcut, zooming around the image centre, and keyboard panning while zoomed, all make sense, and I will have a look at them.

And no worries, I do not read your list as demands at all. It is exactly the kind of practical feedback that is useful, and I’m glad FerrumPix is already usable for you.

Regards,
Patrick

Works! I oversaw that.

Works, thanks!

Tags and Digikam, not a deal-breaker for me.

At this point I can use FerrumPix very well as my standard image viewer instead of gThumb, your app is way faster with large sets of photos.

Thanks for all your hard work!

I have some thoughts about masks.

Let’s assume I create two masks (two layers). I make visual adjustments for the first one (brightness, contrast, etc). Then I switch to the other mask (layer) and application automatically switches to Mask Edit. I would rather expect to stay in the current activate tool (Adjustments for example).

Switching between masks should bring back the tools values/settings saved for each mask, while still allowing the user to switch tools manually.

Does it make sense or am I missing something?

Yes, that makes sense. I agree that switching the selected layer should not automatically switch the active tool.

I’ve changed the behaviour for the next version accordingly: selecting another adjustment, selection, mask, paint, or image layer now changes the target, while keeping the current working tool active.
So if you are in Adjustments, Retouch, Selection, or Mask, you can continue working with that tool on the newly selected layer.

The exception is when you are already using an overlay tool such as Text, Image, Watermark, QR code, Shapes, or Symbols. In that case, selecting another overlay can still open its matching editing context, because that is where its properties belong.

Editing a layer mask is now explicit: use the mask icon or “Edit layer mask”, rather than simply selecting the layer.

1 Like

out now, check the behaviour in the new version :wink:

1 Like

Wow, that was a quick one! Trans-Code Express :slight_smile:

Now it behaves more naturally. Works for me, thanks!

2 Likes

A little FerrumPix follow-up, versions 0.9.44 added quite a few things since my last post.

Probably the biggest additions:

  • There is now an automatic Level to horizon function under Transform. It looks for suitable straight edges in the image and corrects the rotation automatically.
  • Automatic perspective correction was added too. It detects converging vertical lines, for example in architecture shots, and straightens them with one click. The result is written back to the normal controls, so it can still be adjusted manually afterwards.
  • A new Open with option lets you send the original image directly to external applications from the gallery or viewer.
  • G’MIC integration : if G’MIC is installed, FerrumPix can send the current image to it and bring the result back into the editor as a new layer.
  • The viewer got some nicer keyboard/zoom behaviour: Z toggles between 100% and fit, and Shift + arrow keys pans around a zoomed image.
  • TIFF export is now available, both from Save As and batch processing.
  • The Windows version is now also available through the Microsoft Store , including automatic updates.
  • Selecting another layer no longer throws you out of the tool you are currently using. Drawing, retouching, masks, selections and adjustments simply continue on the newly selected layer.
  • Inserted images now start at their original size, and holding CTRL while moving an object temporarily disables snapping.
  • Immich people thumbnails/faces should now display correctly again.
  • Remote video handling for Immich and Nextcloud was fixed as well.

There were also a number of smaller fixes around perspective editing, object deformation previews, project previews and saving.

So the recent work is still partly about polishing and fixing things, but 0.9.44 in particular also adds a couple of features I had wanted for photo editing for quite a while.

As always, feedback is very welcome.

4 Likes

Hello, I had a quick look.

  • Level to horizon works – or does not work when it can’t find suitable horizontals. Apparently it doesn’ work on vertical lines?

On this photo it says No straight edge found to level against.

  • Auto perspective. corr. Does nothing on that same photo: No converging verticals found. Using Warp / manual, I get this (just a first try), already better.

  • Open with works fine, I added ART (and Gimp in the mean time).
  • G’MIC integration: can’t get that to work. With a photo opened, the menu left under shows an entry “Edit with G’MIC” but nothing happens when I click on that. I have gmic_gimp_qt installed, as well as gmic and I pointed in Preferences to the right entry. Quick work-around: Add Gimp to Open with…
  • The Z works as advertised, and it zooms to the middle of the image. Shift+arrows work as well. Thanks!
  • TIFF export works as well, but I have a question. If I convert a 16MP RAW in ART to 8-bit tif, the file size is about 46MB, and double that for a 16-bit tif. Yours is 22MB. Are you using compressed 8-bit tif?

Kudos again, I really like your app!

1 Like

Hello Paul,

thanks. I measured the original image with my geometry diagnostics rather than judging it from the screenshot.

It does detect edges 48 in total. The problem is that they do not form one sufficiently dominant “level” direction. Automatic levelling deliberately requires fairly strong agreement between the detected lines, otherwise it could end up rotating an image based on one accidental edge.

Vertical lines are included in the levelling analysis, so that is not the limitation here. In this particular image, the roof, floor and columns produce several competing directions.

For perspective correction, the strongest convergence leads to a vanishing point inside the image. FerrumPix currently only accepts vanishing points sufficiently far outside the frame for automatic correction, because the two perspective sliders are intended for normal keystone correction rather than full four-corner projective rectification. So in this case, manual Warp is indeed the better tool.

Regarding G’MIC: I think the selected executable is the issue. gmic_gimp_qt is the GIMP plug-in. FerrumPix needs the standalone executable gmic_qt, because it passes a temporary PNG to that program and receives the result back as a new layer.

On Xubuntu, that is normally provided by the gmic-qt package. Please select gmic_qt in Preferences rather than gmic_gimp_qt. I will also improve the validation there so selecting the GIMP plug-in does not appear to be a valid configuration.

And yes, TIFF export is currently lossless Deflate-compressed, 8-bit per channel. That explains the roughly 22 MB file size. It is not JPEG-style lossy compression, but it is also not a 16-bit export.

FerrumPix currently uses an 8-bit working image internally, so exporting a 16-bit TIFF at this stage would only expand those existing 8-bit values into a 16-bit container rather than provide additional image information.

Regards,
Patrick

Hello Patrick,

I agree my test image was a difficult one. On other shots with clear nearly horizontal lines, your took works well.

I’ll look a bit more on perspective correction later.

Gmic-qt works now!

TIFF: good to know.

Regards, Paul.

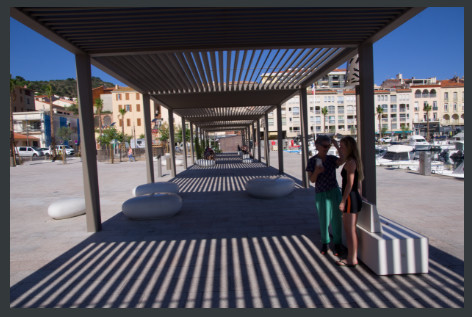
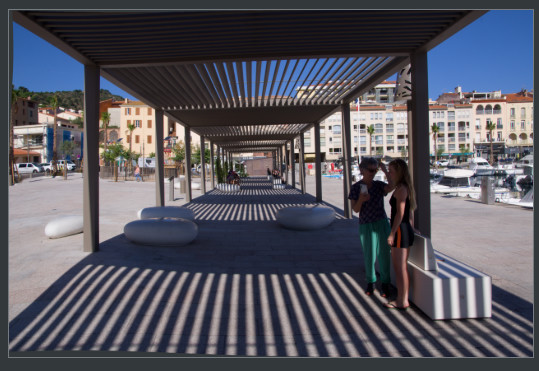
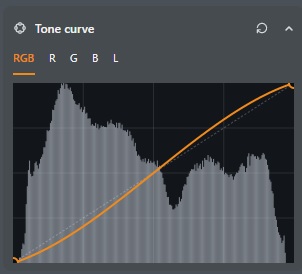
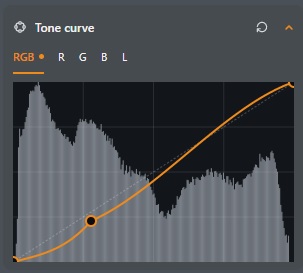
Just started working with this software yesterday and oh my, well done! It’s very stable, highly intuitive and a pleasure to look at. I do have a question regarding the tone curve. The default appears to be a slight s-curve. When adjusting it to, for instance, darken the shadows, it creates an unusual shape that I’m finding rather tricky to manipulate. Is this normal behavior for the tone curve in FerrumPix?


Hi, thanks a lot, and glad you’re enjoying it!

Good catch on the tone curve, and no, that’s not how it should behave. The curve is stored as a straight line by default, but the way the ends of the curve are calculated makes it look like a slight S-curve. As long as you haven’t added a point, that S isn’t applied to the image at all, so the display is simply wrong there. Once you add a point, though, the curve is applied as drawn. That’s why darkening the shadows gives you that odd shape and a stronger effect than you’d expect.

I’ll fix this in the next version.

Regards,
Patrick

Salut Patrick, some remarks.

  • I just found out how the Group view works and that’s very practical, It showed photos taken per day for example. However, if I choose to group my files by iso values, they are not grouped in sections like 100 iso, 800 iso, etc. They are just shown in the order of the iso values. Do I miss something here perhaps?
  • In the Info panel, tab General, there are two entries, Date taken and Created. They are the same. Can the last one be substituted by Exposure compensation perhaps? Btw, those two fields use the date format mm/dd/yyyy, I would like to see the European format dd/mm/yyyy. Customizable perhaps?
  • This one puzzles me somewhat. I open a raw, make a crop and save that file. When I inspect that raw in the gallery (select + space bar) it shows the uncropped version. When I open it, it shows the cropped version because it reads the sidecar. Now my question: is there a way to reload the original raw without crop? Yes of course, I can remove the crop, but if I made 63 more modifications, that would cost time! The only solution I found for now was either to rename the sidecar to .off, or to duplcate the raw.
  • I tried the Pin option, to show 2 photos side by side. Works well, including zoom, but it opens with two representations of the same file. Why not show directly the next file in the comparison window? I know I can use the arrow keys to choose another photo to compare.
  • Feature request. Darktable has an option to use a template for the name of saved files, my template is filename_dt.*, so I know that file was processed in Darktable. A similar option for FerrumPix would be nice, filename _fx for example.

That’s all for now!

Oh, did I say already that I like your app? :upside_down_face:

Hi Paul,

I went through your wish list and decided to simply tackle the points directly. All five are now covered in 0.9.45:

You were right about ISO grouping: it simply wasn’t available before. You can now group the gallery by ISO, with each ISO value getting its own section.

I also cleaned up the date information a bit. “Date taken” comes from the camera’s EXIF data, while “Created” is the file date. Since those are often identical after copying from a memory card, FerrumPix now only shows the date once when they match. Exposure compensation has also been added to the General tab, and the date format can now either follow the system setting or be set manually.

For edited RAWs, the quick spacebar preview now shows the same developed image as the Viewer. If “Develop edited RAWs in the viewer” is enabled, that includes your crop and other RAW edits. There is also a new “Reset all edits” button next to Undo, so you can temporarily return to the untouched RAW without renaming the sidecar. Nothing is written permanently unless you save afterwards.

Pinning should also feel more natural now: as soon as you pin one image, the next one appears on the right.

And finally, “Save as” can now suggest filenames from a template. The default is {name}_fx , but it supports the same placeholders as Batch Rename, so you can build things like {datetaken:yyyyMMdd}_{name} .

Thanks again for the suggestions they were all useful ones.

Regards,
Patrick

Check out 0.9.45