You can either add them all to the ‘favourite modules’ tab, or, once they are all turned on, on the active modules tab.
Yes, I normally bring in some other modules via auto-apply presets, including the color balance and local contrast modules. And then there are some other modules I may or may not apply, like crop, lens correction, denoise etc. All the modules I am likely to use regularly I put in my favorites list, to make it easy to find them in one place. In the end, with so many people using darktable in different ways, there is probably no optimal grouping, and so I think the ability to create a favorites list is a good approach to deal with this.
Are these graphical changes embedded in the darktable-3.2.1-win64.exe file, which is available on the darktable site? If not, how can I add them to my Darktable?
Sorry for the basic question…
No, they didn’t make the 3.2.1 release. They are currently available on the main development branch, and will become part of an official release at the end of the year.
So, there is no way for me to use them before EoY? That is a pity, since I find these graphs very useful to better control what I do in Filmic.
Anyway, merci Aurelien pour ton travail.
1 Like
Only if you are prepared to build darktable from source, either off the main development branch (usual caveats apply concerning db compatibility/backups), or by cherry-picking the commits associated with this feature. But, if you want to use a prepackaged windows build, best to wait until Christmas Eve 


But since the rounding is not done in filmic itself, perhaps this could be worked around by judicious use of the “dithering” module?
Et oui, bien sûr, merci pour tout ça. ![]()
1 Like
Dithering is yet another hack. We can predict the error of the rounding ahead of the 8 bits conversion and compensate it exactly while we have all the data. Also it is compensated in a chroma-preserving way, using filmic perks.
1 Like
There are ways to use tone EQ and color balance without changing the DR bounds and therefore not void filmic settings.
I am not sure that I would call dithering itself a hack (now, the darktable module, I don’t know), or at the very least, it’s a very elegant one. It’s a widely used technique in signal processing (especially in audio engineering) to decorrelate quantization error from the signal and make its mean 0 by completely replacing that error with noise of our choosing (generally flat or biased towards high frequencies), since it’s also done ahead of the quantization while we still have all the data.
But yes, admittedly, I am not really sure how best to apply it to correlated 3-channel data in a non-linear space.
Dithering will take care of “normal” quantization errors, but close to black, quantization errors also mean quantization clipping since you can fit an infinite number of EV zones in the ]0 ; 0.015]% range. And that clipping can be hidden to some extent but not fixed by dithering. And it’s not awfully difficult to fix cleanly, so there is no reason not to do it.
2 Likes
In the tablerc file there is a group number associated with modules…wonder if you edited that could you swap them?? I might try just for kicks
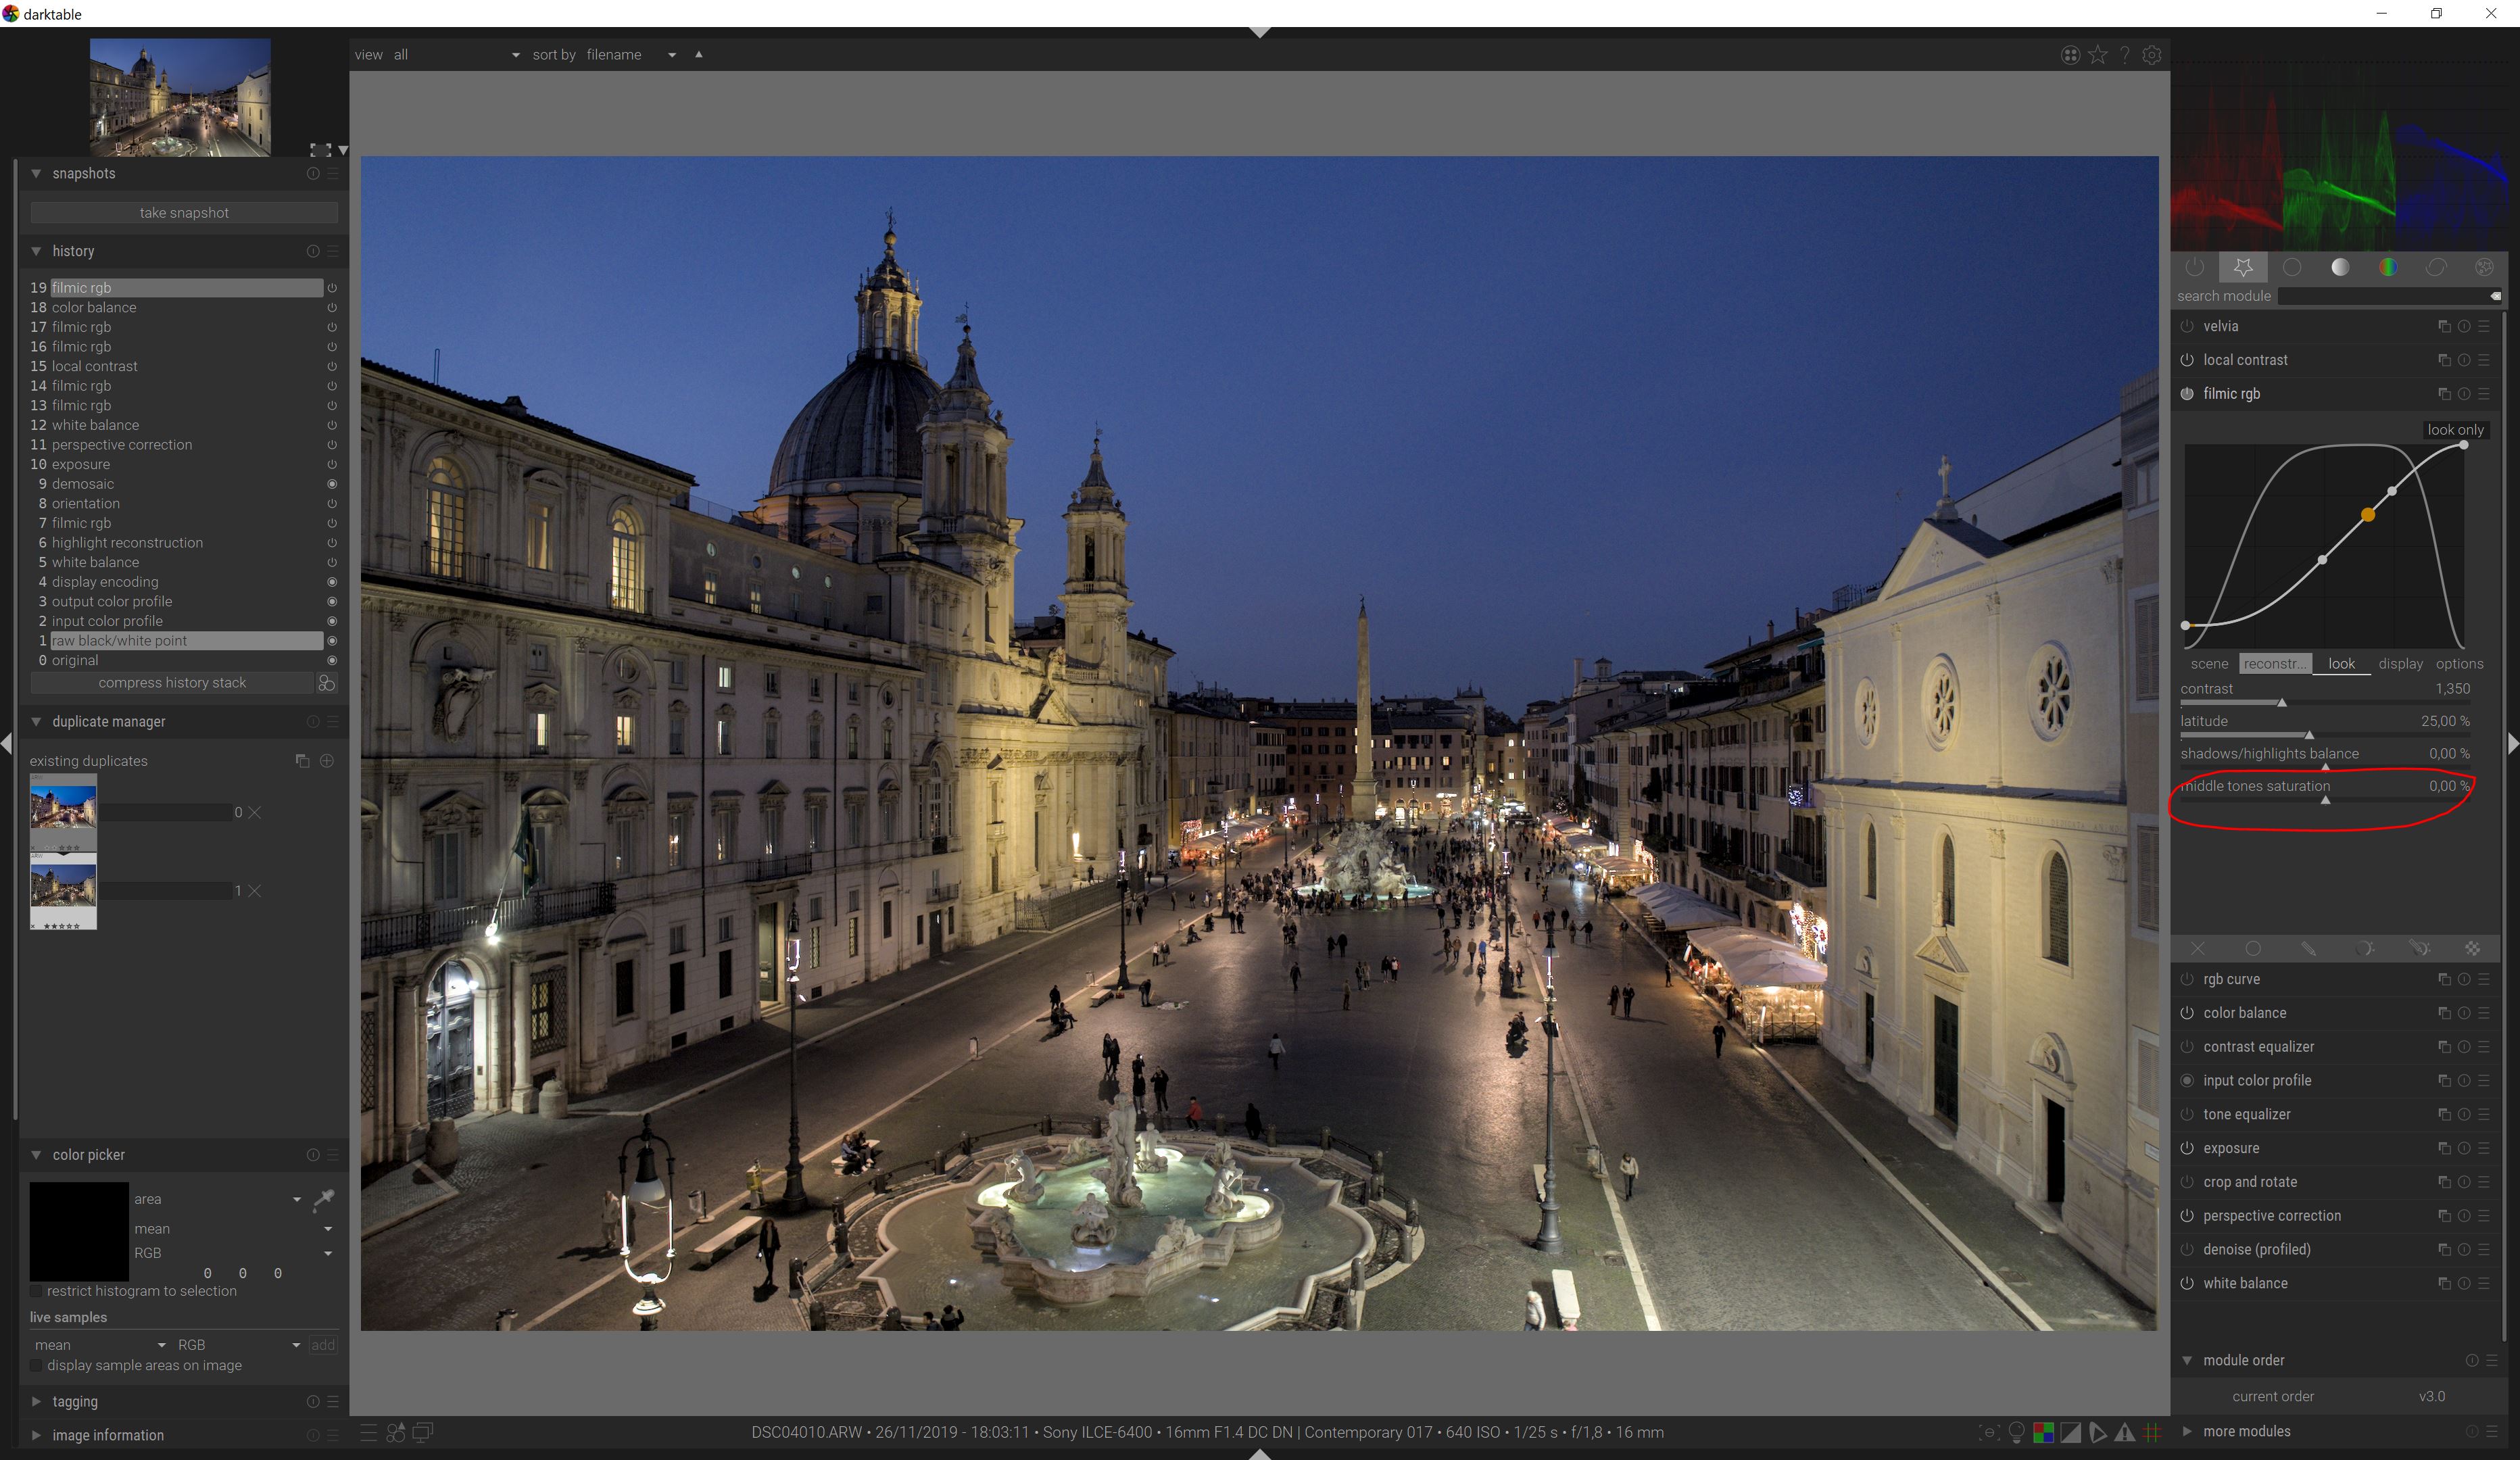
When using filmic V3, I used to have color a balance preset to increase saturation (130%). With the new midtones saturation slider in filmic V4, there is now a new way to manage saturation directly in filmic.
What is the technical difference between using color balance (followed by filmic midtone saturation at 0%) vs using filmic midtone saturation. Is there any recommandation on which module to use / when?
Comparing the 2 methods, I obviously can see differences and choose the best (I have had good results with just filmic, in particular with deeper reds on portrait) , but I’d still be interested to understand why and how they differ.
Saturation in color balance is some by-the-book ITU BT something standard defined as the difference between RGB channels and Y luminance. Basically, it pushes RGB values further away or closer to the luminance of the pixel, depending if the user param is > 1 or < 1. But it applies to the whole range of values, no matter if the resulting color is in-gamut or not, or even in visible locus or not. This algo is not 100% hue-linear, so changing saturation can change the hue a bit.
“Saturation” in filmic has nothing to do with actual saturation anymore. It’s only making the light spectrum (that will result from the RGB values once displayed on a screen) more laser-like or more evenly distributed, by offsetting the RGB ratios. It’s even less hue-linear but it works better to compensate the color-fading that comes with tone-mapping when you brighten pixels. It is applied only to midtones, in order to avoid pushing very high lights and dark shadows out of gamut.
1 Like
However, I found that saturation in filmic pushes deep blues (like the one for example in blue hour pics) out of gamut much more (for the same % increase) than CB does, while it should be less. At least according to the gamut checking in DT.
One example:
-
no additional saturation
-
+15% saturation in filmic, gamut checking
-
+15% saturation in color balance, gamut checking

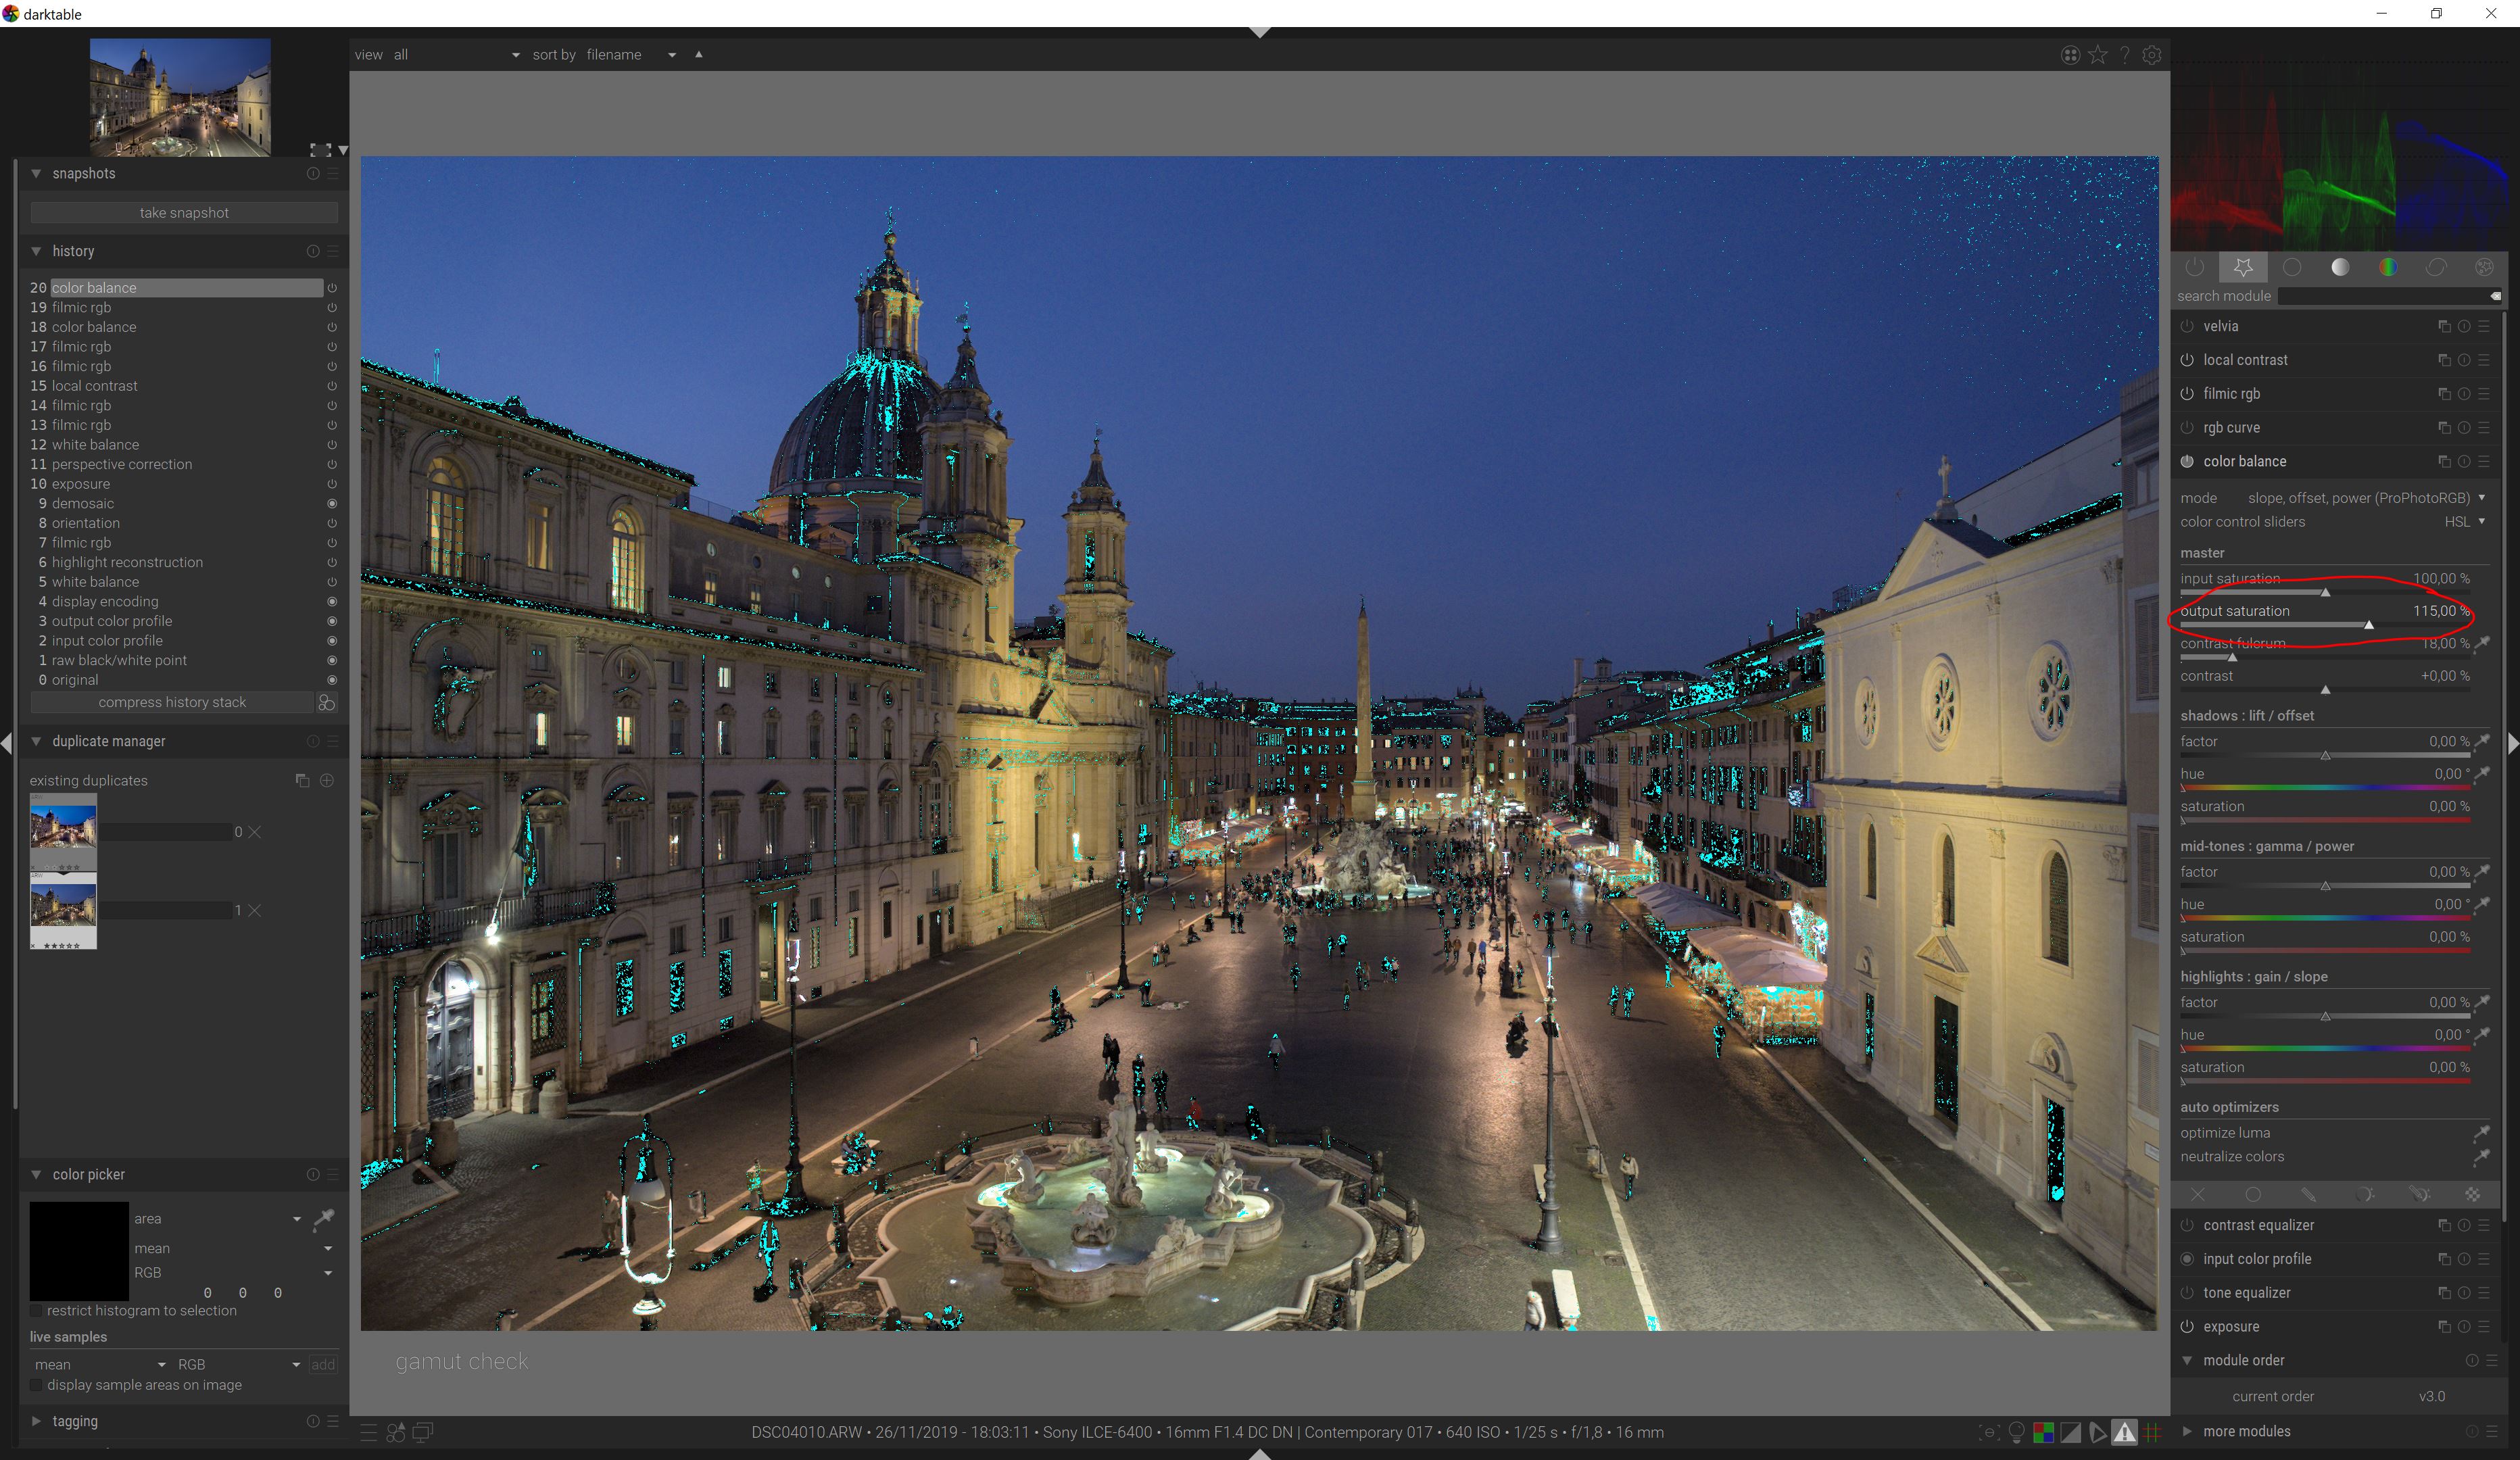
Also visually, the effect of saturation in filmic is much stronger than CB one, specifically on the blues.
1 Like
If that happens, go in the filmic module to options → preserve chrominance and change it to luminance Y.
Yeah, that helps, thanks.
Next question is: what are the pros and cons of the different preserve crominance modes ?
Gamut checking against what color space ? The pipeline is supposed to be a master edited in an ideal color space (visible locus). The color spaces that are the closest to that are Rec2020 and Prophoto RGB (although this one overflows the visible locus).
It is to be expected that sRGB and other media spaces will be overflown by the pipeline values since they are so small, and it’s usually not a problem since the output color profile takes care of that. So, gamut alerts (done at the end of the pipe) tell us nothing about the pipe if they are done against sRGB and AdobeRGB.
The point of gamut caring in pipeline is not to comply with whatever output gamut, but to avoid pushing colors that used to be in the visible locus, outside of it, because that would be a shame if editing just made the image worse at the end. Things like white balance can push pixels outside of the visible range. But the master should not care about the output medium color space, or you will end up with 3 different edits if you print on 3 different media, and that’s unnecessary plus cluttered.
The only constant thing among gamuts of any color spaces is their 100% luminance end is pointy, so they all degrade to 0% saturation at 100% luminance.
Should the soft-proofing profile be set to Linear Rec2020, if that is your input profile?
- Input profile should never be Rec2020 since Rec2020 is an output medium color space.
- Soft-proof profile has nothing to do with input profile.
- Rec2020 is used in soft-proofing only as the closest match to visible locus.