Would anyone be able to help me with this please. I am trying to create a certain font (that looks slightly like stich). I have come across this picture and I’m looking at creating the same font. Would anyone know how to achieve this please?
I have posted similar post with regards to this, so sorry if i’m going over old ground.
There was an earlier post about creating a stitched effect. I tried with patterns and stroking paths without much success. However for a less than wonderful (but quick) effect.
Make the text.
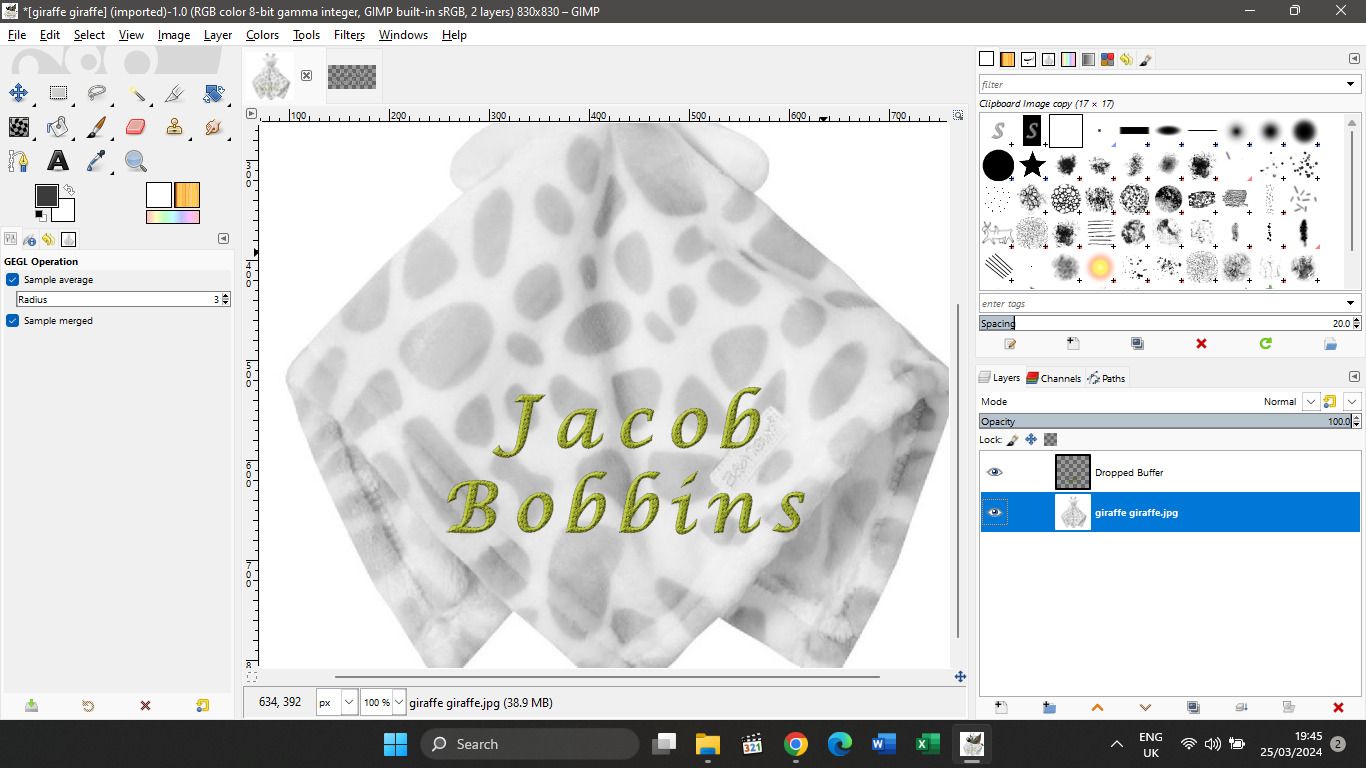
Lock the alpha on that text layer.
Use Filters → Artistic → GIMPressionist the embroidery option to fill the text. Note. No longer a text layer.
Duplicate the layer, remove the alpha channel, apply a default gaussian blur Filters → Blur → Gaussian Blur. Turn layer visibility off.
Back to the text and apply a bump map Filters → Map → Bump Map using the blurred layer as the aux input.
Thanks Rich.
Sorry, I’m a bit of a noob when it comes to software. I clicked “install” when I opened the font. I have no idea where it has installed to or how to now use it in Gimp.
I will assume you are using Windows and Gimp 2.10 . The place to put fonts that only Gimp will use is;
C:\Users"yourname"\AppData\Roaming\GIMP\2.10\fonts
Download the zip, unzip it and put Yesterday-Regular.ttf in that folder.
Try this for a download https://www.ffonts.net/Nastaliqh.font.zip
and extract the ttf as described earlier. It is a bit of a strange font to use, not really recommended. Should really be an italic version.
Thanks once again. I have quite a few to choose from now. Feels like a school day again with all this learning.
I did see an impressive listing on amazon whereas someone has put actual stitching onto each of the baby comforters. I can see that its not a picture of the actual embroidery as it doesn’t follow the contours. Very impressive
There can be a couple of ways, a selection can be deformed and stroked. Another way, for example the path from the text Layer → Text to Path can be stroked with a brush
Wow, is there nothing you don’t know about GIMP!
I thought they may have had the embroidery done on a plain background, then cropped and copied the image and used it on various images. Whenever I tried and copy an image, using the fuzzy select tool, it tends to have poor edges.
I need to “brush” up on my GIMP skills!
It comes with practice and some images are easier than others. That first image “olivia” has lots of jpeg compression artifacts in the background. The best way for that is the Gimp foreground extract, followed by going round the edges with an eraser. Always another way with Gimp, not always easy.
Back to an embroidery font. I still have not found one but there is a Gimp “custom-font” which is not a font at all, it is a graphic alphabet where you assemble text via a script. I have not made one for 10 years (it is very tedious) and still not able to stroke a pattern around a character with overlaps. This is the best I can do.
If you want to give it a try, then the Gimp stitch.xcf file (goes anywhere convenient) + custom_font.scm (goes in your scripts folder) + custom_font_on_path.py (goes in your plug-ins folder) is on my cloud storage. Download and unzip.
The fonts the amazon example, were done with an embroidery machine. I wonder if there is a conversion tool somewhere to take that stitch pattern and, and turn it onto a font? or perhaps there is a set of these already. As the software for doing embroidery would need to show the pattern. Try Bother, they also make embroidery machines, and the software to fun them. You might find an answer there. (long shot)
I found another for you Rich. This one has curved it round the blanket with a really nice font that seems to “sit up” a little bit. Obviously there is a way to curve it, but when I try looking on youtube to an example, they all give examples of “text on a path effect”, which isn’t what I’m after
To make a suitable map can be a bit of an art but for a layer with transparency - text or a logo
Duplicate the layer
Desaturate and lose remove the alpha (transparency)
Blur it and that is the bump map
Back to the first layer and use the Bump Map filter. quick example: https://i.imgur.com/30j2Ul4.mp4
Bump-mapping is one of those fundamental Gimp processes and it is worth practicing making maps.
Of course there are any number of scripts and plugins to assist. This is old but works, play with the settings
No they were not stitched in real, you can see that the letters are not deformed following the clothes bumps certainly because the “designer” is not aware of “Map / displace” or alike
Example:
For the stitching, in Inkscape there is a nice plugin called InkStich which is literally made for embroidery, you can just stroke the path instead to send it the machine.


