As I mentioned in the thread under, I’m here to inform you of some changes regarding ‘Game Changer’.
How to process a Sunset
I’ve opened a pull request here, with more detailed explanations.
Pull Request
This mainly concerns three things:
-
Slightly improve CIECAM (Color Appearance & Lighting), which remains, in my opinion, the Rolls Royce of CAMs (Color Appearance models), by allowing hue rotation and saturation variation for each R, G, and B channel. Why reinvent the wheel? The latest version dates from 2020 and has very few shortcomings… The researchers’ work began in 1997. Admittedly, it might seem like a few things are missing… nothing is perfect.
-
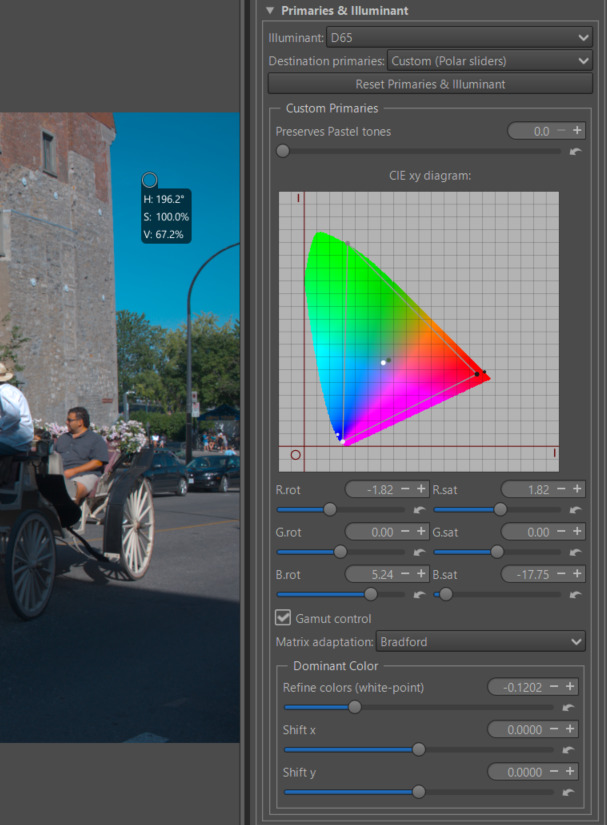
Allow the “Primaries & illuminant” Abstract profile to vary primaries in polar coordinates, rather than linearly: it’s a bit more intuitive… but just as tricky to use… like anything related to primaries (regardless of the software). Be careful with imaginary colors and exceeding the gamut.
-
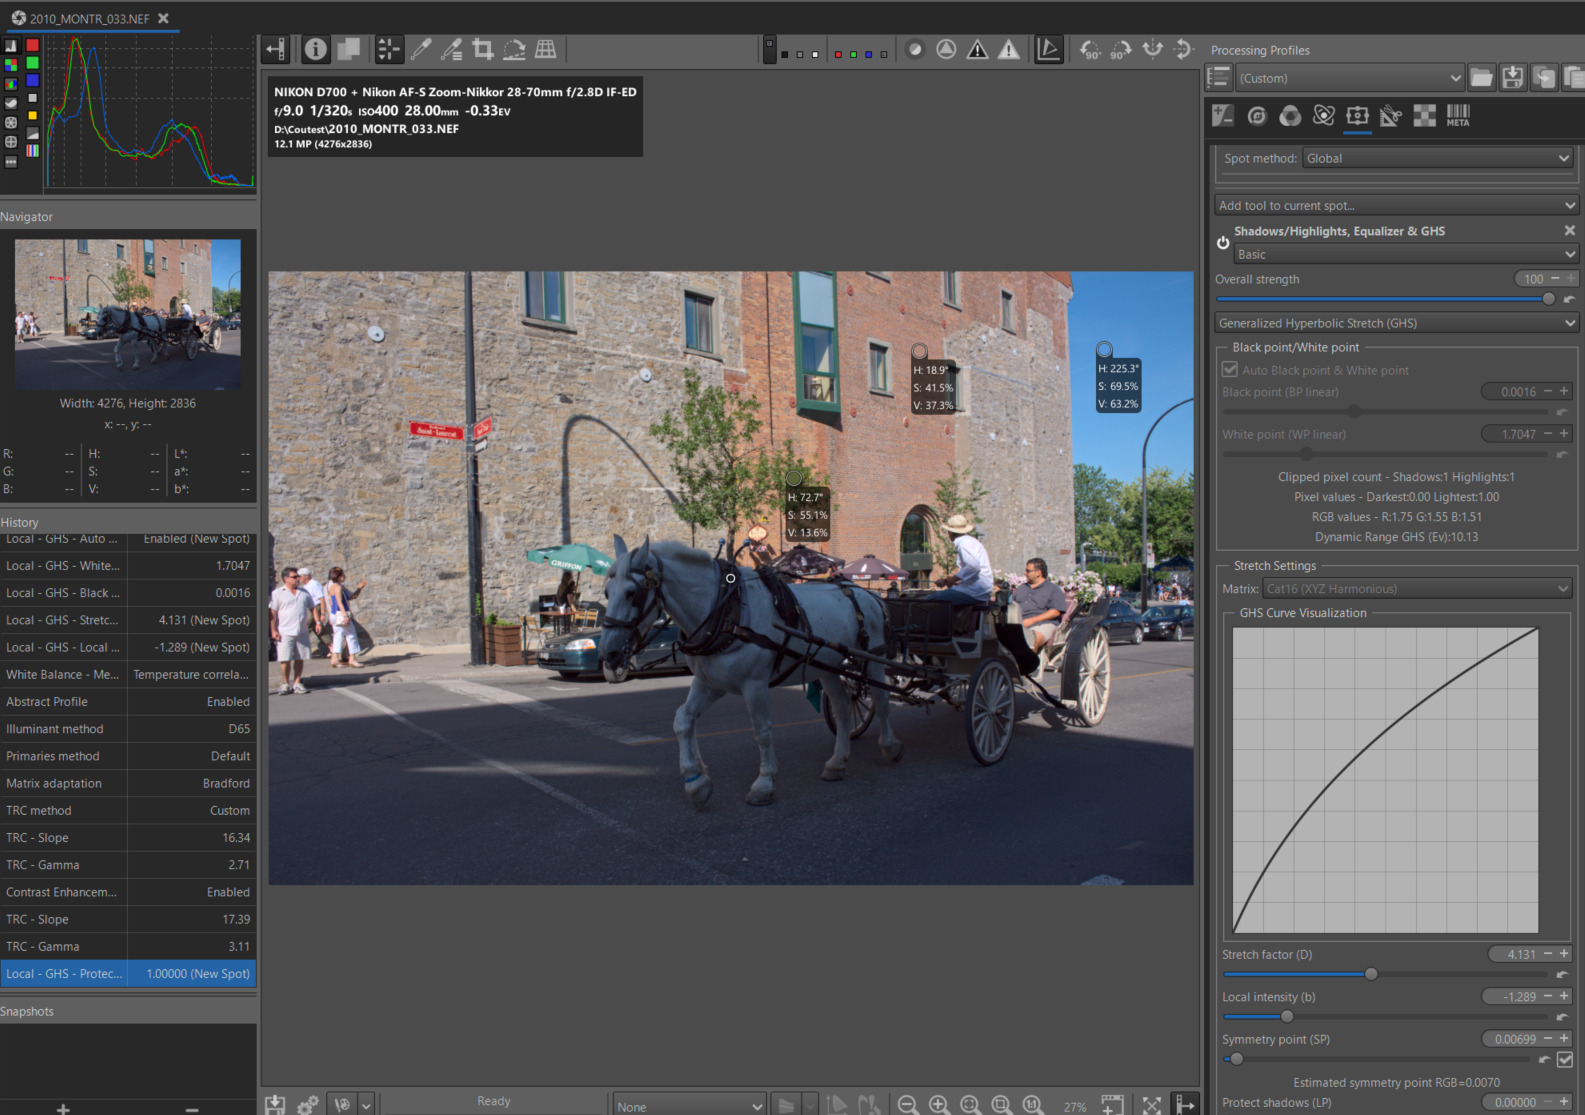
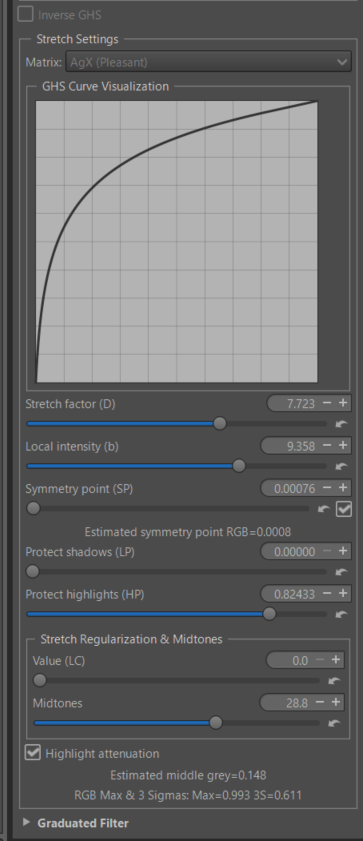
For GHS (Generalized Hyperbolic Stretch) Add two matrices to ‘Stretch Settings’. In addition to ‘none’, ‘AgX’, ‘JzAzBz’, and ‘Cat16’ (the latter three working in RGB mode), I added JzAzBz and Cat16, these 2 models in XYZ mode, which is at least theoretically more rational.
-
I also modified the default values, which are chosen either when opening a new image or after selecting ‘Neutral’.
-
I don’t see why I would keep the default AgX Matrix setting, which implies a preference. So I changed it to ‘none’, meaning GHS alone. The user can choose their preferred option from the 6 choices, based on the images.
-
Similarly, even though in ‘RGB Luminance’ mode the automatic Symmetry Point (SP) predetermination works quite well in most cases (except with LEDs), it doesn’t work in other situations.
-
Therefore, I prefer to put the system in ‘neutral’ mode, allowing the user to make the choices:
-
‘Matrix’: one choice from the 6 available (default = none)
-
'Symmetry point automatic’ disable (it’s very easy to enable) as ‘Auto Black point & White point’ which is disabled by default
This is more neutral, by giving the user more initiative.
Some more detailed information on these 3 changes :
Slightly improve CIECAM :
As a reminder, even though CIECAM seems complex, I think it’s one of the most sophisticated color management systems. I consider it the most comprehensive system (even if not perfect) for mastering colorimetry. It has been the subject of work by universally renowned researchers since 1997. The latest update is from 2020. It can be criticized for not being ‘perfect’ for HDR images, or those with high dynamic range, hence its position at the end of the RT pipeline, where GHS, for example, can handle the main part of controlling this dynamic range.
I’ve included a link, which is admittedly a bit old, but the fundamental principles haven’t changed much.
I’m supplementing this link with a brief summary of what it is :
There are three processes.
-
The first (Scene Conditions) compresses the data for the CIECAM environment, where the user can select the white point (D50, D65, free, etc.). It takes into account a significant number of physiological aspects (accessible to the user, or calculated if possible), such as the concepts of ‘surround’ , ‘absolute luminance’, ‘Mean luminance (Yb%)'. This compression requires ‘chromatic adaptation scene’; the calculated value is displayed.
-
The second process handles information within the CIECAM environment. Six variables are considered, which vary in importance depending on the image : J=lightness, Q=brightness, C=chroma, S=saturation, M=colorfullness, h =hue rotation. To simplify things and avoid significantly increasing resources, I haven’t provided direct access to the other three variables “ac” and “bc” (equivalent to “a” and “b” in Lab*), nor to “H,” the absolute value of Hue. But of course, this data is taken into account in the internal calculations. Of course you have access to its variables, but also to other related concepts such as ‘Contrast(J)’, ‘Contrast(Q)’ and 3 types of “Tone curves”.
-
The third process (Viewing) does the reverse of the first. It decompresses the data into the working profile, taking into account viewing conditions (which many forget, but which are essential for objective comparisons), such as ‘surround’, ‘absolute luminance’, and ‘mean luminance (Yb%)’. A viewing chromatic adaptation is calculated by the system.
What I’ve changed.
In addition to cleaning up the code, some parts of which dated back to 2012, I’ve provided finer control over the ‘hue’, allowing adjustments to the rotation of Red, Green, and Blue, as well as the saturation (I chose this variable from among the three possible ones - C - M - s - for the sake of code simplicity). This allows you to easily retouch a sky, a sunset, etc., without significant risk of creating imaginary colors.

Primaries in polar coordinates
I kept this function minimal, simply because converting to polar coordinates is more intuitive than using linear mode. The CIExy graph is too small (unless the tool area in the right panel is significantly increased). I copied and slightly modified the code from another free software program. I’m limiting the use of this code to geometry (why repeat what’s already been done?).
I chose variable names (R.rot, R.sat, etc.) which are abbreviations to allow for a more compact GUI interface. It’s easy to change these abbreviations. The tooltip (in poor English) attempts to explain what is updated between the three representation systems (linear, graphical, polar). I don’t think we need to go any further with the automatic reciprocal updates.
However, it’s crucial to be very clear about the inherent risks of manipulating primaries (beyond the bizarre color effects one can create).
If you over-attenuate or over-saturation (I could have chosen other terms, like attenuation or purity…) or if you drastically alter the primary rotations, you’ll end up with either imaginary colors or color gamut violations.
The CIExy diagram lets you see what you’re doing.

Of course, you can also change the ‘white point’ and adjust the dominant color, which hasn’t changed since the creation of Abstract Profile 5 years ago.
JzAzBz and Cat16, these two, in XYZ mode
In GHS you now have 6 possible choices as the conversion matrix before and after GHS :
-
none (Neutral) – default, only GHS with RGB datas from ‘Working profile’
-
AgX (Pleasant) - It uses an LMS conversion in RGB mode; I copied the matrix into another free software program.
-
JzAzBz (RGB High Dynamic) and Cat16 (RGB harmonious). It uses two LMS conversion matrices to JzAzBz and Cat16, in RGB mode, which is intellectually unsatisfactory. It works correctly with some images but not others. Note that I use the term “matrices” and not algorithms like CIECAM or JzAzBz, which carry out a complete (and complex) process.
-
JzAzBz (XYZ High Dynamic) and Cat16 (XYZ harmonious), the same remarks apply to matrices and processes as above. However, the approach using XYZ instead of RGB is more respectful of colorimetric rules.
A reminder of the principles of Game Changer
(only for colorimetry)
These are principled choices; you may not need them in some images. This is a summary of previous tutorials. Refer to them and note the lack of documentation.
-
set to Neutral.
-
Raw tab – Raw black point – enable Dehaze
-
Exposure tab : Color Propagation - disabled Clip out-of-gamuts colors
-
Color tab : White Balance Auto – temperature correlation (not for LEDS …)
-
Color tab – Gamut Compression
-
Selective Editing tab – GHS (one or more RT-Spot – at least the first in Global mode) : a) choose the matrix ; b) Enable auto Symmetry point (SP) c) Enable ‘Auto Black point & White point’ - Manually increase the ‘White point’ value if necessary, especially if it is less than 1, to give the system more flexibility by avoiding possible gamut overflows due to GHS or subsequent adjustments ; d) adjust ‘Stretch factor (D)’, ‘Local intensity (b)’, as well as the other settings
-
Color tab – Abstract profile a) Adjust primarily gamma and slope ; b) Enable Contrast enhancement ; c) Retouch primaries and illuminants only if strictly necessary, for example, with LED highlights. Of course, you can retouch outside of these conditions, but be careful.
-
Advanced tab – Color Appearance & Lighting – a) Adjust the viewing conditions; everything else, except the Illuminant, is done automatically b) Adjust the colorimetry with the CAM settings (Image adjustments), such as Brightness, Saturation, and the new hue settings per RGB channel.
Conclusion
I hope that’s clear… If you have any comments on the labels, tooltips, and of course on what I’ve done, no problem, I’m all ears.