Sorry, maybe my English is too bad. I read a lot but I don’t know how to start?
On the left lower corner there is a lua script installer. And there is a file InitialWorkflowModule.lua in my extracted download-directory. I didn’t find out how to select the extracted lua-download
If you’re new to darktable, I would advice against using it. This is for those that already have enough experience to know what they are doing when editing.
In my view it would take an experienced and advanced user to know how to successfully program this script to achieve the desired outcome. I wonder how many users here actually use this script.
I would recommend learning DT 5.2 and when you identify steps that you are always repeating in your edits then create a style. A basic style for me would include sharpening and denoising since this is pretty standard for me. I have also developed styles that give results similar to the cameras JPG but with more sharpness and detail.
From what I see in the README with that script, I can see no advantage over styles.
I see one disadvantage: I see no option to store different “initial workflows”.
I can have multiple styles predefined, and apply the one(s) I need to each image or group of images (in lighttable view). This is especially useful for me as I have some specific shooting conditions where a style can do virtually all the editing (except cropping!).
Other occasions require a different style and manual intervention.
Which steps are most times recommended I would like to see this with the script.
I had about 10 modules in my favorite modules.
Every module had a preset and then I decided which modules I want to use with this special photo. Not sure if I have already used simple styles, it is a long time ago.
So can you recommend other modules, which you often use with a “standard” photo? I mean a photo which doesn’t need a lot editing.
I have 3 types of photos:
Fullformat DSLR
APS-C DSLR
mobile phone photos, some DNG, most times jpg
With DSLR lens correction is used always.
Most time I used shadows and highlights
I have read, that sharpening works now different.
If there is no noise profile, it depends what I do.
I fundamentally use it for this reason, to preprocess “filmic RGB” automatically because styles of course apply a preset of it instead, so I let the module do its thing and tweak later if needed.
I could use styles for other things, but somehow I always find myself underusing that feature.
I don’t know, I like doing every little change myself and maybe this module just scratches that itch, even tho it takes significantly more time to go through.
Lately I started considering dropping scripts entirely because, on Windows 11, I get a bunch of terminals at darktable’s startup (yes, I read some comments about how it could be solved in the future) and I can’t do other things until they are done vanishing.
DT has no one defined or recommended processing style. Some of the styles I have made are camera specific. I have tried to get a look similar to the camera’s JPG capture as a starting point. But these images have more detail in the shadow and better noise reduction leaving the image sharper than the camera’s attempt.
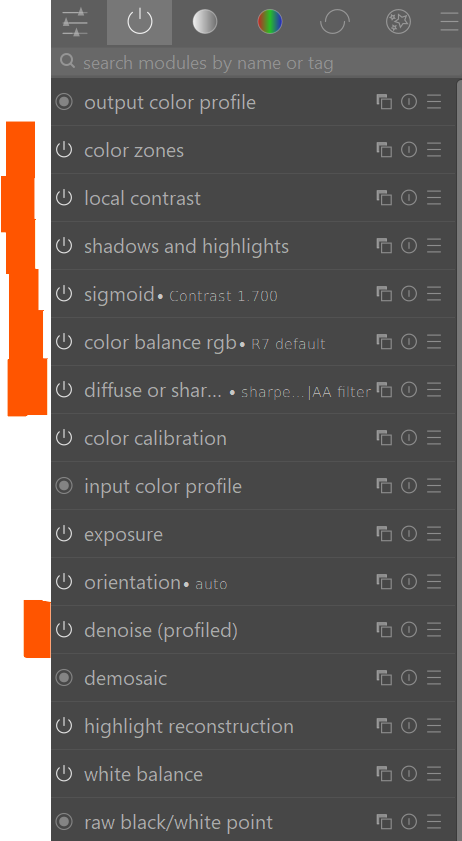
The way I created these styles was to open the JPG and take a snapshot. I then opened the RAW and compared the snapshot. The first module to adjust was exposure so that the raw and jpg had similar brilliance. I then added local contrast which I use on most of my images. The default value is a good starting point. I then adjusted contrast in the sigmoid module for some cameras as I found 1.7 better than the 1.5 default for some cameras.
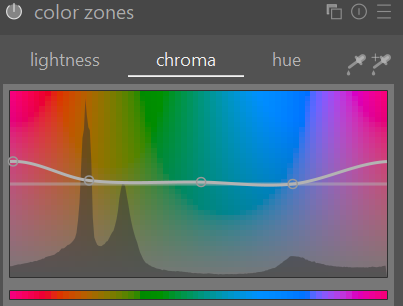
Some cameras but not all benefited by the shadow and highlights module being included. I tweaked chroma for specific zones in the color zones module to better match the appealing color produced by the camera. I included denoise (profiled) which works well on my cameras and a basic sharpen demosaicing option from the diffuse or sharpen module. But what you need in your style will be totally different. I would concentrate on just mastering DT and recognizing that some steps you are always repeating and creating a style will simplify this process for you.
Here is a sample of my style for my Canon R7. Raw on left and JPG from camera on right. I have more shadow details and fine details are sharper from the RAW than the cameras JPG but I have a starting point for this edit that is close to what I saw in the camera. I have no desire to perfectly match the JPG as that is a pointless exercise in my view.
The lua-scripts don’t ship with darktable. The scripts installer just gives you an easy way to install them. Once they are installed you can add the downloaded script to them. The scripts are installed in $HOME/.config/darktable/lua.
Once the scripts are installed, scripts installer is replaced by script manager which will let you turn scripts on and off.
@Terry,
Why do you use the chroma adjustment in the (display referred) color zones module for this, rather than the saturation adjustment in the (scene referred) color equalizer module?
Those modules are similar but I choose to use both. In color zones I can get control over the shape of the curve and put as many or as few nodes as I want. I also want to change chroma not saturation. Color equalizer is also a good module and I use it as well for adjustments. I believe the number of nodes are fixed, but I may be wrong about this. Also, I wonder what is the “real world difference” between chroma in color zones and saturation in color equalizer.
I am happy to use scene referred and displayed refer modules. I have not yet seen a reason to discard display refer modules if they give me the look I like. But I am always open to change.
Of course, but I have to start somehow. Maybe you can help me with an important earlier edit.
There was a curve to correct the exposure somehow, I mean making the picture darker or lighter, it was not the exposure module, changing the EV. It looks like this curve is gone. Which module is used now with 5.x. Sorry for this kind of question, but maybe someone knows what I mean.
I have found https://youtu.be/ZUc6LOzg_Nk which explains 5.0 but not 5.2. Do you know a similar video using 5.2? For me the advantage of the video is, it gives an idea which modules I should learn first and what I should configure in the settings.
The whole documentation is not very helpful at the beginning, because it describes every option and a lot which is not needed to get a better, but not perfect result compared to the original photo. Of course the manual makes sense after you experience is growing and you know what you are searching for.
There are no significant differences between 5.0 and 5.2. In fact, there have been no changes since the introduction of Sigmoid in 4.2 that impacts what you should learn as a beginner. And Sigmoid is just a simpler alternative to Filmic.
This tutorial is based on 3.6, but other than the settings having changed a bit and the old version of Filmic he’s using, it is fully relevant to the latest version of darktable. It covers the core concepts of the new (post 3.0) workflow, that you need to understand.