Hello,
If a photo is unevenly lit for whatever reason, as in the example of the checkerboard here, you can easily compensate for this with RT of the dt using the Graduated Filter.
How do you do that with Gimp? There is the possibility to choose “Gradient” and then select the appropriate one in the different modes. But the results are not satisfying, sometimes it doesn’t work at all.
How do you do it?

Here’s one way of doing it:
- duplicate layer,
- set blend mode to linear burn,
- set foreground colour to white,
- apply gradient (white->transparent).
There are probably other ways of doing this, this came to mind first.
4 Likes
Hello @Jade_NL
oh, that works very well. But it is very complex, compared to Graduatet filter at RT or dt.
I have sometimes managed to work only with Gimps Gradient but it only works sometimes.
Thank you for your very good video.
You do need to take a few more steps compared to RAW editors, but it isn’t all that complicated.
If a RAW is the starting point and one does need GIMP later on I would do the above step as part of the RAW to TIFF/EXR conversion before importing it in GIMP. But that’s not always possible, which I assumed is the case here.
I have supposedly done everything exactly as you have shown in the video - but with me no good result comes out.
I have obviously overlooked one little thing.
This is what I did:
duplicate layer,
set blend mode to linear burn,
set foreground colour to white,
apply gradient (FG > transparent).
Now I have found my mistake:
You have to set Offset to 0,0 and it looks fine.
Thanks again.
This is actually very easy and very controllable in GIMP. However, if working a RAW image I would do this sort of adjustment in the Raw editing programs like Darktable or RawTherapee. If working a Jpeg or Tiff file I would do this in GIMP.
For many landscapes or the sample shown here you need to use a gradient to balance the lighting. This can be achieved by opening the image in GIMP and duplicating the layer. Then adjust the brightness of one layer using either curves or levels. Add a white layer mask and use the gradient tool to blend the two layers together. Once you know what you are doing it cannot be any easier. BTW, the blend mode for the layers is kept as normal. Where the gradient is black the lower layer is 100% visible. Where the gradient is white the top layer is 100% visible and the gradient in between produces a blend of the two layers progressively.
I just had a quick go in GIMP and here is a rough and dirty result. However, when working the image I realised it is not a simple linear gradient that is needed. I feel Darktable’s gradient masking would be best on this image as it can be curved which would match the lighting problem here better. I am unsure if RT has a curve gradient option.

2 Likes
Tried the same technique(*). In Gimp 2.10 When you apply the gradient on the mask you can move the midpoint to make it more to your liking (in fact you can almost completely redefine the gradient on the spot).
One of the limit is that if you want the right side to be as light as the left, the chessboard frame turns grey, so we likely need a luminosity mask that excludes the darks.
(*) a bit more hardcore since I used a screenshot of the histogram of a selection on the left to compare it with a “live” histogram of a selection in the right, while adjusting the layer with the Hue-Chroma filter.
Hello @Terry
Yes, sure, everything goes much better when you develop the RAWs. For a long time now I’ve been doing everything with dt or even easier with RT. It’s no problem to create a wonderful exposure compensation with Graduated Filte. This is useful when I reproduce artwork with only one lamp from a greater distance, which is no problem if I then correct the light fall-off with RT.
Now I wanted to finish such a picture with Gimp again and stumbled. With the above mentioned method of @Jade_NL, it works fine - but it is surprisingly complicated compared to dt or RT.
That sounds very interesting. But unfortunately I still understand almost nothing. This is also due to the language. I understand English only rudimentary, but can translate with DeepL quite prima. I have temporarily switched Gimp to English, so that I can better understand your instructions.
Could you write down your steps exactly? The way it was done?
duplicate layer,
set blend mode to ...
set foreground colour to white, ?
apply gradient (white->transparent). ??
?
That would help me a lot.
It is always easy to work with programs that we have learnt. Could you not just open the image in RT or DT and fix the exposure problem there as you are very familiar with resolving the issue in those programs? But, as per original post, it can also be done in GIMP. For me, I have fallen in love with the masking options in Darktable and do most edits in that program.
Here is a quick go in DT. I used multiple instances of curves to reduce exposure problems and one instance of curves to adjust color with a gradient as the left side was cooler in color. I also used DT options to straighten up the checkerboard.

Yes, of course I can edit jpg or tiff images with dt or RT. I used to do everything with Gimp, and now I was almost shocked that with Gimp you have to use a relatively complicated procedure for this seemingly simple function. And there my thick head says: That can’t be true, that must also go easier with Gimp - only I don’t know it yet. Now I see that it works, but just as described above and not as playfully simple as in the Raw developers. I can live with the fact that it is so.
Thank you all for the interesting suggestions.
Every program has strengths and weaknesses. Use the best tool for the job. I have also added a DT edit to my previous post. BTW, as a photographer I would try and create a suitable lighting for subjects like this rather than falling back on editing. I appreciate that is not always possible. Have fun.
1 Like
Yeah, sure, I do that as much as I can. I had illuminated the chessboard so unevenly to have a useful example.
My challenge was a large Polaroid collage, which I had lit with only one flash, due to lack of space. I assumed that I could simply compensate for the drop in lighting. Which is true with the Rad converters.
One tip I would have is to use a polarising filter if you are not already as the photographs tend to get reflections. Also move the lights as far away as is reasonable to reduce light drop off effects. Possibly bouncing the lights off your ceilings and walls may produce a softer and more even lighting. Good luck and yes the chessboard was challenging (mission achieved).
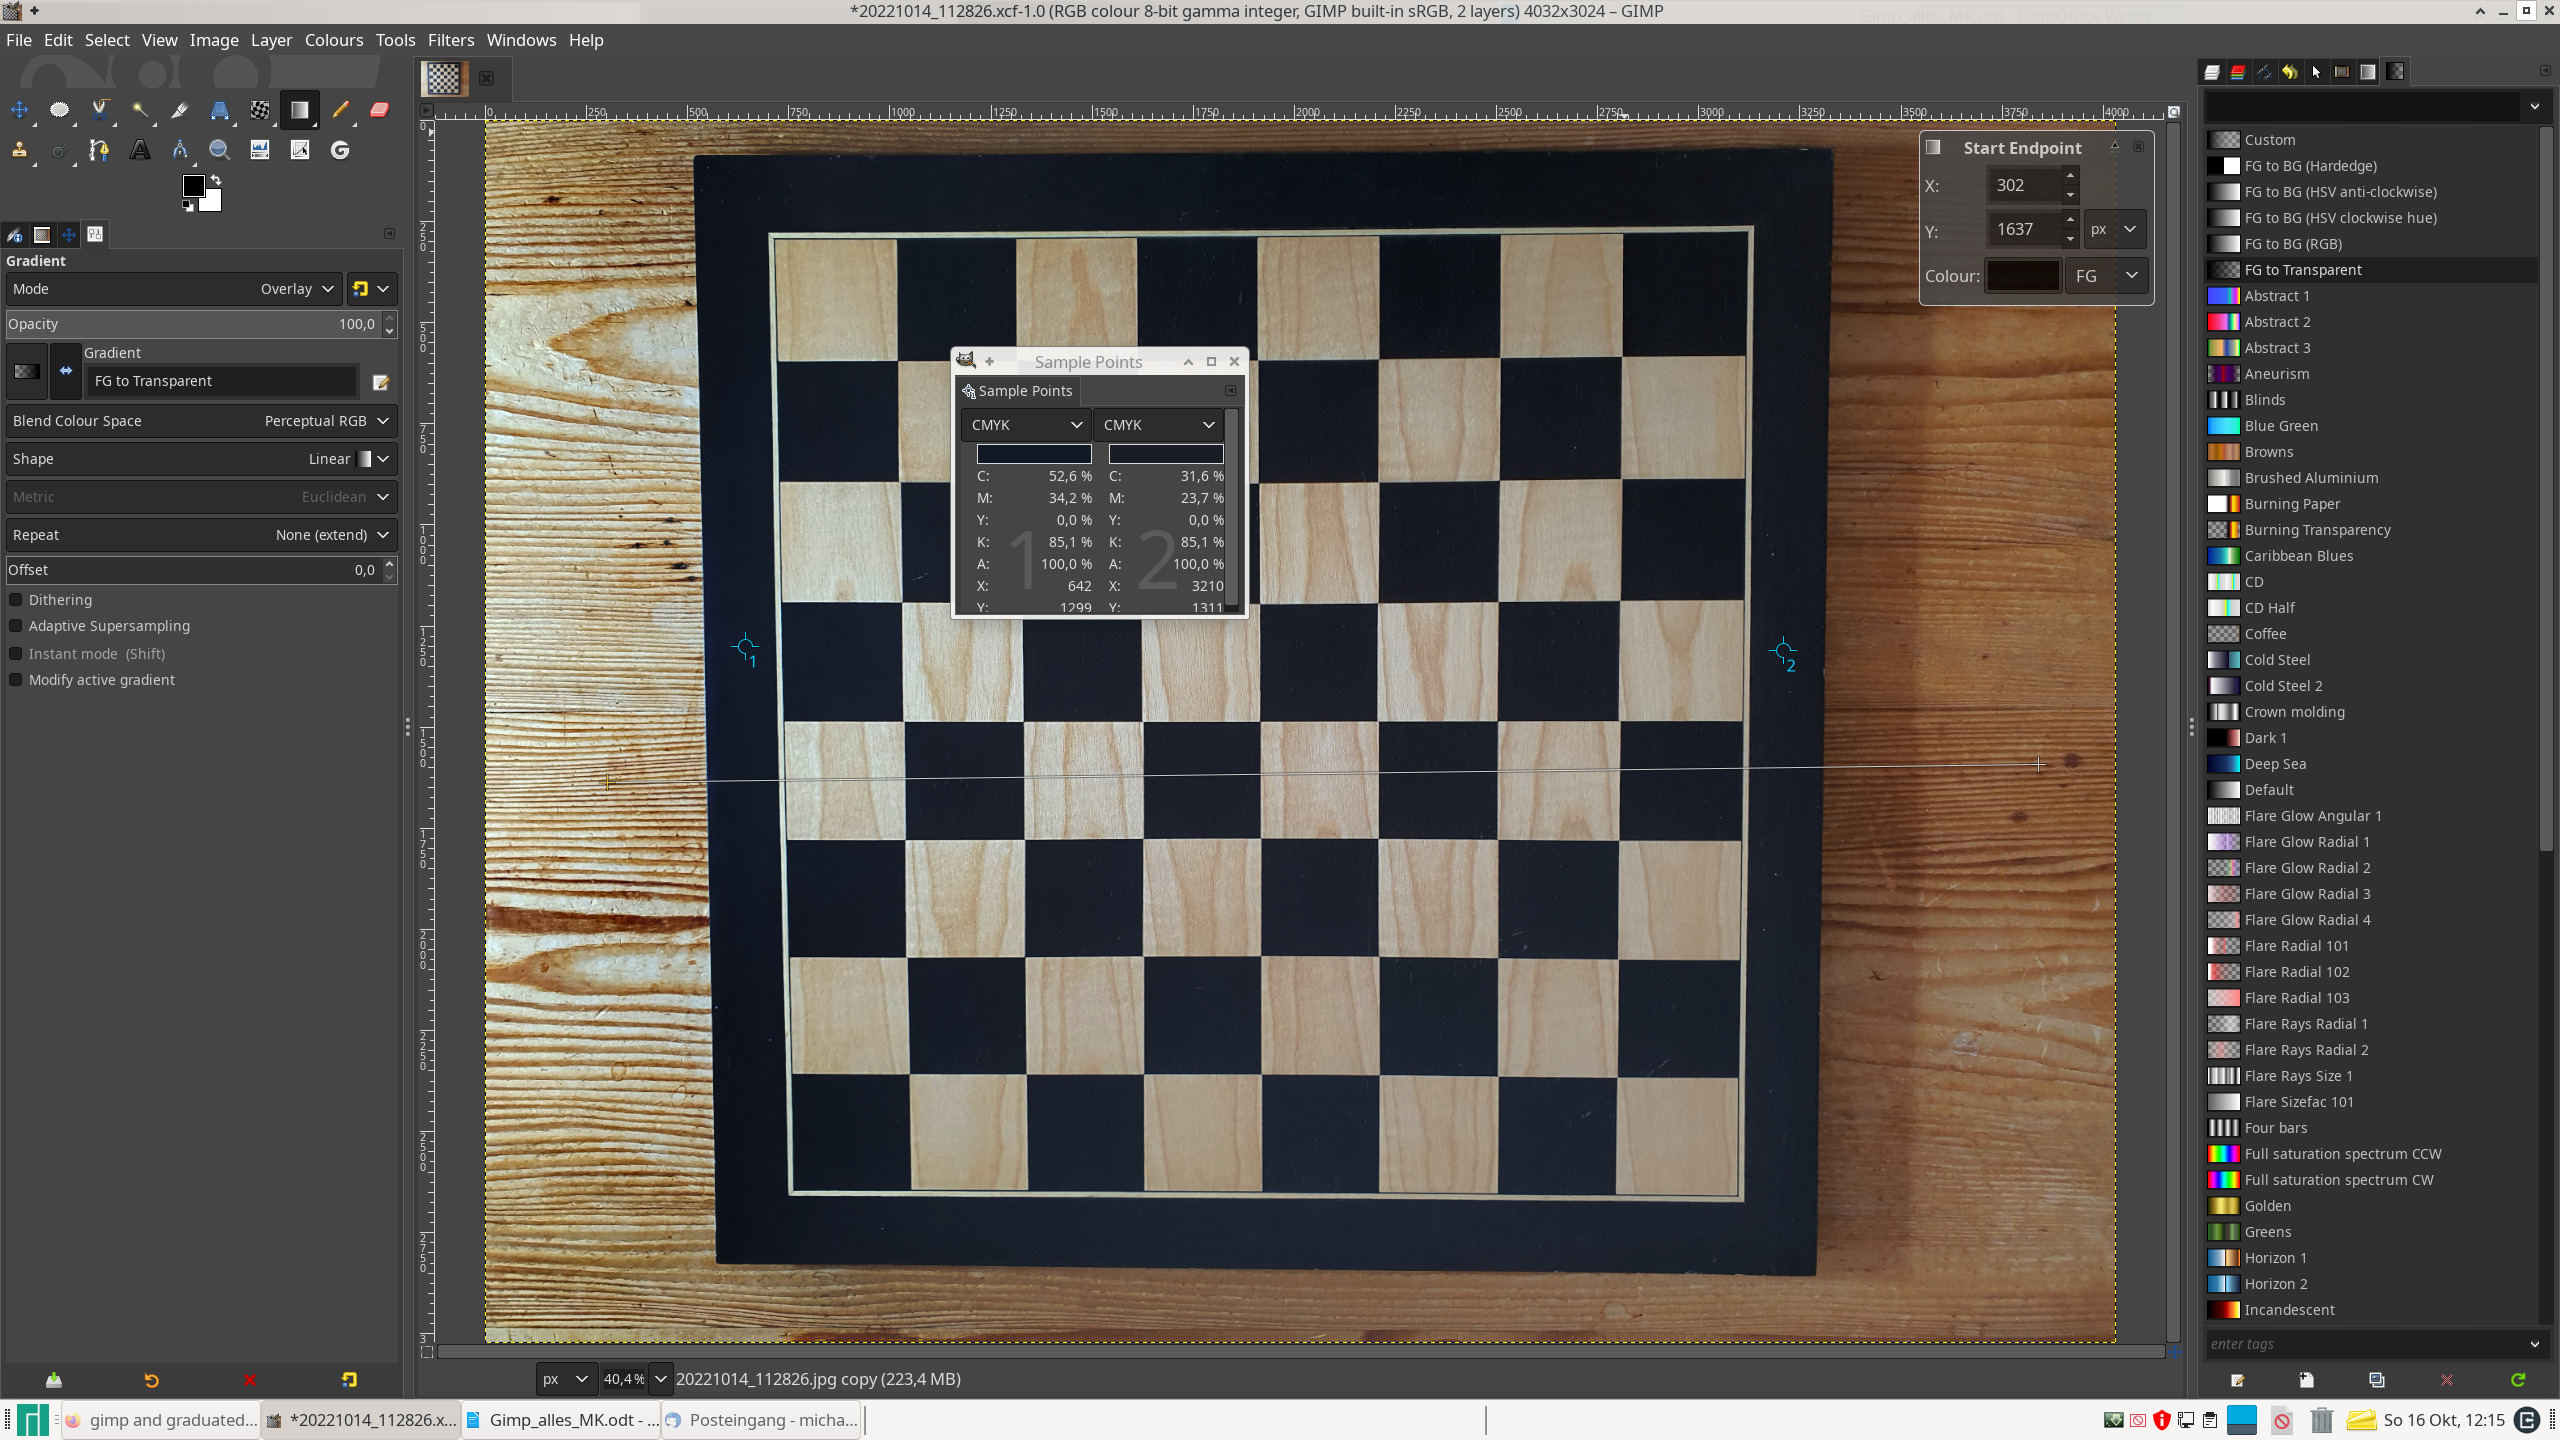
Now I have found an even simpler method:
Gradient Tool
Mode: Overlay
Gradient: FG to Transparent
And now I have the same black on the left and on the right. I have set two sample points to prove this.
However, the contrast of the grain in the wood of the table is much more contrasting.
Or even better:
Mode: Soft light
Gradient: Default
I get good results with this. However, the black on the right is lightened a bit and now you have to increase the contrast a bit.
Hello to all Gimp lovers:
In honor of the good old Gimp I have to say: With RawTherapee and with darktable I cannot compensate this strongly uneven exposure of the chessboard at all reasonably. If I apply the Graduated Filter of the Raw developers, then the formerly bright, left side becomes darker but above all also grayed.
Gimp can do that classes better!!!
I must confess that this surprises me very much.
I thank you for the many suggestions and I am glad that I have learned good things.
Hello @Terry,
I would like to ask you about your experience with raw developers, also because you were a photo professional and now you are mainly a teacher of photography:
My favorite was and still is RT - everything great, except that there were no updates for a frighteningly long time. Not that I miss anything, but it almost seems like it’s stuck forever.
Then there’s dt, which I also get very good results with - but significant developers seem to be running away as it gets more and more complicated.
Because we are leaving the topic a bit, I would like to write you a personal mail. But surely others are also interested in this topic.
Hi Micha, so what I write here is just my own opinion. I like the GUI of RT and its fork ART. I like many of the tools in RT. But what won me over to DT as my main RAW developer program is the fantastic masks system available in nearly every module. It is the best masking system I have ever experienced and makes Lightroom’s masking options look sad. I do a lot of localised adjustments and I just can not get that same level of control in RT. I would love to see a merge of RT and DT because there are great aspects about both programs.
In RT defence I should say that with very noisy images I have found the demosaicing options in RT are an excellent first approach to fixing major noise issues in some CR2 files I worked for a student. At that time, DT had limited demosaicing options but this has since changed.
With DT a significant developer (AP) appears to have jumped ship because the software has become bloated in his viewpoint. I hope this will not detract from DT going forward , but we will see. However, some of what AP might want to remove from DT others like myself may want to see retained and still use. I guess the bigger the development team is the more likely there is a lack of consensus what should be included or excluded from a program or even the direction it should take. I hope I have not accidently misrepresented AP’s view here. I also appreciate that there are issues with maintenance and compatibility of old modules with the future development of DT and at some time some modules may have to be removed out of necessity. I defer to the developers about this. I really love the work AP has done recently with filmic, the exposure module and color calibration module. I hope he can continue to contribute to and support DT going forward.
I am not sure why there are so few updates. Others may have better knowledge. Maybe they have reached a stage where there is little need for much more development, although I would love to see the masking options from DT adopted by RT. ART is an interesting fork of RT and might interest you.
Thanks for your question about my viewpoint. Use the best tool for the job is my suggestion. As stated by yourself in this thread, even GIMP may be the best tool for some jobs. I guess when I used RT I had to do a global edit in RT, export as a tiff and do localised adjustments in GIMP. Now with DT, GIMP is rarely needed because the DT masks facilitate localised adjustment.
1 Like
Certainly not because of technical complexity. Perhaps because of the complexity of working with others.
It doesn’t seem to have so far. DT has most of the changes from r&DT thus far. AP has commented many times that he feels dt is pretty much feature complete.
The consensus is between the person making the PR and the maintainer, @Pascal_Obry. Others provide feedback, but there isn’t a formal process for a quorum. The process is much less formal than it may appear from the outside.
Not sure what you’re referencing, but all the processing modules are still there. There have been changes to lighttable models, but if you editing something a long time ago, it will likely work in the latest version. Modules get deprecated, but just make a preset that uses it and you can keep using it.
2 Likes
I thought I read or heard that AP felt the need to stop including some of the depreciated modules because it bloated the software. I hope I don’t misrepresent AP here. There are certainly some deprecated modules which I still choose to use in new edits. For instance, there are some images where the defringe module works better than the chromatic aberrations module. Not many but some.
That is good to hear.
I am sure there is potential for more features which may not be everyone developers priority. I find that the digital asset management (DAM) features are improving and hopefully this will continue. Some individuals may look at this as unnecessary bloat while others will just see DT becoming even more useful. I am in the later group.
Thanks for your feedback.