What I’m looking for is the flame glowing,but keeping the sharpness in the rest of the image.
How I usually would approach this is: Blurring the image, toning it down so only the glow remains. - the rest is dark. Then adding it (blend mode) on top of the original. But I don’t know I could do that in dark table.
Thanks for your reply.
Bloom does the masking right, but the blur it does seems to be just gaussian, wich is not how glows are supposed to look. The falloff is much too linear.
I didn’t really take care of contrast beside filmic and exposure. You could use the tone eq and another instance of diffuse or sharpen with the local contrast preset, masked exposure modules, etc.
Thanks, your right. Appreciate it. But still, it feels more like a hack and I think my unresirticted version looks better.
I would love to hear @anon41087856 thoughts on this topic.
maybe see what you can get with HR in filmic… playing with the mask there, bloom and the color sliders… I don’t have my pc near me now but you might be able to get what you need… I think AP did a video or post also with some flame…
You might want to elaborate a bit more on what results you would like to accomplish. If I understood you correctly, you said you wanted the results of the diffuse or sharpen module but restricted. My thinking was that you could get better results using the Jz slider. If what you want is a mask that feathers the same way that light does, I can’t help you. Perhaps someone else has a better way to do it.
Or you could use filmic, set the white level lower, enable reconstruction, and go for blurring the highlights.
I’m on master, so I’m not sure my XMP would work for you, but here are the settings:
exposure:
Use diffuse & sharpen, bloom preset, parametric mask in RGB general on highlights, blending mode on add, then tune filmic white.
The masking needs to be done in RGB because it will make the transition more gentle and better blended than JzCzHz. Diffusion will simulate fog, the addition blending mode will simulate a fog screen between the object and the observer (much like when you drive in foggy weather with car lights on). The whole thing will be very close to real fog, simulated numerically with accurate physics.
Thanks everybody, unfortunately all approaches are not the way this needs to be done to be correct. Still appreciate the provided hacks though. They rely on extra masks which do not respect light falloff and introduce wrong values to the image.
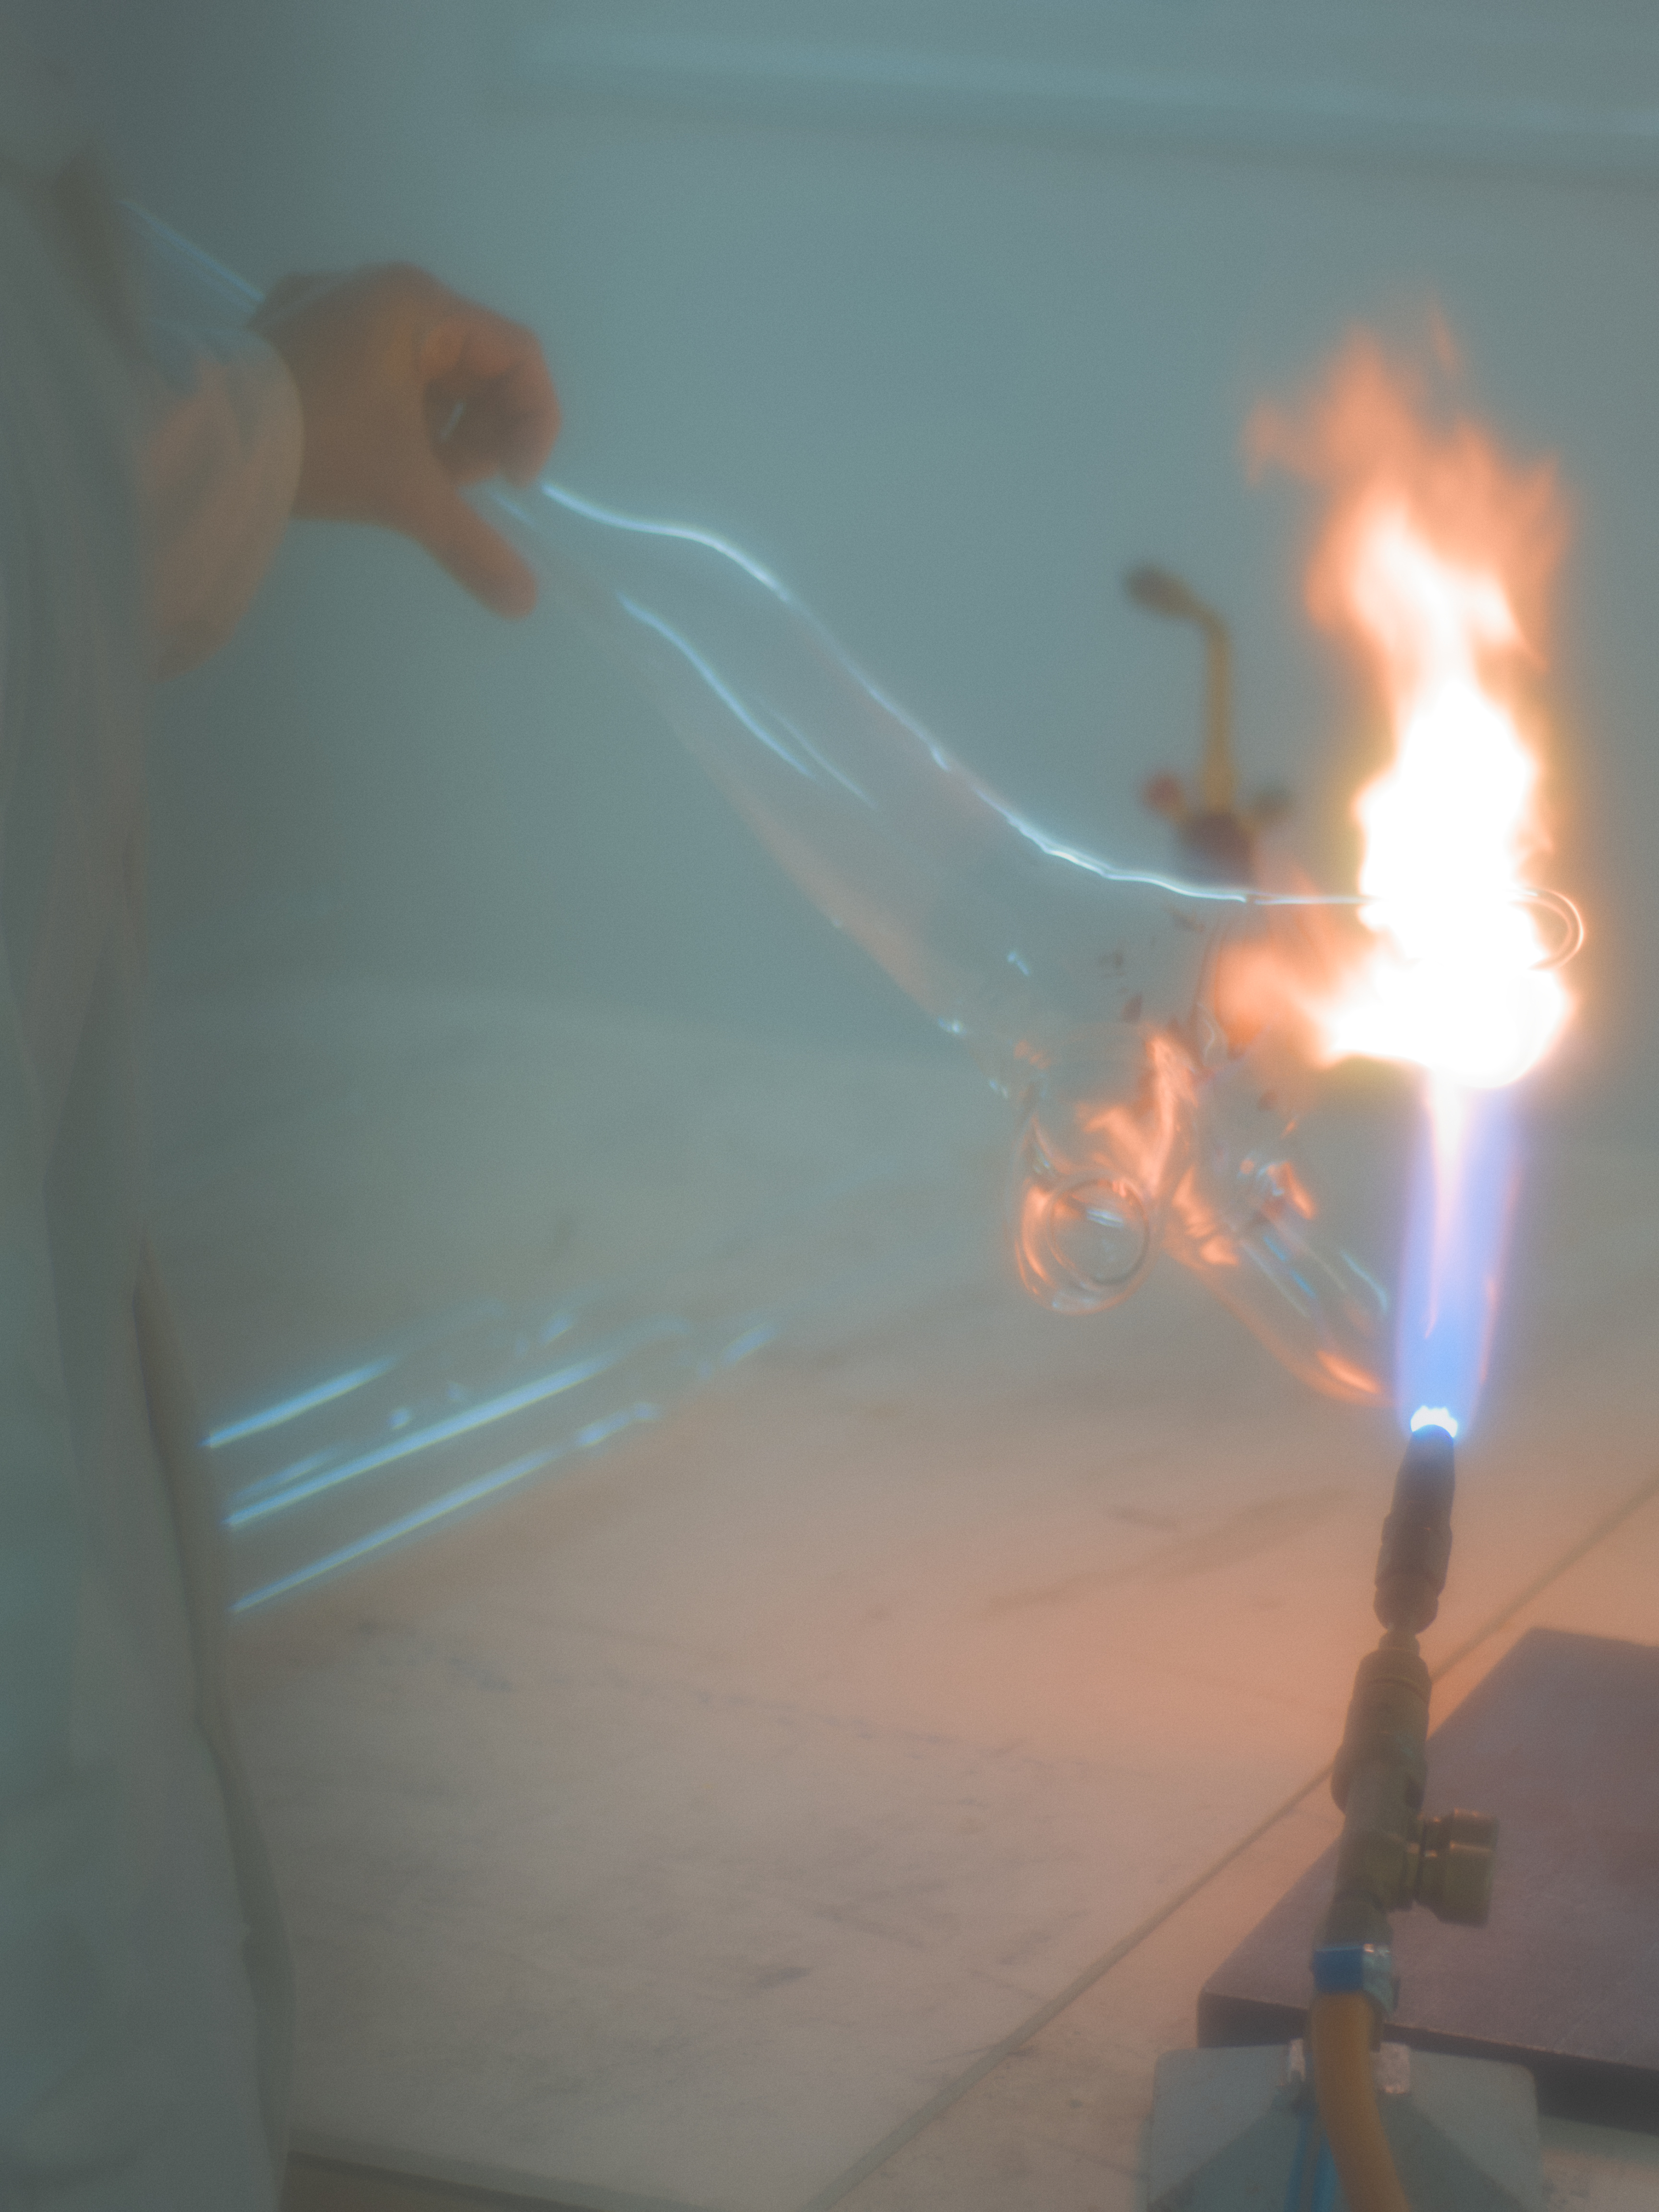
If we use a luminance mask and blur it it expands wrong and blurs in both directions, weakening the source too. If a light produces a glow, the glow needs to have an inverse square falloff. So it is fading out very gently. Even if the mask would have the correct falloff it would still introduce wrong values, because the background is mixing with the glow. In the example image I’ve provided the background is grey. If we mask the glow and add it back to the original image, the grey background by itself will brighten the image. So the diffusion we calculated is becoming irrelevant, because the resulting glow is mainly defined by the mask, not the calculated diffusion.
The best way would be to tonemap the image so only the parts remain that need to glow - rest black. Then apply an exponential glow to it and add it back to the image.
Here is a comparison of a regular glow and an exponential:
And here is a video about the relevance of diffusion nowadays. It’s focused on film, but it applies to photography too.
I think the best thing would be to rewrite the bloom module to produce a more physically accurate result. What is your opinion on that?
No. Glow has nothing to do with the source, the energy of the source stays the same, glow or not. Glow is relative to the observer. If we have the same source energy spread over more surface, it is expected that the resultant emission as perceived from the observer of the source decreases, so this is absolutely consistent.
I don’t get where the idea of an inverse square fall-off comes, do you have serious references ? We are dealing with phenomenons described by differential equations here, so everything is either an explicit exponential or an implicit partial differential solver.
As it should. Notice that the diffusion in itself is already producing an exponential fall-off.
Ok, you have no idea what you are talking about.
The best way would be to tonemap the image so only the parts remain that need to glow
You probably mean segmentation instead of tonemapping here, because tonemapping is a 1D process that has nothing to do with the matter at hand.
An exponential fall-off is just the algebraic solution of the simplified 1D diffusion process. The general 2D diffusion process we solve in diffusep sharpen is a generalized Fourier heat equation (generalized for non-isotropic diffusion and ispotropic diffusion as well). A particular solution in 1D of the isotropic general equation is the heat kernel which is… essentially a time-dependent 1D gaussian blur kernel, aka your exponential. For the anisotropic case and the inverse case (where diffusion is simulated to be reversed), we can’t find such a nice concise solution, so we use a temporal iterative solver based on a laplacian. Different path to the same result.
“Computing a glow” is diffusing the light source into the surrounding air (possibly with dust and vapour) which is transluscent (but not entirely). Now the matter is to determine whether the light source lies between observer and background or behind the background. Both ways, you need to peel your image into as many layers as you have depths planes, possibly add an artificial particles layer (simulating dust and vapour in the air), and apply the source + diffusion at the right depth and on the particles layer, then flatten the image back. For this, you need at least some segmentation or (ideally) a z-map.
But this becomes advanced compositing, for which darktable is neither meant nor equipped. So your closest bet is to use masking. In such masking, the transition between light source to background/surround is a twofold problem:
the blooming transition, aka the light fall-off of the “solid” image layer,
the masking opacity transition, aka the alpha composition blending layers within each other… keeping in mind that we have only one layer here, so we have to manage that.
The blooming transition is already fully taken-care of by the diffusion, things should fall in place except for the “who should bleed on who” part. The masking transition is parametric in darktable and uses a sigmoidal fall-off of an user-set width. Sigmoidal is again a rewrite of the exponential, so not completely disconnected to particles diffusion and infinitely smooth at both ends of the transition (which an 1/x² fall-off equation would not be).
TL;DR the diffusion process gives you what you call the “exponential glow” because it’s the 2D-generalized version of the 1D exponential fall-off (which is therefore much more versatile), and observations like :
really have their way of triggering me. That’s not a hack, the hack is what you show here. Diffuse & sharpen is a partial-differential equation solver posing as an image filter. That’s litteraly the kind of things we use in computational fluid dynamics (CFD) in industrial applications where we have a heat source and we need to compute the time to reach a precise temperature somewhere, for example in metalurgy to temper steel.
You could even use darktable to solve thermodynamics problem if you color-code your temperatures as shades of grey, simulate time with the number of iterations and diffusion rate with speed, then you could predict the stady-state temperature of some solid (minus the boundary conditions).
The physically-accurate result is called diffuse & sharpen, preset “bloom”.