Maybe, Majority filter with blur and blending mode.
1 Like
I will explain how I got the results above.
- First open the image with File - Open. And then it looks like this:

- The picture is a little dark and we have to lighten it up. The easiest way to do this is with Levels (Colors- Levels). Move the black, middle and white slider so that the photo gets brighter. See how I did that in the picture:

- The photo is grainy and we have to denoise it. This can be done with Noise Reduction (Filters - Enhance - Noise Reduction). Just move the slider until the photo is denoised enough:

- The cat has a lot of details (a lot of texture in the coat) and we have to reduce this without affecting the edges too much. This can be done with Selective Gausian Blur (Filter - Blur - Selective Gausian Blur). Blur radius should be high and Max delta low:

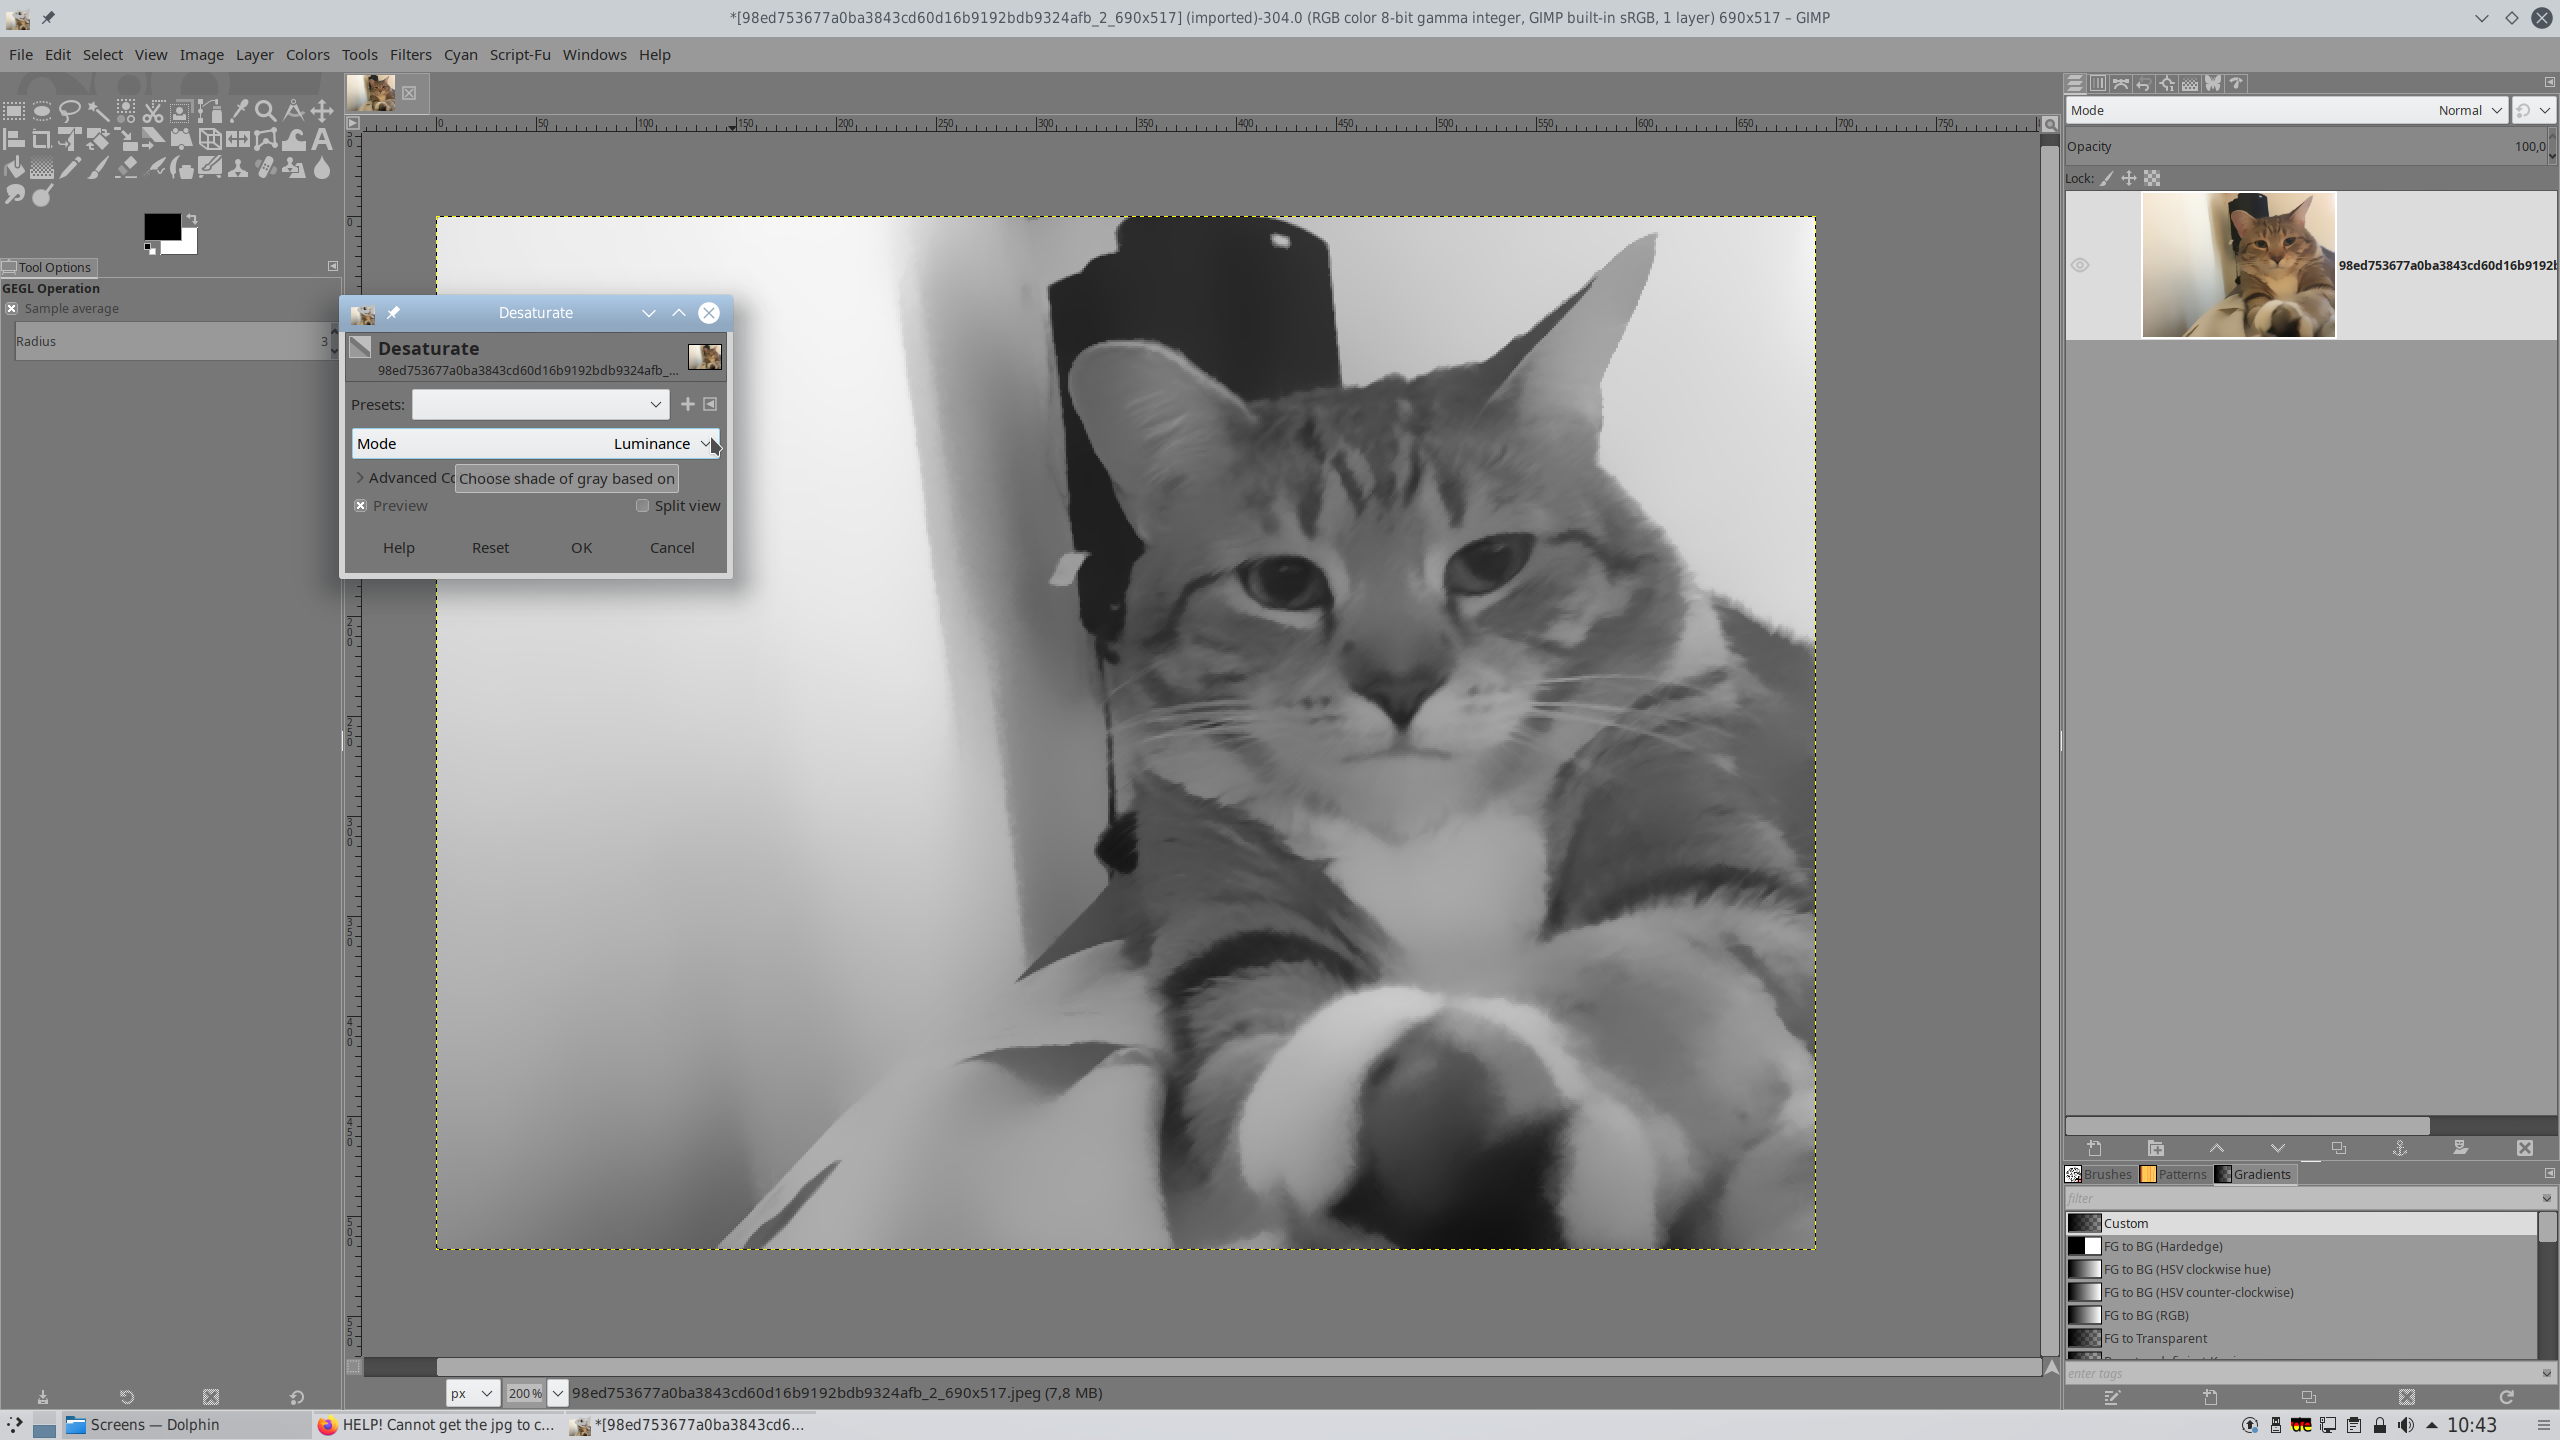
- Now the photo is ready and we can remove the color with Desaturate module (Colors - Desaturte - Desaturate). Lightness is a standard option and you can leave it as it is:
- Now we need to duplicate the layer (go to the layer window, click with the right mouse button and choose the option “Duplicate layer” from the menu):

- Here we will repeat the steps I described in my first article (steps 1-5). The result should look like this:

- Now we have to turn this result into a new layer. Go to the layer window, click with the right mouse button and choose the option “New From Visible” from the menu:

Now we have a new layer with the result:

- Now we choose this new layer and combine it with the one below. Activate this new layer, click with the right mouse button and choose the option “Merge down” from the menu:

- Now we have only two layers and using Levels again we can darken the upper one a bit so that the edges are better visible:

- Now we can try different blend modes (Mode in layer window above layer thumbnails) for this layer to get the desired look (overlay, grain merge, linear light etc.) Here is the example with overlay blend mode:

That’s it. In the next article I will present a method that may also work well.
2 Likes
Another method would be with the help of Cartoon module in (Filters - Artistic - Cartoon):

After you have lightened the layer, you can change its appearance again with different blend modes. Here with Hard Light:

1 Like
OMG Boris!! U ROCK!! Thank you so much for taking the time and effort for doing this step by step for me-its amazing!!
Let me ask you something…I adore what you did with your original you showed me of your houses on the water-is this the same way you got them or what makes it different? what kind of photos make them come out as perfect as your houses on the water?
I cannot thank you enough! Its very early here in LA–6am -but il going to try this now!
A million thank you!!
Glad to be of help!
Yes, Same method.
You can see in the original photo that the houses and the sky have clear edges and almost no details (blue sky, white walls). The trees and also the grass did not turn out so well, because they have many small “parts” (leaves, grasses) - so, too many small details.
That’s why I had to reduce the details of the cat (hair of the fur) with the help of blur to get good results.
All photos with subjects that have clear edges and not so much detail in between.
I have been having too much fun with G’MIC scripting. @s7habo’s second example is much more practical. 
Here is another attempt.

PS Drummer is actually a more difficult subject due to its compression and low resolution, but the method on the cat also works on the drummer. Notice the dark circular shapes. Those come from the blown specular highlights of the original image. Mitigate by filling them in with inpainting or the surrounding colour.
