Hi, I’m newbie…of RT… In other section of forum o
I posted one jpg processed with lightroom and other woth rt…there are someting wrong i do… sure… I think by default when i load cr3 file in RT the profile loads very very empty or flat…with very soft …without sharpness… instead with Lightroom MOBILE…when load cr3 file…seems load with minimum adjusts i the image is very sharp …can you help me edit the original cr3 file upload here?..
I ATTACHED jpg from RT Too…
Hi, your image above has some strong artifacts from your settings. I did a quick test to see what my simplest processing would look like with your image.
RT uses a system of .pp3 files to store and share edits. You’ll likely find it next to your raw image sharing the same name except the extension. It’s helpful if you post this with your raw files so users can see what you did in your edit.
You can load any pp3 file “onto” your image to use the settings in the file. Use the folder icon under “Processing Profiles”
to load the following pp3 file. (to completely clear your settings you should first either click that tree like icon to the left above so that all bars in the icon are light or chose the neutral profile from the drop down that says (Custom) in the screen shot above.) R7G_9377.jpg.out.pp3 (14.5 KB)
And let us know what you think. I used way more sharpening and local contrast than I usually to to somewhat match the out of camera look embedded in your CR3 file. If you want even more contrast just crank up sharpening and contrast under wavelet levels in the advanced tab.
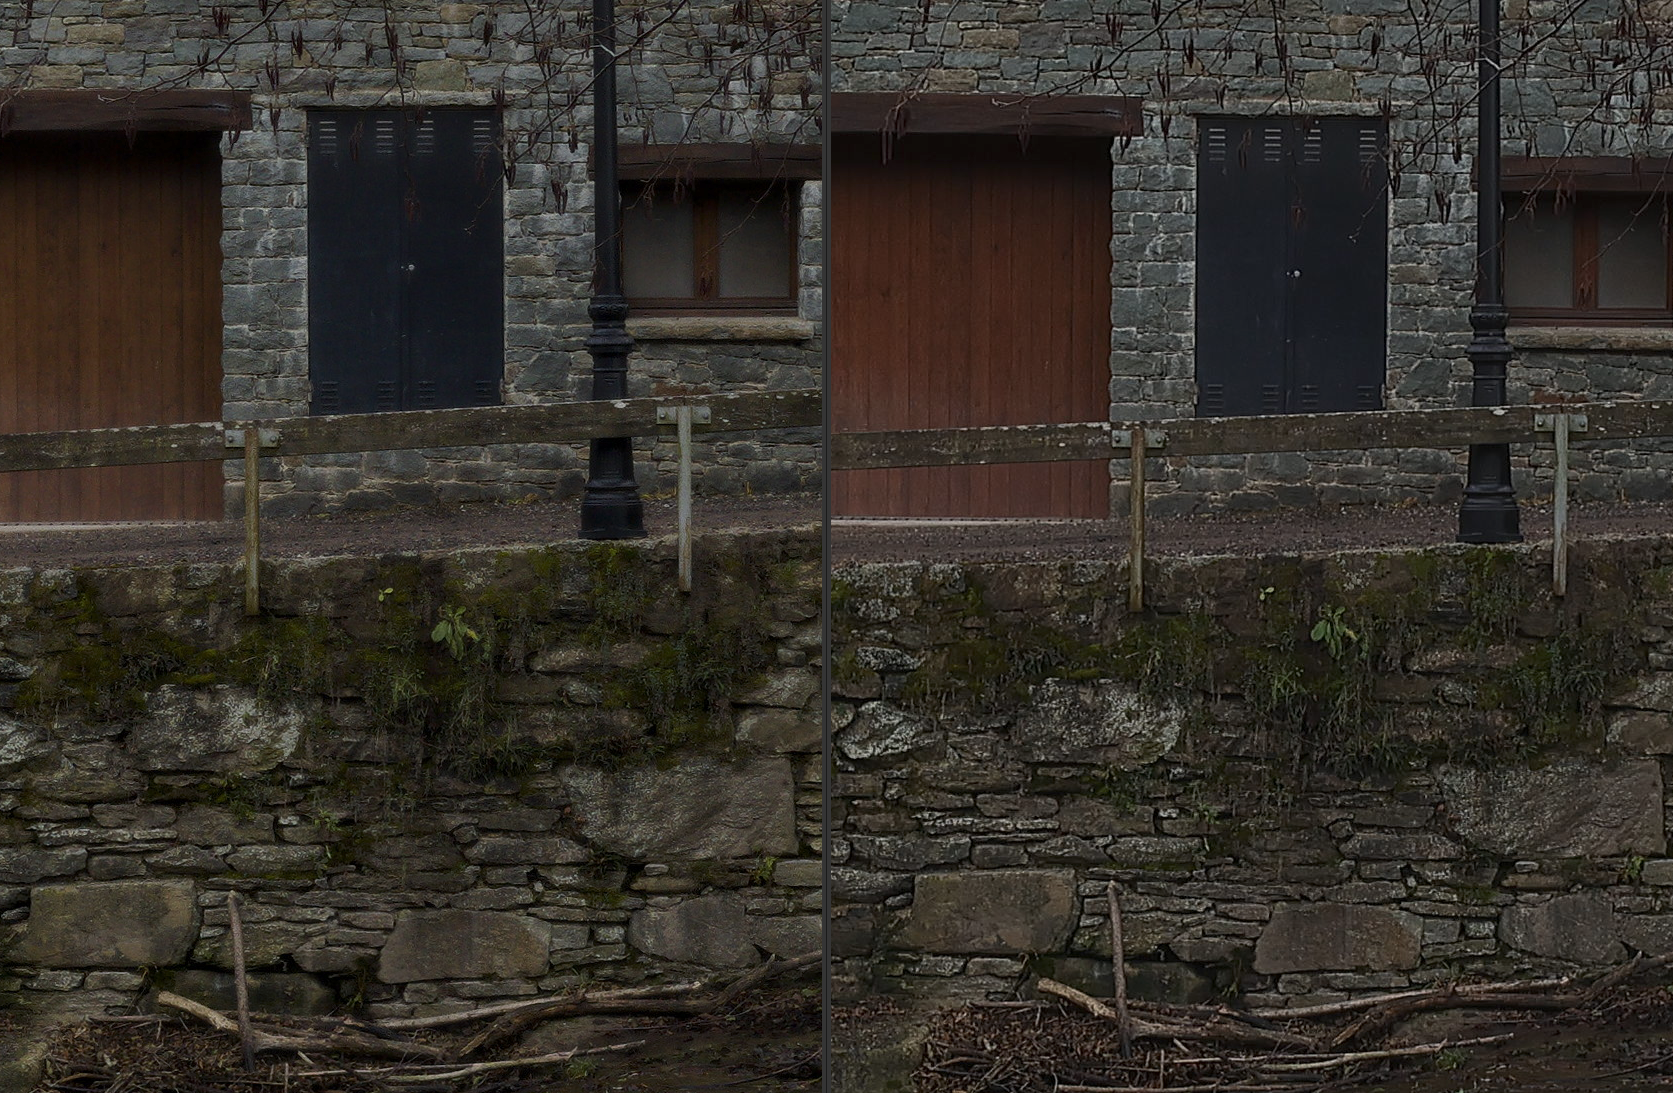
The RT export has way more detail but may look less contrasty in a full size export. See this screenshot comparing my rt export with the CR3 embedded jpeg.
Hi Jordi,
I know you asked about RT but I am a dedicated darktable user. Here is a one minute edit from me in DT. I have applied my default denoising and sharpening that I use in DT. I too by the way have a Canon R7. At least this edit will give you a comparison point. R7G_9377.CR3.xmp (11.4 KB)
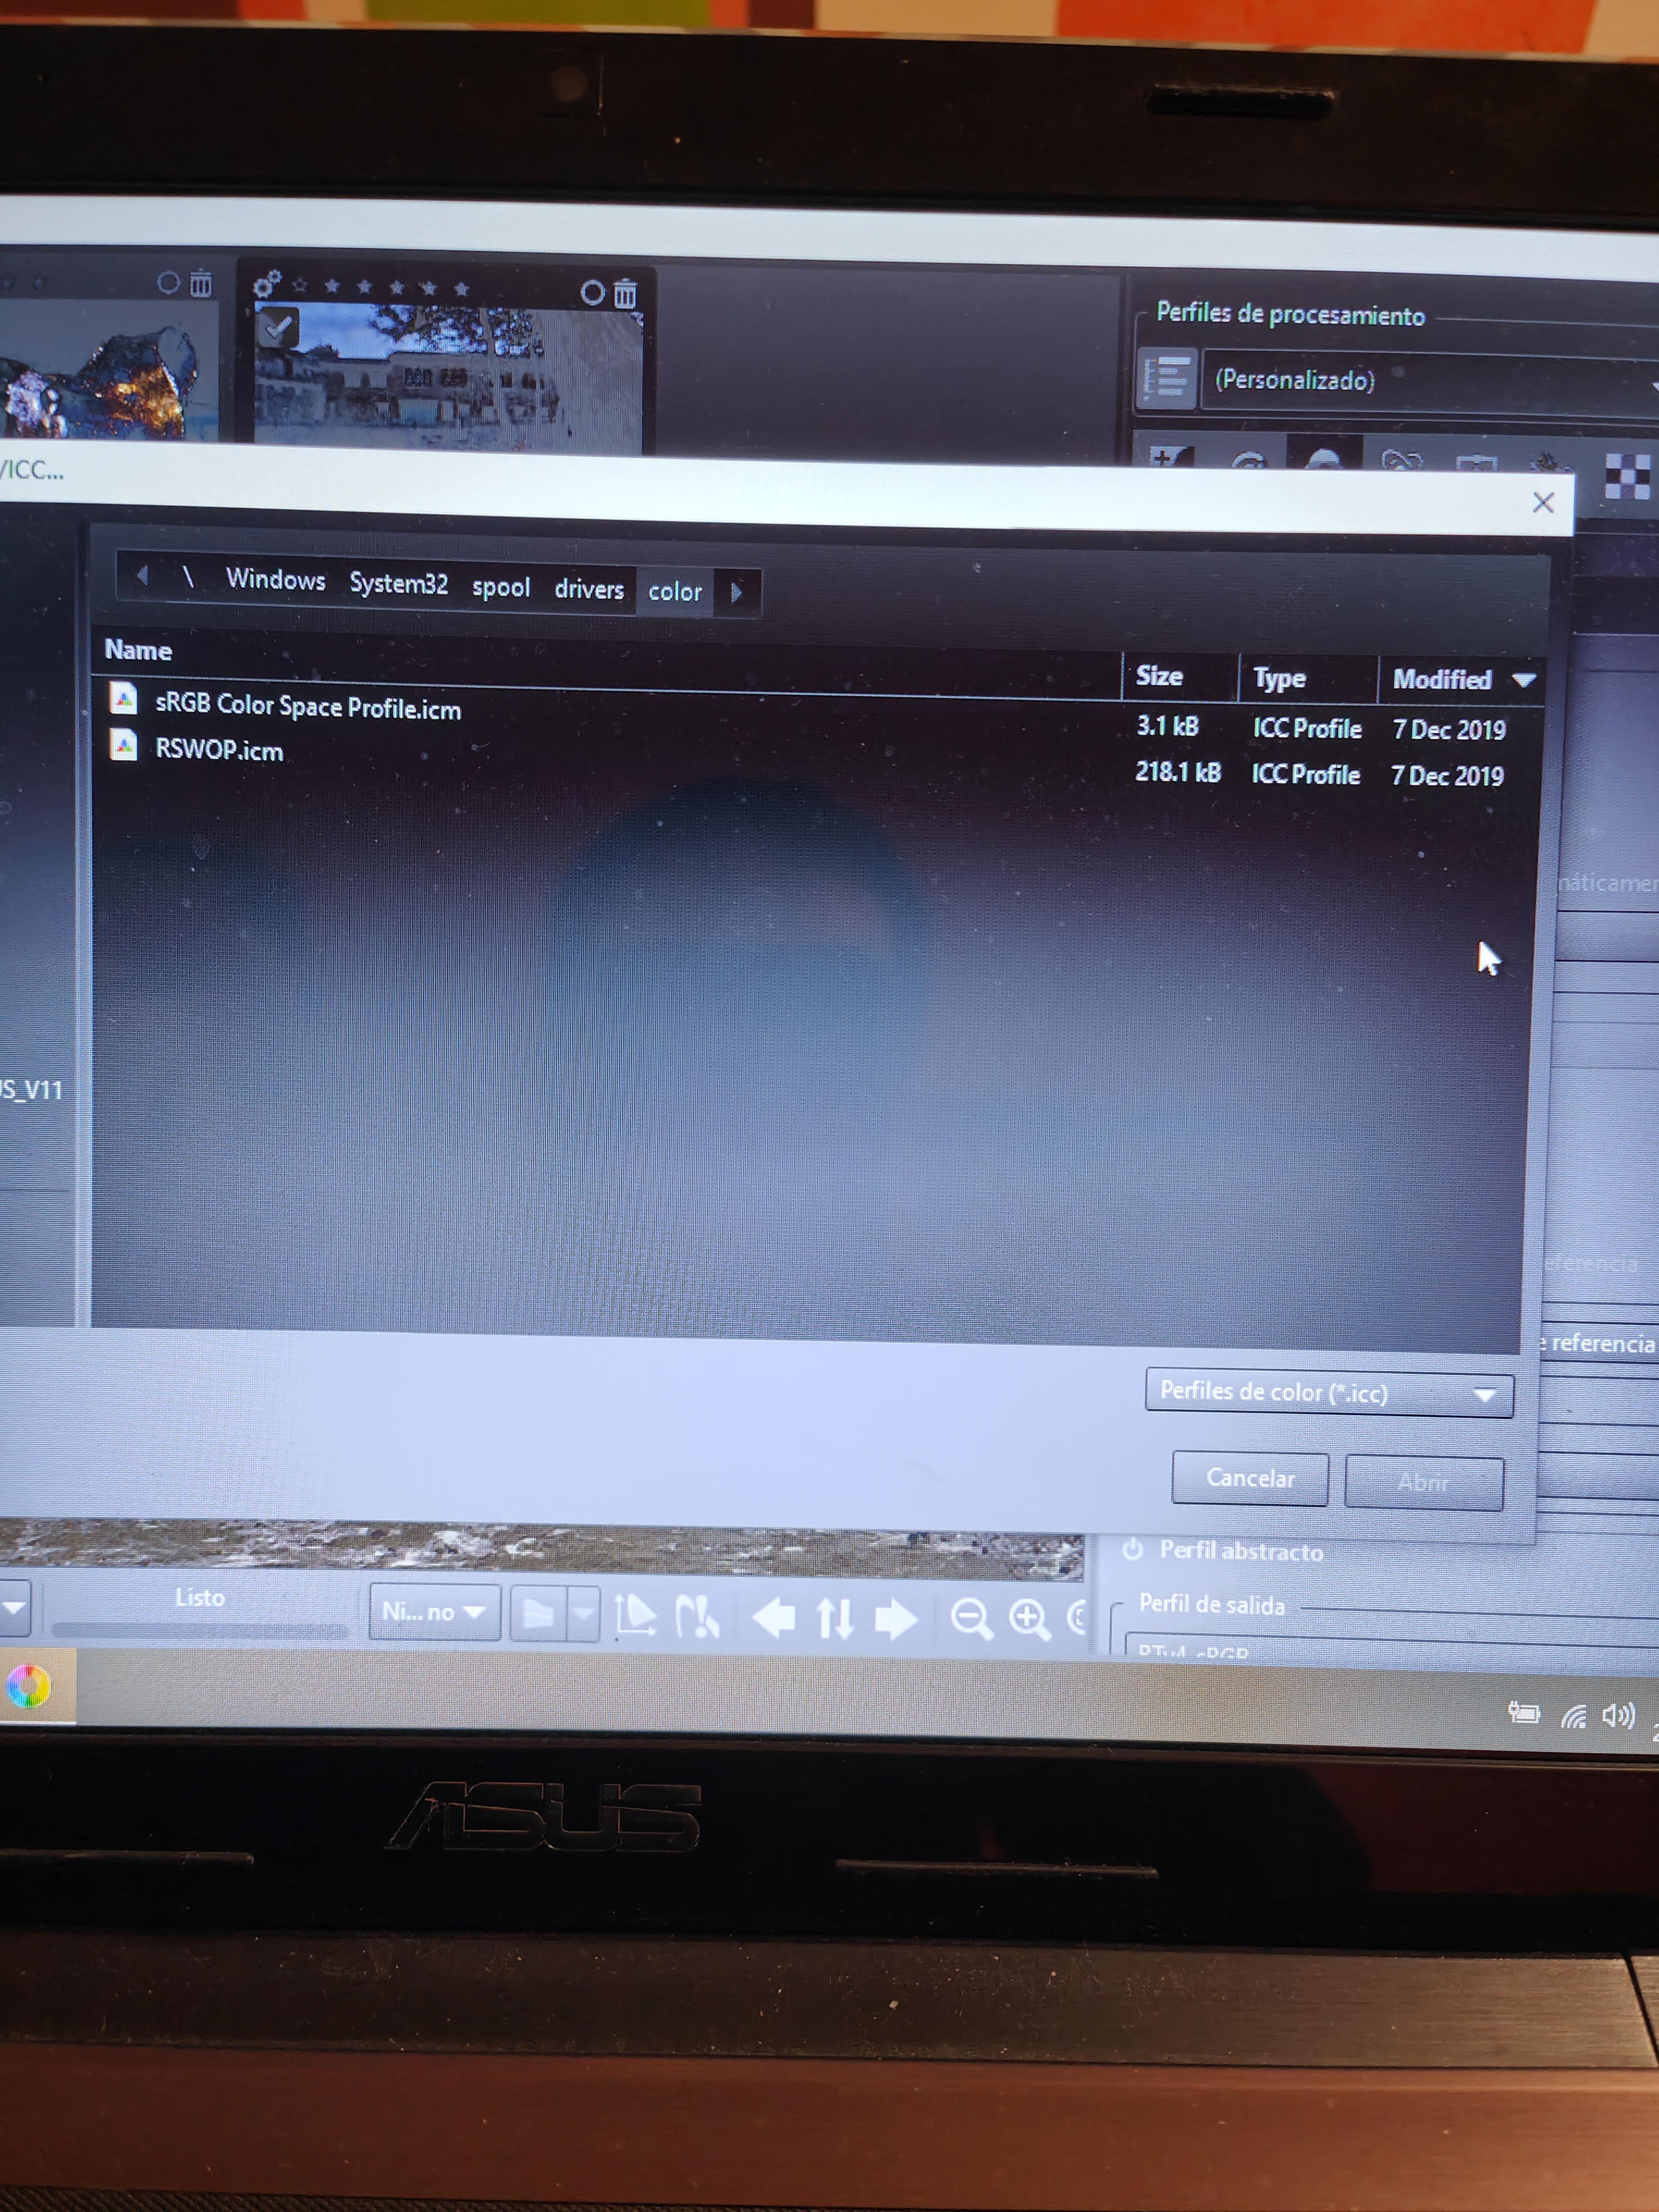
Thanks i currently taking a look your pp3 profile…but for example in my case (eos r7) y section color management what profile? The option “selected profile automatically” is greyed out (disabled) and custom if i select sRGB THE image turns a lot dark…change a lot…and i can see only 2 profiles… sRGB.icm and RSWOO.icm is normal??? Why i can’t find a eos r7 specific profile color? I attached screenshot…
That’s the working profile and prophoto is fine. Make sure you have the right selection for your display profile so that Rt can display things properly…should be system if your OS is set up properly or if you calibrate your monitor select that one to be sure…You can also install Adobe DNG convertor and use the DCP file for your camera if that works better for you as a camera file than the camera specific one provided by RT
The “camera standard” is fine and specific to your camera. It’s, I belive, just not a profile created to RT standards by RT dev’s/users. It’s often the same or similar to the profile Adobe uses. This profile is camera specific but not as accurate as the Auto matched profiles can be. Adobe profiles have hue twists and other tricks to make for pleasing images with their pipeline. The results will be good using “camera standard”.
yes, just open the CR3 as it is. In case you want to keep your former edits (the existing pp3-file), first create a snapshot (down left) , then open the downloaded pp3 file. After your review of my edits, just recall the snapshot and your edits are the same as before.
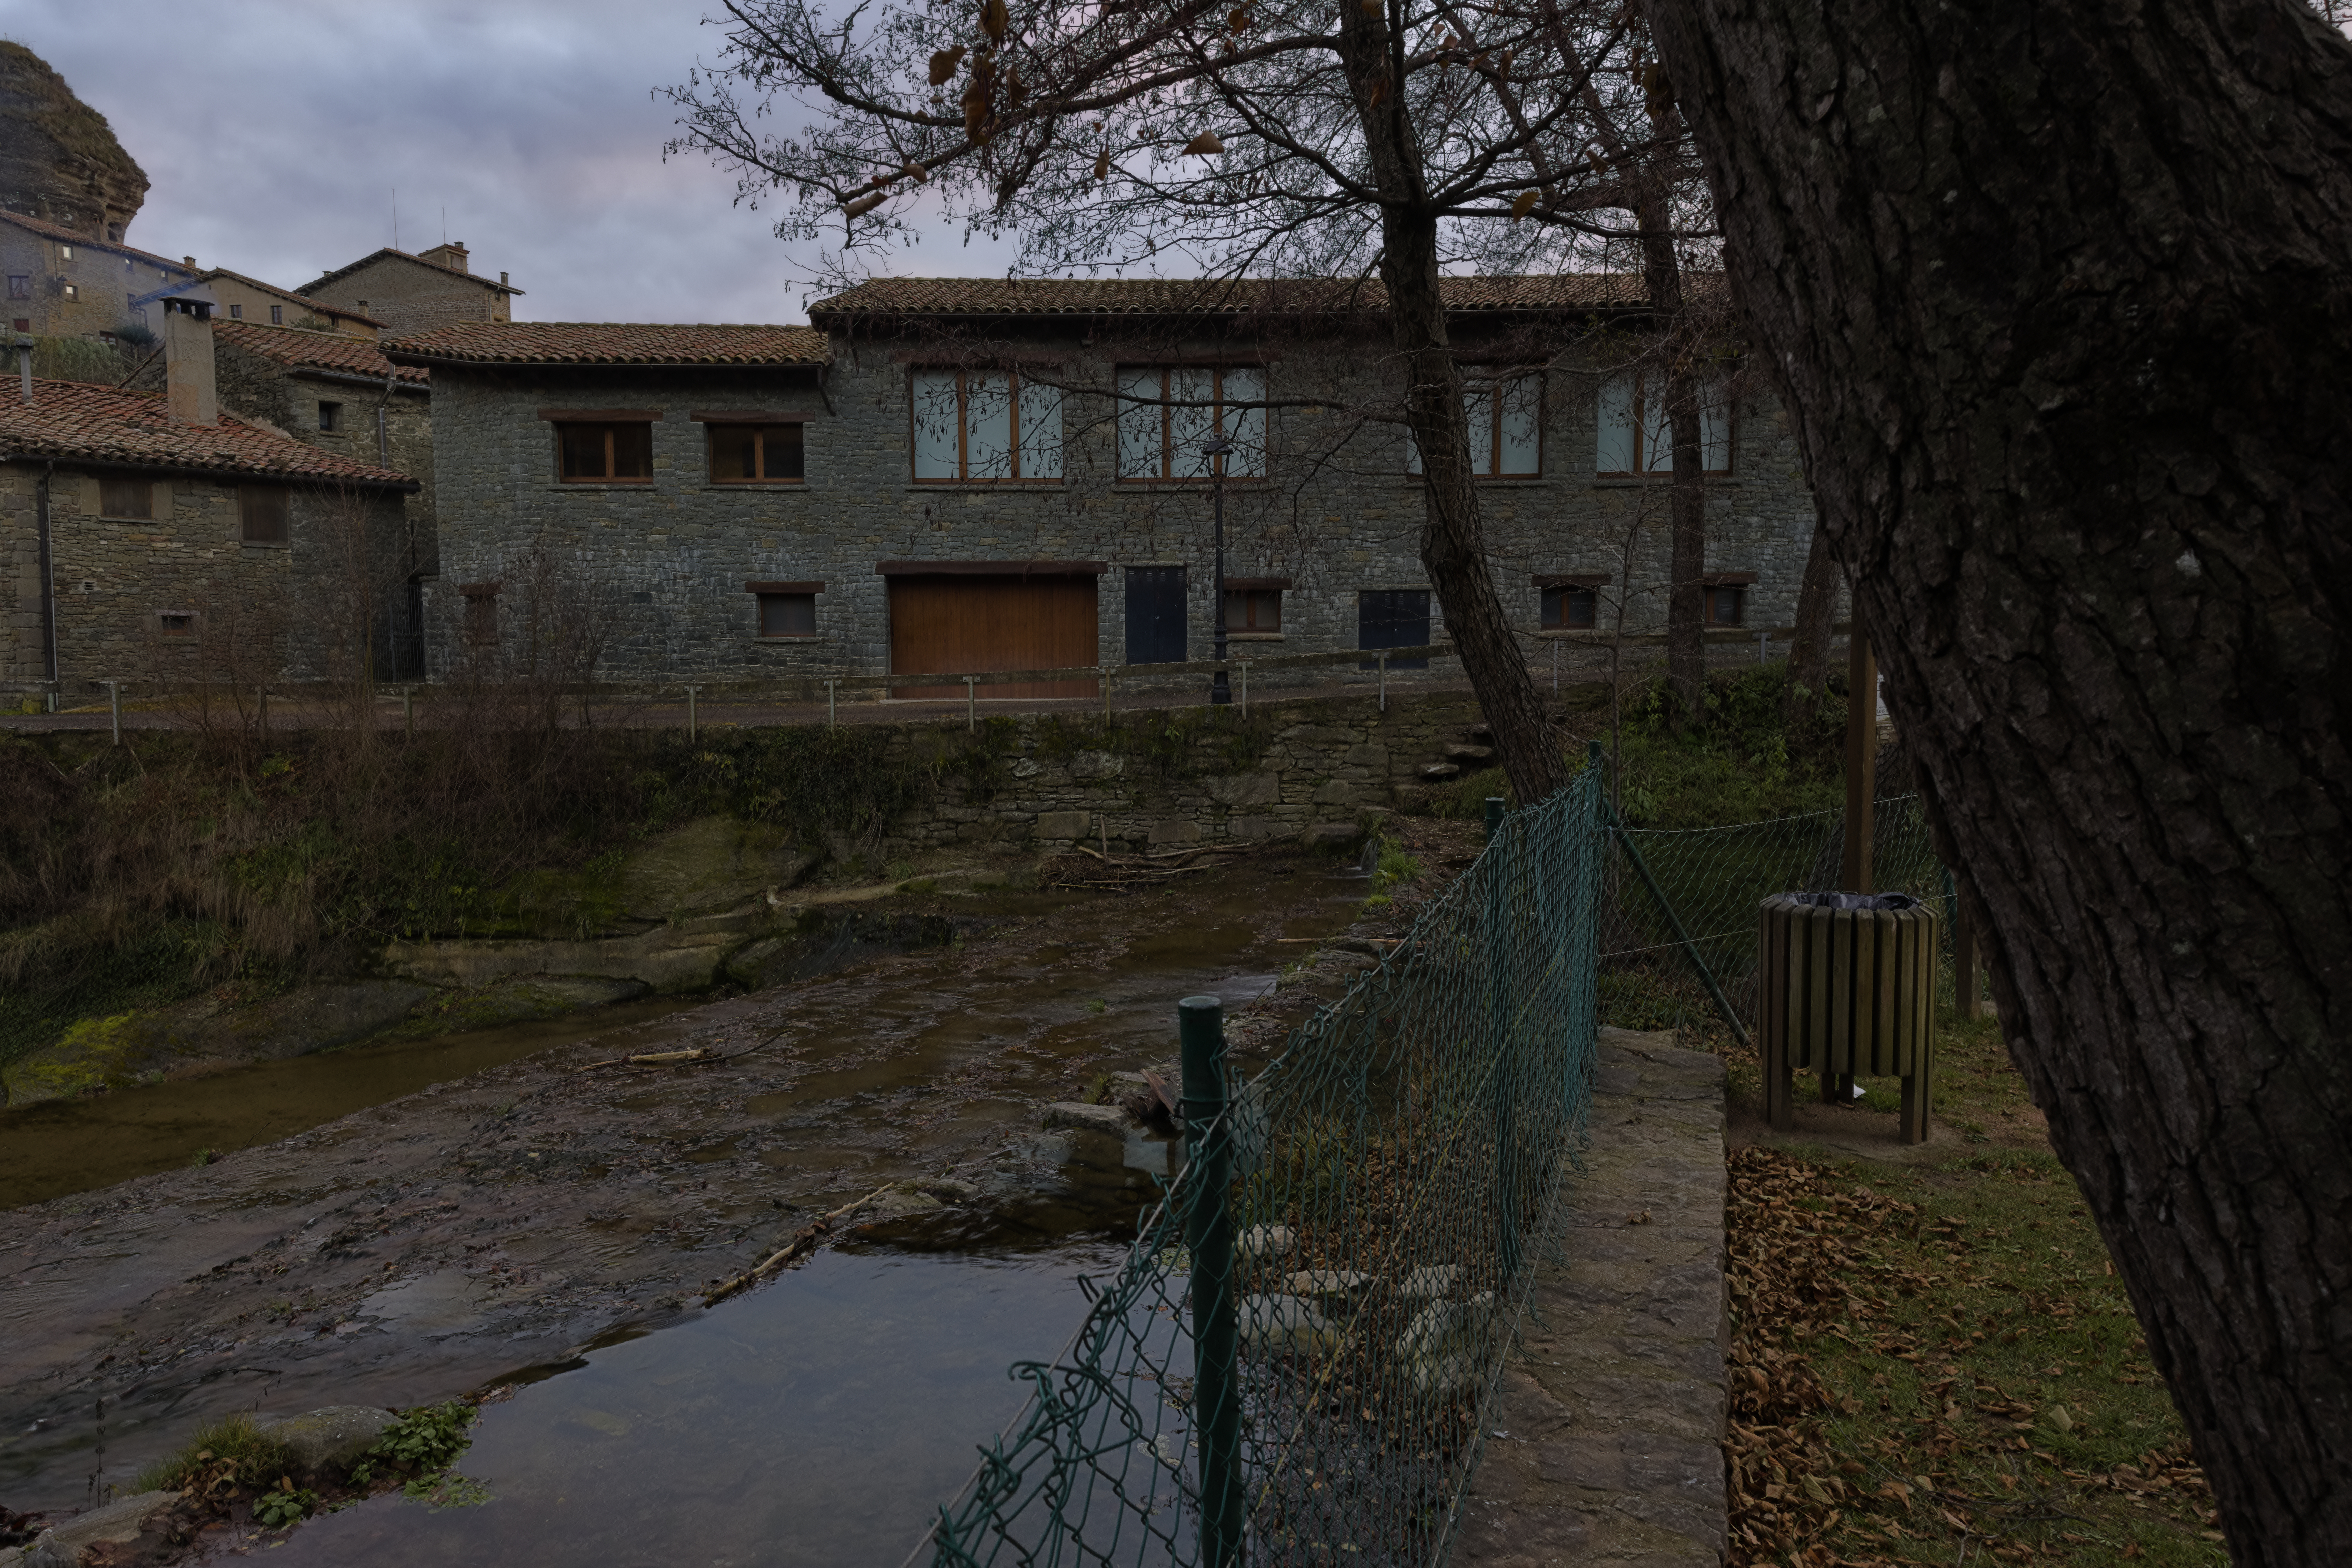
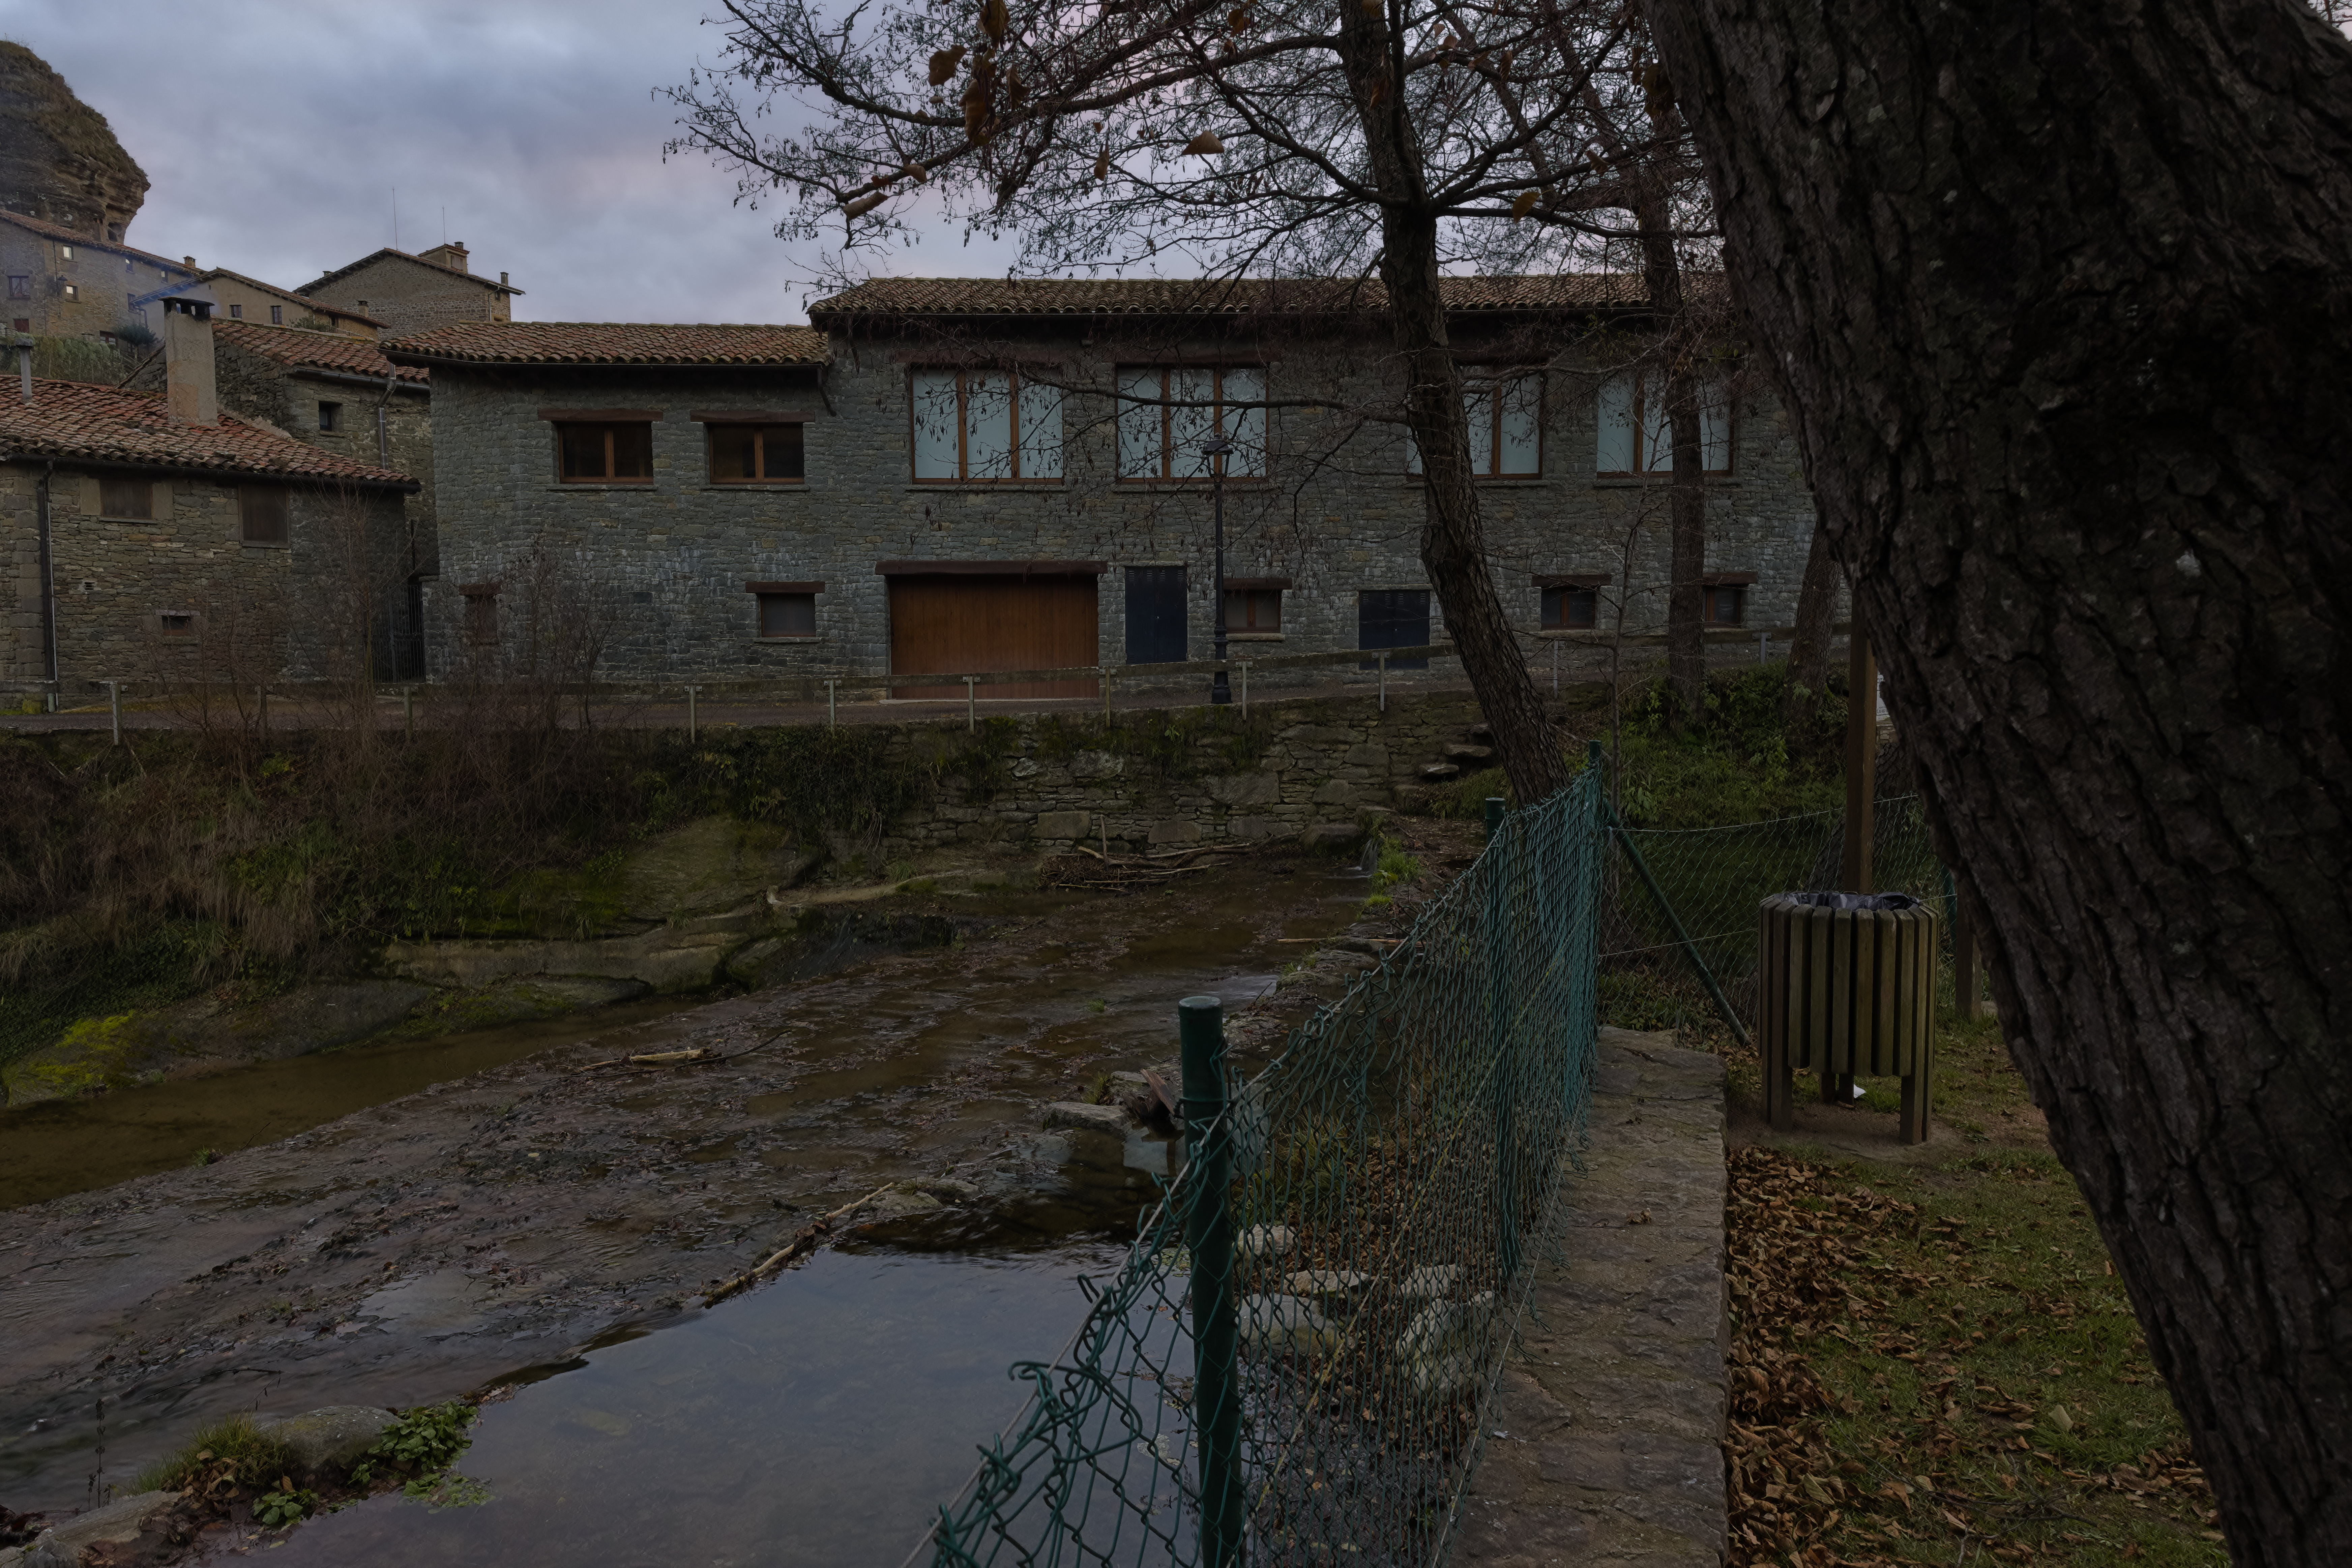
Ok many thanks for quickly help here …you are amazing … now i can get decent edits with sharpness and no artifacts but in my last cr3 (canon eos R7) i get the horizontal noise lines…i suspect is electronic shutter…The thing is that using the preprocessing tool in the RAW tab in the line noise filter section, if I increase the value to 200, I see that they disappear, but then I see that the sharpness in the image decreases in general… is there any way to compensate for this? I don’t want those lines in the sky (top left) but I also don’t want lost detail and artifacts afterwards… how could you help me with that? In local adjustments in RT I don’t see the line noise filter option…
I attach here a jpg without lines applying the line noise filter and another jpg with the lines and I see that the photo is sharper and without artifacts… any solution to that?
Thanks.
Yes! Sorry the lines are there…look well… I show you a screenshot of my edit from LIGHTROOM MOBILE…a some days ago before use RT… The lines in raw file into RTi can see it too…but line noise filter eliminates but i loss detail and gain artifacts…
The lines come out when applying extreme sharpening. They are in the raw file but invisible to the eye until you really crank that sharpening and contrast up.
One solution would be to use “selective editing” for contrast/sharpening. However I think you should just see it as a sign you’re overdoing the contrast/sharpening and pull it back.
Make sure you are considering the final output it’s best to ouput jpegs at a pixel size close to the viewing device. When scaling down using the resize module you can adjust post-resize sharpening to suit your output. Exporting a full size image and then letting the device scale it down will result in inferior and unpredictable results when it comes to sharpening.
Many thanks! But this lines in mechanical shutter never happen… I have EOS R7… its interference??? Its very strange and not always happen…but if happen it is in only electronic shutter…any thoughts?
Thanks.
I mostly shoot with mechanical shutter and haven’t seen this particular effect before.
Not sure if it’s related to electronic shutter/in camera raw modifications, just the way the camera records things or what it is. Pixel shifted files can reveal similar things after extreme sharpening but thats the only time i’ve seen anything similar.
Edit: I realised that the auto focus sensors on mirrorless cameras can create such effects since they are on the sensor itself and thus need to be masked. It’s one of the well known trade offs with milcs.