This was shot this morning to try and prove “something”, it’s roughly the same settings that you used (from memory), with limited depth of field to show up the grain. It was shot on a Panasonic Bridge camera dating from 2014 compared to your camera which dates from 2007.
Zoomed in the sharpness captures the beads of water on the padlock, but this is not to diss your equipment, more to highlight that you take whatever you can, wherever you can, with whatever you have.
Searching flickr for Eos 40d reveals a host of images all of which in jpg for the web, the “grain” is not an issue.
I will not go into technical considerations.
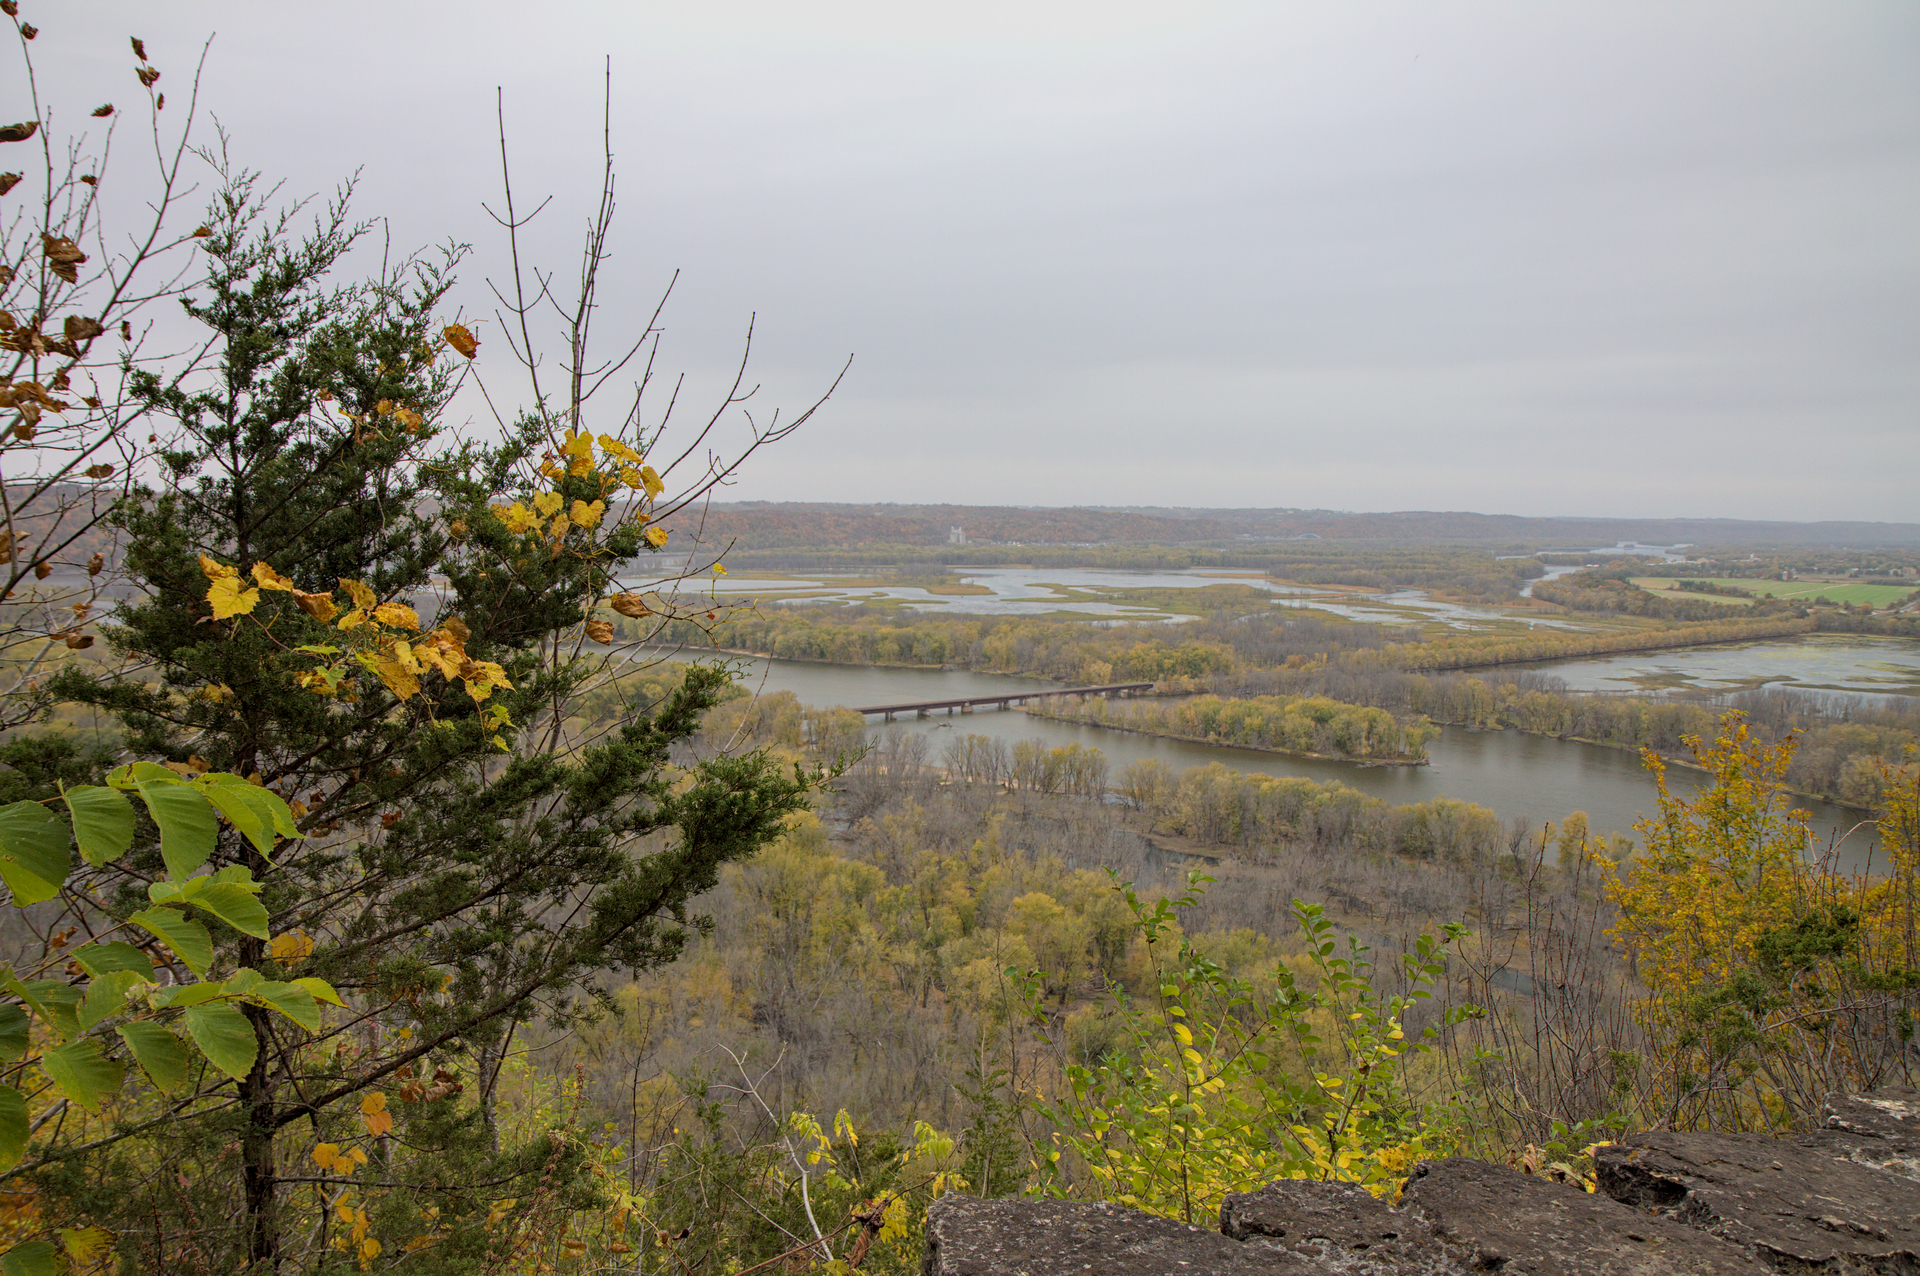
What attract my eye in this photo is the island and the bridge in the middle of photo. Regretfully it seems that the lens is not focused on that (or there is motion blur, I don’t know) but rather on the tree in the left and the foreground. for me, noise is not the issue as I already demonstrated.
Attached is my attempt at this shot using the two copies of denoise (profiled) that I described above; both the RT method you used and this approach seem to reduce the noise on the black mount behind the padlock nicely. Were you intending to illustrate how even a newer camera (e.g. circa 2014) can have this same type of noise issue, and that it can be reduced/eliminated in post?
This is something that I find challenging - determining where to set the focus point in the moment. When taking this shot, I thought the tree in the foreground on the left would be important so I focused on it to be sure it wouldn’t be blurry and used a relatively small aperture to try and get a lot of DOF. It seems that this wasn’t enough to get the island and the bridge perfectly in focus, but I’m not sure I’d want to risk blurring the foreground either. Would it have been better to use an even smaller aperture (if the available light or tripod permits) and still focus on the foreground?
Take my comments with a grain of salt, because I’m better at saying them than executing them
“in the moment” - nothing in this scene was going anywhere. Don’t rush. If you want to get the shot with a particular light such as golden hour, get there early so you have time to get to your vantage point and compose without a “Oh %$#^, I’ve got to get this set up fast or I’ll miss the shot” situation.
My guess is that that tree was pretty close to you, and it was not possible to set your focus to get both the tree and the valley in reaonable focus. I can think of two workarounds:
Set up far enough from the tree that you can get reasonable focus on it and the valley. If you have to crop away some foreground later, so be it.
Nope, more along the lines of “noise happens” and if one looks for it at 200% one will always find it, regardless of equipment or tech improvements, so go out and take pictures with whatever is available.
Nice, this looks like a useful app! Does this mean that if I had been 2.7 meters or more from the tree and had still focused on it, the background (e.g. bridge, island, etc) would also have been in focus and sharper? I was definitely closer than 2 meters so that would explain why it wasn’t focusing to infinity as I had intended
That’s it.
Download it and play with it, if you don’t want to do the math manually from those dof charts you find on the internet.
Thanks to @shreedhar who first mentioned the app to me.
At the magnifications you use, you may be disappointed, you need to understand that hyperfocal is “acceptably sharp” and this is very much based towards holding a hard copy and what the human eye can see. Circle of confusion - Wikipedia has details, blowing an image to 200% on a computer screen is different. Fujifilm cameras have two depth of field scales LCD setting, one is big and based on print, and one is very narrow and based on a computer screen.
I don’t seem to be able to recreate this with the enhanced yellows and greens. When I tried loading the Canon 50D profile into the input color profile module, I don’t see any difference in the colors, just the sky getting darkened (default settings with enhanced color profile on the left, Canon 50D profile on the right):
Thanks, this article (and the explanations by @nodal and @CarVac) was helpful for me to better understand hyperfocal distance; I had not given much though to sharpness throughout the DOF before but definitely will now. The double to distance method seems like an easy technique to remember; I’ll have to give it a try!
I don’t know what to say in technical terms.
Please, load my xmp, select step 15 (tone eq.) in history and take a snapshot. Then go up to the input profile step and compare. I can see yellows andr greens pop up. But the sky is heavily flattened after that. In the next step, I use tone eq. to step down the sky until the histogram regains contrast (actually, when applying this step, I don’t use the histogram to guide me, I just look at the image)
Note that I’m using the waveform histogram.
EDIT: Wow, strange… I just clicked on the images I uploaded and the one where input profile is enabled seems to flatten the yellows and greens. I doubled checked in darktable and the punch is there. Maybe it’s a browser’s color management stuff going on here (but, again, I’m not technically savant)
If you’re not color-managed, the input color profile won’t do anything. Its the input to a color transform, where the output is defined by either a working profile or the display/output profile. Check to see if you have a working profile enabled. Also, a display profile.
I just compared the image processed with the Canon 50D matrix and ssf input profiles, and there’s not a lot of discernable difference for this image. In some of the evergreen greens I can detect a shift from the yellow side, but most of the deciduous leaves seem to be yellower shades of green to begin with.
Probably a good illustration of the colorimetric accuracy of well-made matrix profiles; where they suffer is in retaining hue gradation of extreme colors due to the straight-line transform to a place just inside of the destination gamut. Also to consider: If the encoded colors of the original image capture are already within a destination gamut, a colorimetric rendering intent won’t touch them…
I can see the historgram changing as seen in the screenshots you posted, but I still don’t see a noticeable difference in the yellows and greens. Thanks @ggbutcher for the article and suggestion about color management - I am indeed using colord and darktable-cmstest shows that I have a profile selected for my monitor. In any event, I appreciate knowing about this profile for the Canon 50D and will try using it with future shots!