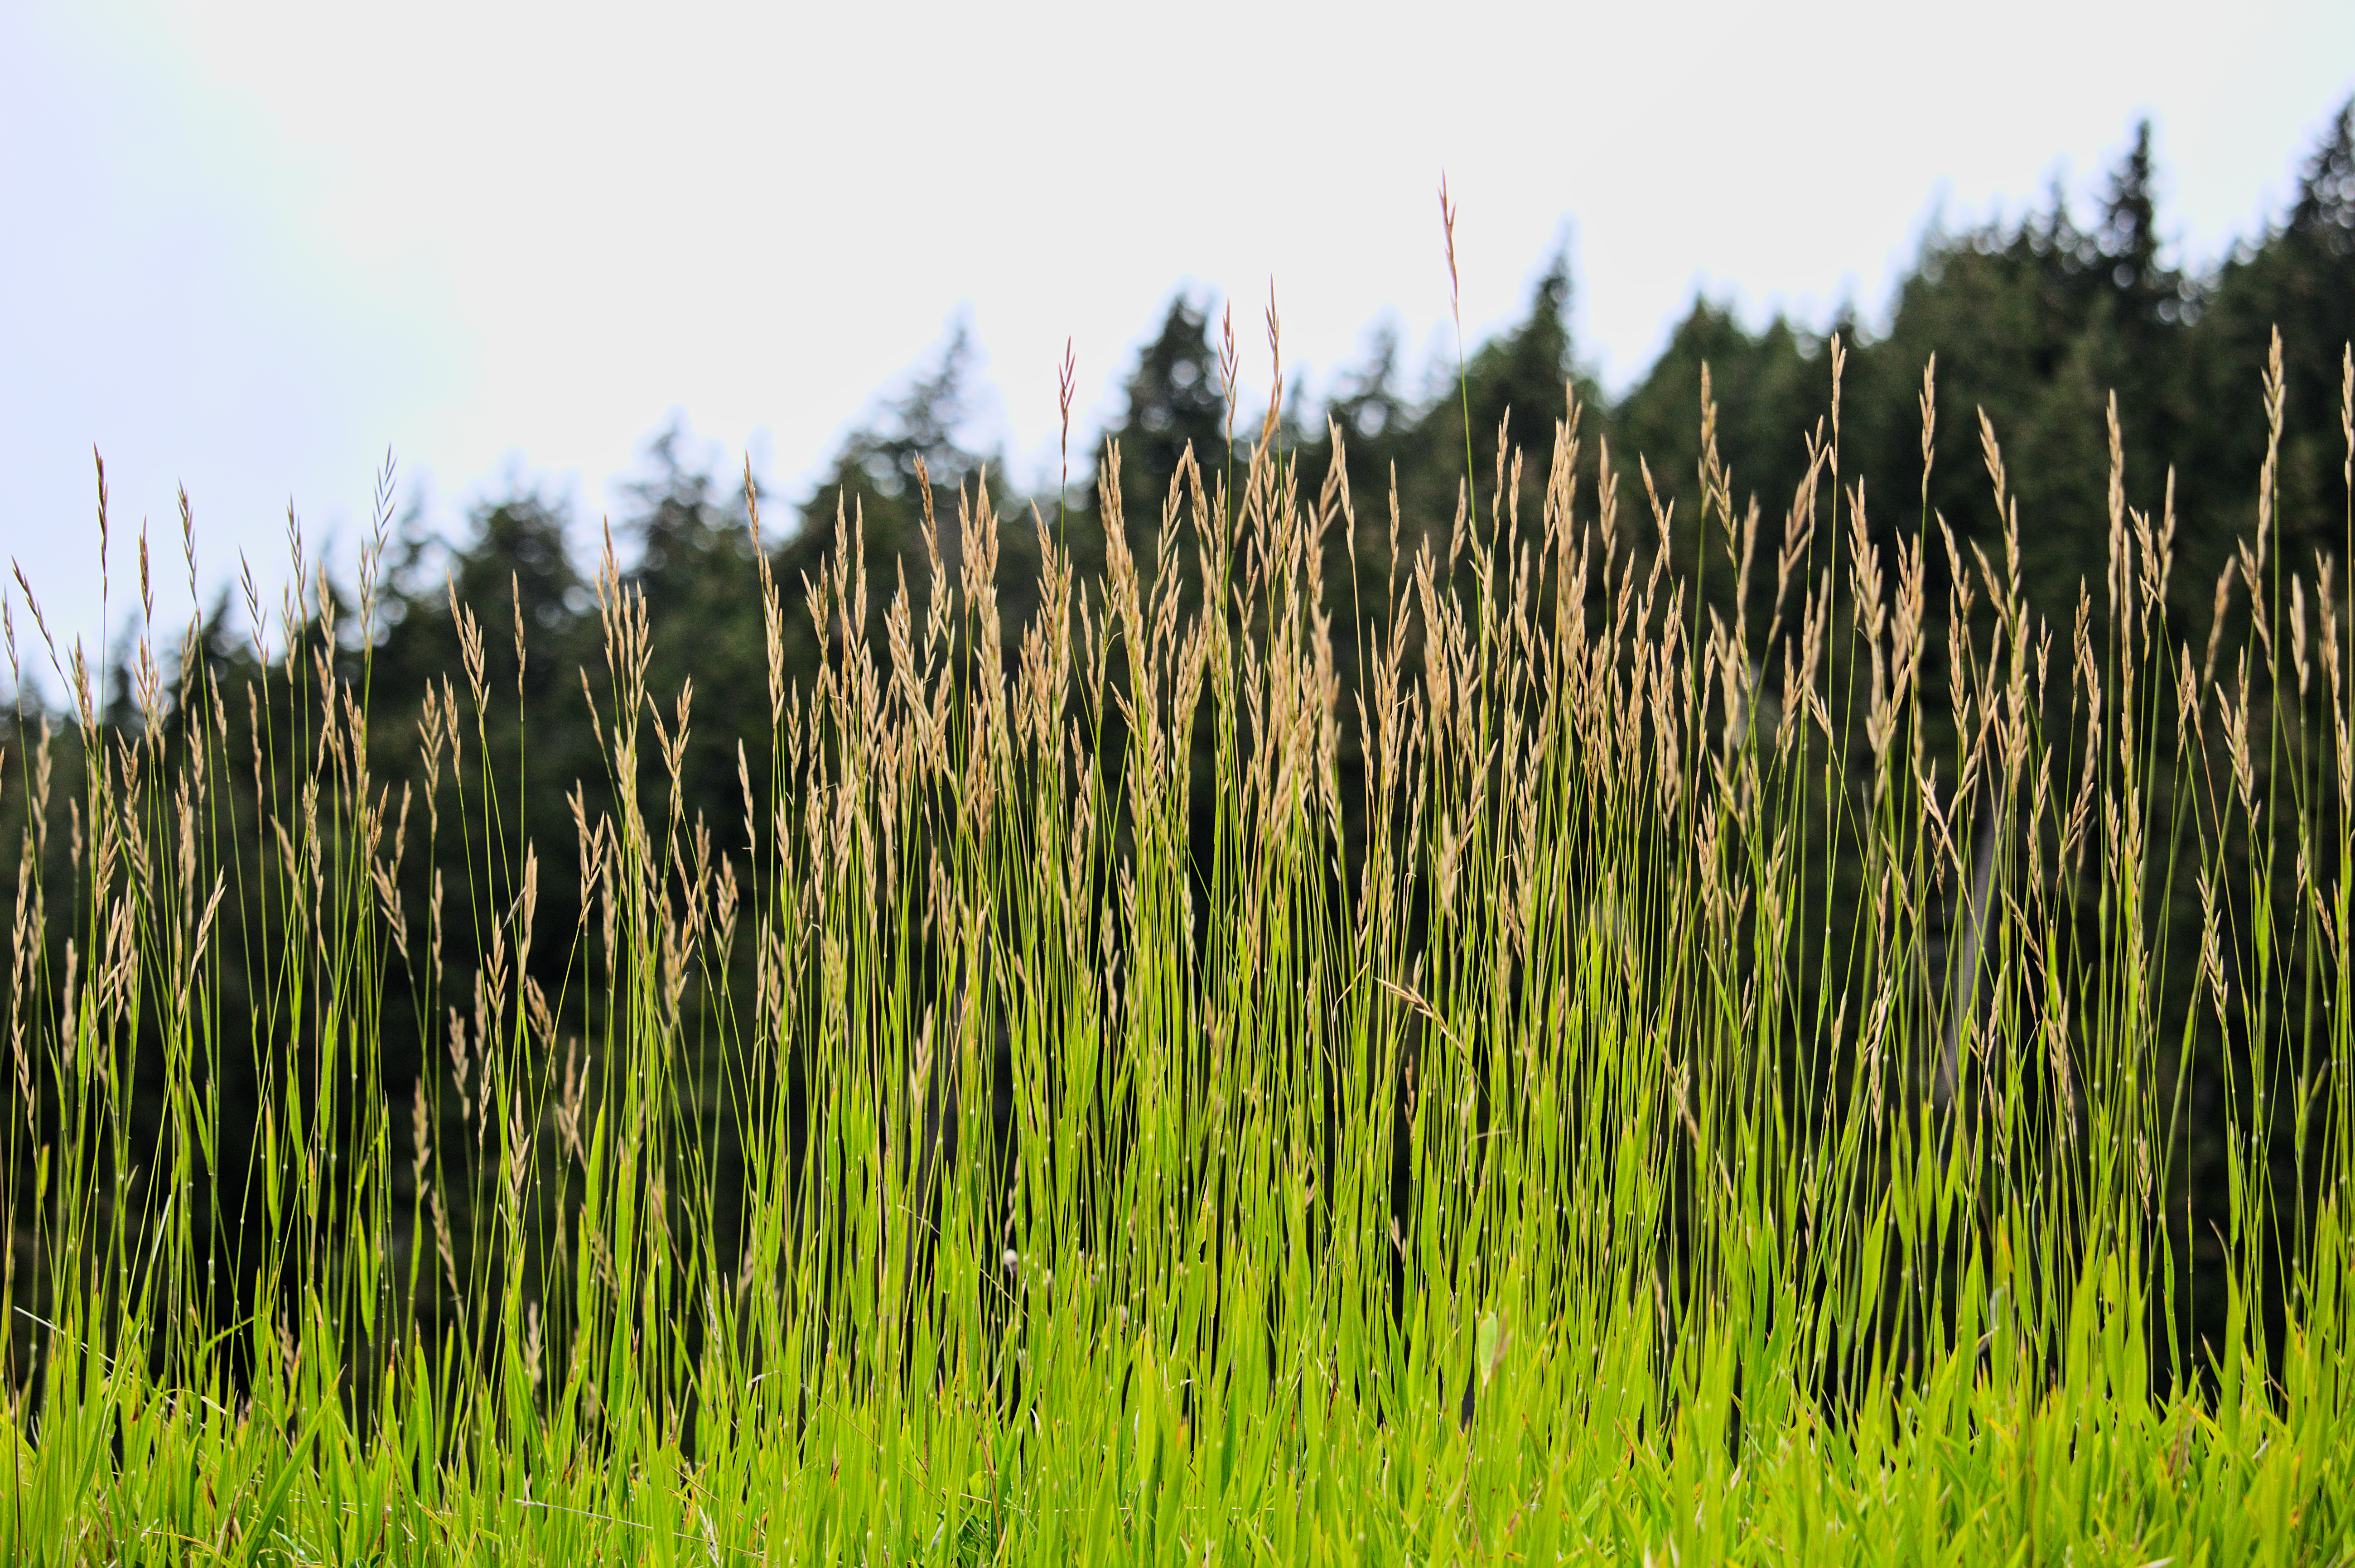
Hello everyone, how would you postproduction of this shot with the lights burned?
IMG_0285.CR2 (24,8 MB)
IMG_0285.CR2.xmp (5,7 KB)

This file is licensed Creative Commons, By-Attribution, Share-Alike.
Hello everyone, how would you postproduction of this shot with the lights burned?
IMG_0285.CR2 (24,8 MB)
IMG_0285.CR2.xmp (5,7 KB)
This file is licensed Creative Commons, By-Attribution, Share-Alike.
I think that Color reconstruction works well enough this time. So I just let it as default, and played a bit with Color Look Up Table to grade bit the greens and make the grains pop a bit.
Hope that helps!
(Very soft editing, more contrast and saturation could probably be added)
2nd version with a bit more of contrast, and a bluer sky
IMG_0285.CR2.xmp (9.6 KB)
IMG_0285.CR2.arp (11.8 KB)
The CR2 loaded in DxO PhotoLab 5 with optical corrects and their normal no-nonsense luma-only noise reduction:
IMG_0285_dxo.dng (65.3 MB)
In Filmulator:
In DT 3.7.0+1332:
IMG_0285_dxo.dng.xmp (10.8 KB)
Filmulator shows a bit of the ‘edges’ around the trees, but that is because I upped it’s “drama” parameter to get the details more visible in the highlights. If I left the drama at default, it was more like the DT way (but a bit less saturated).
I don’t really had to do anything ‘special’ with burned highlights? They don’t really seem clipped to me anywhere? Or am I just too simple in my edits that I don’t notice? :P.
Some part of the sky is clipped. There is a band of sky near the trees that is not clipped. I don’t know what is the reason of the apparition of this band.
I noticed that some processing destroyed the upper part of the trees which gives a unnatural look.
The edge where the clipping occurs (in one or two channels) is seen as a boundary / edge / detail for local-contrast effects I’m guessing, which will highlight that edge the more you push them. Masking the tree-line can help, I guess.
So… my DxO cheat has done some ‘repairing highlights from unclipped channels’ apparently. I didn’t even know it could do that.
I did another attempt straight from the CR2. Things like this can help me learn :).
IMG_0285.CR2.xmp (22.3 KB)
So, the sky is clipped in the blue and green channels, only the red channel is free of clipping from what FastRawViewer tells me.
Turning off the default filmic module, and disabling highlight-reconstruction, you can see what it does when lowering the exposure:
Exposure set to -1.2EV:
Turning on highlight-reconstruction in its default ‘clipping’ mode and zooming in 200% at the tree-line, it shows the weird crossover point:
So, before anything else, I start toying with the highlight-reconstruction mode till I think that the transition from the trees into the sky looks natural (enough).
‘Reconstruct color’ mode gives me weird artifacts. Maybe because of my dev build, or because I’m forcing OpenCL enabled on a device that is otherwise in the blacklist… but anyway I can’t use it:
So one of the two other modes it is. I start with ‘reconstruct in LCh’ and start dragging the ‘clipping threshold’ parameter around.
Turn it way up is not the answer:
Lowering the threshold eventually gets rid of the ‘transition line’. You don’t want to overdo it, because that would lose true detail still in the file, but somewhere between 0.65 to 0.75 or something looks usable:
From here, I can continue to edit the image ‘normally’. Raise exposure back to the default 0.5EV, and even a bit up from that:
Activate filmic, then I start by raising the latitude all the way, and then on the 1st tab see what the ‘auto’ button brings. It doesn’t seem to freak out, yay. I lower the white exposure a bit more to keep data in the sky. Personally I have my clipping indicators set to 96%, and I lower the white-exposure to the point I see no clipping indicators (in this case at least). This gives me some ‘headroom’ later if I need it.
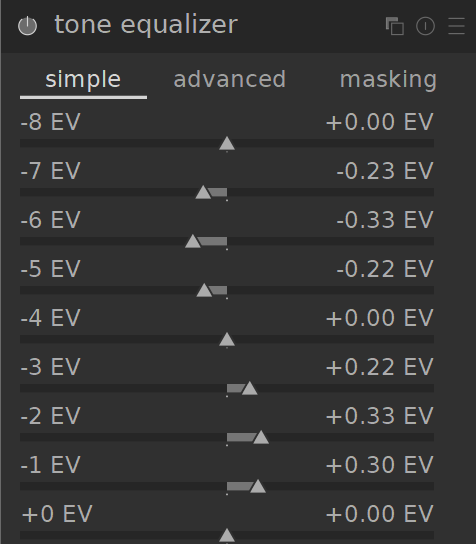
Filmic may end up looking flat, so add contrast in one of the methods available. I load the ‘contrast tone curve: soft’ preset in the ‘tone equalizer’. I change the -8 EV point back to 0 ( no change) and the +0 EV point back to 0 (no change), and smooth it out a bit:
Then I add ‘color balance rgb’ with the ‘add basic colorfulness’ preset and tweak it to taste.
I try to get more details in the sky (but it’s not really working that well) by using ‘local contrast’ module in bilateral mode (368%, 50, 3) with a mask for only the highlights. I make sure the mask is smoothly around the transition-point of the tree line:


At two diffuse-modules for sharpening, and a ‘denoise profiled’ in blend mode ‘chromaticity’ to only use a tiny bit of luma noise-reduction, and I think it’s done.
Personally I would leave the local-contrast bilateral thing out of this. It’s not doing enough for me to make it worth it and keep fighting with a mask, and it may undo all the smooth treeline work we did at the start.
Of course, everything is to taste, so what do I know :).
(PS, some screenshots were with the local-contrast module enabled all the time, so they don’t really give the best image (and might highlight the tree-line transition again)).
Thanks for all the suggestions, now I have a lot to study.