How to auto apply Lens correction when two lens flagged *OR*

Hello Folks. I’m struggling a bit to find a way of auto applying a Lens correction preset to my Tamron Lens.

DT identifies it as a Sigma OR a Tamron (correct)

Being a bear with a little brain, I’m not sure how/IF I can add a variable in the preset field to automatically pick and apply the correct lens.

Any help appreciated

Thank you.

if you don’t use both lenses then help exiv2 to identify the correct name:
see (thats a conseqece of reuse of canon ids by third party manufacturers):

1 Like

I had this case too in the past. You can simply copy the whole text to the preset field.

1 Like

Yeah. That’s what I initially tried, but it still gives me the camera/lens not found error.
I should have mentioned that, sorry.

Adding that isn’t telling DT how to resolve the Mexican stand off between lenses!

Does your correct lens activate?

Thank you for that.

Yes, it does.

Just to be sure: you manually chose the correct lens before creating the preset and you discarded the history?

Yes. I made a default preset after manually choosing the Tamron lens.
Thanks for the demo.

On a Mac running DT 5.4 and OS 26.2

I guess it’s a bug, then, I will post to dev. Thanks for your help.

Not life threatening, as I can just make a style and apply on import.

Here’s the RAW I showed: Lazy drums (with at least 15 characters)

So you can check if this works for you, maybe I was just lucky with my combination? If you don’t mind sharing a RAW, I could cross-check yours too.

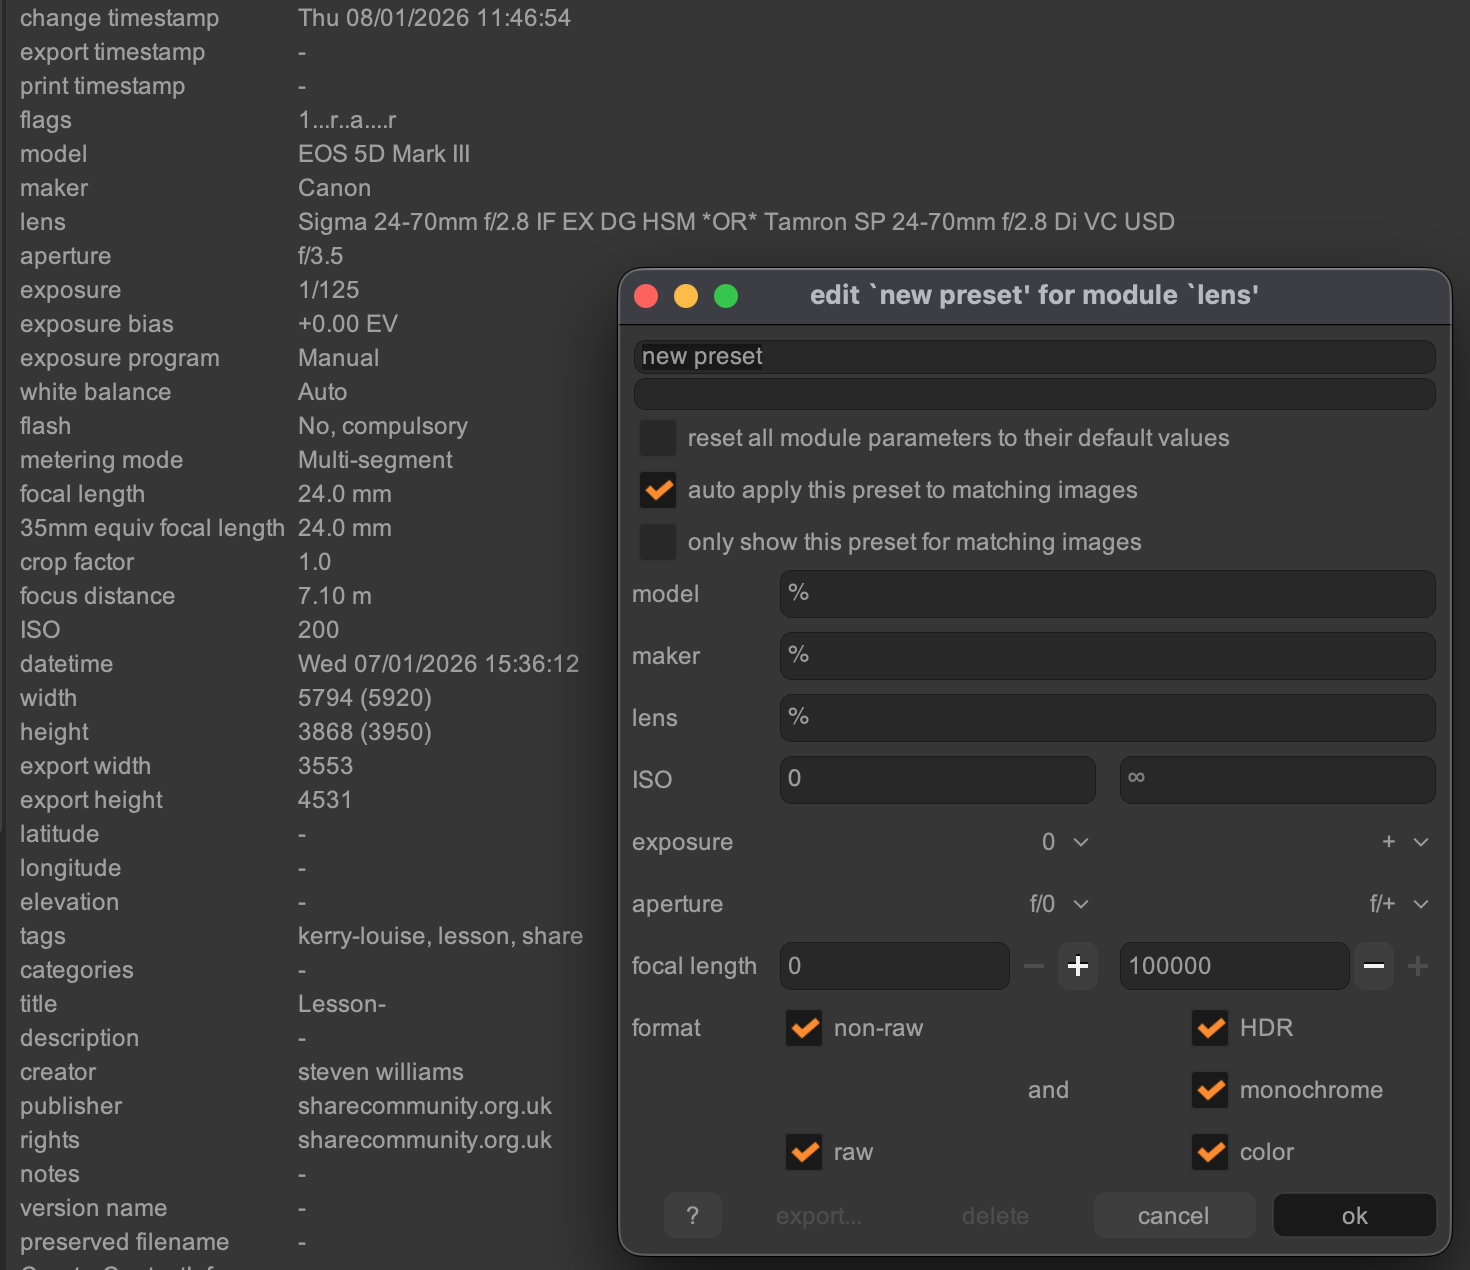
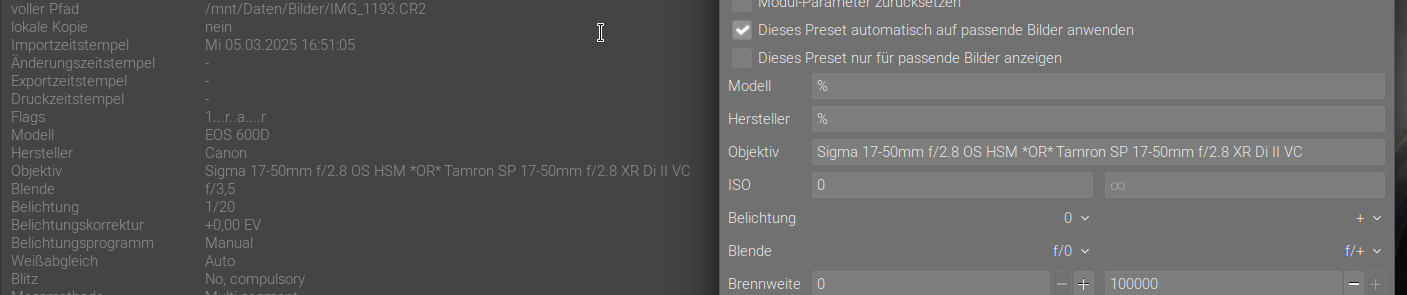
Unfortunately no bug. Since third party lens manufacturers reuse existing canons lens ids the user must override the lens identification determined by exiv2.
On Mac it’s quite simple; you just need to create the required .exiv2 file in your users directory.

1 Like

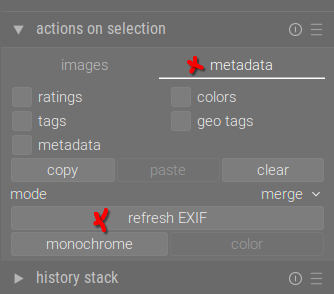
On Linux too. This works perfectly, thank you. Since I’ve never messed around with stuff like that and wasn’t aware of this function, I would like to add that you have to refresh exif on already imported photos after creating the file/entry:

2 Likes

not simple enough for me!
Could you point me at the location?
I have terminal terminal skills, if you get me.

Thanks

in the Finder App you need to toggle display of hidden files/directories by Command (⌘) + Shift + Period (.) to see a hidden file as .exiv2
You find your Home directory via Command (⌘) + Shift + H
You can use any Texteditor to create the .exiv2 file there. Or create it via terminal: touch .exiv2

1 Like

I used your super helpful guide. Conquered my fear of Terminal (a bit).

  1. Identified the correct lens
  2. Saved the .exiv2 file
  3. Query gives me the correct Sigma result.
  4. DT > Reset Lens Correction
  5. DT Still lists it as Sigma OR Tamron
  6. Doesn’t apply any correction

Have I missed something?

exiv2 seems to be working on my system, but not talking to dark table.
Am I missing something in the custom .exiv2 file?

Thanks again for all your patient help

did you follow the step to update the metadata as described by apostel338.
Exif data are read during Import so for already imported stuff you need to reread the metadata with new .exiv2 settings…

I forgot that step.
Works perfectly.
Thank you so much! :pray: