On the last Play Raw I offered, @chris asked if I’m giving lessons, in bringing life to boring photos. So I thought about a mixture between a Play Raw and a How-To, describing my thoughts and intentions when editing a picture.
At first, we need a really boring photo, which anyway has at least a little bit of potential. After some search in my unedited images from my last Scotland trip, I stumbled over this one.
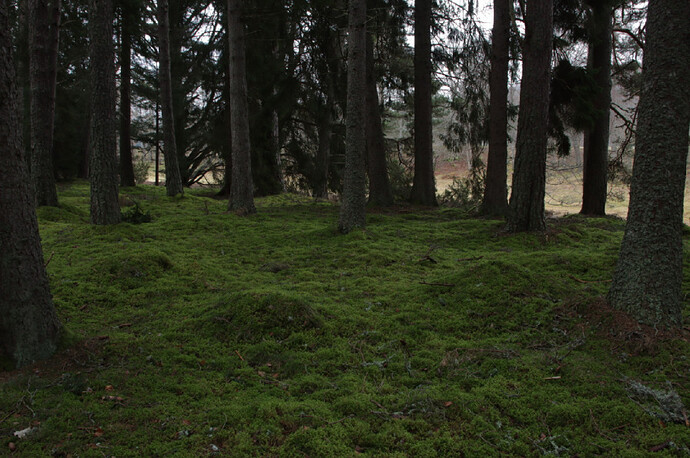
This is the ooc jpg - not very promising…
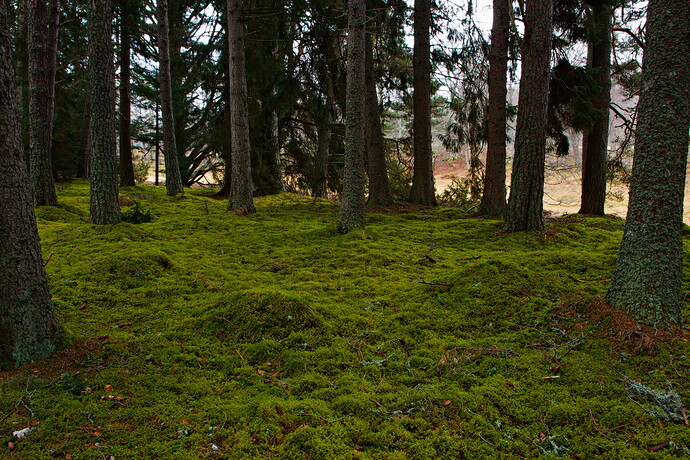
This is what I get after I applied my standard starting point:
Still not really a picture which I would show to family and friends. Even so it’s brighter, it’s still horribly boring.
OK, what’s next? Usually I would simply leave this picture aside. It is what it is: A boring photo which is not worth to keep. But for this Play Raw I have chosen this photo exactly for this reason. The goal is not to generate an outstanding masterpiece, but to change it into something which looks lively and at least to an image, which people have no pain to view.
So the first move is, to analyse what makes this photo bad and boring. Afterwards, we have to think about what makes a forest photo interesting. And at last we have to bring some missing magic to this picture.
At a first glance, you will recognize trees and moss. That’s it. A subject to look at is missing. Your eye doesn’t get any guidance, where to look at. The photo is flat, everywhere you look are more or less dull brown and green tones, diffuse light leads to weak contrasts. And even so, there are at least two layers: forest and the bright background. Depth is missing. Even the composition isn’t able to generate some tension. Poor photographer. ![]()
We can’t bring in a subject without using GIMP to leave the field of photography and enter the field of compositing. But we urgently need some tension. So at first I changed the crop and the composition to generate at least a bit of it. But of course this alone doesn’t make the photo a good photo. We need some depth. We could generate this with different areas of sharpness or some mist. But on a forest photo, this is a lot of work.
So I decided to do it with different zones of light. I darkened the area in the foreground and added a vignette to guide the view more to the centre of the pic. Be careful with the vignette. The brightness gradient shouldn’t be to obvious, so I usually tend to just darken shadows and mid-tones. This leaves the bright background bright. I even used the bloom module to emphasize it. If there is need to use a heavy vignette, I quite often prefer to use a brush on the exposure module, so the gradient isn’t too regularly.
So after these first changes the viewer is now looking more to the centre, but he will be disappointed, because there is not much to see. There is no proud deer, not even a cute rabbit. All we have is moss and trees. But wait, this is a lot of moss, an unusual amount of moss. If there would be some sun breaking through the trees to light the scene with some warm and bright spots, this would probably be something which looks nice and special.
But for a scenery like I described above, there is too less contrast, to dull colours, and the overall light is too diffuse and regularly. So that’s exactly what I tried to correct next. I used further instances of the exposure module to doge and burn. To bring in warm light and shadows. If you lift the blackpoint on the brightening instances, you as well get more contrast and colour where the sun should shine.
Where there is sun, there is a lot of bright and saturated colours. So don’t be shy on this. Don’t oversaturate, but be aware, that the world is very colourful and often more than we tend to think. To be a little bit over the top is allowed if not something which you want to be:
A picture is interesting, when it shows something which you don’t see every day. But of course it is a narrow path between a little bit over the top and completely unrealistic.
At last I added a frame to get some cinematic look. I usually don’t like frames on digital images, but for some pictures, I use them anyway (at least on this forum ![]() ).
).
So after all this thoughts and words, how does the picture look finally?
Well, here is the result:
20240308-1355-9468.cr3.xmp (29,8 KB)
Still nothing I would keep and maybe a little bit over the top, but now there is live in, and it’s far away from the horrible boring picture it once was.
That’s all, besides the fact that there are many ways to achieve a goal and that every photo deserves an individual treatment.
I leave this RAW to you for playing and showing me your results, of your own way to bring live to this boring picture. Have fun!
20240308-1355-9468.cr3 (36,9 MB)
This file is licensed Creative Commons, By-Attribution, Share-Alike.


