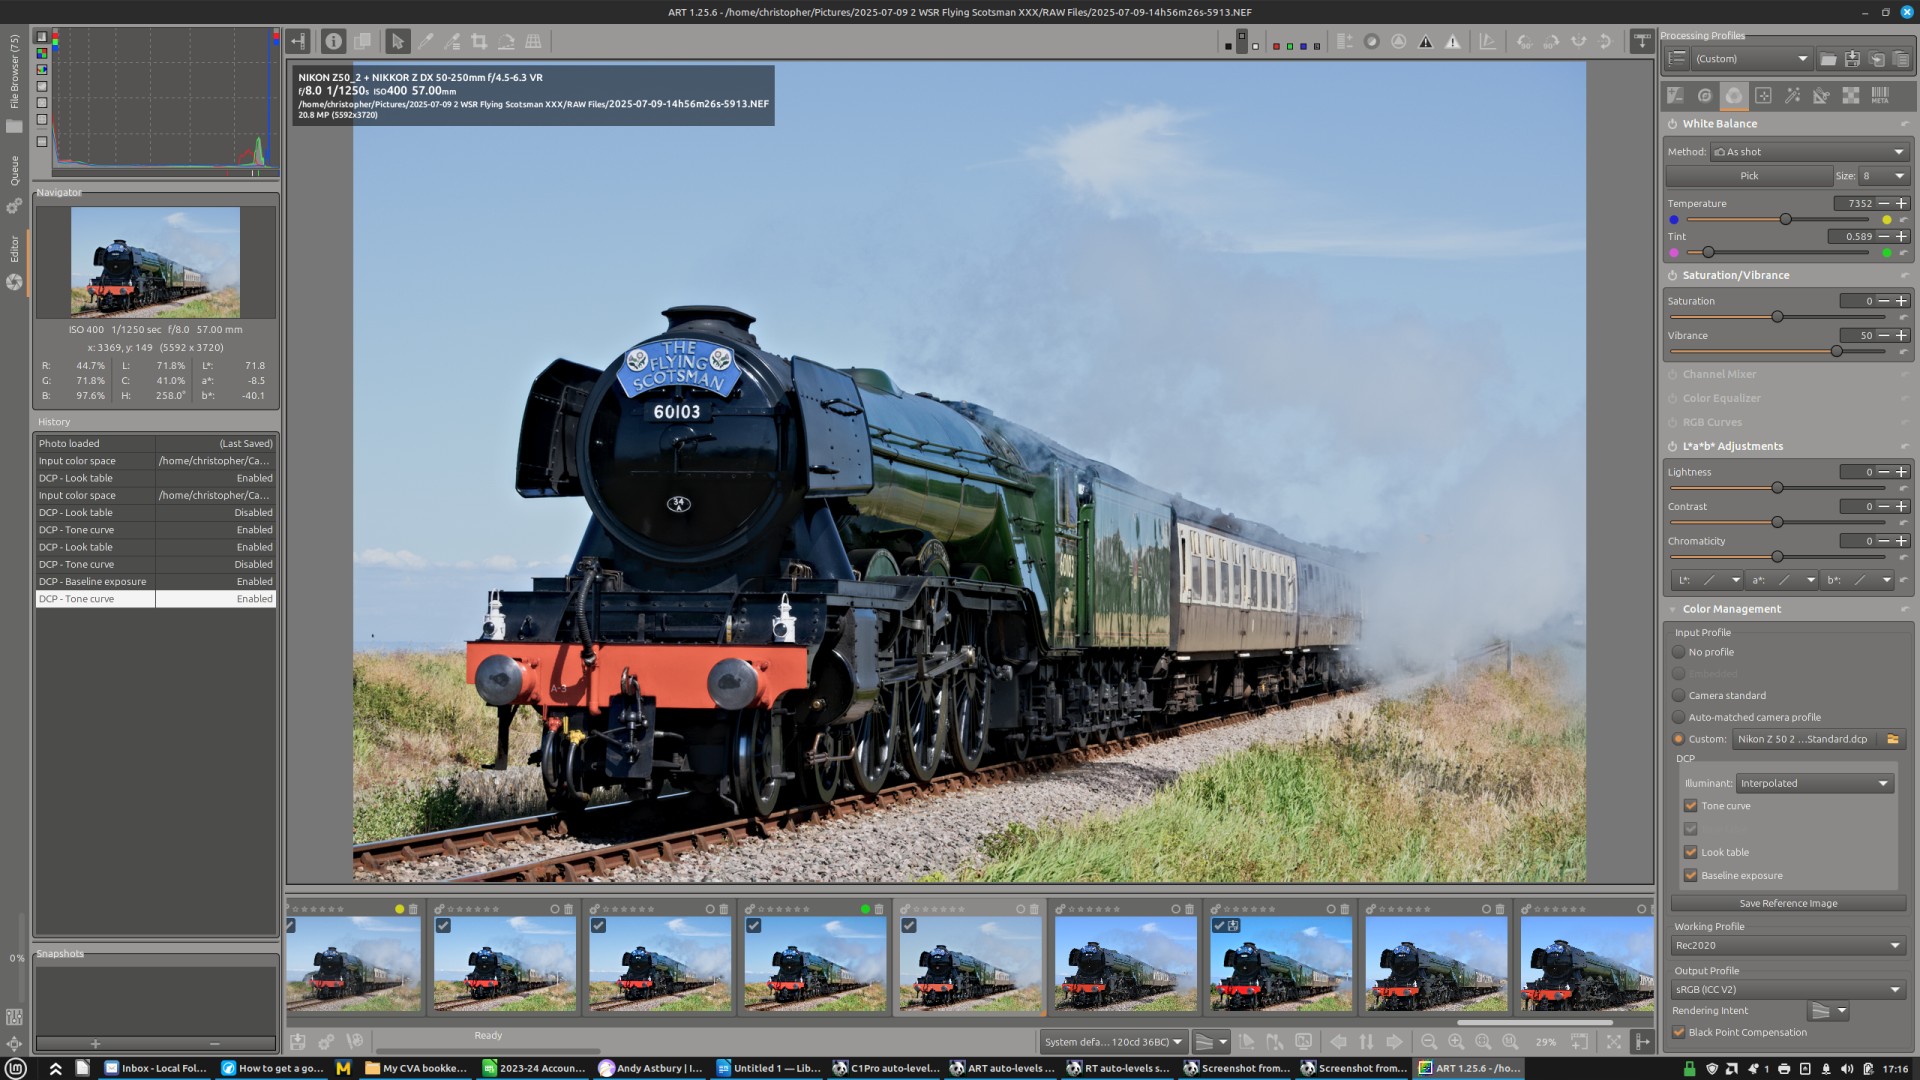
I’ve recently started using ART, having moved from Windows to Linux, and finding running Capture One on a virtual Windows machine much too slow and clunky.
I’m really enjoying ART, love its masking abilities (why I chose it over RawTherapee), and have worked through Andy Astbury’s videos which have been a great help.
One thing I would really appreciate help on, though, is how to get a good ‘baseline’ image to the edit further? In Capture One (and RawTherapee I used back in 2011-13) I would use Auto-Levels for this, but ART doesn’t have Auto-Levels or even a Levels tool.
As a consequence, I would welcome any advice on what tools there are to spread out the histogram, please, as often when I open my RAWs in ART the tones don’t go all the way from pure white to pure black. What adjustments do you use if you come across this problem, please?
Or is there a way to use the other tools in ART to get an effect similar to auto-levels, please?
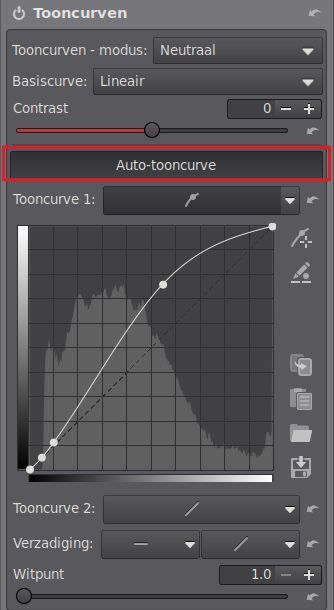
Hello, Auto-levels are available in ART, but they work only on raw files.
To get a good image to start with, open a raw, then apply Auto-levels (perhaps already done while opening the raw), then fine-tune with the Tone Equalizer + the contrast slider in Tone curves.
ART offers many other tools that can do more or less the same, but the above method is a good way to start learning ART.
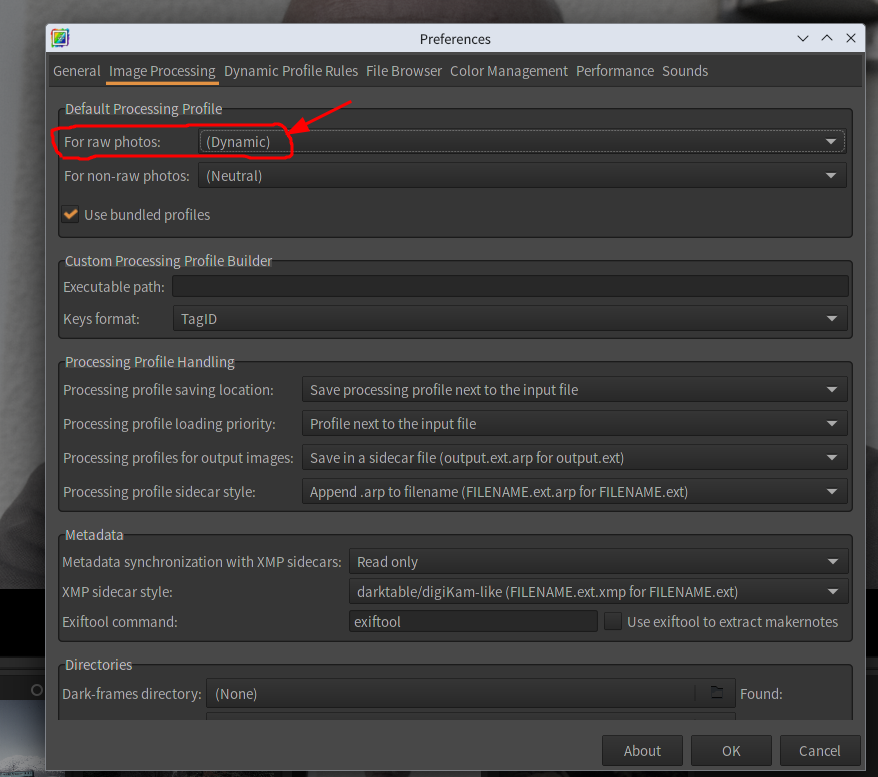
In preference, if your Default Processing Profile is set “(Dynamic)”, ART reads exif data from the Raw file and automatically makes resemble image with Raw embedded jpeg.
Get an Adobe camera profile and use that as your starting point. Make sure any DCP Illuminant checkboxes that are available are checked. I’m hoping that ART didn’t get rid of this feature; it is in RawTherapee.
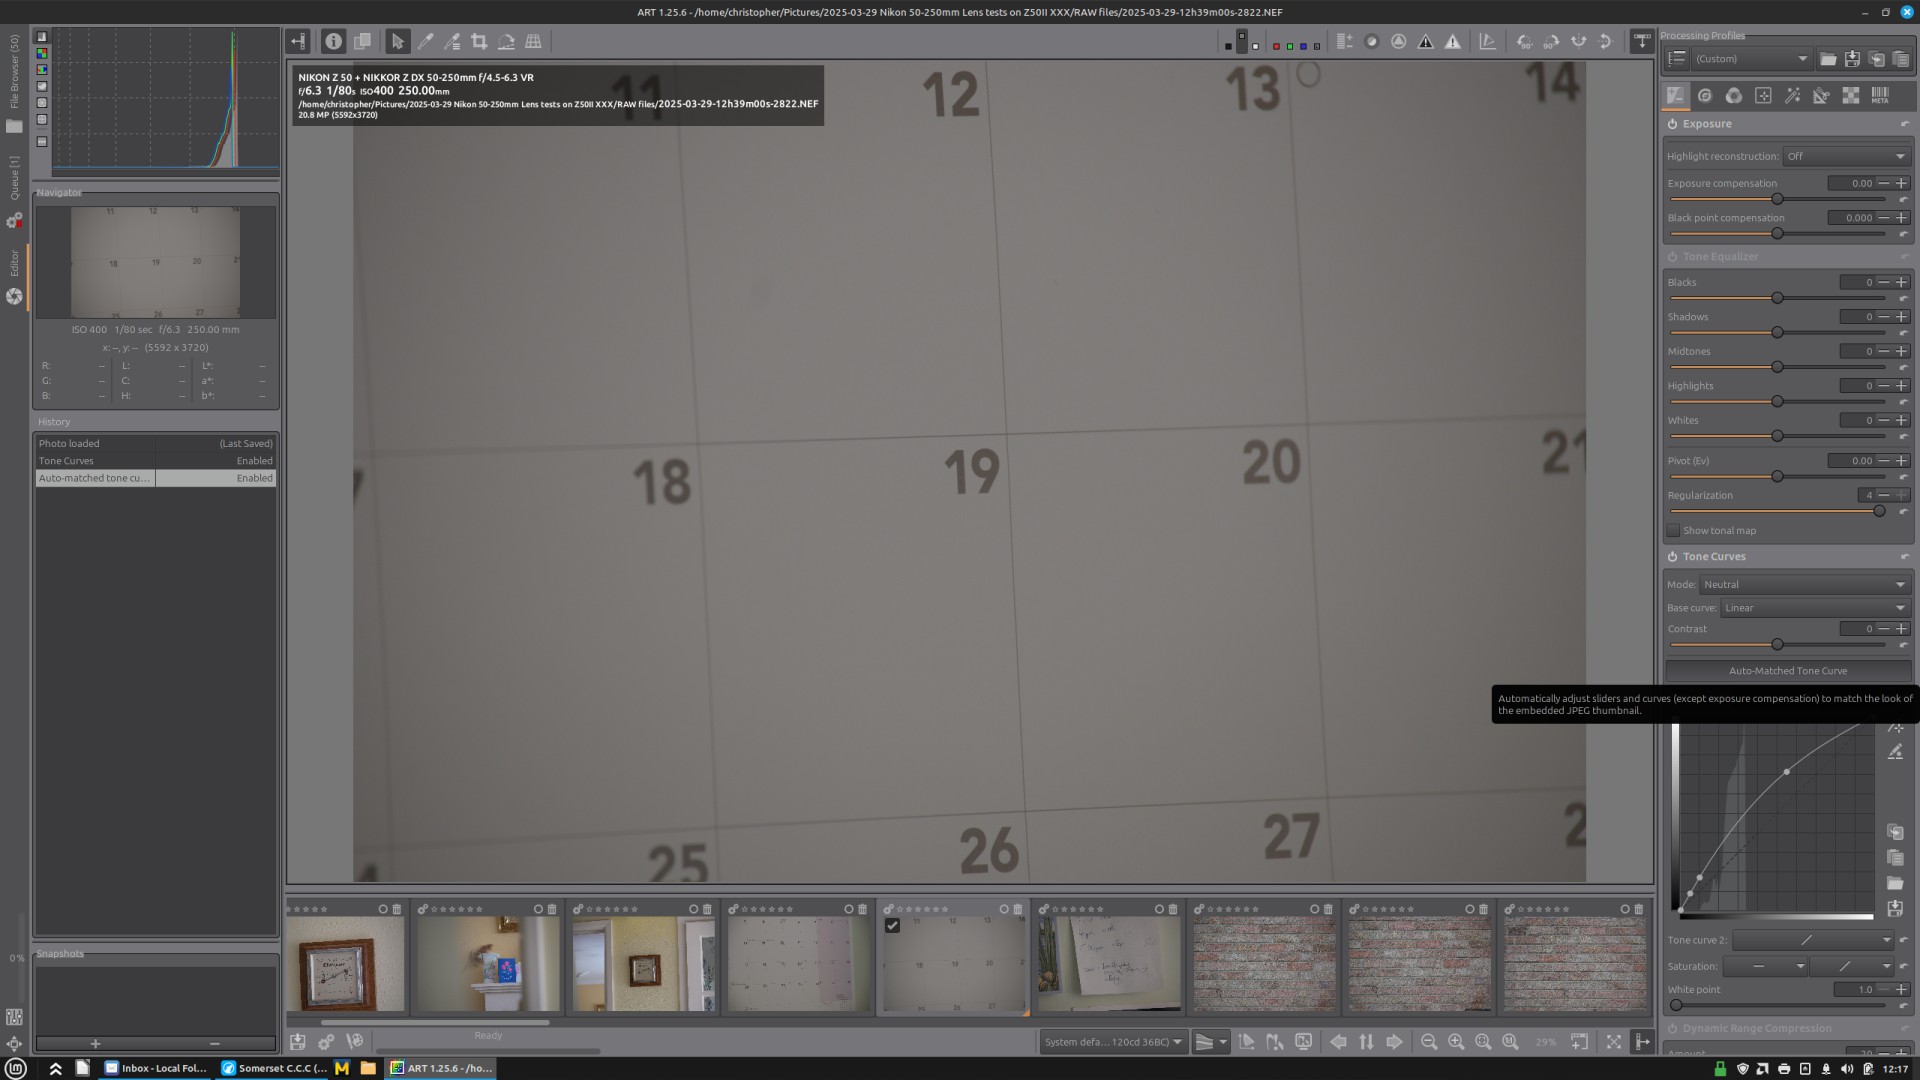
Hello Paul, many thanks for your reply, and for pointing me to the Auto-matched Tone Curve/Auto-tooncurve button.
I have tried this, but unfortunately Auto-matched Tone Curve doesn’t stretch the tones from pure white to pure black (as auto-levels would), rather it tries to match the look of the JPEG embedded in the RAW file, as per the ART book.
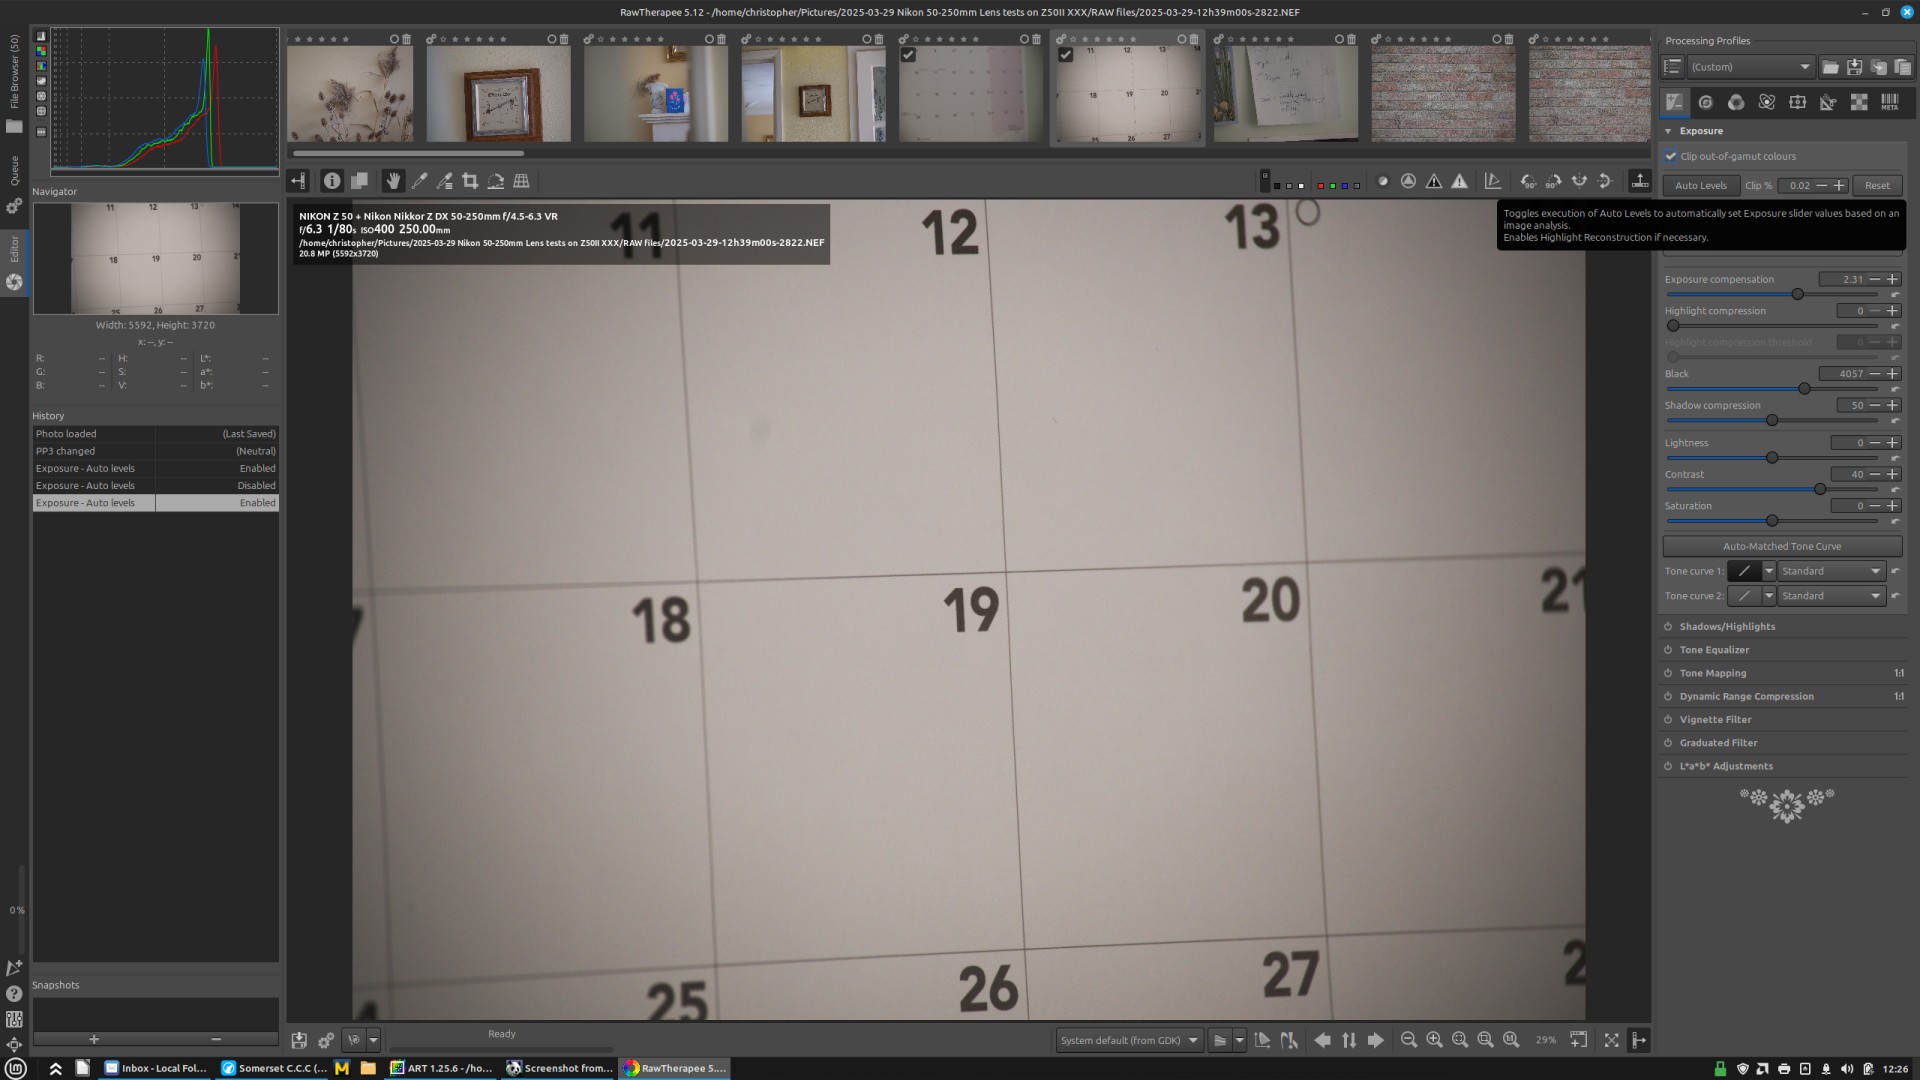
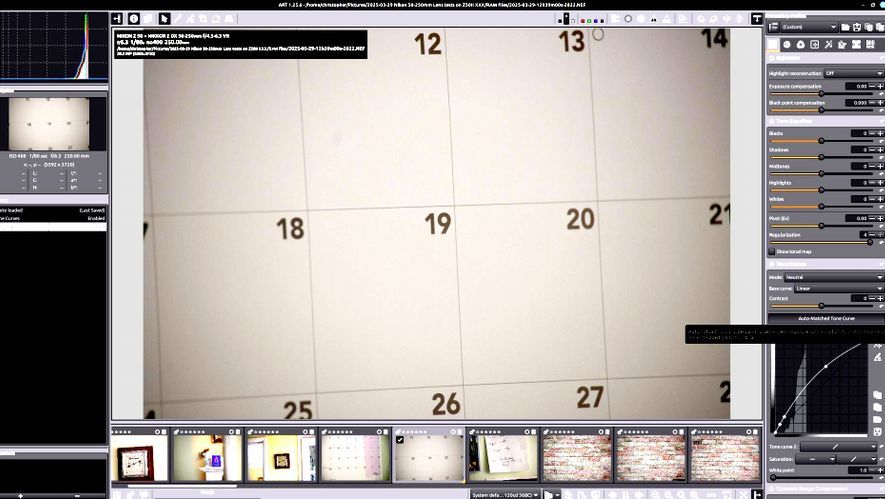
To show how this compares with Auto-levels, I have tried processing a shot with limited dynamic range in ART, RawTherapee and Capture One, and attached the screenshots below.
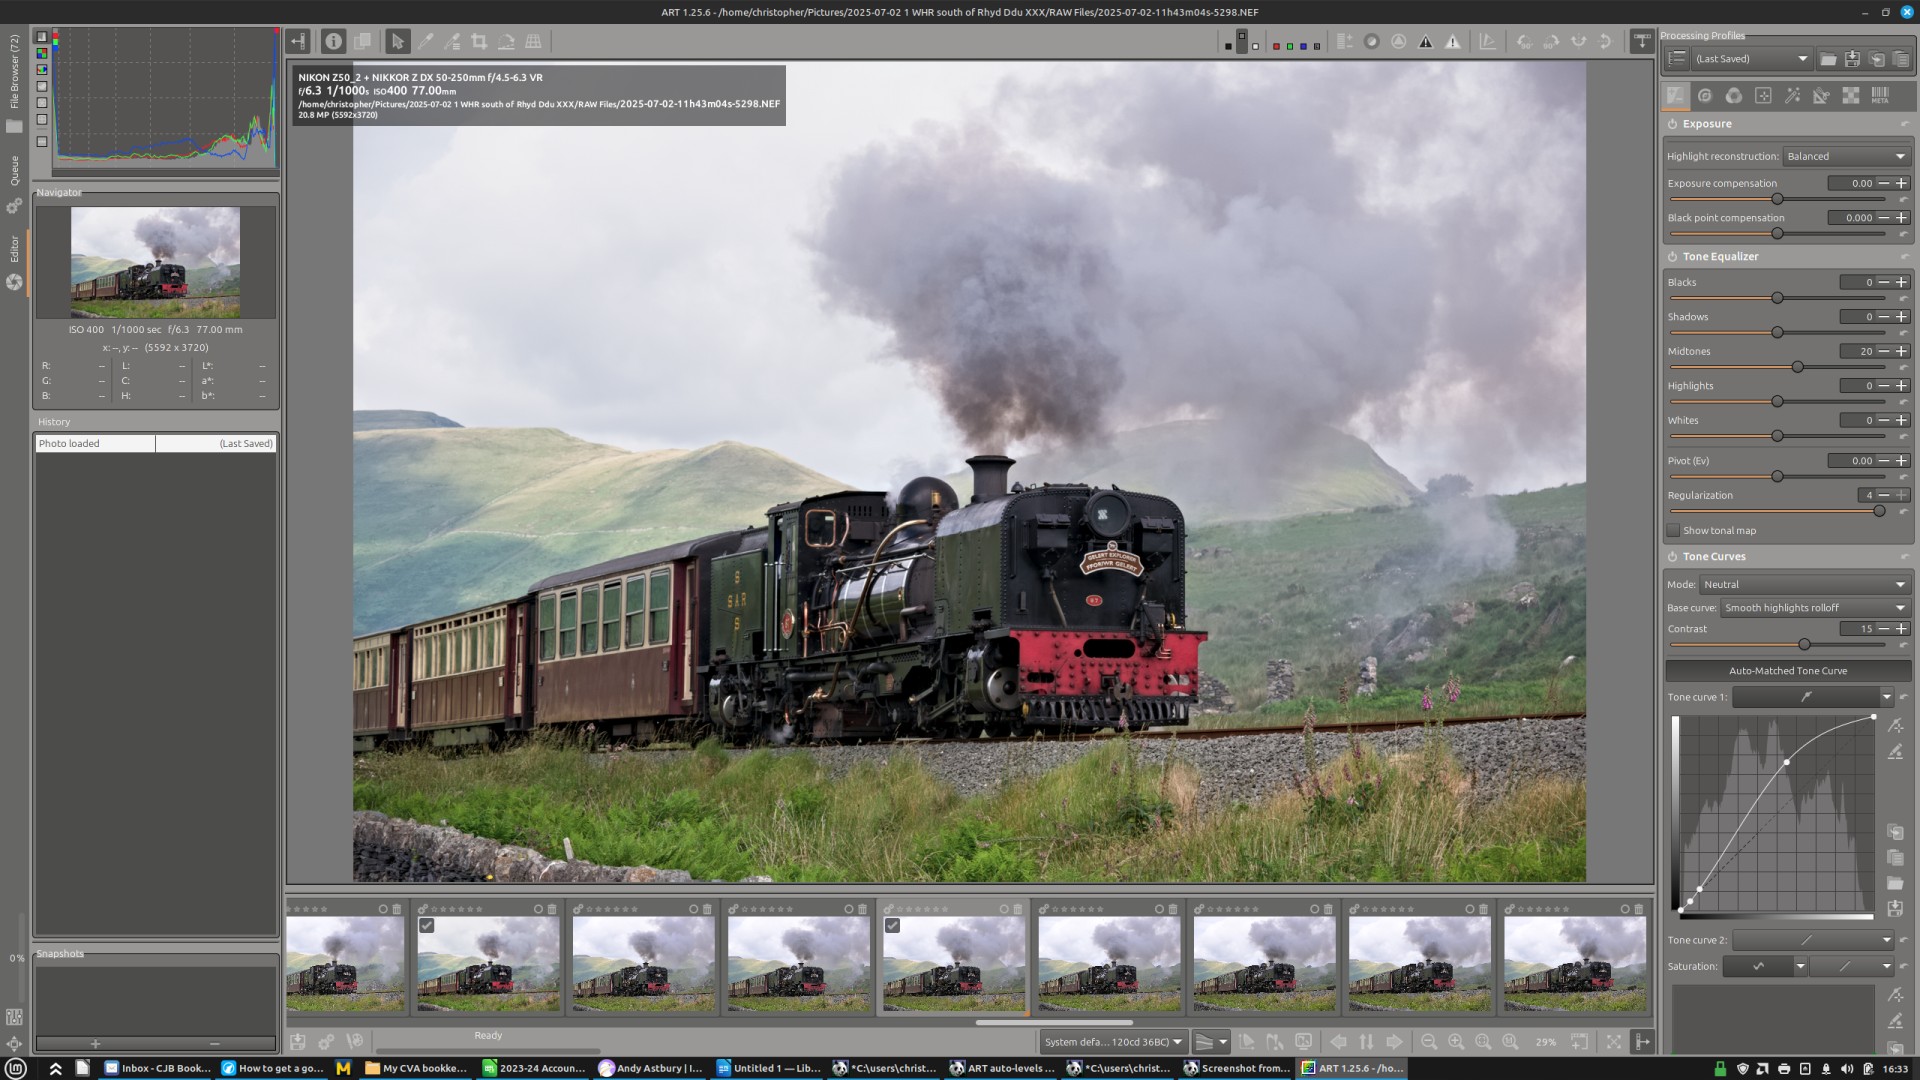
Firstly, ART with Auto-matched tone curve enabled – here the tones in the histogram are bunched up and never reach pure white or black.
Most of the time not having Auto-levels isn’t too much of a problem, as I have set up quite a contrasty initial profile. Even this is no guarantee that the image’s tones will reach both pure black and pure white, though, as in the image below.
@tankist02, many thanks for your reply, and details of how you have set up your base profile – it’s really helpful.
Thank you also for recommending the ART book. I had already come across it, but it is always helpful to go back and re-read it!
@Rick, many thanks for your advice about using Adobe DCP profiles. I did try this when setting up ART, as Andy Astbury recommends it in his video, but found using the Adobe profiles made the colours strange - reds got very flat, and blue sky went to cyan.
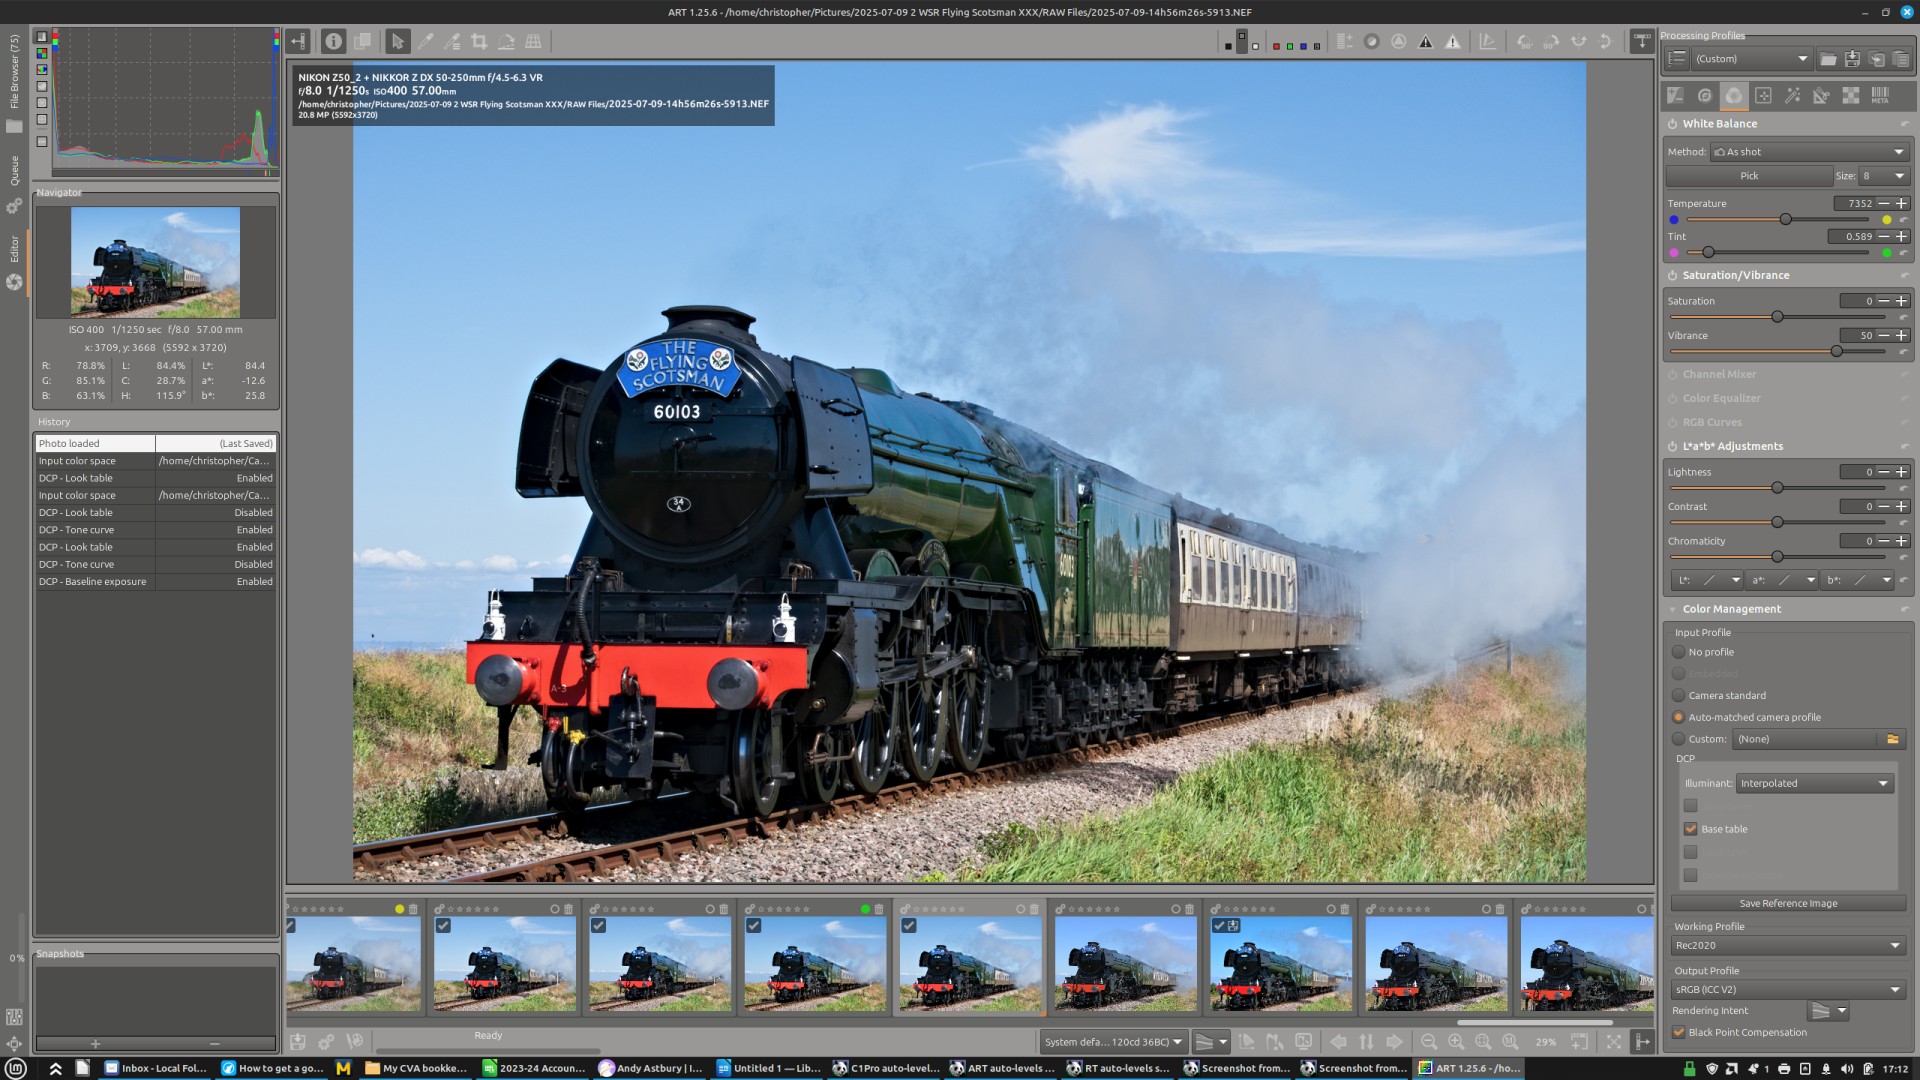
This is an image with ART’s Auto-matched camera profile…
Hello, I took your screenshot showing Auto levels in ART, then processed it in ART with Exposure compensation (first tab), then Local editing (4th tab) > Hable Filmic Tonemap (ACEScg). I downloaded the Hable filter somewhere on Internet, forgot where. That gives this, not far away from your Capture One screenshot imo.
Hello @WestCountry
Basically, it’s very easy with ART. My basic settings for every start are:
Color > Color Management > Input Profil > Camera standard.
Exposure > Tone Curves > Auto-Matched Tone Curve
Exposure > Log Tone Mapping > Gain (Ev) turned on: ON
Exposure > Log Tone Mapping > Automatic
That’s a very good starting point. Most of the time, the image will be too soft and too bright, but that’s easy to fix: use less or sometimes more “Gain”, and adjust the contrast with “White relative exposure (Ev)”, here, too, simply use more or, in most cases, reduce the value selected by the “Automatic” setting slightly.
Try it out and you’ll be amazed.
Of course, we rarely want something like this, because such images look unnatural and usually lack atmosphere.
But @WestCountry, as a beginner, asked whether there is such a thing as an automatic system that reproduces all tonal values well without clipping. Yes, there is such a thing with ART: Log Tone Mapping - and it is very easy to take back too much of this automatic so that the pictures look good again.
he said: … often when I open my RAWs in ART the tones don’t go all the way from pure white to pure black. What adjustments do you use if you come across this problem, please?
I took it to mean that, when opening his raws, if the tones don’t go all the way from pure white to pure black then it is a problem.
Your interpretation seems quite different.
As to Log Tone mapping, I didn’t understand - "and it is very easy to take back too much of this automatic so that the pictures look good again.", sorry.
Some might argue not…while you can push and pull with this module…Log tone mapping is a function to bring HDR to SDR for the most part and it could actually make an image less pleasing if it already has nice tone and is managed by the SDR range of tonality so to blanket apply it and then push and pull might also not really be desirable as a default…
I think our misunderstandings arise from the language barrier. I have to translate back and forth between English and German.
What I mean to say is that I always use Lot Tone Mapping and am totally thrilled with what it does. I start with the automatic setting, even for gain. Of course, this tool exaggerates and produces an image that is much too balanced, which I rarely like. I almost always have to adjust the strong tone value adjustment of this automatic setting, usually by increasing the contrast again by reducing the white relative exposure back towards the standard value of 2.50, sometimes even lower. I also rarely leave Gain at the value set by the automatic mode. But I think it’s great what the tool does: it shows me the tonal values in such a way that everything the sensor has captured is differentiated and clearly visible. However, in order to develop a usable image from this, I reduce the automatic settings.
I hope this explanation clears up any misunderstandings.
@priort, do you really think that Log Tone Mapping is not suitable for all images by default? I use it enthusiastically and only rarely does a photo look better without it.
I must say I probably don’t have enough experience with ART to speak from that view but in the pipeline it comes before the automatched tone curve. So you would be doing the log mapping and then the histogram matching tone curve with the auto matched TC…I would think that you would use one or the other conceptually but as with all these tools bending the data with any combination that works is what matters in the end… I would probably use one or the other and pair them with the tone eq as I find it works really well. Also some of the other tone mappers in ART can work really well too…even the simple gamma ctl with its two sliders can leave the image in good shape.
I say I would probably use one or the other because I am more used to DT where I would boost exposure and and then tone map it globally but even there I often find that I can get away without log tone mapping and therefore not have to manage the compression flatness unless the of course the images are boosted to clip by the exposure added to set a middle gray point and then I would need that sort of math to manage the clipping… .