
1)Film negative white spot
2)film negative black spot
3)white balance, same spot as for film negative
4)tone curve
Basically yes, exactly that. Something I would note is that the two sliders in the Film Negative section, the Red and Blue ratio, will help you with “white balance” also.
Not sure why the results seem a bit grainy so I also turned on noise removal to get rid of that a bit, and switched demosaic method to LMMSE.
@obe You can share whatever license you want since it is yours: the negative and the re-shooting. Same principle as for Play Raws; e.g., PlayRaw stuff to keep in mind or something else. I think it is worth considering since it is a pretty image.
@Sunhillow Thanks. Last known ping was in 2014, not long ago. Guess it is still in commission.
Bonus
@martin.scharnke In the tale, Sadko really had to go overboard, though he got together and wed a ![]() .
.
2 Likes
Remember that after you pick the 2 spots, you must always re-set WB. The easiest way is using spot-WB on one of the two spots chosen before.
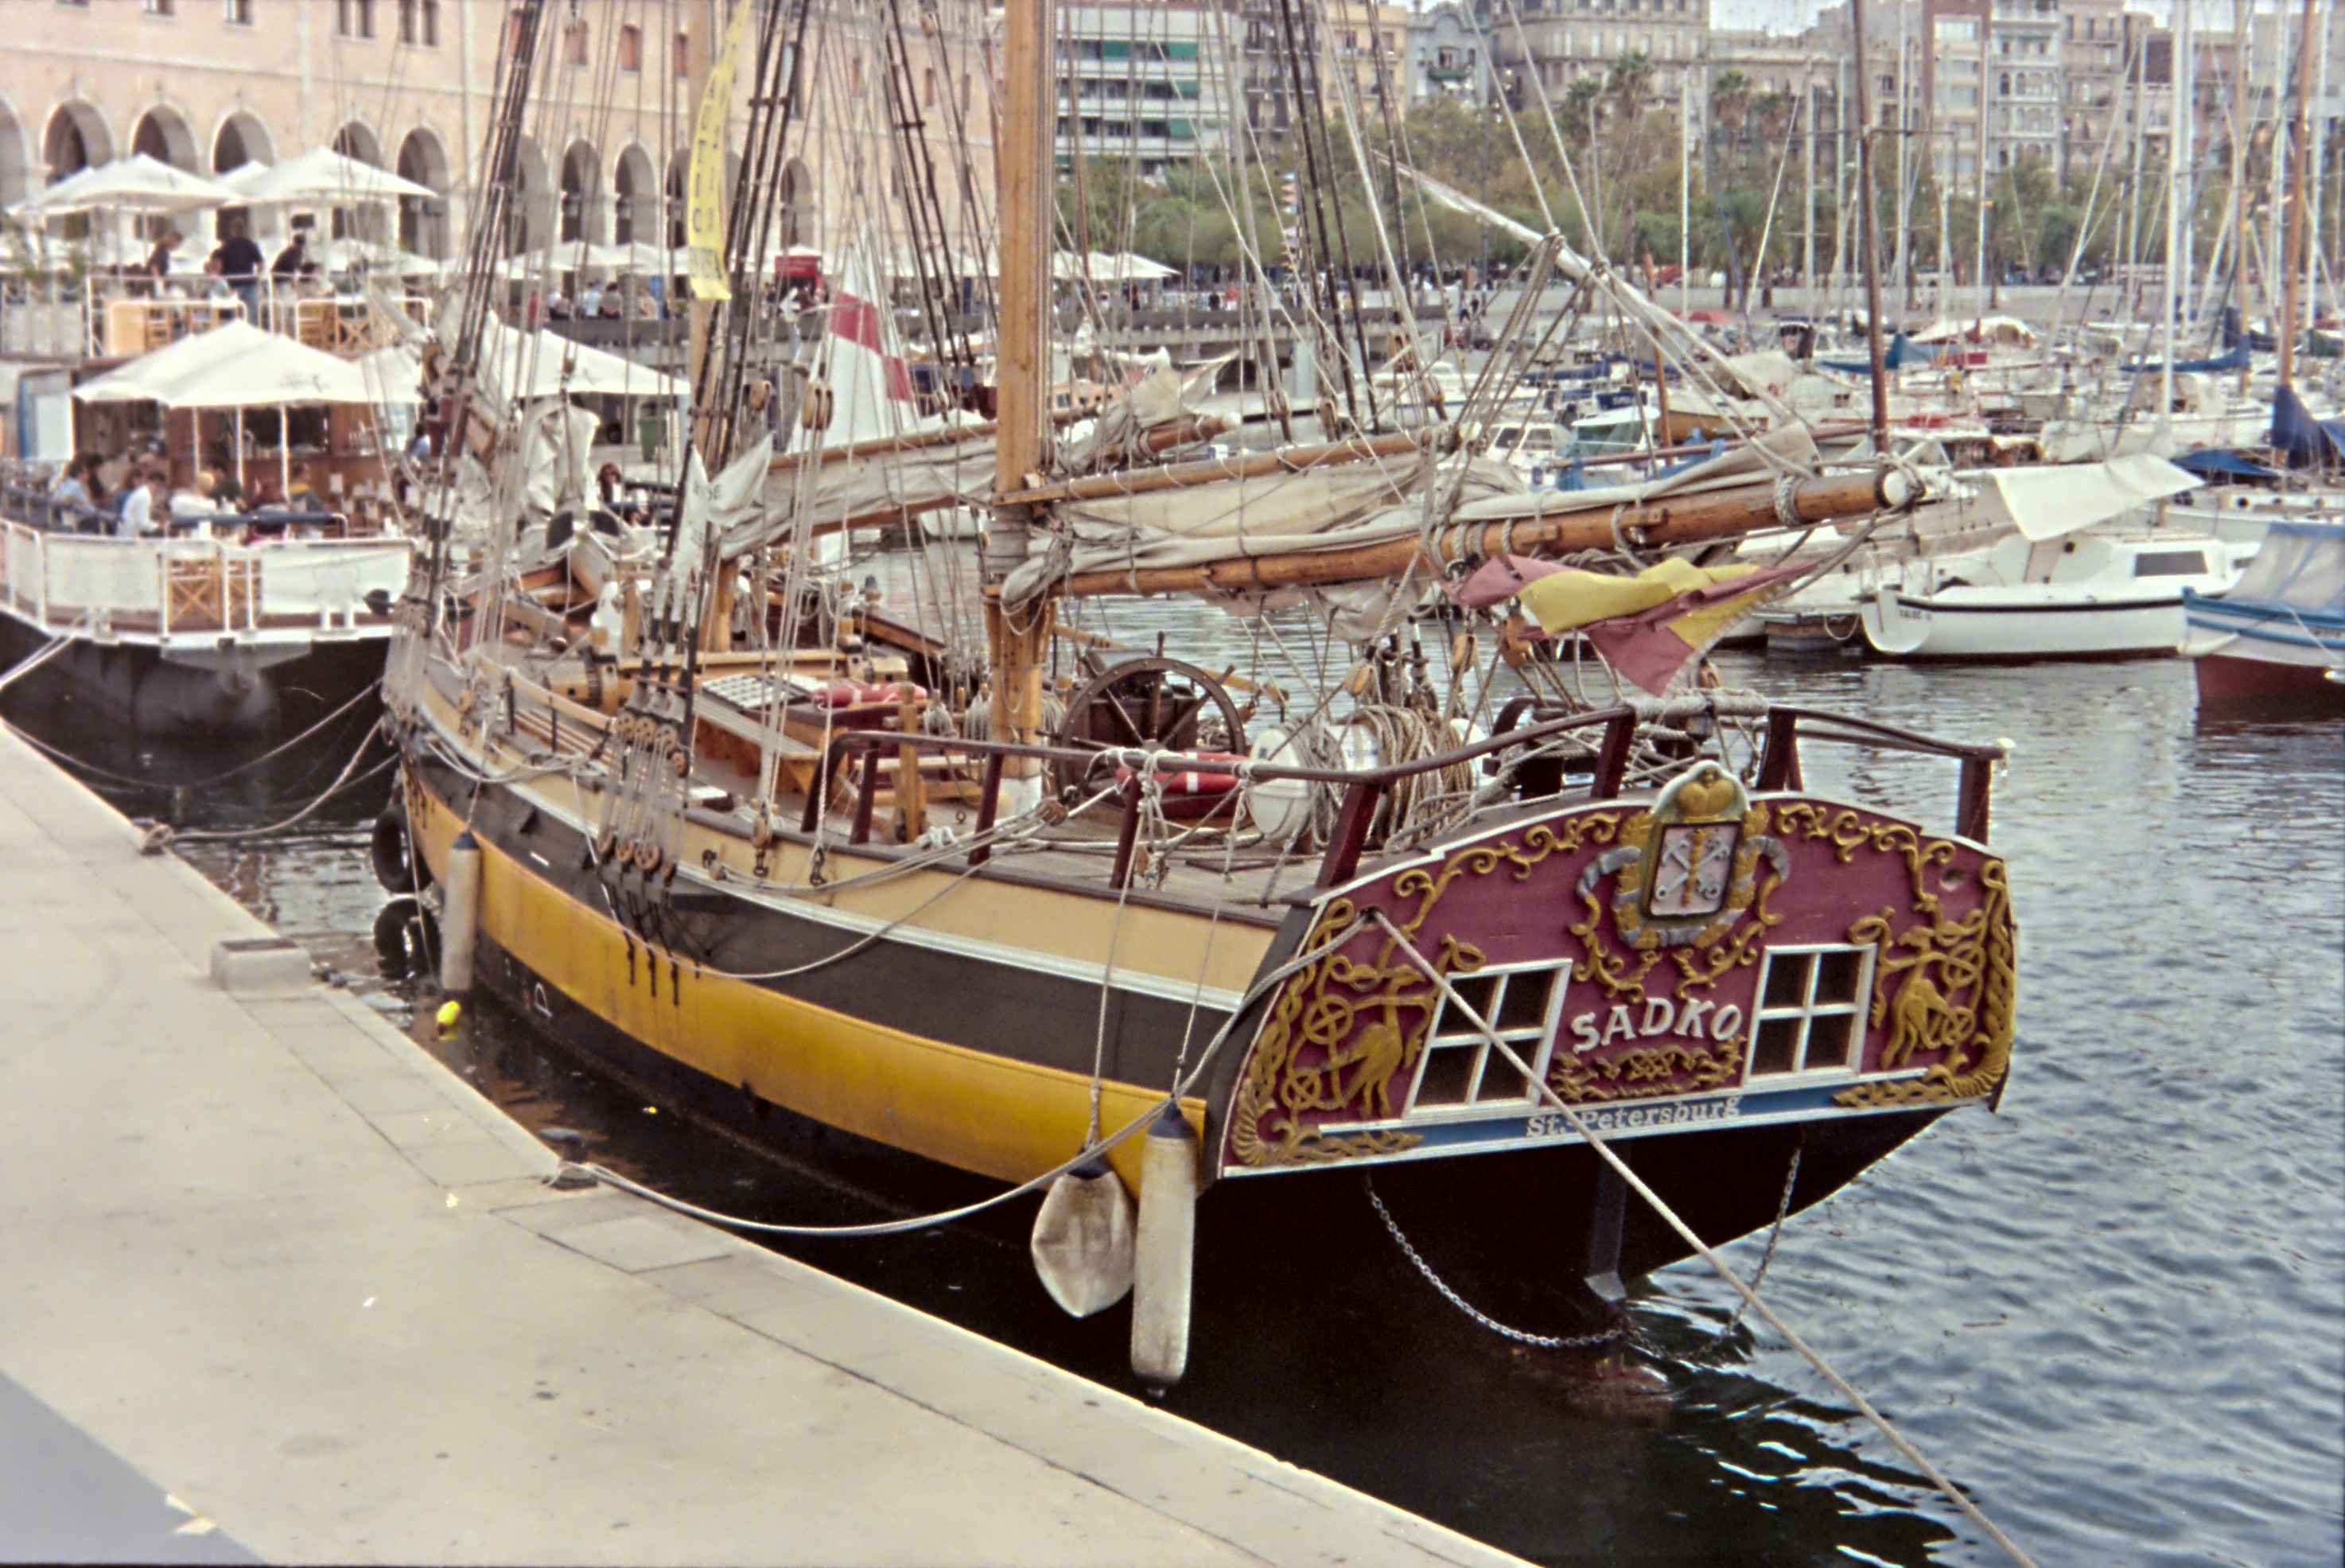
Don’t get me wrong, i’m not talking about the actual analog picture on the film itself, that is awesome and perfectly esposed ![]()
I’m talking about the digital picture of the negative. Try taking the picture at 1/125s instead of 1/250s, for example.
Currently, this is the raw histogram of your NEF file:

there should be plenty of room before the raw values start clipping, so you can overexpose and make better use of your camera’s dynamic range (btw, select 14bit lossless raw if you haven’t).
Don’t worry if your camera says you’re badly overexposing; the film negative tool operates before normal processing, even before gamma correction, so you’re only interested in the raw values.
You can get an old manual macro lens for pretty cheap on ebay, and get very good results. Otherwise, there are extension tubes for even cheaper.
Nothing to be sorry about, thank you for testing & sharing! ![]()
It should be a Superia X-Tra 400. Still in production. Who knows if they still use the same emulsion… i’d like to see if the exponents stay constant on the same film type… hmm… ![]()
Thanks! ![]()
1 Like
Hi’ @rom9
Based on your post I have tried the following changes:
I was able to zoom in on the negative by mounting my close-up lens on a tele (maybe the image got a little less sharp). No fat white border surrounding anymore.
The exposure was raised so that the raw file is almost clipping assuming that this is the correct way to expose a film negative.
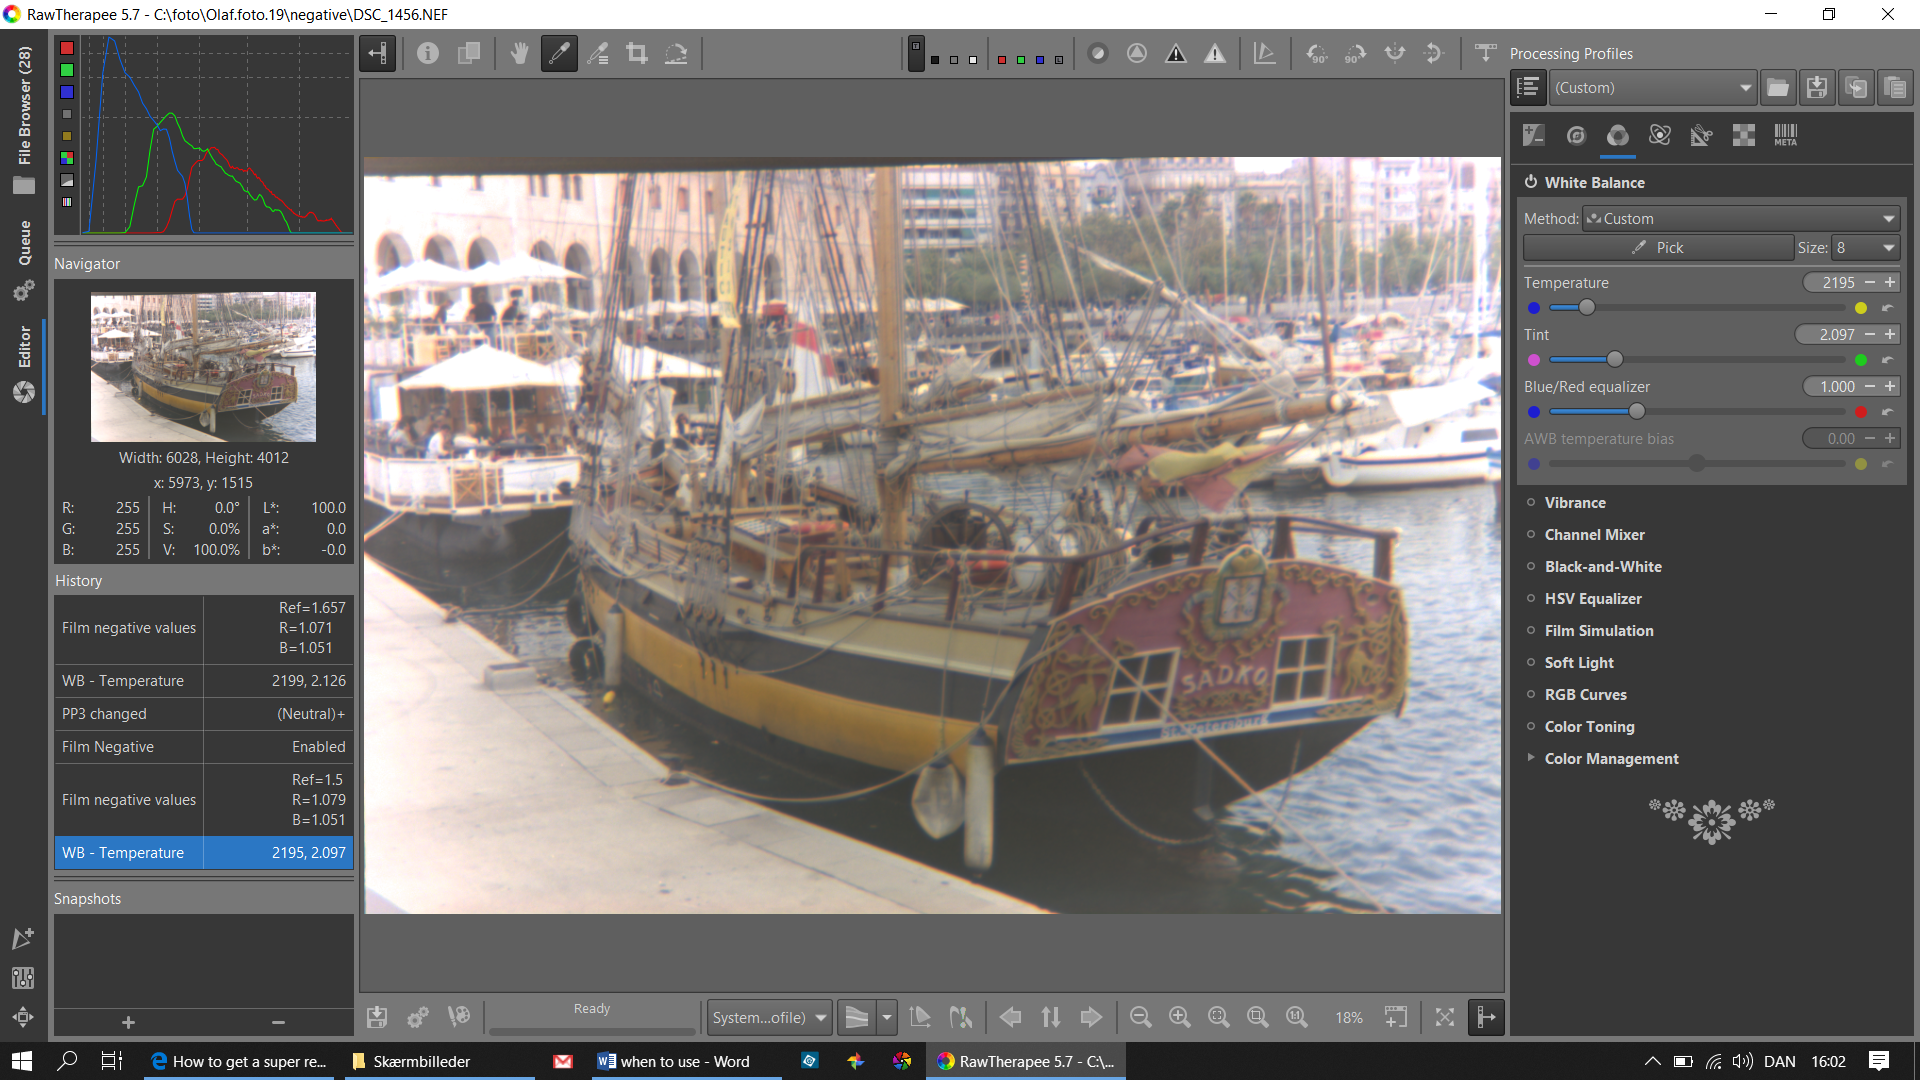
I reprocessed the negative using only the following steps: neutral processing profile, enabling the film negative tool, picking white/black spots and the white balance tool picking the same white spot.
Here are the screen shots of the results step by step:

Neutral processing profile

Film negative turned on
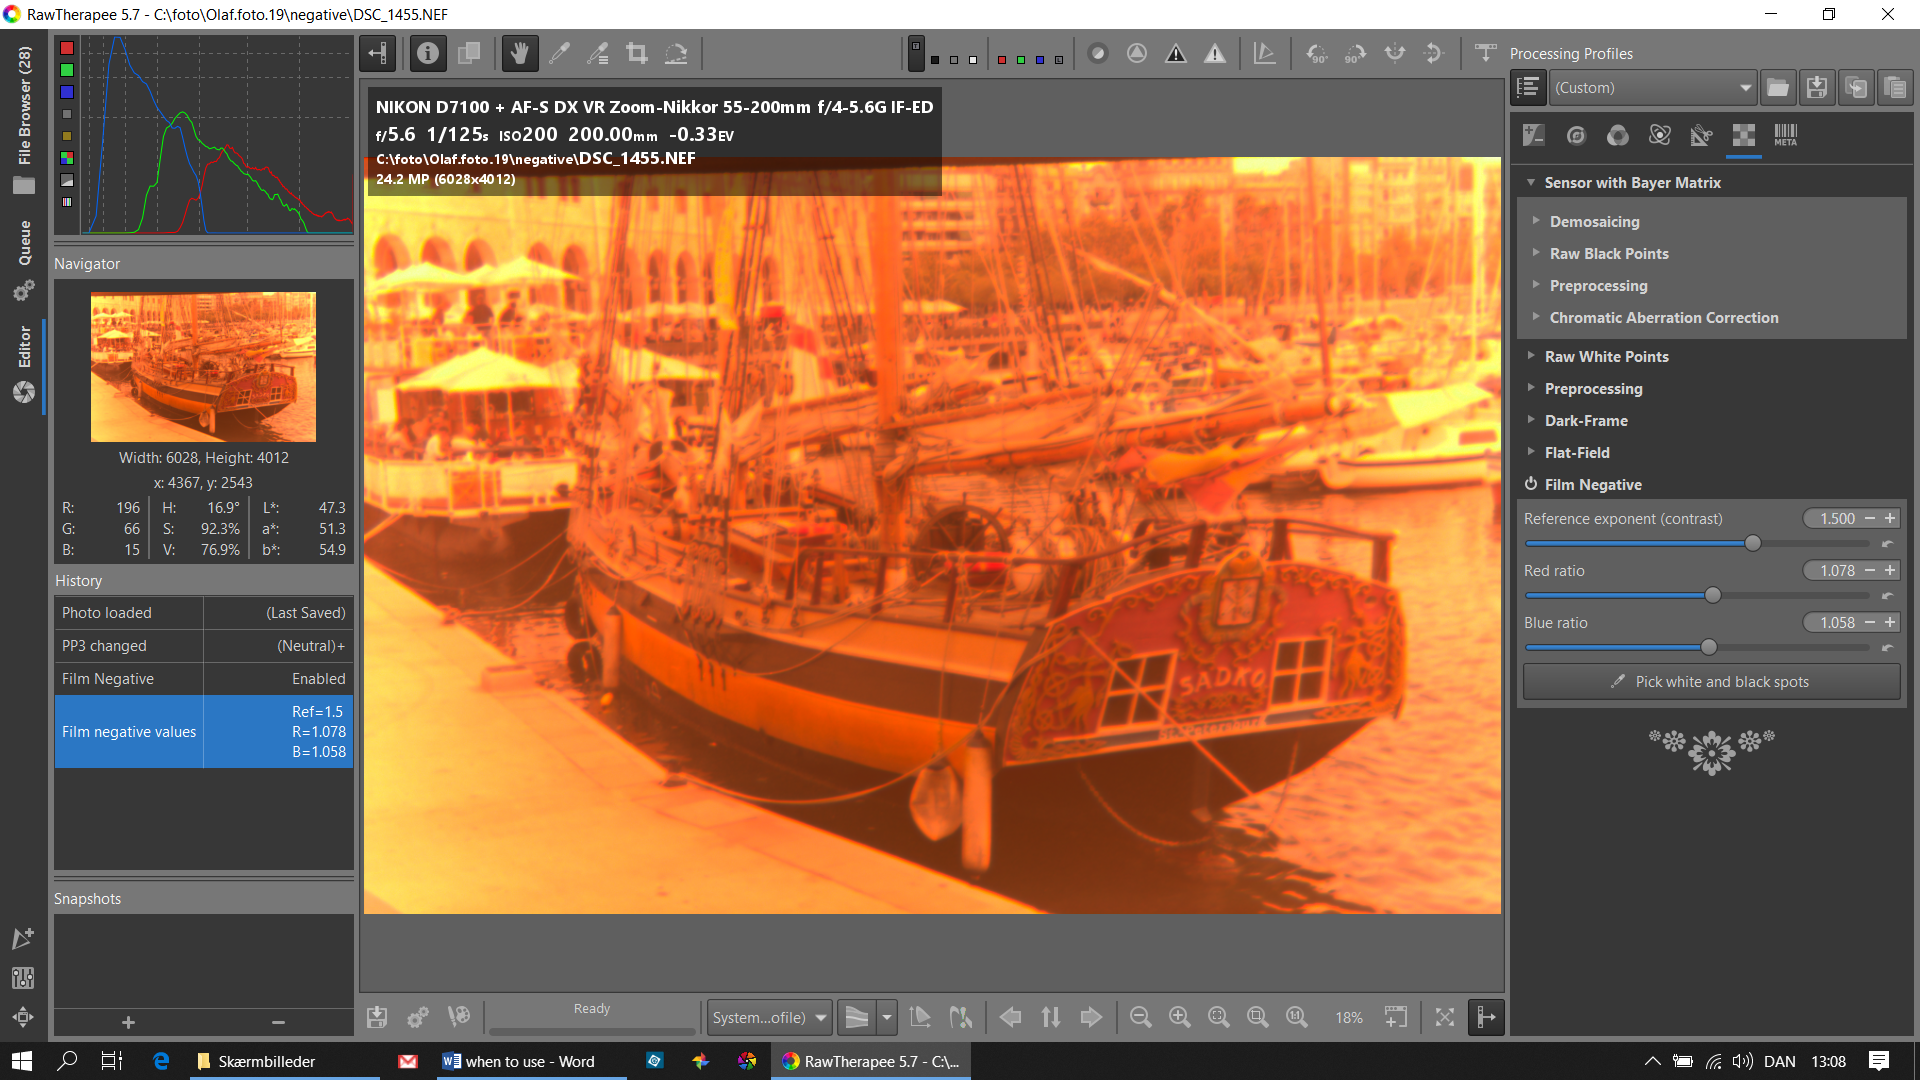
Film negative, white and black spots picked
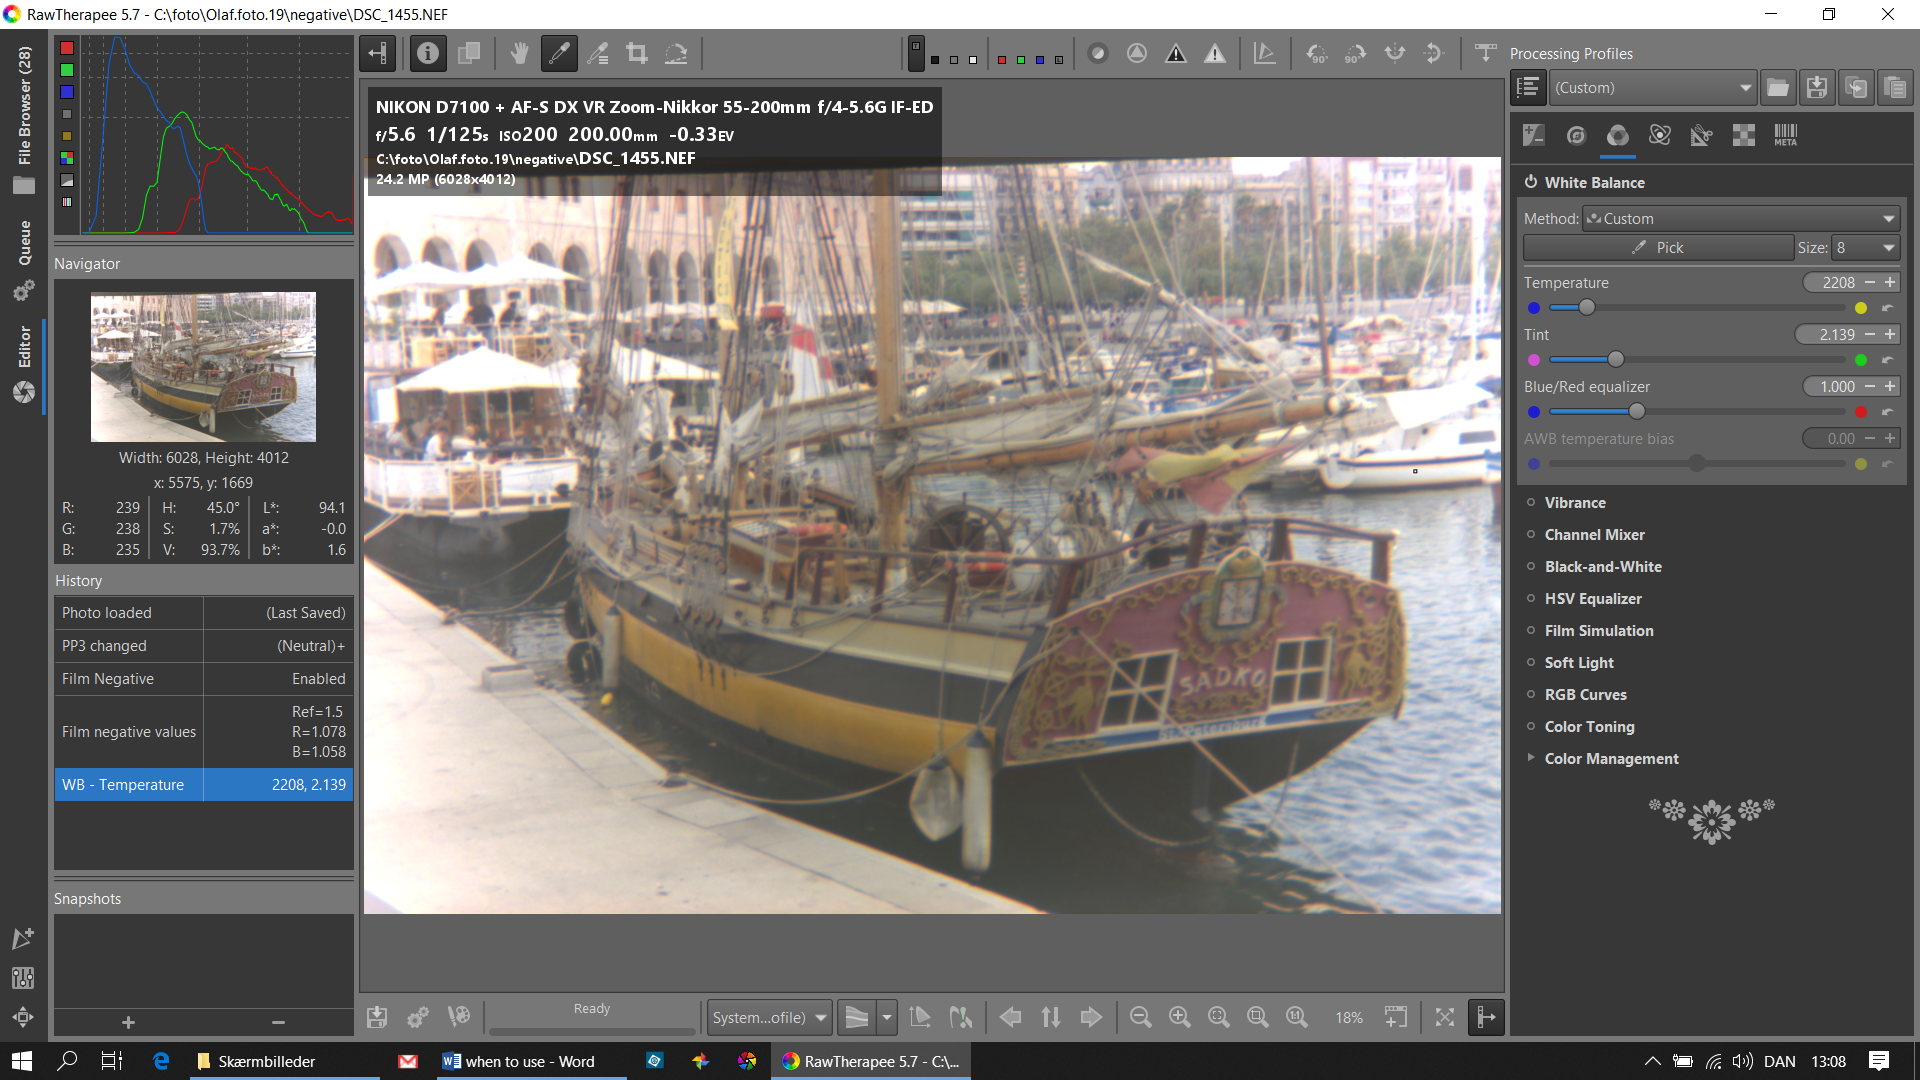
White balance, white spot picked
The result seems to be an ok base for further editing but it’s rather hazy.
It’s necessary to pick a white/black spot in the film negative tool before picking a white spot in the white balance tool to get the best result. This is impossible (for me) to recognize from looking at the orange output from the film negative tool. I would not know what to look for to adjust the sliders manually. The film negative tool seems therefore as a kind of intermediate step before the white balance tool and a lot of further editing.
The default output just turning on the film negative tool is now much improved due to the absence of the white border surrounding the negative in my original post.
I have tried using a DCP tone curve (from Adobes DNG converter) but I prefer the camera standard.
I also tried a very different exposure where the raw is a long way from clipping. The result seems almost the same. See below:
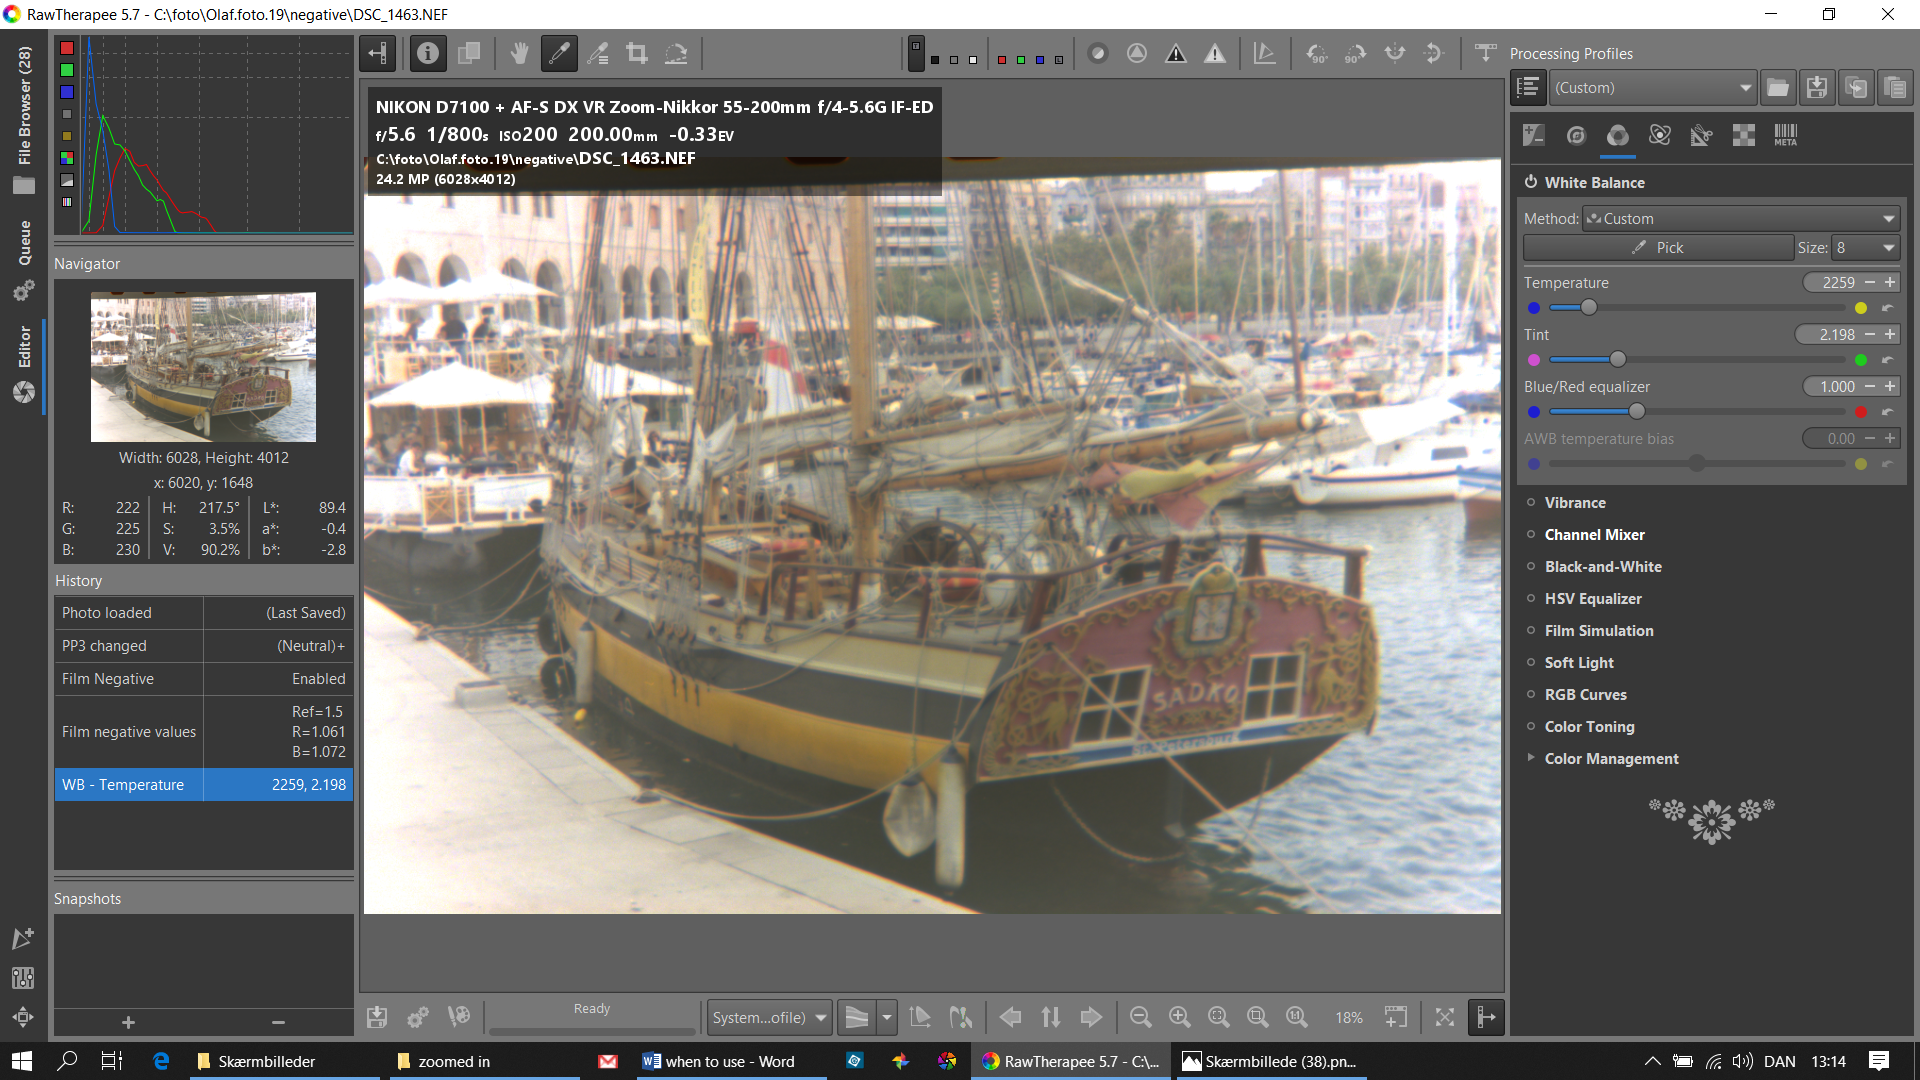
The film negative tool seems not to be sensitive to “correct” exposure.
Do you want me to upload something for reference or further analysis?
One observation of the filmneg tool is that the “black” point is not pulled down to zero. This was intentional/by design.
What I usually do is:
Mouse over some of the unexposed film near the edges. Look at what the L* value is
Use the LAB adjustments tool to map this value of input down to 0 on output.
(I’m not at my editing machine at the moment so can’t provide more detail.)
You are right but I don’t understand how you are able to know that? I used the black stribe on the side of the ship like some of the other contributors.
Good idea to use some unexposed film for the black point.
Could you pls. clarify the meaning of this?
Tried to get a “clear” look. Done in darktable 2.7
Inverted image with the tone curve module and additional white balance. Used the color zones module to better match the colors of the original (necessary?).
Tried to further improve with local contrast, tone curve for contrast, haze removal, raw denoise, saturation and reduction of highlights.
1 Like
Hi,
Actually, now the raw histogram is clipping, see the red channel here:

i notice from your screenshot that, in addition to lowering the shutter speed to 1/125s, you also increased iso from 100 to 200, and opened up the aperture from f7.1 to f5.6 … this is a bit too much ![]()
Try with 1/125s , f7.1 and ISO100, it should be ok. As a rule, avoid clipping at all costs. If in doubt, choose a lower exposure, since clipping is a much worse problem than not using the full dynamic range of your camera (the reason why i originally suggested to expose more).
Keep in mind that the image will be inverted, so by clipping highlights in the input, you will loose shadow detail in the output, which (in extreme cases) might be the cause of a “hazy” result.
Yes, absolutely. Setting the ratios by picking the two spots is the first thing to do. If you change the ratios afterwards, you must re-do white balance.
Yes, either you have a reference image, or you will have to tell from memory or intuition. You don’t have to be super-precise, though. You can still get a good result, even if the spot chosen as “white” was not the purest white, or the one chosen as “black” was not the purest black in reality.
Even more important: you don’t need to strickly pick “white” and “black”; any two shades of gray will do. The more neutral gray, the better.
Yes, they’re almost impossible to adjust manually, but … once you’ve found values that work for one picture, you should be able to apply the same exact values to all the other pictures from the same film roll, and get a good result.
If you can digitize other pictures from that same roll, try it yourself: apply the same processing profile, or type in the values directly. You will still have to set white balance, but that should be enough, without the need to use the “dual spot” tool again.
The raw histogram in this picture looks much better! Maybe the wide border in the original picture was making the histogram look worse than it was, shifting everything to the left…
BTW to alleviate the “hazyness” problem, you might want to raise the “Reference exponent” value above 1.5. This will boost contrast, making it easier to fine-tune with the usual tone curve controls.
It’s not necessary, but if you happen to digitize other pictures from that same film roll, please let us know if the same exponent and ratio values are working fine.
Thanks for testing! ![]()
alberto
Hi’ @rom9
Thank you for your response.
I had the impression that if the raw-file was clipping I would see at least one colored square in the upper right corner as a warning. Like you see here:

I shot several images so it is not a problem trying an unclipped version, but I don’t see any significant difference in the resulting image. Here it is:
Should the black spot be black or neutral grey?
Olaf
Choose a point that you think is unaffected by noise and clipping; i.e., don’t choose the darkest or brightest neutral areas.
Oh, cool, i didn’t know about these little indicators! I guess maybe they get triggered only when a significant portion of the image is clipping.
Yes, the clipping in your previous example was affecting just a tiny tiny part of the histogram, so it won’t cause any noticeable problem. My advice about “avoid clipping” was just as a general rule ![]()
Any level of grey will work, darker or lighter won’t make much difference. The important thing is that it should be as neutral as possible, meaning it should not have a tint of any color.
Of course, don’t choose the same level of grey for both spots (or two very very close levels), as this would make the calculation less accurate
alberto
Hi’ @Thomas_Do
I think this is a super cool result.
2.7 is not an official release, is it? I will have to wait for 2.8 to test your xmp hoping it will work using 2.8.
Apparently, your result isn’t second to the RT-results in any way. It seems that it requires a lot of editing, just as the RT-results do……
This experiment has shown that it is not that easy and straightforward to convert film negatives to super positives. All things considered, it’s amazing that it is possible…. !
!
I understand your advice in this way: The spots you pick should not have any tint of color in the resulting image i.e. after the image has been transformed into a positive. And the same holds true for the color picker in the white balance module. Correct?
Olaf
Yes, exactly. And those same two spots you pick, should not have had any tint of color in the real-life scene that was photographed initially. So we have:
2 grey spots in real life => negative => conversion => 2 grey spots in the resulting image
…which means, an accurate reproduction ![]()
Yes again.
1 Like
Yup. Just as an FYI to obe:
It IS possible that if you choose your two “neutral” spots, they will NOT appear white on your screen until you then use the white balance module.
e.g. the spots should be “white in reality” - but until you apply WB correctly, may not appear white on your screen.
Sorry for not providing an example of black level adjustment yet, I’ve been busy this week trying to get a new laptop working well. (NVidia power management is horribly broken in Linux on it… This isn’t entirely a surprise but I have usually had less issues getting a complete shutdown of the card for when I don’t need heavy GPU lifting.)
1 Like
2 Likes
Perfect!
Just a typo “only once per film role” => “roll” 
Hi’ @Morgan_Hardwood
I absolutely prefer your text.
I think there is another issue that might need clarification: How does the film negative and the white balance tool interact? Is the sequence of steps described in Rawpedia important and why/why not?
Reading the Rawpedia text I get the impression that you should do your film negative stuff and then white balance. However, the text states, strictly read, that the optional picking of the white/black spot is step no. 4 and should therefore be executed after the white balance. Is this correct and does it matter?
You’re right, i didn’t think about that.
@Morgan_Hardwood , please can you also swap points 3 and 4 ? The “dual spot” feature is the optional step, and the white balance step should always come afterwards. Swapping the two points should make it more straightforward, especially with your new clarification.
Anyway, the sequence of steps is not critical. You can also set the WB before and then pick the white/black spots, as long as you re-set the WB afterwards. The previous WB setting does not affect the work of the film negative tool.