How to get OOC look / correct colors in Darktable

If you’re new, please read the docs. You don’t read them straight thru, but start here: darktable 3.8 user manual - an introduction to darktable's workflow

Thanks, I have already read parts of the documentation. Might be that from topics like custom matrix support for the camera I got the wrong idea that the image is not properly interpreted.

If you don’t get a popup message when you switch into darkroom view, then you should be good.

Welcome, @fales

When I first jumped into darktable, that was my main concern.
After a couple of months (and many videos and post readings), I started to feel that usually you have to tweak a small group of modules to get you to the starting point.
That was before scene referred.
After that workflow became the default, that small group of modules became smaller, so it became much easier to get a good starting point.
This is my interpretation. (Which I don’t claim to be better than the ooc rendering. But there are some things in the latter that I don’t like)


IMG_4049.CR2.xmp (13.2 KB)

1 Like

Same here. But then, I realized I was in some cases trying to undo what had already been done, and adding what I wanted on top was just slinging the data back and forth. And so now, while I have a default filmic curve in my proof processing, I usually disable it when I open images I want to work further to see what the linear RGB looks like, and go from there.

1 Like

This gets asked all the time…Google Frank Walsh. he recently made a video to fully demonstrate this…

EDIT:

This is a good point and I had been suspecting to run into this problem.

May be it is best to explain that I am not into heavily processing all my images (yet). Until now, I have been shooting in jpg and, in fact, mostly satisfied. But here and there, I felt like the image could benefit from post-processing. And I have actually been using Darktable for this even with the jpg’s. Since much more can be accomplished when editing raw I would like to give it a go in the following sense: when I return from a photo trip I would like to be able to play with a few images and get the others (hopefully almost effortlessly) developed in a similar way as they are from the camera. Is it possible to achieve this with a well tailored style in Darktable, or is my best bet for this purpose to shoot in raw+jpg?

Thank you, looks good to me and it will definitely help me to get better understanding how I could proceed.

77D uses the same sensor as M5. I have created some styles to imitate Canon’s colour and tone curve, Do you want a straight out of camera JPEG style in darktable? Here we help each other - #51 by Peter
However there is a bug in darktable 3.8.0 that will be solved in 3.8.1 about importing styles. As a workaround, open .dtstyle and move up info.


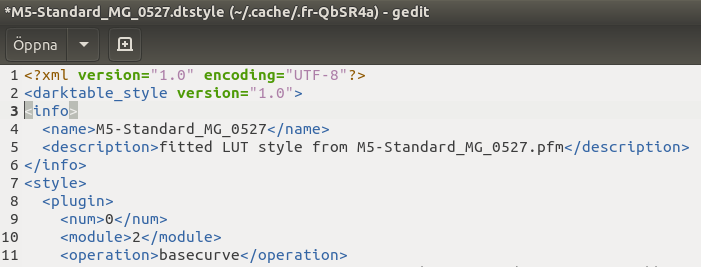
The styles are created with darktable-chart and are the old display-referred way.

Another way is to just enable the base curve for Canon and change preserve color to None. Also old display-referred way.

A third way is to increase exposure, add filmic and increase the contrast, and add the preset of color balance rgb. That is scene-referred.
IMG_4049.CR2.xmp (13.1 KB)

1 Like

You’re welcome.

But I strongly advise you to read again the manual section linked by Mica above, specially the Process section.
You’ll see that, at the core of my edit, lie exposure, filmic and color calibration (if you import my xmp file, you’ll notice that I struggled a bit with the color calibration module, full of comes and go’s)

As for mass editing, I’m still not there, I have to learn how to do it with styles. Sometimes, though, simply copy and pasting edits from one image to another works fine (when the images are similar).

Since you’re beginning with raw, I’d shoot raw+jpg.

What also could be interesting is looking through the playraw category here; not necessarily to study how a certain effect was obtained, but to see what’s possible and why editing raw is interesting. Personally, I like a less contrasted look (and less sharpened) than the OOC image.
You also can get the .xmp sidecars to study how an image was obtained, but that might be a bit overwhelming for some images.

And you really win with high-iso images, where the camera can get a bit heavy-handed with the denoising. Not surprising, as the camera cannot take a minute to calculate the jpeg image (a second is already a long time…)

@gadolf: I just gathered some basic settings I use all the time in a style, and take it from there. There’s too much difference between days for me to get fully automated mass editing going, so the style just handles a few basic settings that suit me. E.g. I need a bit more exposure correction than the defaults, and I like using local contrast. I also add a bit of sharpening (one of the “Diffuse and Sharpen” presets). Some others (like common crops) have module presets, which usually need tuning.

But if I have a series taken under the same conditions and where I want the same “look”, I edit one, then copy the history stack to the others.

2 Likes

I second this. Of course you could share own raws and ask specifically if people would share their default presets to get some inspiration and help finding yours.

1 Like

I wandered through just this sort of evolution to my thinking, and tried raw+jpeg for a bit for the same reasons. Y’know what got me to finally go all-raw? The size of the camera JPEGS!

I like to make 800x600 “proof” JPEGs as my default processing. They’re easily schleppeded over dodgy internets, and the small size (I think) deter’s unauthorized use, or at least hobbles it. I don’t own a camera that’ll make a JPEG smaller than twice that size. If they did, I might still be doing raw+jpeg…

Well, probably not. The software I use writes the processing toochain in the JPEG metadata, and I can open a JPEG with the option to instead, read that toolchain, open the source file, and re-apply the processing. That way, I don’t have to re-bulid the toolchain from scratch for each rendition. The only way I think you can get close to that is to use the camera manufacturers’ software; yech, for other reasons…

You could have a look at this old tutorial by Aurélien:

Instead of color balance, use color balance rgb, and just add the preset basic colorfulness for a start, then tweak later if needed.

For local contrast, you can either use local contrast, or (if you have a powerful computer and/or a GPU that provides OpenCL acceleration) the new diffuse or sharpen module with the add local contrast preset.

When tweaking the basic colourfulness preset, I found that adding more chroma to the shadows and less to the highlights in colour balance rgb really helped to get rid of the slightly flat grey look whilst avoiding making colours in the mid tones and highlights too lurid. Worked for me anyway…

This is a bit unrealistic…I think you need to shoot both for now and also abandon the notion that the raw is just a better version of the jpg waiting to happen…you will find the raw data is just that very raw. It gives you access to an unmodified source of the light information from your camera.

Your jpg is a baked in recipe created by your camera manufacturer. So first you will never match it bang on for sure and the effort to do so will be time consuming…

Having said that for sure with some practice you can and will be able to if you so choose likely come somewhat close to it but really the advantage of raw is access to that unprocessed data giving you the raw canvas to process and create the image…

So there are advantages to raw images but also its not by default a better version of your jpg just waiting to happen…when you embrace that you will be off to the races…

I think for me this is the main way I edit… I tried early on to create styles and or copy others but the global applicability and consistency of results just wasn’t there with that approach.

Going through a series I just pick an image to start with edit it and then copy the history stack followed by small tweaks as needed for these then when I come to the next image that needs a different approach …do a new edit then copy that if appropriate… I am sure styles can be used to automate some basic stuff but for me I use mostly module presets to build and edit and then copy paste and modify from that…

Since you mention RT…you can go to RT and load your image with the neutral profile. Compare that to the default profile that you see…The default will look much more like your jpg and the neutral will be quite flat…more like what you are seeing in DT…

This is the difference between software that adds a punch color and tone vs not…

In Dt if you use the basecurve vs filmic you will sort of see something similar.

You just have to get used to it that you are adding back a lot to the image in DT but you are in control of that and its not baked in…

If as you mentioned above you want little effort then using the base curve will suit you better but the main appeal of DT is actually the scene referred potential and in that case at least initially there will be some work to learn and apply this…

Hello, juste ouvert la photo dans Art sans rien touché.
Deepl translation:
Hello, just opened the picture in Art without touching anything.

Et cette fois en sélectionnant le profil “Neutre” après ouverture.
“And this time by selecting the “Neutral” profile after opening.”

1 Like