Hello,
I’ve been struggling with Darktable and following these discussions and tutorials made it easier. As many, I came from lightroom, and the only step I’m missing is how to replicate the “Color Calibration” that I used abundantly in Lightroom.
Is there a specific module you recomend in Darktable? I’ve tried color calibration, color balance rgb, as well as color zones, but still can’t get the results I easily got with color calibration in Lightroom.
Can you help? What do you recomend, to achieve the same results as easily?
It may not be the same and I am not that familiar with LR but this looks like it lets you tweak the RGB primaries of the color profile used. You could try the Color Lut module and tweak the r g and b primary patches there and see if you can get close to what you want to do… I think this is the only module with sliders organized in a similar way…other wise you will have to use some masking and multiple instances of other modules like CB
If you want to try out the masking/Color Balance approach @priort is referring to, this might help you: Color Balance RBG: select by hue presets - nice thing about it: you can download some presets with hue masks already baked in
LR is closed source program and no one knows what it does internally, so you won’t be able to replicate the same effect the same way as the lr color calibration does.
In darktable there is also way how to modify primary colors - it’s the channel mixer part of the color calibration module (RGB tabs). https://docs.darktable.org/usermanual/3.8/en/module-reference/processing-modules/color-calibration/
You may need to find own way to achieve similar results.
If you are looking for free software which has the same controls for primaries as LR, there is channel mixer in ART. Just don’t expect the same results. https://discuss.pixls.us/t/rgb-primary-corrections
The module is called “color look up table” and you can find it by searching in the search box above the modules. It might not be visible by default if you don’t have all the modules activated.
Hi! For the saturation part of LR’s camera calibration you can use the colorfulness tab in the color calibration module.
For the hue it’s a bit more cumbersome. Create three instances of color balance RGB. Set each of them to use a uniform mask, and set the blend mode to the red, green and blue channels respectively. Then adjust the hue slider to your liking. Mind you that each channel’s effect might be different than in LR, for example the red channel in darktable might do what the blue does in LR.
Thank you very much for the reply! I’m finding it difficult to execute.
On the “color calibration” module should I only use the colorfulness tab , or the R,G,B as well?
On the “color balance RGB”, after creating the mask, should i navigate in the “master” subtab, and then use the “hue shift”?
Indeed it’s very hard to see the results I could easily get on Lightroom. I wish there was an easier way
Could you explain how you got the result in Lightroom approximately? Like what steps you took to get it? I don’t have too much experience with Lightroom but if you could explain what you do and how each step changes the shot, maybe I could replicate the result in darktable…
Just use the sliders on the colorfulness tab. They increase or decrease the colorfulness of each of the three channels individually, similar to what the saturation slider does in LR’s camera calibration.
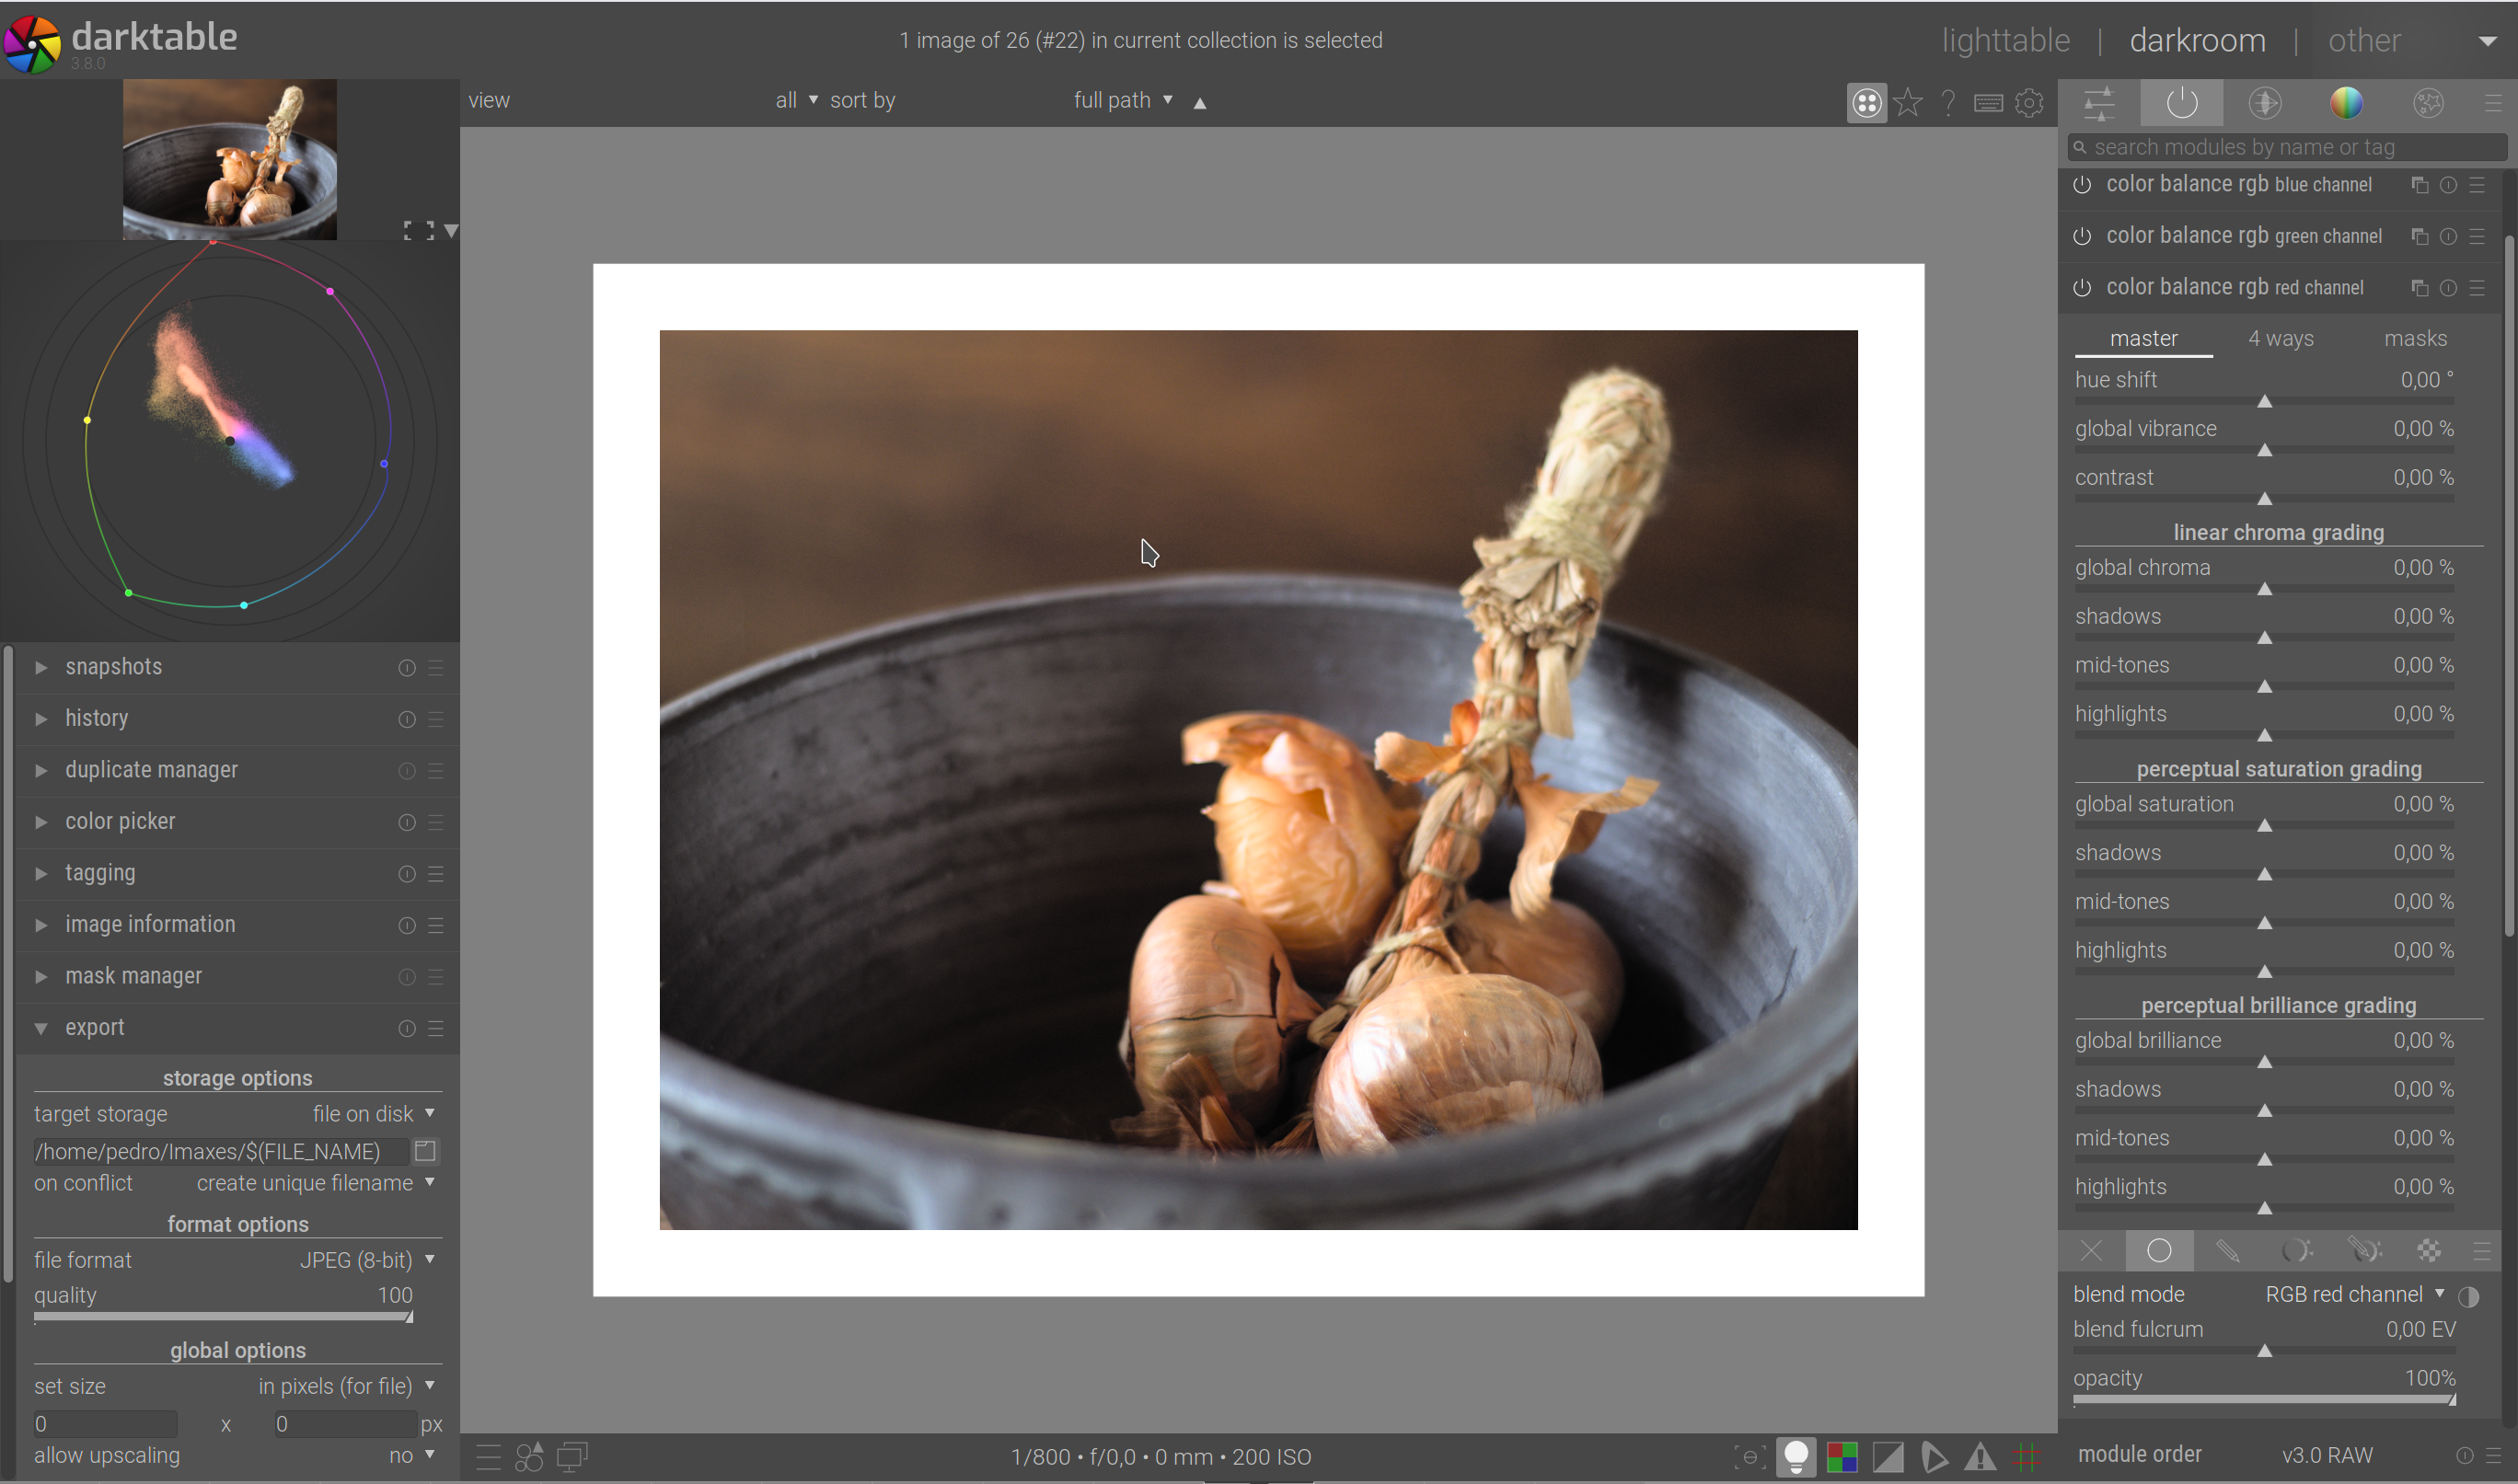
On the right panel, I’ve created three instances of the color balance rgb module, renamed each one accordingly, set the mask to uniform (below the module, that circle that is highlighted), and adjusted the blend mode to the appropriate color channel. Once that’s done you just need to adjust the hue shift slider to your liking.
If you are going for a bit of a “teal-orange” look, you just need one instance of the module, set to the red channel, and move the hue slider slightly to the left.
Does someone has a good understanding of the channel mixer in RT ? I can get nice results by pushing a slider up and then compensating with another one but I don’t really know how to get to a specific result. What does the inner/outer colors indicate ? If I want to do teal & orange what would be the logic being pushing such and such sliders ?
An example where I somehow stretched the color spectrum in the blue-red direction, I’m liking the result :