Thank you very much for the reply! I’m finding it difficult to execute.
On the “color calibration” module should I only use the colorfulness tab , or the R,G,B as well?
On the “color balance RGB”, after creating the mask, should i navigate in the “master” subtab, and then use the “hue shift”?
Indeed it’s very hard to see the results I could easily get on Lightroom. I wish there was an easier way
Could you explain how you got the result in Lightroom approximately? Like what steps you took to get it? I don’t have too much experience with Lightroom but if you could explain what you do and how each step changes the shot, maybe I could replicate the result in darktable…
This is a decent demonstration of it…globally changing red green and blue…these things are often baked into an icc profile or in a channel mixer or some module that lets you select the primary colors to be altered… How The Calibration Tool In Lightroom REALLY Works (And How It Will Change Your Editing Forever) - YouTube I tried CB
Just use the sliders on the colorfulness tab. They increase or decrease the colorfulness of each of the three channels individually, similar to what the saturation slider does in LR’s camera calibration.

For the hue I told you it was a bit trickier. Sometimes a picture is worth a thousand words:
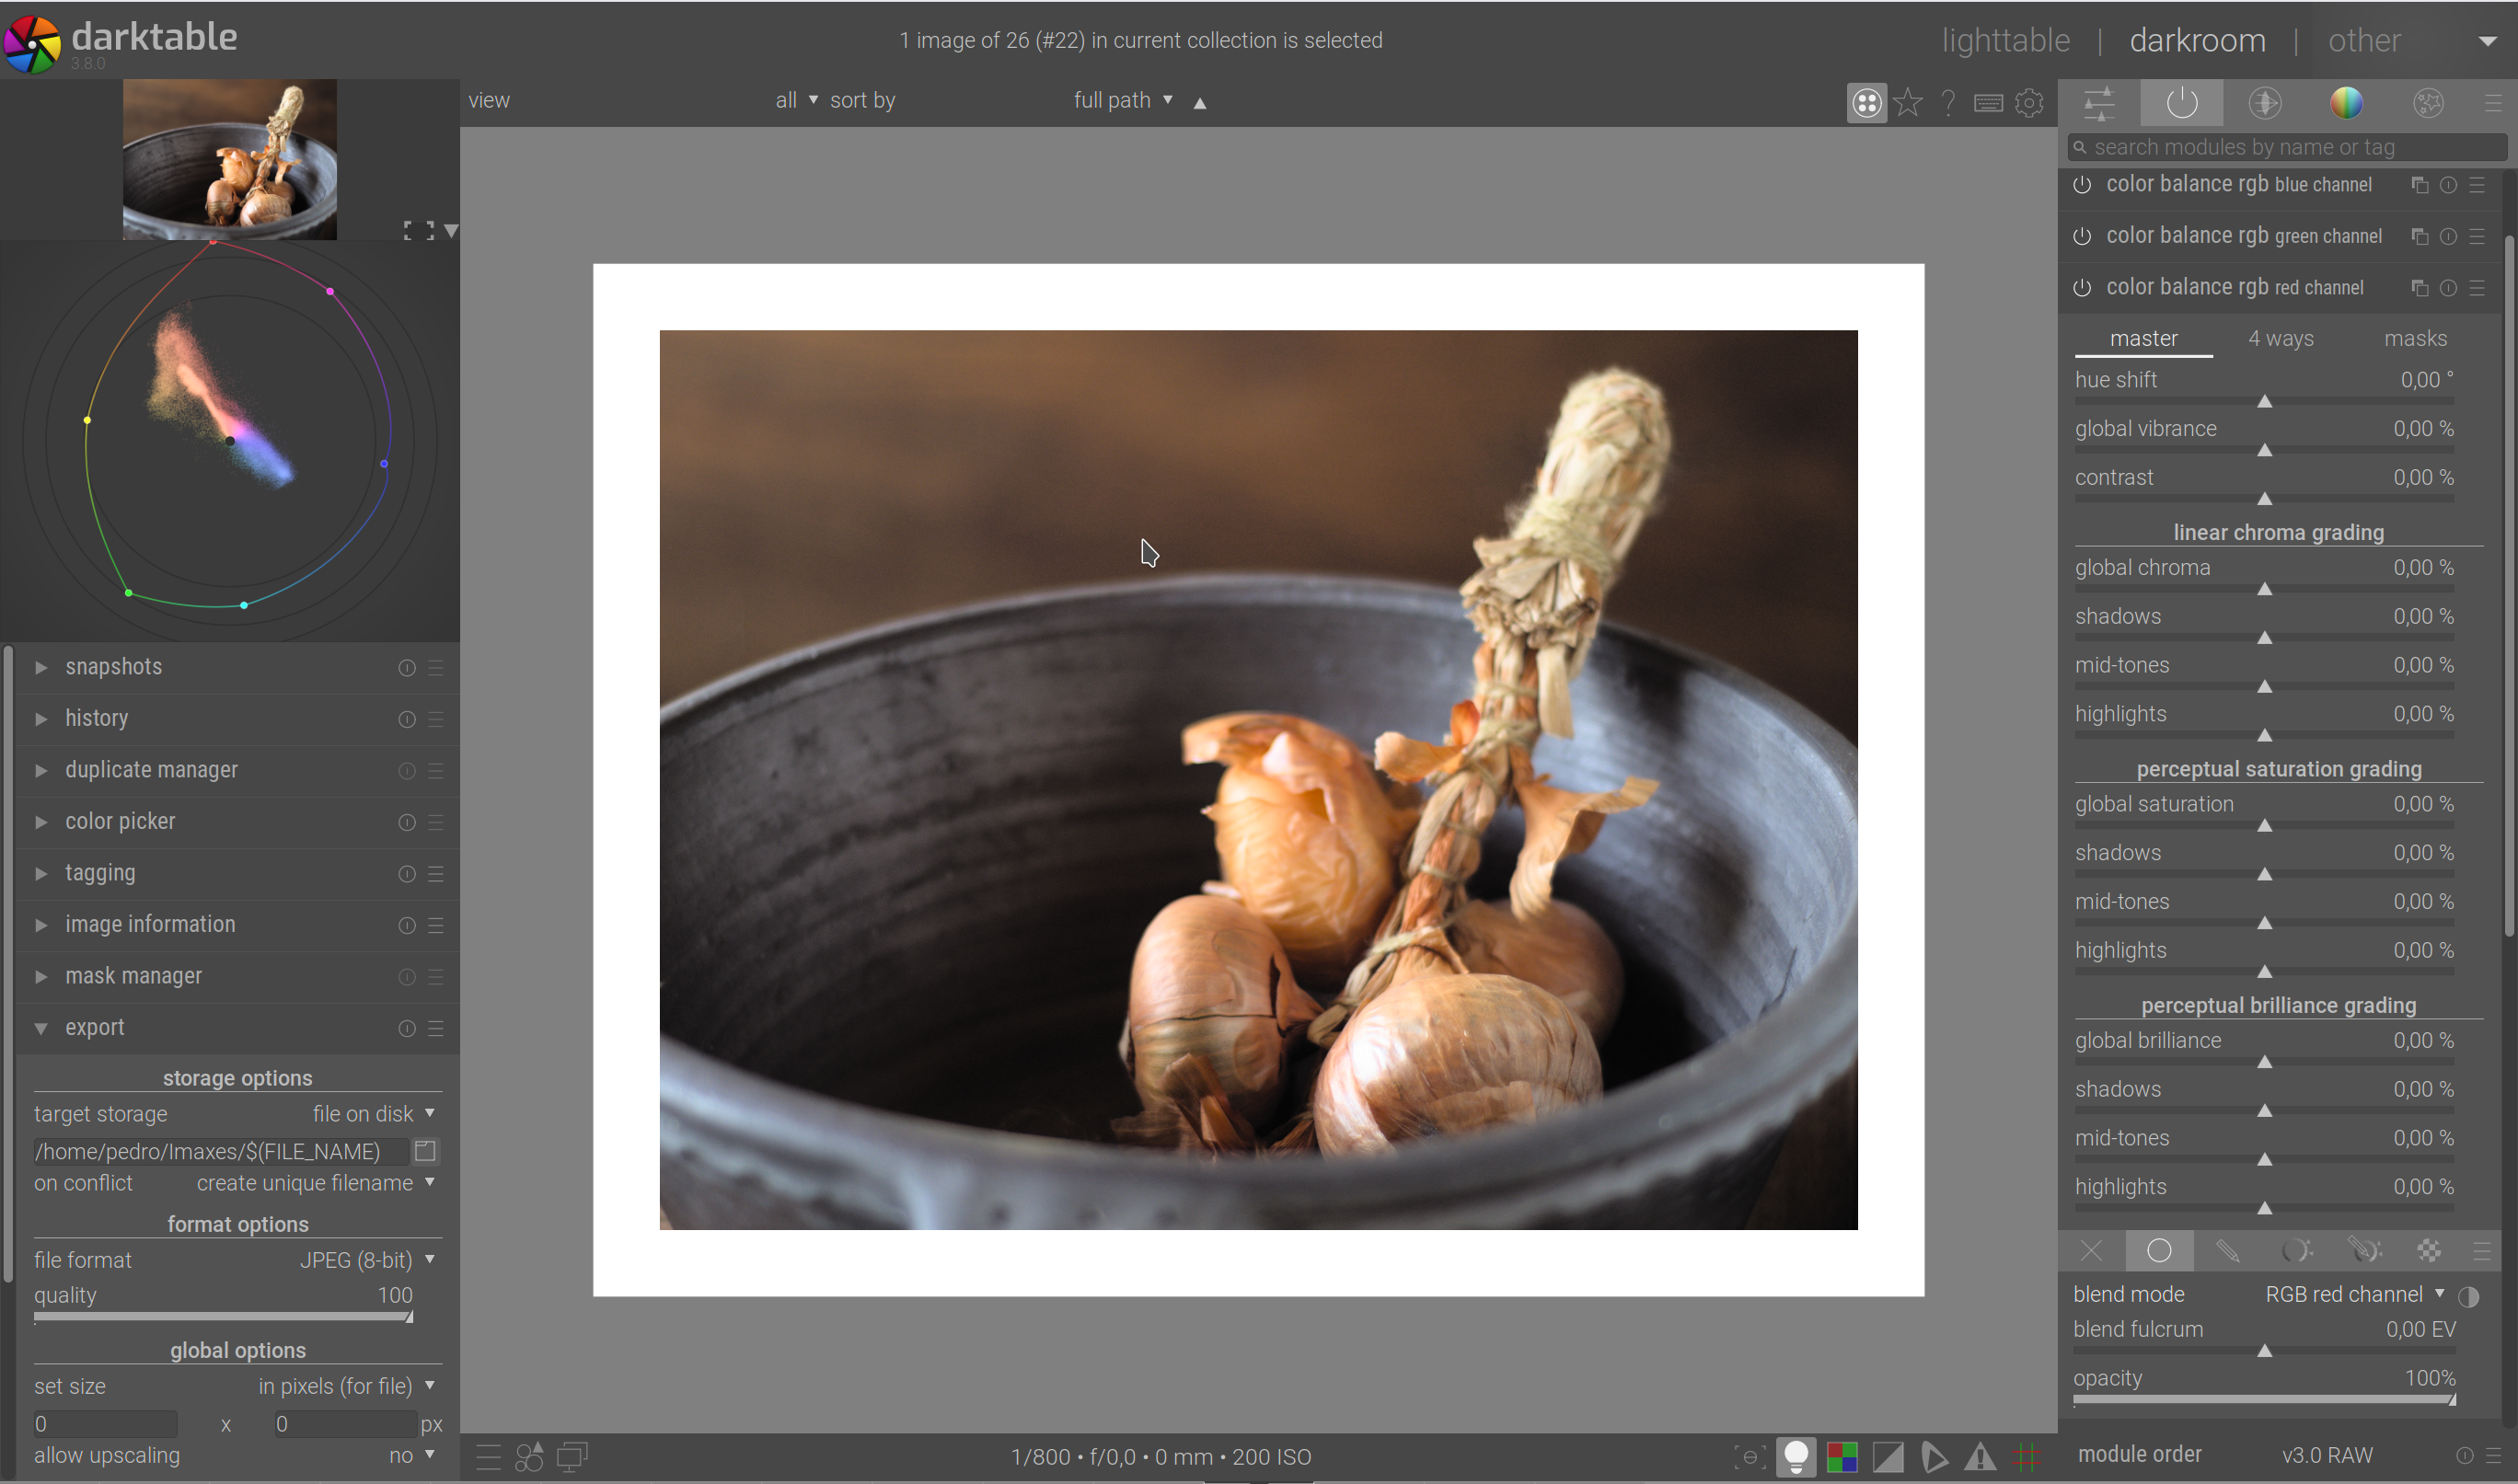
On the right panel, I’ve created three instances of the color balance rgb module, renamed each one accordingly, set the mask to uniform (below the module, that circle that is highlighted), and adjusted the blend mode to the appropriate color channel. Once that’s done you just need to adjust the hue shift slider to your liking.
If you are going for a bit of a “teal-orange” look, you just need one instance of the module, set to the red channel, and move the hue slider slightly to the left.
Hope that helps
1 Like
Does someone has a good understanding of the channel mixer in RT ? I can get nice results by pushing a slider up and then compensating with another one but I don’t really know how to get to a specific result. What does the inner/outer colors indicate ? If I want to do teal & orange what would be the logic being pushing such and such sliders ?
An example where I somehow stretched the color spectrum in the blue-red direction, I’m liking the result :

1 Like
I thought the same and tried it last night on a colorchecker image but I dont’ feel like it works like the LR hue changes… in LR moving the red slider creates a nice deep orange and I could not get that effect on the color checker blending to the red channel and rotating hue…I don’t have LR to check though…I think there are similar sliders in the Adobe Profile editor… I might look but that’s off topic
It probably won’t achieve exactly the same effect, but it is as close to it as I know how inside darktable. That said, two thoughts:
Lightroom’s hue slider is restricted. With the red slider you can go towards magenta, or towards orange, for example. In colorbalance RGB you can rotate the hue 360°. That means that small changes have a big effect. If you want finer control, adjust the opacity of the module.
The three channels do different things between programs. To achieve the teal and orange look wirh LR’s camera calibration, you need to tweak the blue channel, and in darktable it is the red one.
2 Likes
Actually, I think the colors in your example are quite unnatural. This is what I get with a quick & dirty edit of your first JPG with the modules “color calibration”, “tone equalize” and “color balance rgb” in darktable.

A7305857.jpg.xmp (4.9 KB)
2 Likes
Thank you @anon16817310 ! I’ve been trying hard to replicate the effect, it’s closer but it’s hard, a lot of sliders to move around, and the RGB Module with that mask isn’t replicable for other photos, I would have to create it each time I want to do a similar edit… Even creating a style and copying it can have undesired effects because I believe it builds on top of whats in the photo.
The number of sliders is the same. LR has 3 for hue and 3 for saturation. Darktable has the 3 in the colorfulness tab of color calibration, and 1 hue slider per colorbalance RGB module, with the workaround I suggested. The other sliders in the colorbalance module do other things, and unless you know what you are trying to do, I wouldn’t recommend tweaking them using the red/green/blue blend modes.
If you want a neutral base to start (like LR), you can create a style, so that the three colorbalance modules are automatically applied in the right blend mode, but no other settings changed. That way is only annoying to set up once, and you can experiment with each picture until you get the hang of it. Then make styles with your most common parameters.
One more bonus tip: if the hue slider is too sensitive, and changes are unpredictable, reduce the opacity of the module. That should let you make more precise adjustments.
If you want to learn more about darktable, I recommend the manual, and a couple YouTube channels: a dabble in photography, and Aurelien Pierre’s.
Hello,
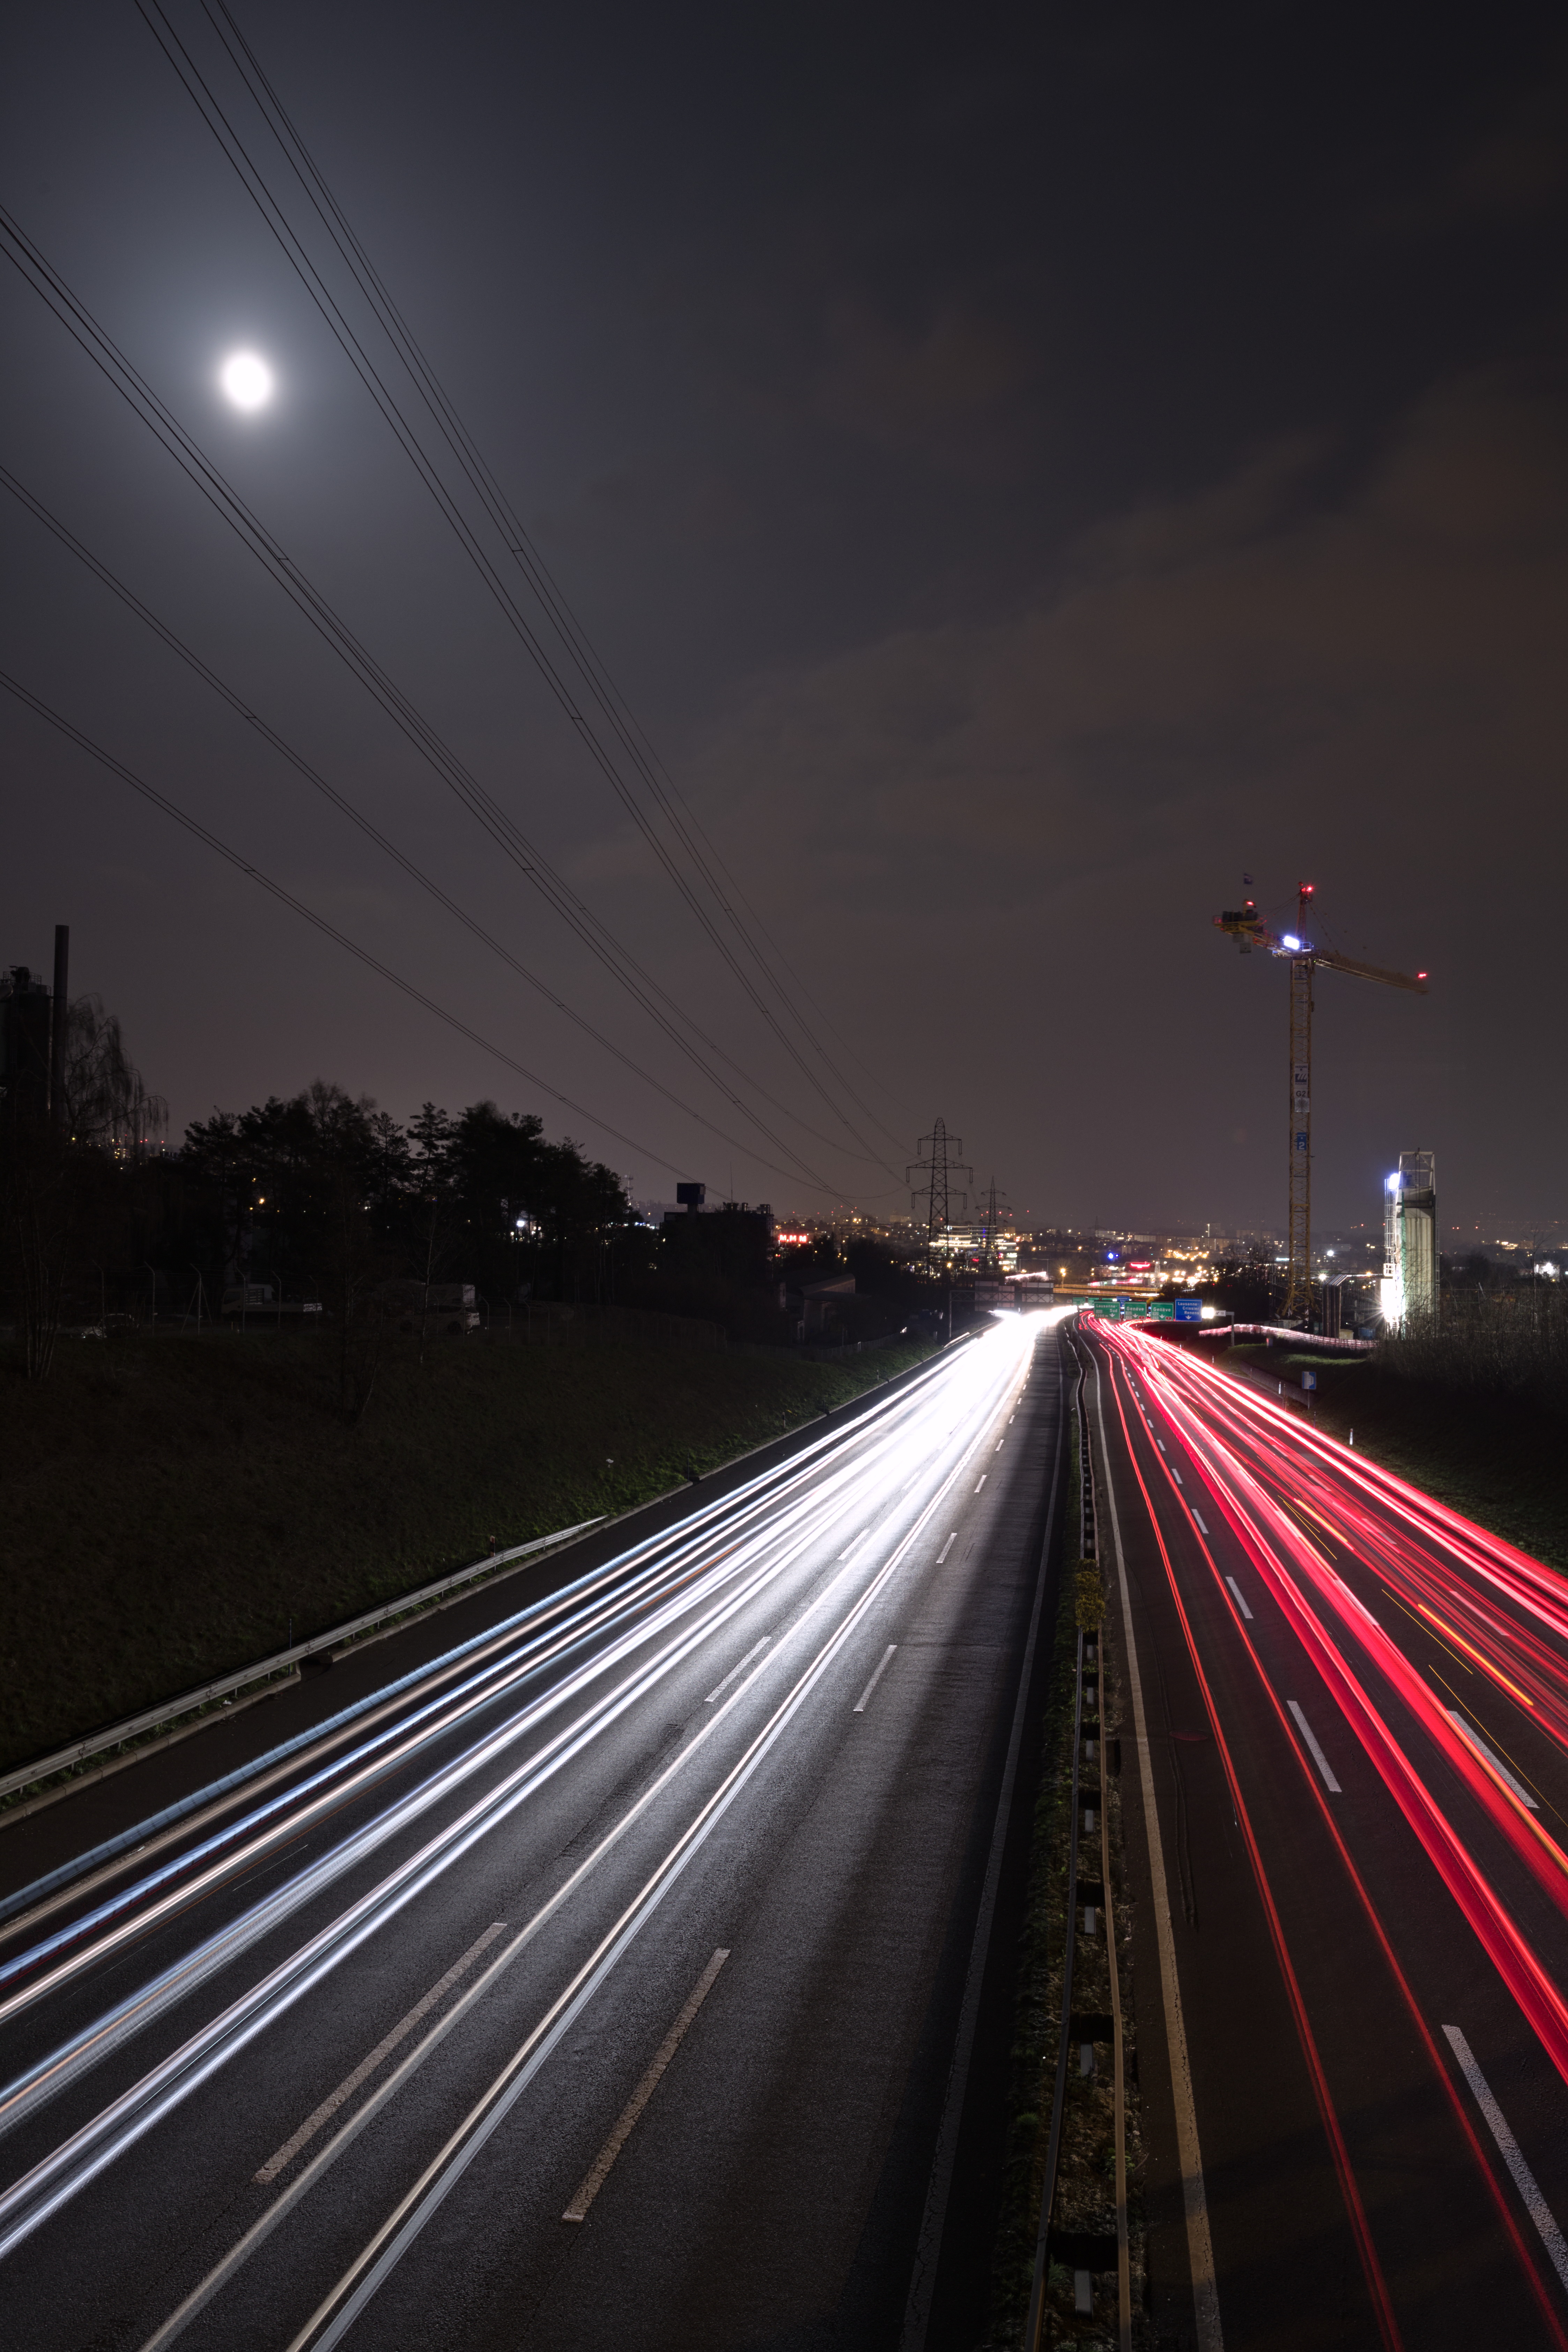
I’m still strugling to achieve the same results on Darktable that I can easily pull off in Lightroom. Please see here one photo edited in Lightroom, using as well the color calibration module. How can I achieve a pretty similar result on Darktable? (I’ve tried using the color RGB module, as suggested before, but to no avail)
A7307795.ARW (23.9 MB)

Here is the version with darktable. The sliders in the “R” and “breitness” tabs in a new instance of the color calibration module were used:


4 Likes
And here is another version as described above but with sigmoid instead of filmic…

…and additionally with Tone Equalizer for brightness…

…and contrast equalizer for sharpening…

…to get even closer to your version:

6 Likes
Great job Boris! (as usual ![]() )
)
I find this part of CC very powerful, both creatively and for matching to jpgs too. It does take a little practice though.
2 Likes
On the other hand, you only need to master this one module and with it you can replace half of all other sliders in 90% of all other “professional” photo editing software. And that, in turn, speaks volumes about sales strategies. But don’t even get me started on that topic… ![]()
5 Likes
![]()
![]()
I know its a bit off topic but it was interesting when I looked at the skin tones I thought they looked a bit off and I know this was a call for an edit match to a DT function never the less I found it interesting… the edited version provided by the poster gives “Salmon” skin tones…

Check out Dt with only exposure and filmic with auto white/black (v5 set to no…my preferred version) … and I must say this looks nicer to me. I know the query here was to match some LR tweak… never the less check out the reported color… “Average Caucasian Skin” . I found this amusing esp since there was no color grading added at all and at least in the past there were often many complaints about skin tones coming from DT processing…

1 Like
Thank you very much!
Could you explain how can i go about it using this module? I’ve tried to replicate your results creating a new instance of color calibration module, and the mentioned sliders, but the results are not like yours (they look more redish).

Which version of darktable are you using?
Did you change anything else?
Can you please include your sidecar xmp file here so I can take a look at it.
Here is a short video how I did it. I entered the same values and did not change anything else:
2 Likes