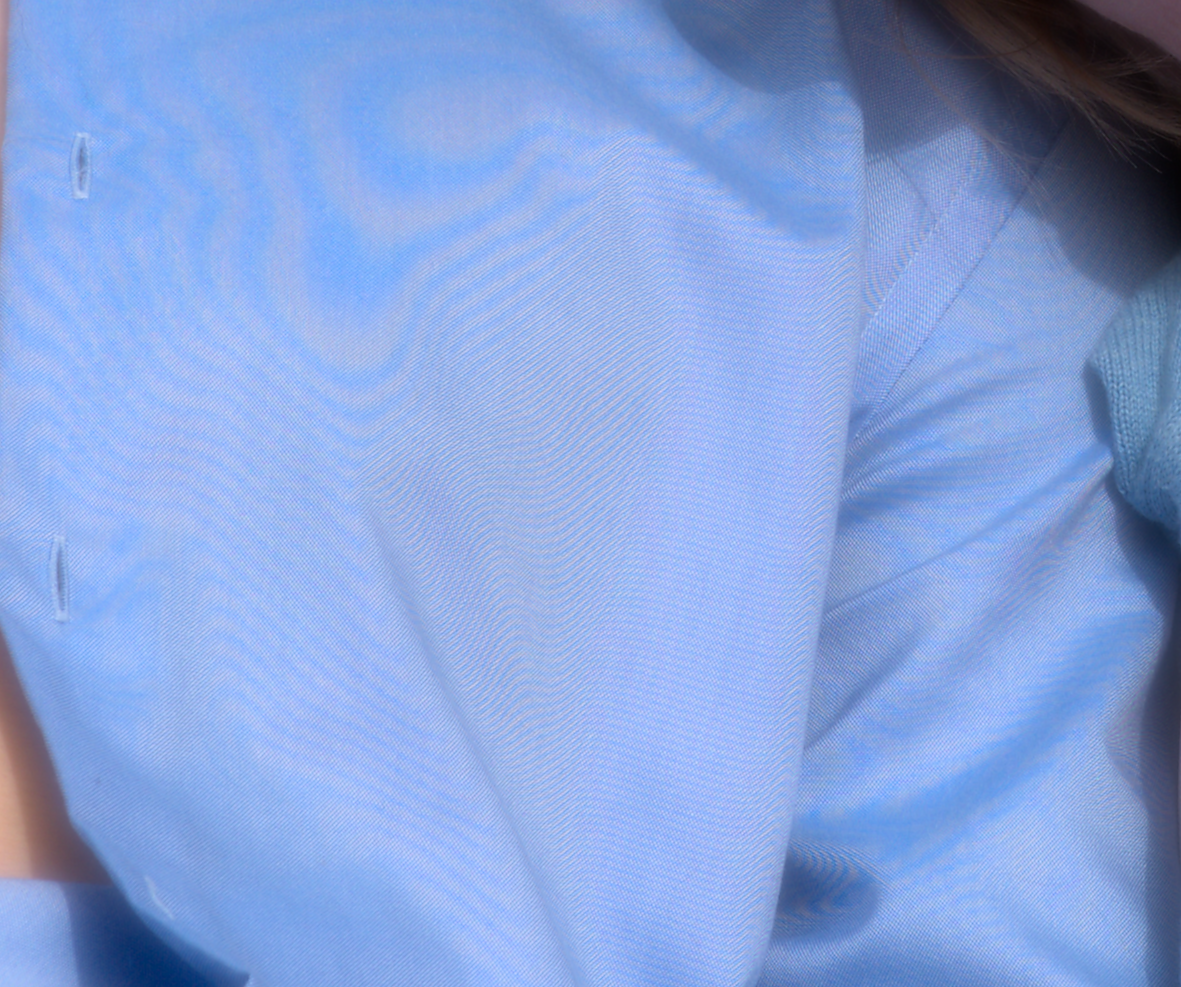
I defer to any more knowledgeable people who may post here, but I don’t believe this is a problem with demosaicing. I believe it is simply moire effect. Google the term moire effect and you will find out about the cause or you could use this link What is Moiré and How it Can Ruin Your Photos
If I recall surface blur will fix it fairly well…there is an older post from a few years back with the same question on a shirt… but I think surface blur helps…
Do zoom in to verify, though: you have a third grid in the mix (the display screen) which could also cause moiré to appear. If that’s the case, the visual moiré changes when you change the magnification.
The effect of the demosaicing method on the appearance is coupled to an overall “sharper” or “softer” look: if you diffuse the fine details a bit more, the “grid” becomes less well defined, so the moiré becomes less visible.
The article that you have provided helped me a lot in understanding the problem. Knowing that my camera is only 16M with no AA filter, now I need to put more attention to avoiding moire. Strange that I have not noticed it before, at least not to such extent.
It is not my a display problem of my monitor.
I will not share with you the RAW as persons on the picture may not like it. I will try to deal with it by methods you suggested.
The best thing I could do is to use more iterations in d/s surface blur. It is faaaar from ideal with huge impact on resolution and sharpness but thanks to masking it is applied only for the affected parts.
Maybe it wasn’t surface blur then…there was a module that applied basically removed it and it was a blue shirt as well… I will keep trying to find the post…
Thank you for the video. Again, it helped a lot. This time, as suggested in the video, I used surface blur with blend mask - chromaticity. However, in addition, I had to tune the r/g/b values in the module to very high values, around 0,3 and more.
There are some side effects, like a bit of blur for other parts of the photo and some color shift towards purple that you can see on the verge of the shirt. Can I somehow add a draw mask on top of this to limit the effect to the shirt only?
Yes almost every module can be masked… use the pencil icon and then use the path option and click and draw…then refine with the slider to refine and blend the edge…