Hello,
First off, thank you for this application. As someone who sparingly shoots, it is wonderful to have a powerful tool that doesn’t come at a steep price.
I am curious if there is a proper way to transfer my styles and LUTs to a new computer. While traveling in Europe, I had my laptop, which was enough to get me by. However, now that I am home I desire to use my much more powerful desktop (and 45" 4k monitor) to process the photos that I took.
Upon moving the photos to the desktop (including the .xmp metadata files), I found that select images were presenting as black squares rather than the displaying the photo. As we can see, the photo data is still there - the preview pane in top left and nav bar in the bottom both display it proudly:
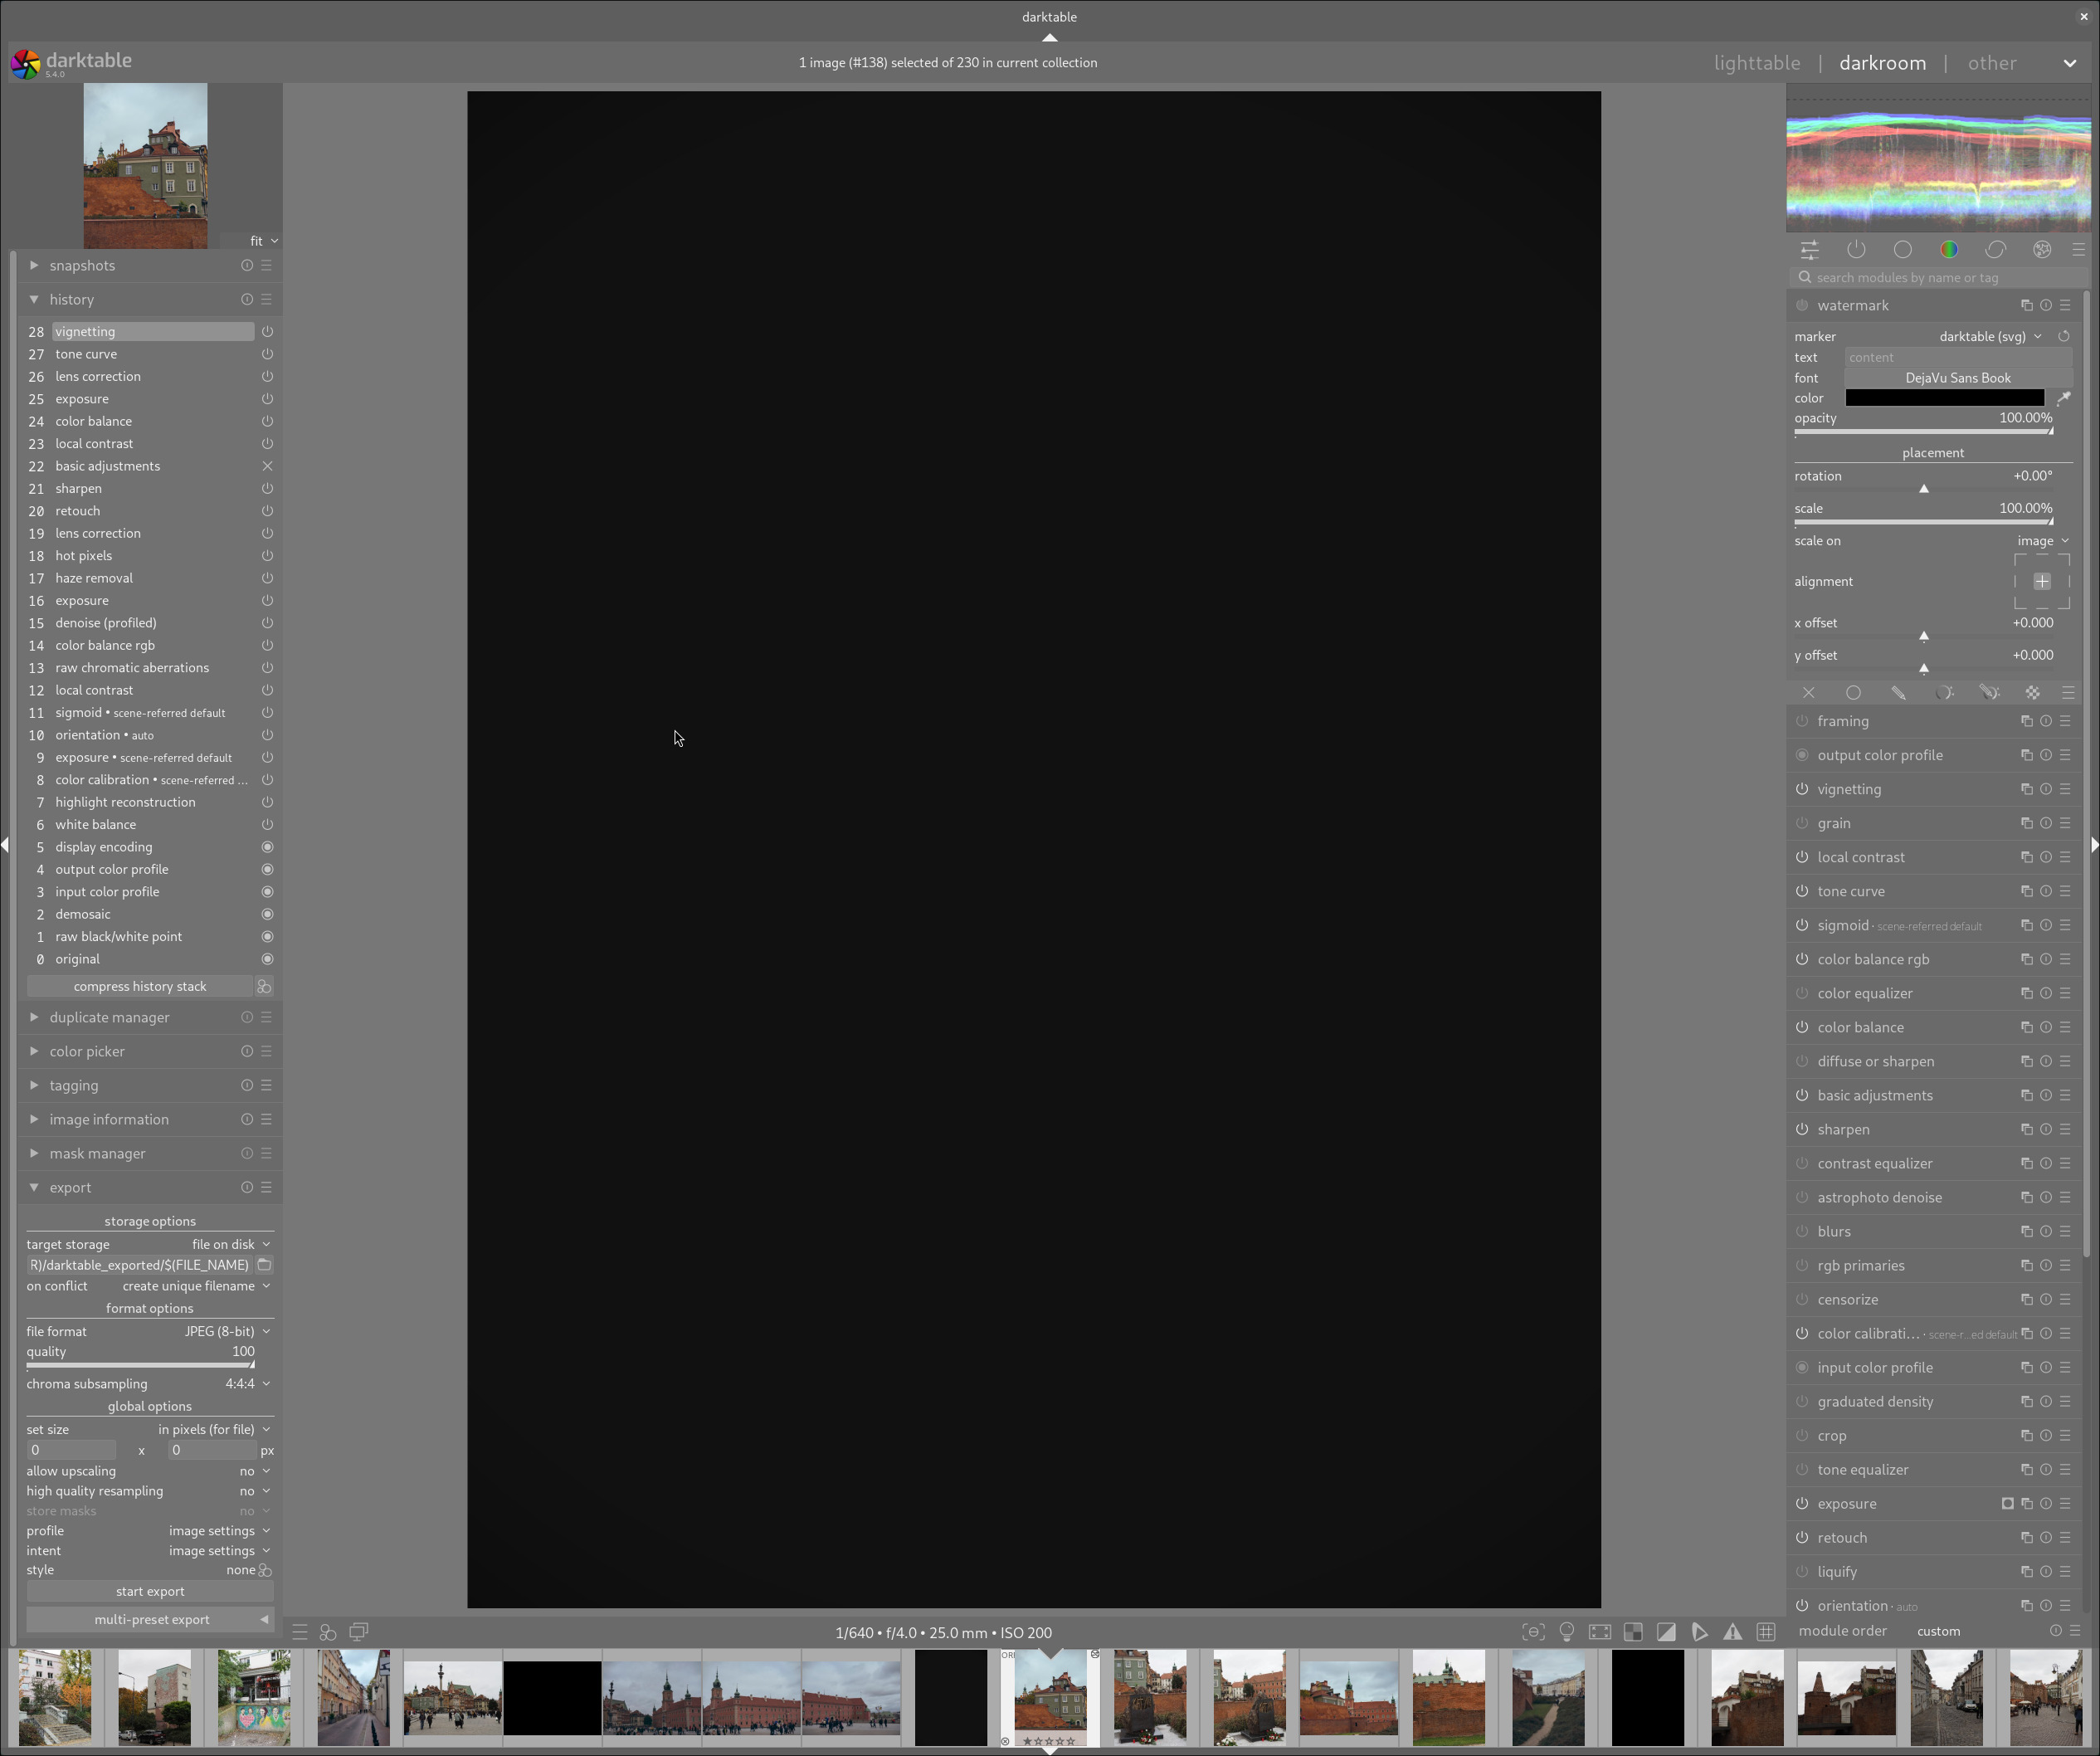
I came to realize that this is because of either missing styles and/or LUTs. I received a notice ONCE upon loading a photo in darkroom, where it notified me that a LUT was missing, but I have not been able to reproduce that.
Unfortunately, exporting all styles from my Macbook causes DT to crash. As such, I dumped all styles from DB and imported to DT on my Linux machine. This appears to have worked fine, I can apply various styles and see that they are taking effect. Comparing style paths shows no difference, so I have a decent level of confidence that the transfer went off without a hitch. I also have come to conclusion that styles, being presets for built-in configuration settings, wouldn’t really have this effect if missing - the configuration options are the things that matter and I see those contained within the XMP files.
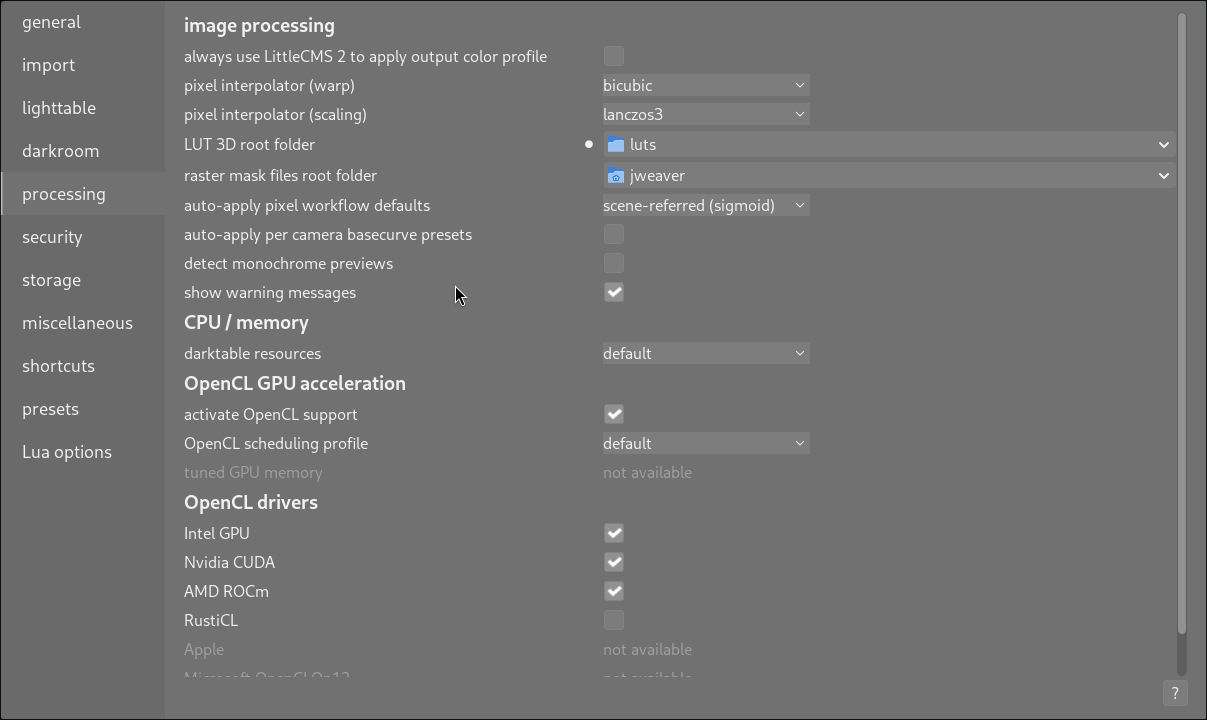
As such, I discerned that missing LUTs is probably the culprit. Accordingly, I tarred and moved the LUTs folder to the desktop, setting it (as it was on the Macbook) to the specific folder containing the LUTs.
However, the images remain black, even after an application restart.
I am curious if there is a happy path to take to restore the images with the edits that I had made earlier on the Macbook. Clearing edits from photos returns them to view, however that is less than ideal for obvious reasons.
If anyone has ideas, I am all ears ![]() . If there are alternative approaches (for example, being able to discern the LUT applied to each photo for manual re-implementation), I’d be happy to run that down - I am very comfortable with the terminal. In fact, I did try running that down, but it doesn’t appear the .xmp files contain reference to the LUT used, only that a LUT was applied (or at least, that’s what I am assuming).
. If there are alternative approaches (for example, being able to discern the LUT applied to each photo for manual re-implementation), I’d be happy to run that down - I am very comfortable with the terminal. In fact, I did try running that down, but it doesn’t appear the .xmp files contain reference to the LUT used, only that a LUT was applied (or at least, that’s what I am assuming).
↪ rg lut -c
08-innsbruck/PA314840.ORF.xmp:1
01-warsaw/PA120298.ORF.xmp:1
11-venice/PB075625.ORF.xmp:2
11-venice/PB086203.ORF.xmp:1
...

↪ cat 08-innsbruck/PA314840.ORF.xmp | grep -i lut
   darktable:iop_order_list="rawprepare,0,invert,0,temperature,0,rasterfile,0,highlights,0,cacorrect,0,hotpixels,0,rawdenoise,0,demosaic,0,denoiseprofile,0,bilateral,0,rotatepixels,0,scalepixels,0,lens,0,hazeremoval,0,cacorrectrgb,0,ashift,0,overlay,0,enlargecanvas,0,flip,0,clipping,0,liquify,0,spots,0,retouch,0,exposure,0,mask_manager,0,tonemap,0,toneequal,0,crop,0,graduatednd,0,profile_gamma,0,equalizer,0,colorin,0,channelmixerrgb,0,censorize,0,primaries,0,negadoctor,0,blurs,0,nlmeans,0,colorchecker,0,defringe,0,atrous,0,lowpass,0,highpass,0,sharpen,0,lut3d,0,colortransfer,0,colormapping,0,channelmixer,0,basicadj,0,diffuse,0,colorbalance,0,colorequal,0,colorbalancergb,0,rgbcurve,0,rgblevels,0,basecurve,0,filmic,0,sigmoid,0,agx,0,filmicrgb,0,colisa,0,tonecurve,0,levels,0,shadhi,0,zonesystem,0,globaltonemap,0,relight,0,bilat,0,colorcorrection,0,colorcontrast,0,velvia,0,vibrance,0,colorzones,0,bloom,0,colorize,0,lowlight,0,monochrome,0,grain,0,soften,0,splittoning,0,vignette,0,colorreconstruct,0,colorout,0,clahe,0,finalscale,0,overexposed,0,rawoverexposed,0,dither,0,borders,0,watermark,0,gamma,0"
...
All told I think there are only about 50 impacted photos, so this isn’t the end of the world:
↪ rg lut -c | wc -l
50
However, I suspect I am being dense and there is an easy solution at hand that I am just unaware of - maybe? ![]()
Thanks!
Jonathan