Hi,
I’ve added some preliminary support for “raster masks” (using darktable terminology) in ART. There is no documentation, but hopefully the usage is clear from the video below:
The only note is that only masks with a name can be used as “raster masks”, and (of course) modules/regions coming earlier in the pipeline cannot reference masks defined later.
If you want to try this out, they are available in the latest nightly builds
I think the raster mask is a great idea. Thanks for taking care of it. I tried it and I see a problem.
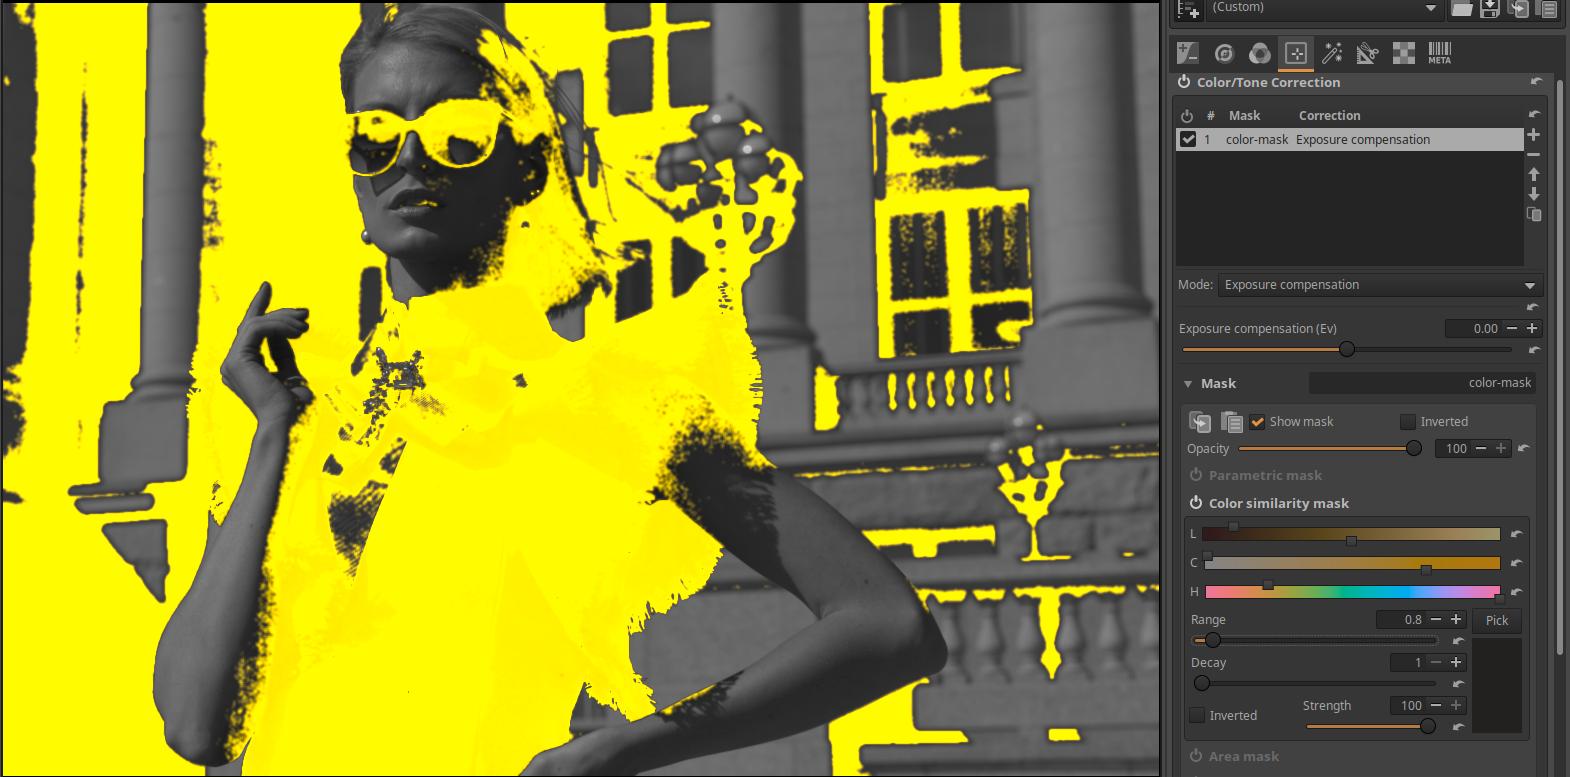
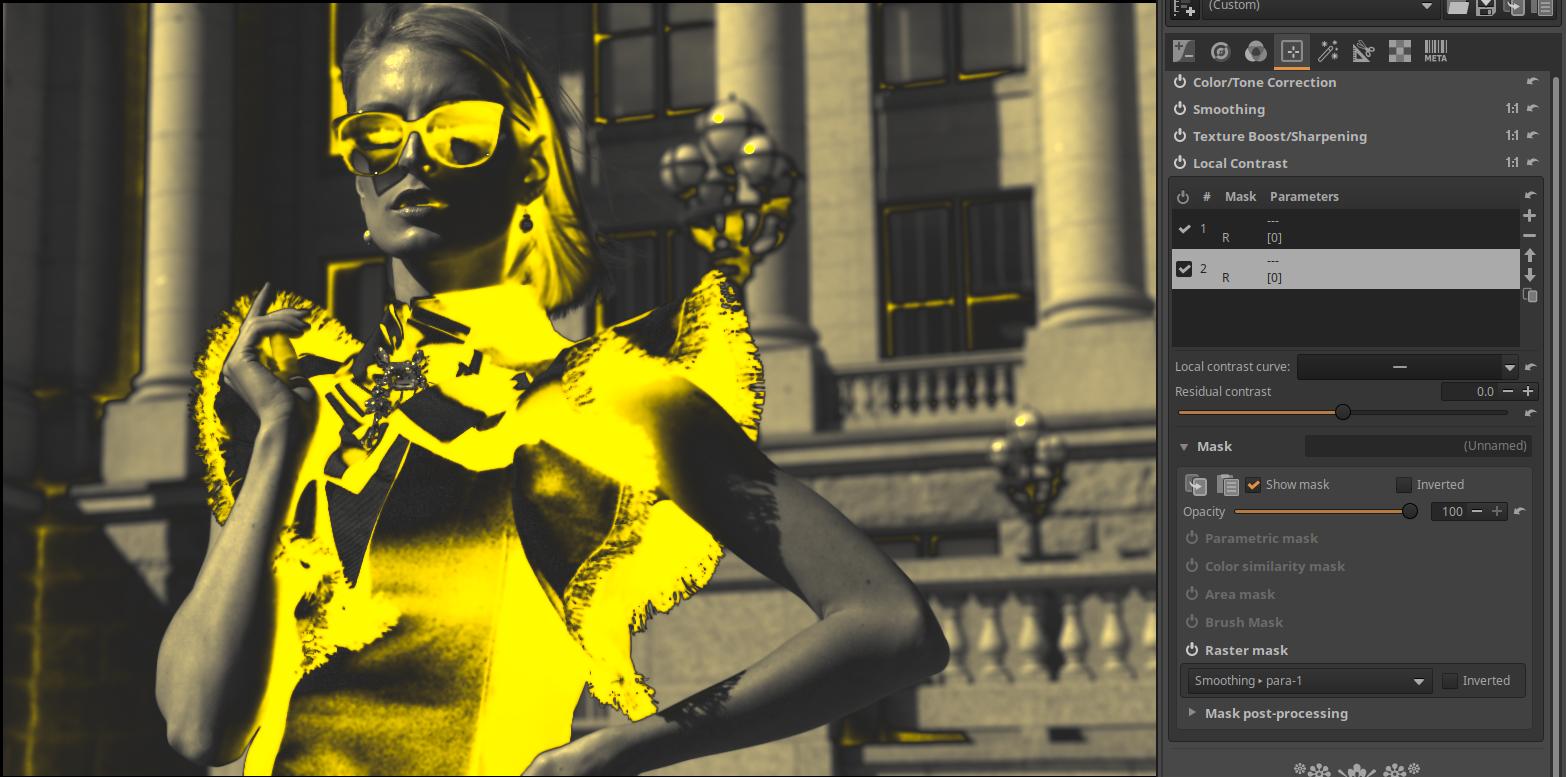
I opened an unedited raw file. In the Color/Tone Correction tool, I created a Color Similarity mask for the model’s dress, which I corrected with the Range slider.
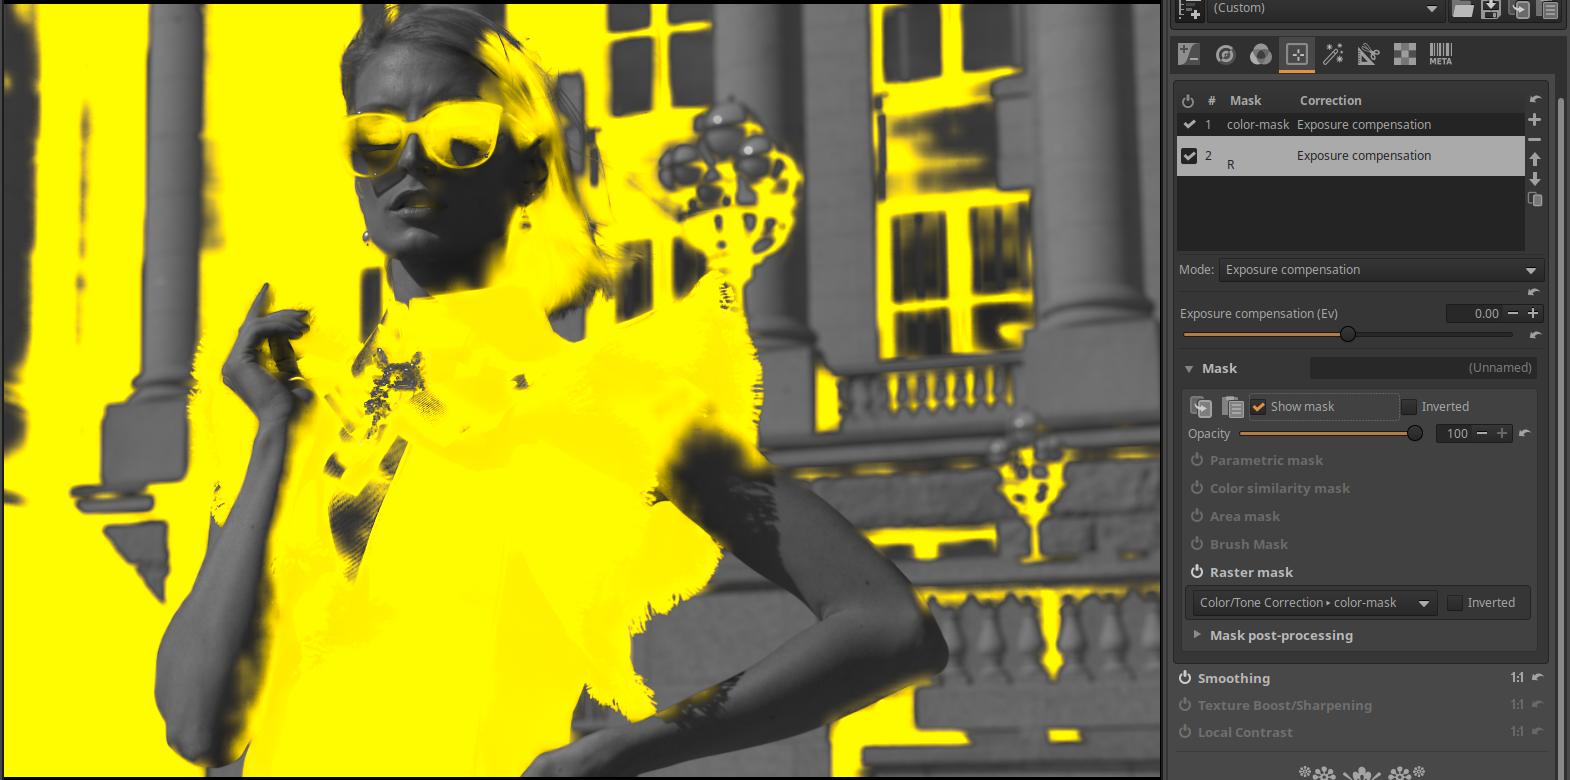
I used the mask as a raster mask in the Smoothing tool. This can be seen in the picture above. The raster mask is much more blurred than the original, even though I haven’t changed anything.
I tried what the raster mask looks like in the Color/Tone Correction tool, on a new Correction layer. It’s just as blurry there. That’s what you see in the picture above.
Thanks for testing! I am aware of the behaviour you describe, and I still have to decide if it’s a bug or a feature
More seriously, this should be easy to change, I can see why folks might find it surprising.
On an unrelated note, also the name “raster mask” is not final yet, I’m thinking that something like “linked mask” would be more descriptive. I’m open to suggestions though.
Btw I also found a couple of other bugs in applying raster masks in the preview, so don’t be surprised if you notice something strange I’ll take care of those in the next days and post an update when done
Thanks for the answer. I was surprised by this behavior because my understanding is that a raster mask is a pixel-for-pixel copy of the original mask, so it should be like the original. I was probably wrong.
I’m waiting for the new version.
Conceptually yes, but internally ART sometimes uses slightly different masks for different channels of the image (differing only in the amount of blur they get), that’s why you can get such mismatches. I have reworked the logic now however, let’s see if it’s better. (there are new nightly builds available)
When I first saw the name “raster masks,” I thought it was a feature that allowed user to import a pixel image file as a mask.
However, it actually allows user to reuse masks between editing modules.
I’m considering adding that as well – let’s see.
But your comment gave me more evidence that the name is confusing – I’ll switch to “Linked mask”, I think it’s clearer.
Quite often I find myself needing to perform both color correction and detail-based operations on the same area. In the past I’ve copied and pasted masks but that’s occasionally been a bit hit-and-miss, with variations like what was posted above but often more pronounced. This new method is very straightforward.
It seems to work well in the Smoothing tool now.
In the Local Contrast and Texture boost/Sharpening tool, we don’t get quite the same mask yet.
Finally, an observation: In the four tools of Local editing, the brightness of the B&W image behind the mask is not the same. It is lightest in the Local contrast tool and significantly darker in the other three tools. A brighter image corresponds better to a color preview.
As I (tried to, but probably failed ) explained above, there might not be a single mask to pick from. This is in fact the case if the source mask is the Color/Tone correction tool (which is probably the most common case, since it’s the one coming earlier in the pipeline). The other 3 tools use only one mask, but color/tone correction produces two. Which one is picked is decided by the downstream tool, according to its logic. I could probably force all of them to pick the same mask (and make that mask the same that is used for preview in Color/Tone correction), but I’m not sure it would be an improvement over the current behaviour. I am open to discussing this though.
If the source mask is the Smoothing tool, then there is no problem.
I found that the Smoothing tool takes the mask well from the Color/Tone correction tool. We can take advantage of this.
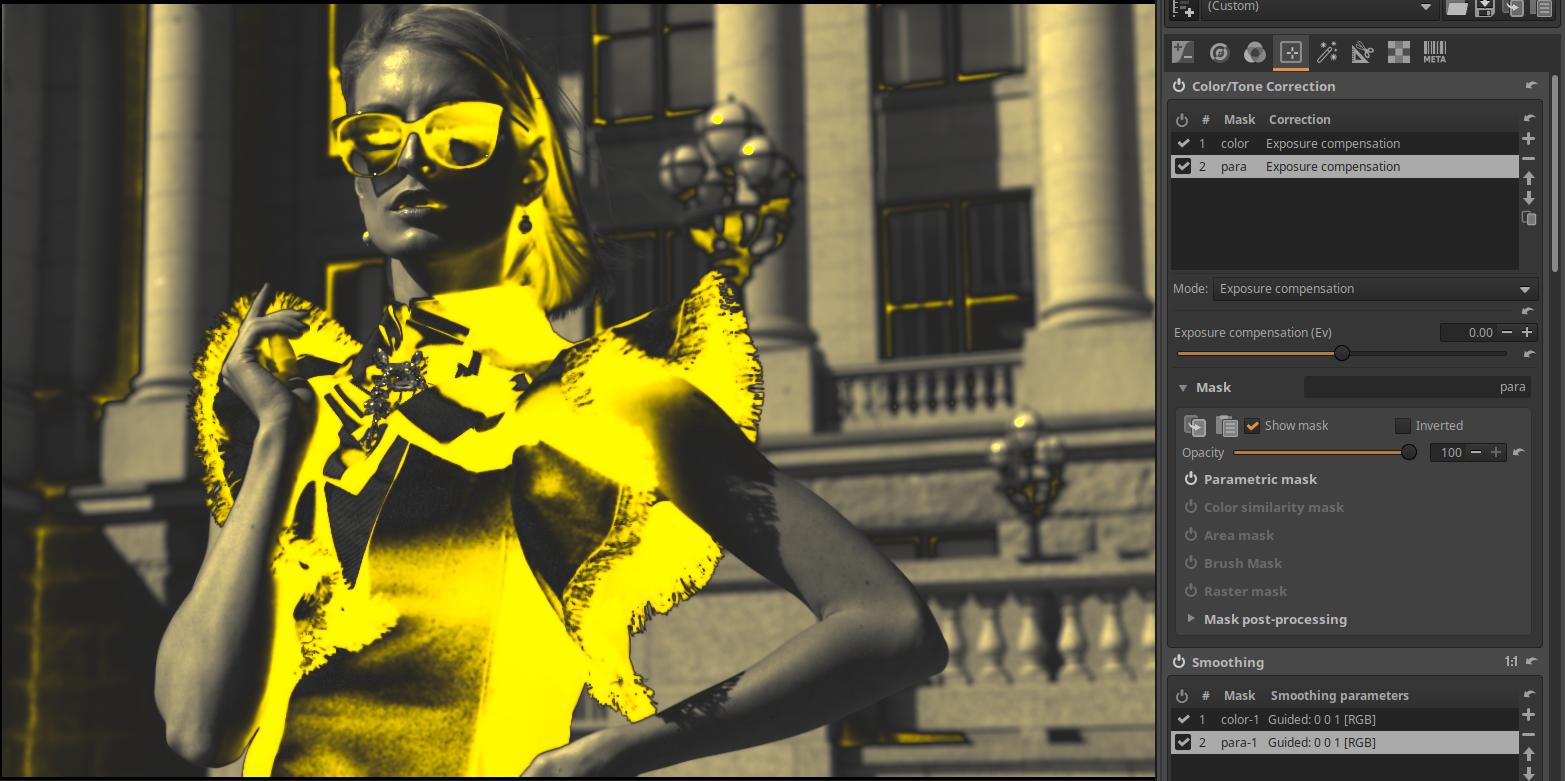
3 In the Color/Tone correction tool, you must create the masks to be linked to the other tools.
These must be linked to the Smoothing tool, they will be the same as those shown in the Color/Tone correction tool. There is only one mask left in the Smoothing tool.
We link the masks linked to the Smoothing tool to the other tools. In my experience, all masks will be the same in the preview image.
If I wasn’t clear, I’ll write more about it later. But now I have to go.
Meanwhile, I realized that I only had to leave in an hour.
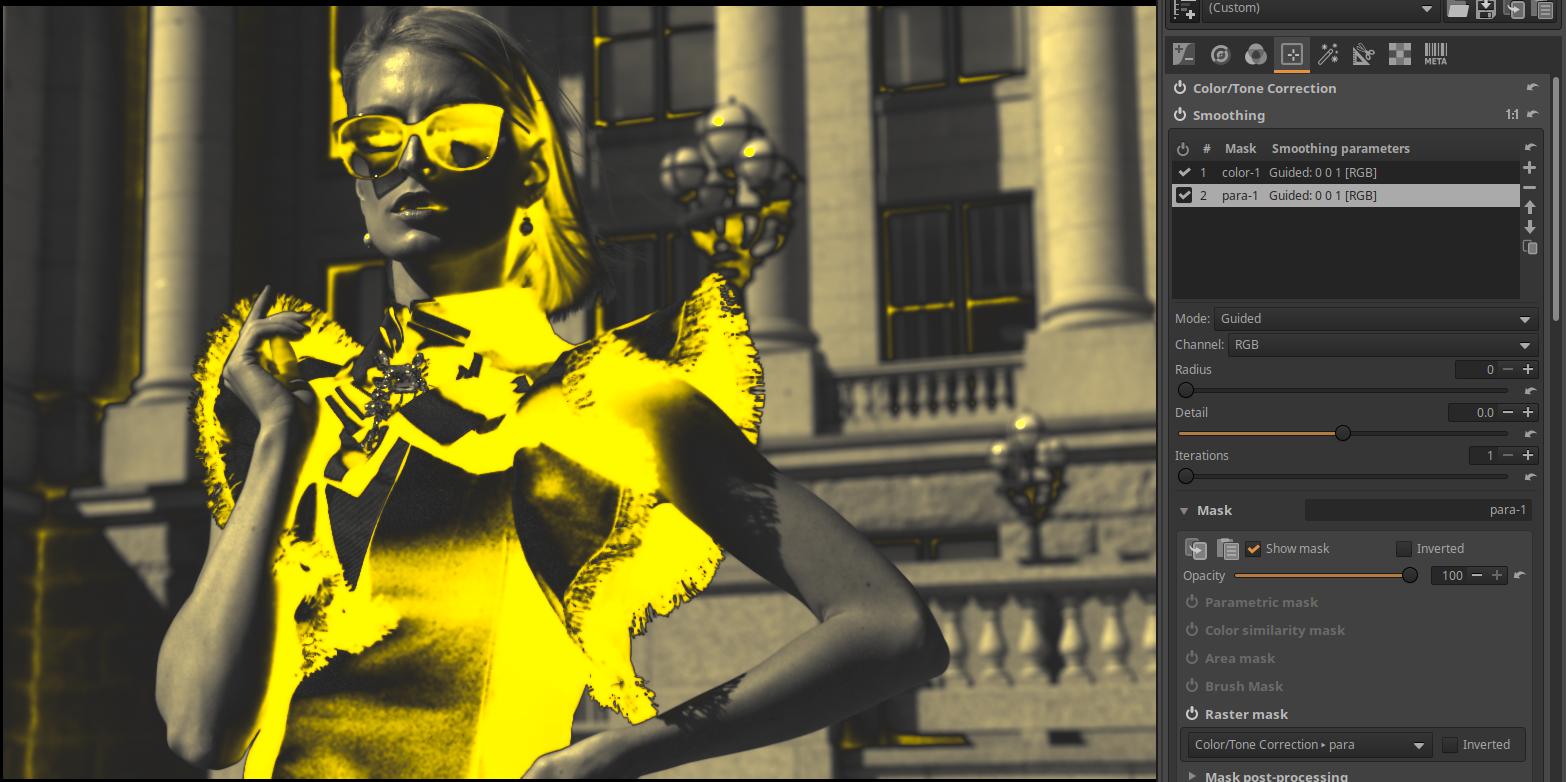
It’s already available a bridging solution that I think works well. I take advantage of the fact that the Smoothing tool takes the masks well from the Color/Tone correction tool by linking. There is only one mask left in the Smoothing tool, and if you link from there to the other tools, the mask will not change.
In the Smoothing tool, I linked the color and para masks from the Color/Tone correction tool, which were named color-1 and para-1. I link the color-1 and para-1 masks from the Smoothing tool to the other tools.
I would even like to add that “Color” is the Color Similarity mask and “para” is a Parametric mask. I used two separate correction layers, but it works the same with one correction layer.
I am still undecided about the behaviour, but regardless I must admit I don’t understand why this bothers you so much… Did you ever notice that two masks were used under the hood in the colour/tone correction tool? If not, why is it a problem that the mask is slightly more blurred in the other tools, where having a pixel-perfect match is even less of a problem? I would be interested to know more about your use case, maybe there’s something I have overlooked.