That’s a good idea. Too late for 2.6, but a good idea nonetheless.
1 Like
- How much work would it be to do it now?
- can we introduce it later without breaking things?
- less than 1 h
- it’s just a UI link between 3 sliders, so yes, the parameters won’t change.
so do it now?
Thinking more about it, no special mode is needed.
- When grey value is changed black and white values should always be recalculated accordingly (As a matter of fact their old values are always meaningless, because referring to the previous grey value).
- Black and white can be adjusted individually as of now.
I’ve made the change on my local copy.
I can confirm that once black and white points are set the grey slider balances nicely the image.
EDIT: I’ve made a pull request in case you wanted to validate the change.
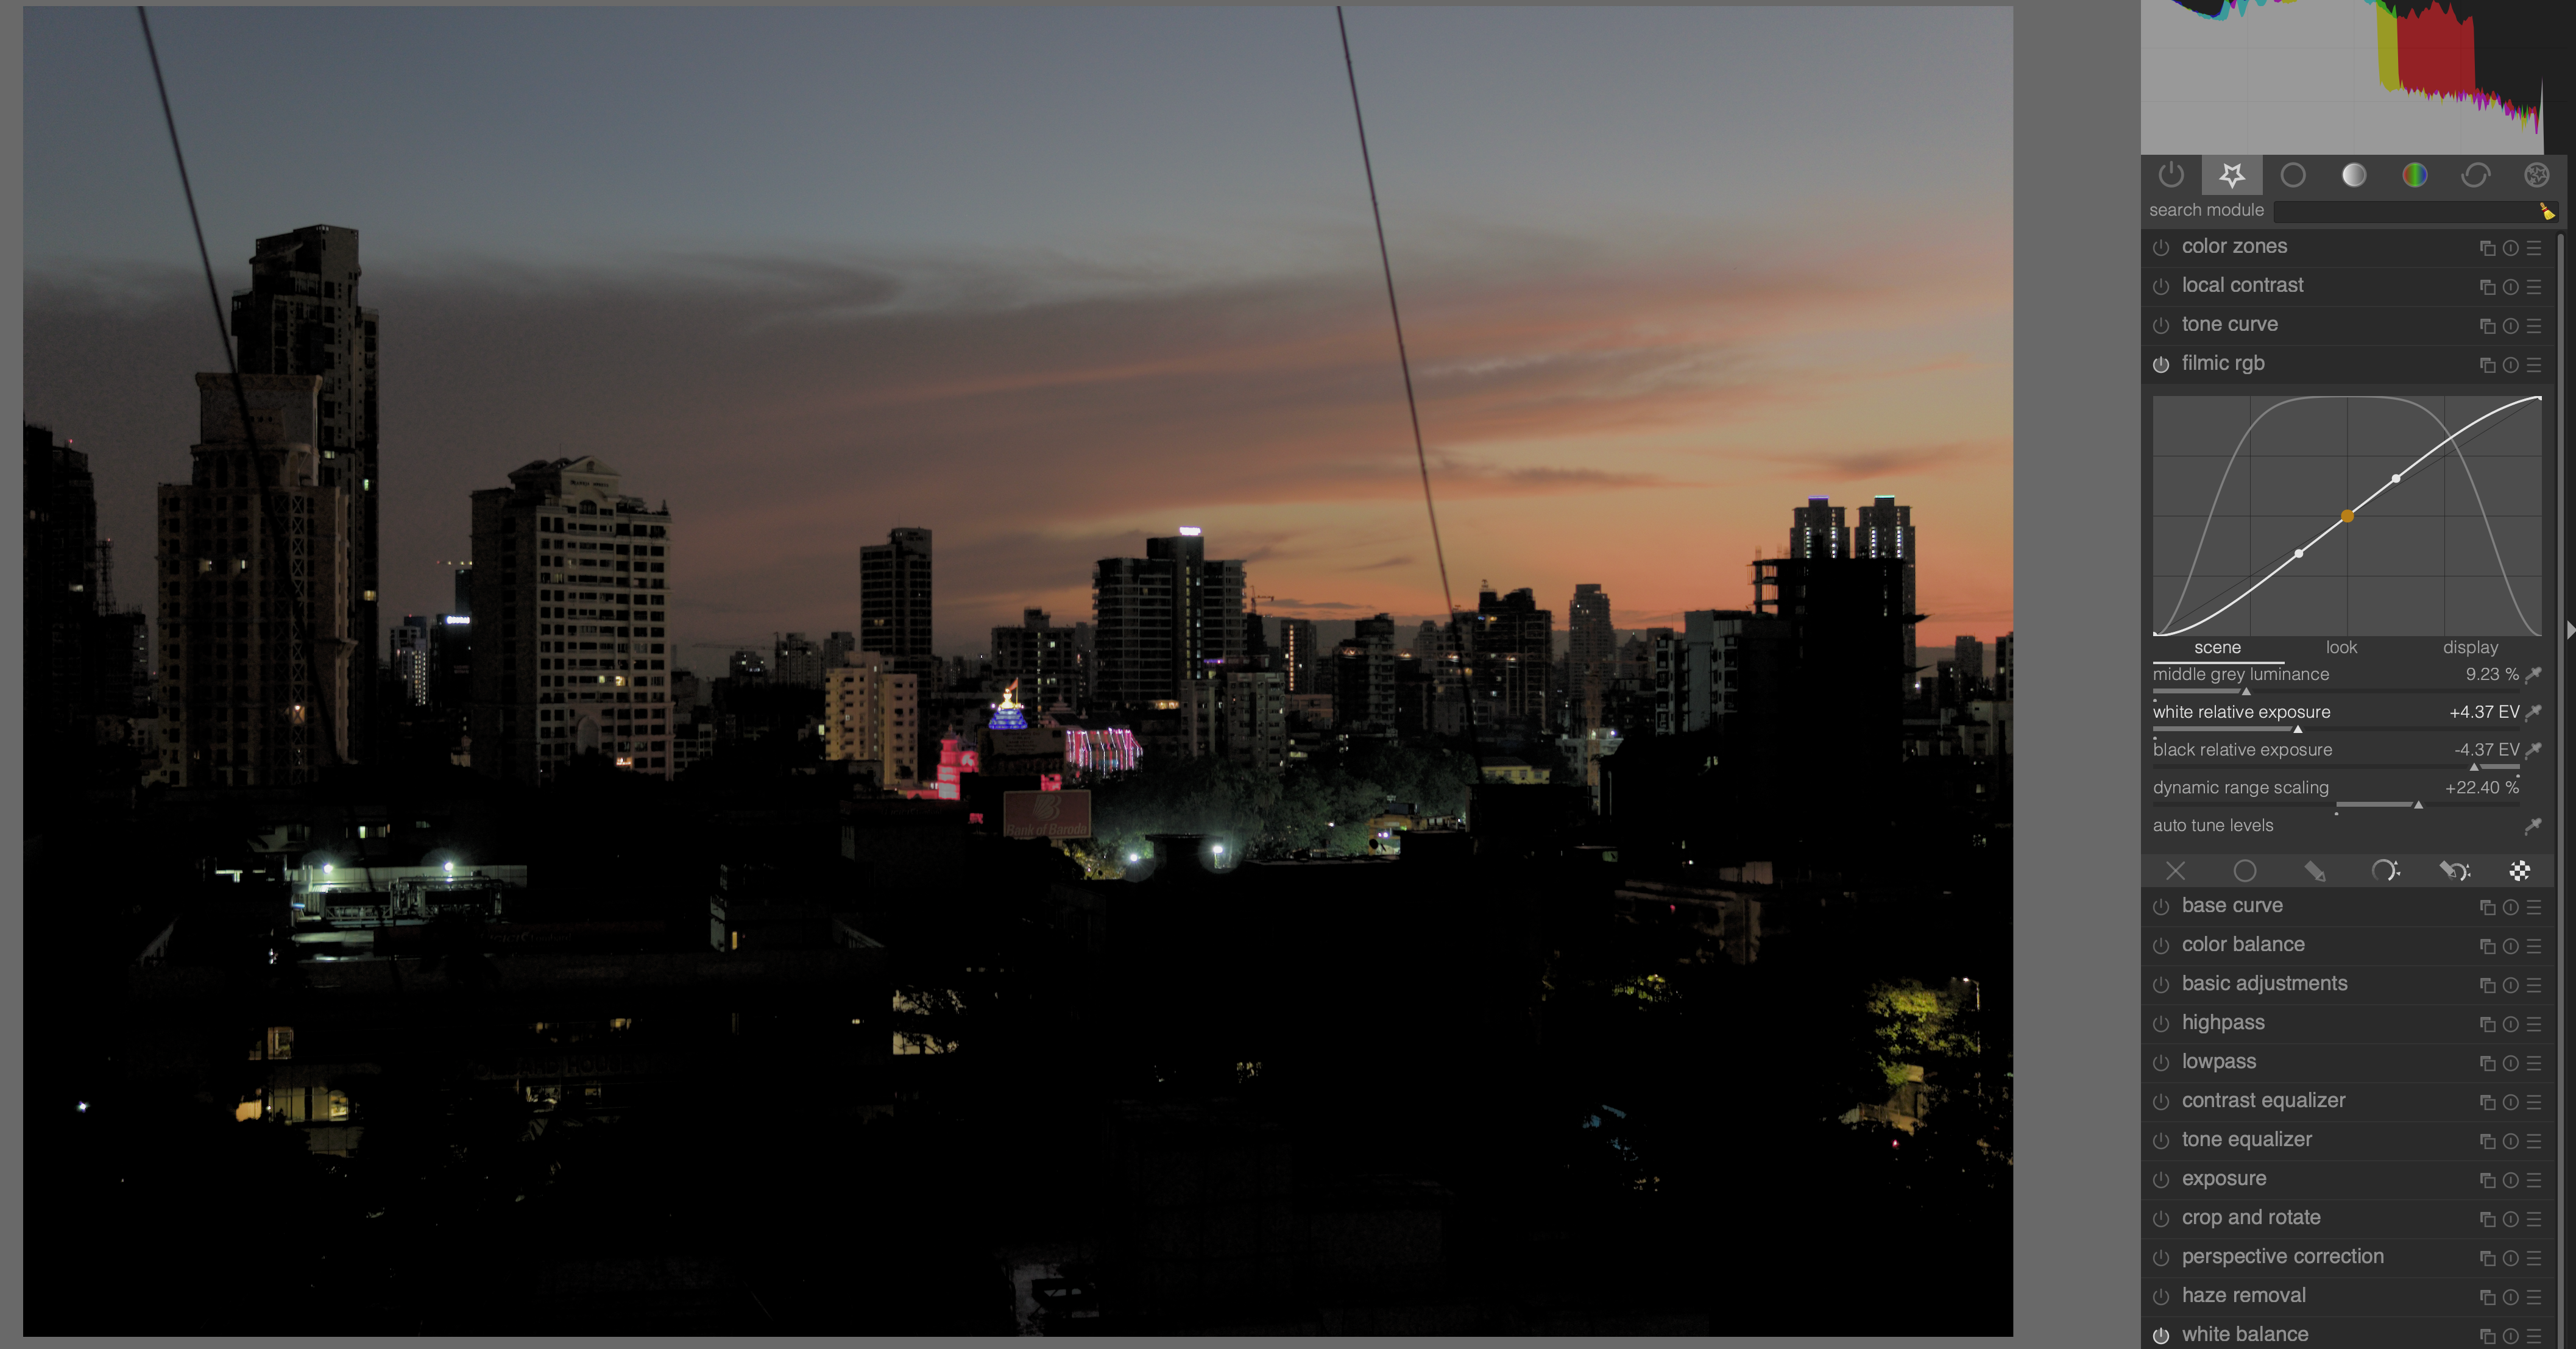
I do not work on HDR images, but sometimes I have images where histogram is on the edges letting the middle part a bit lost somehow, even with contrast lowered to 1.
I was wondering if it could be interesting to have contrast values below 1, a kind of global tone mapping somehow…

Having contrast < 1 (that is, the slope of the curve) has no justification since the input has already been lifted greatly by the log. Besides, it has 90 % of chances to make the splines go crazy (overshoot and cusps).
Finally got to try filmic. Found the shaper section to be enough for my purposes. auto tune didn’t perform well, but I think it was mentioned that it doesn’t perform under certain conditions.
I found myself using the dropper tool only for middle grey and then sliders for the white and black. Oftentimes, going to toggle the dropper would accidentally move the slider to its extreme right because the padding between the slider and dropper is negligible. Unsure if anything could be done about that.
Something strange see the sequence of images and focus on the Red lighted structure in the middle.
sequence
1 No Curves
2 Sony alpha like base curve
3 no Base curve, default Filmic rgb ON (Max RGB)
4 no Base curve, default Filmic rgb ON (Luminance Y)
5 no Base curve, default Filmic rgb ON (no)
Why such desaturation? In maxRGB full saturation also will not give the colour back
.
My 2 cents, please make the default value such that its a good starting point from where further tweaking improves the result


I’d want #5, where there is no highlight clipping.
Define “improve” for every camera at every exposure level.
Filmic is supposed to give you a flexible way to adapt the LDR tone rendition to whatever camera × exposure settings × dynamic range you used, it’s hard to have a one-size-fits-all base setting.
Because white doesn’t have a colour. White is white. So you get to define what exposure level is assumed to be white (white relative exposure, in module – relative to the middle grey value), and filmic will desaturate progressively near that value to avoid gamut clipping and blend smoothly the highlights into the rest of the dynamic range (otherwise, digital signals clip hard).
You can remove some of the desaturation by increasing the “extreme luminance saturation” setting, in the look tab. But if your 100% luminance (==clipping threshold) matches an area that is supposed to be saturated (coloured lighting), you will need to push the white exposure to allow more room to highlights, because no screen will ever be able to display a 100% luminance that has a deep saturation as well. It’s really more an issue with basic digital imagery concepts here, that filmic is underlying, not an issue with fimic itself.
EDIT/ANNOUNCEMENT: For new edits in darktable 3.0, the base curve (with default camera presets) has been moved to a default place in the pipe line where it is no longer a danger for the colour linearity, and also has colour preservation options. So you can chose between a camera-dependent reverse-engineered preset (base curve approach) or a fully parametric and flexible setting (filmic approach) depending how much control vs. how much working time you want.
7 Likes
Thanks for the advice will try it. it is really great that the developer is there to help you understand this very capable (once you know the provided controls and what effects it can have on your image) module.
@anon41087856 The 3.0 basecurve indeed improved a lot, thanks for this background information!
2 Likes
@anon41087856 Great module, thank you for the effort and results.
It seems a good module when you need to compress the dynamic range (almost always at the end, as your output media usually has less dynamic range that your capture image) and have a look similar to what was done on film.
I have some doubts about using it in other kind of photos were you do not want to keep the exact look of the original image (you want to expand shadows or lights in an image which quite a wide dynamic range) as the module will be fighting against your previous work of expanding that ranges.
I have doubts when applying it to an image with a small dynamic range where no shadow or light compression is needed, and with scenes that exceed the dynamic range of your camera and you decide to sacrify lights (or just there are light clipping by mistake).
But I am not confidence enough with filmic nor have tested it with that kind of photos enough to expose that problems or doubts with clarity. I will ask later about it.
I have the impression that it does too much things in one module.
But in well exposed images and were your main interests are mid tones it seems to do an excellent job.
for now, just one question:
In filmic what is shown in the horizontal axis, is it EVs or linear light intensity?
I suppose it is EVs (even if out input is still linear).
I guess that because the base curve is quite a different curve with a clear logarithmic behaviour, while the filmic curve is linear in the midtones.
It won’t make too much sense to use a linear curve when we are wanting to compress the range heavily and simulate human perception and redistribute the available “buckets”.
But it is suppose to be just a curve of output against input and in that sense is confusing, as the input is still linear.
Is it not the filmic aim to convert the linear input to a perceptual logarithmic output or some kind of gamma?
May be I am missing the point and the gamma is not applied until the output profile, and is still linear in the midtones, just reducing the contrast of lights and shadows to fit the output dinamic range.
But it is not clear for me what that output device is the screen? the printer? your export file?
In darktable you have all that output devices at the same time, each with different profiles and dynamic range.
Should you change your filmic settings each time you print, save your file, etc?
How do you know which is the dynamic range that filmic is considering as output?
If you don‘t need filmic, just don‘t use it ![]()
it‘s like several further tools: if the exposure is fine, you don‘t need to apply exposure correction; if a picture is tack sharp you won’t apply additional sharpening.
The only mandatory module are the modules you cant get rid of when using darktable …
2 Likes
You are right but then you wpuld need other way of compressing the tonal range.
Usually i use curves to expand dr contrast of light or shadows and blending modes but blending modes do not work in linear spaces the same way.
I have not tried filmic enough nor developed enough confidence with it, that is why i have said that i have doubts.
And wan to dig in when filmic does its job and when it is working against your objective.
you should use filmic in the beginning of your processing (it is in that spot in the pipeline too) not at the end. you normally replace the basecurve module with it.
Yes I know.
But in the pipeline it is not at the beginning, it is at the end, last step before output profile, and I disabled base curve.
I have to improve my use of it, but it gets good results when your objective is to keep midtones and you prefer sacrify deep lights and shadows.
Not so sure it works when there are clipped lights or when the input dynamic range is small.
It’s at the end of the linear processing pipe. But from an workflow prospective it makes sense to enable it after an initial exposure correction. in fact most modules arent editing the output of filmic, they affect the input filmic operates on.
1 Like