I was thinking more of the sliders used for fine tuning so that the tools that make the biggest difference are clearly visible.
1 Like
Hello @jdc
Thanks a lot to you and the other developers for releasing this option.
At present, in my view, it is much better to leave it in a separate tab, as it is now, in order to make it more visible and therefore much more tested.
Currently, I am still learning how to use it properly but my initial results are already pretty good to my tastes.
I am testing RawTherapee on Windows 10 (by way of yesterday nightly’s build: RawTherapee_dev_5.8-2149-g5d4d637cf_20200617)
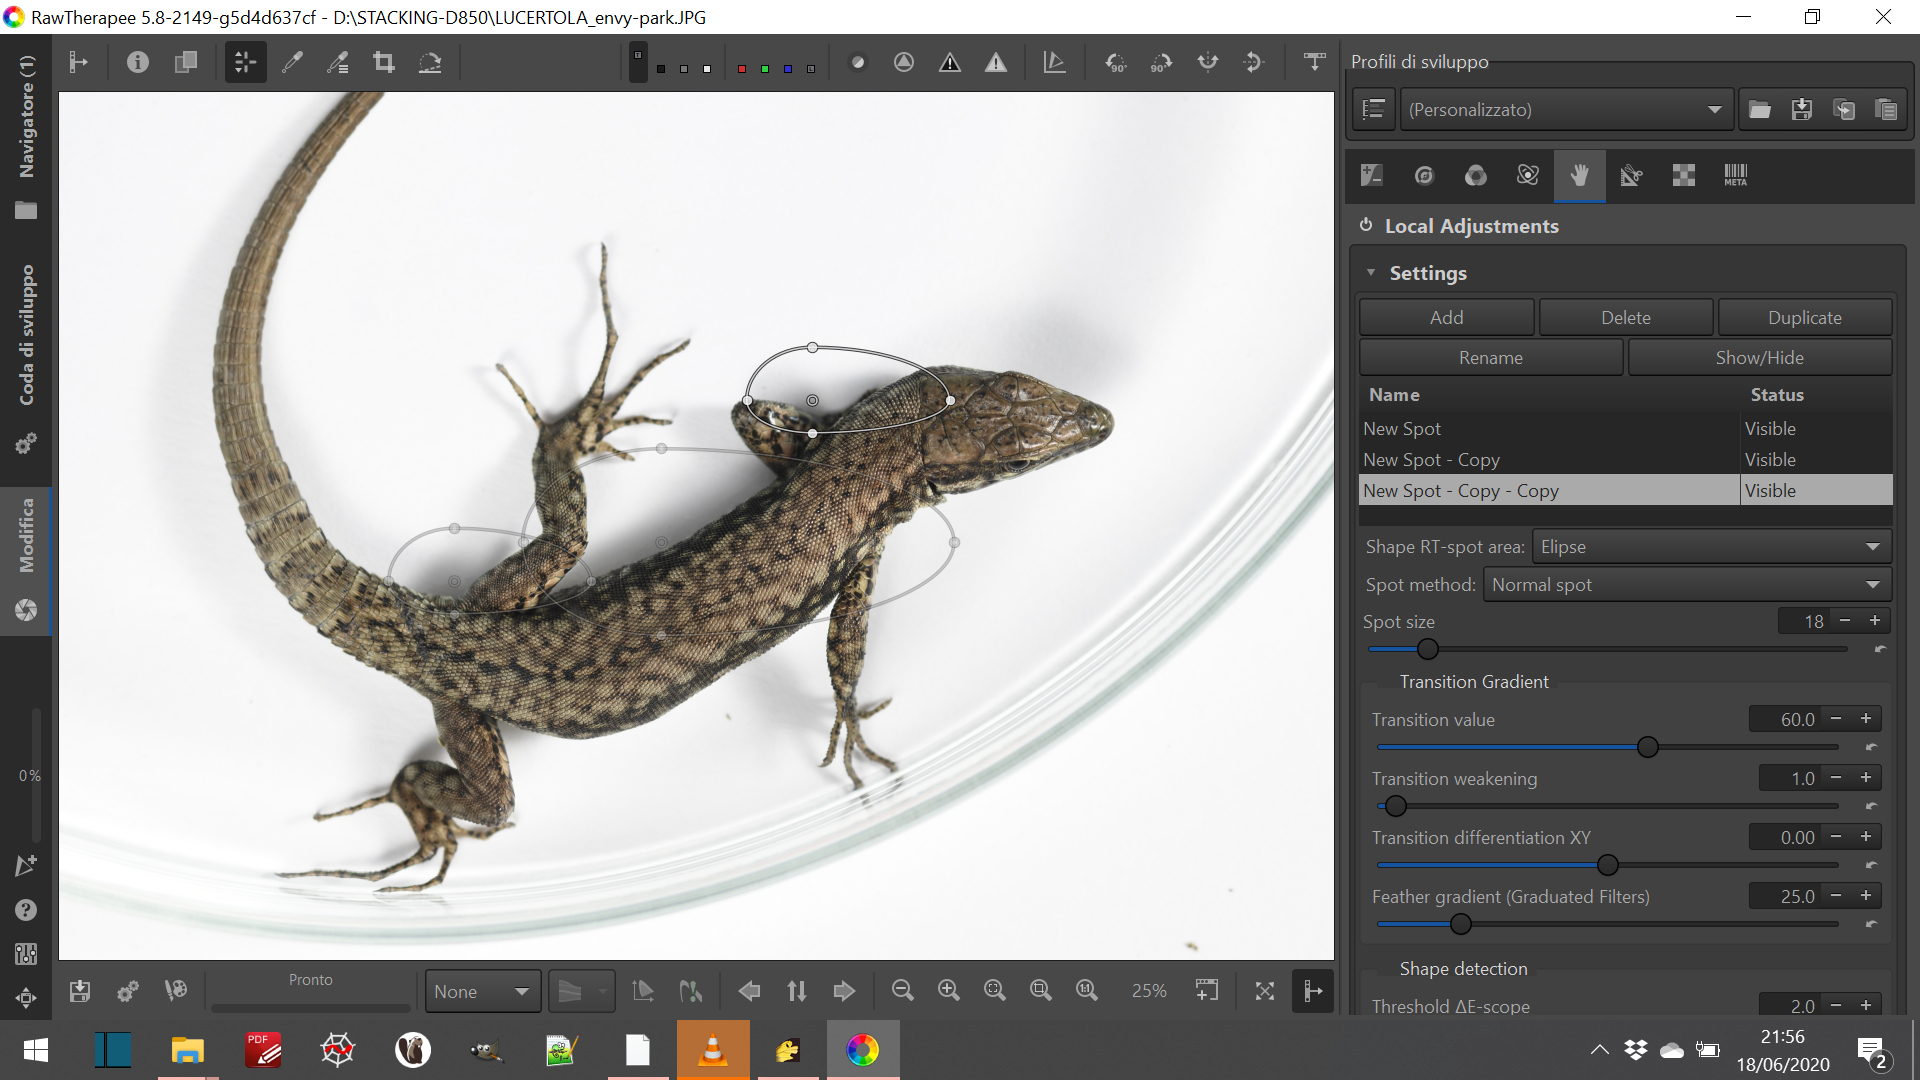
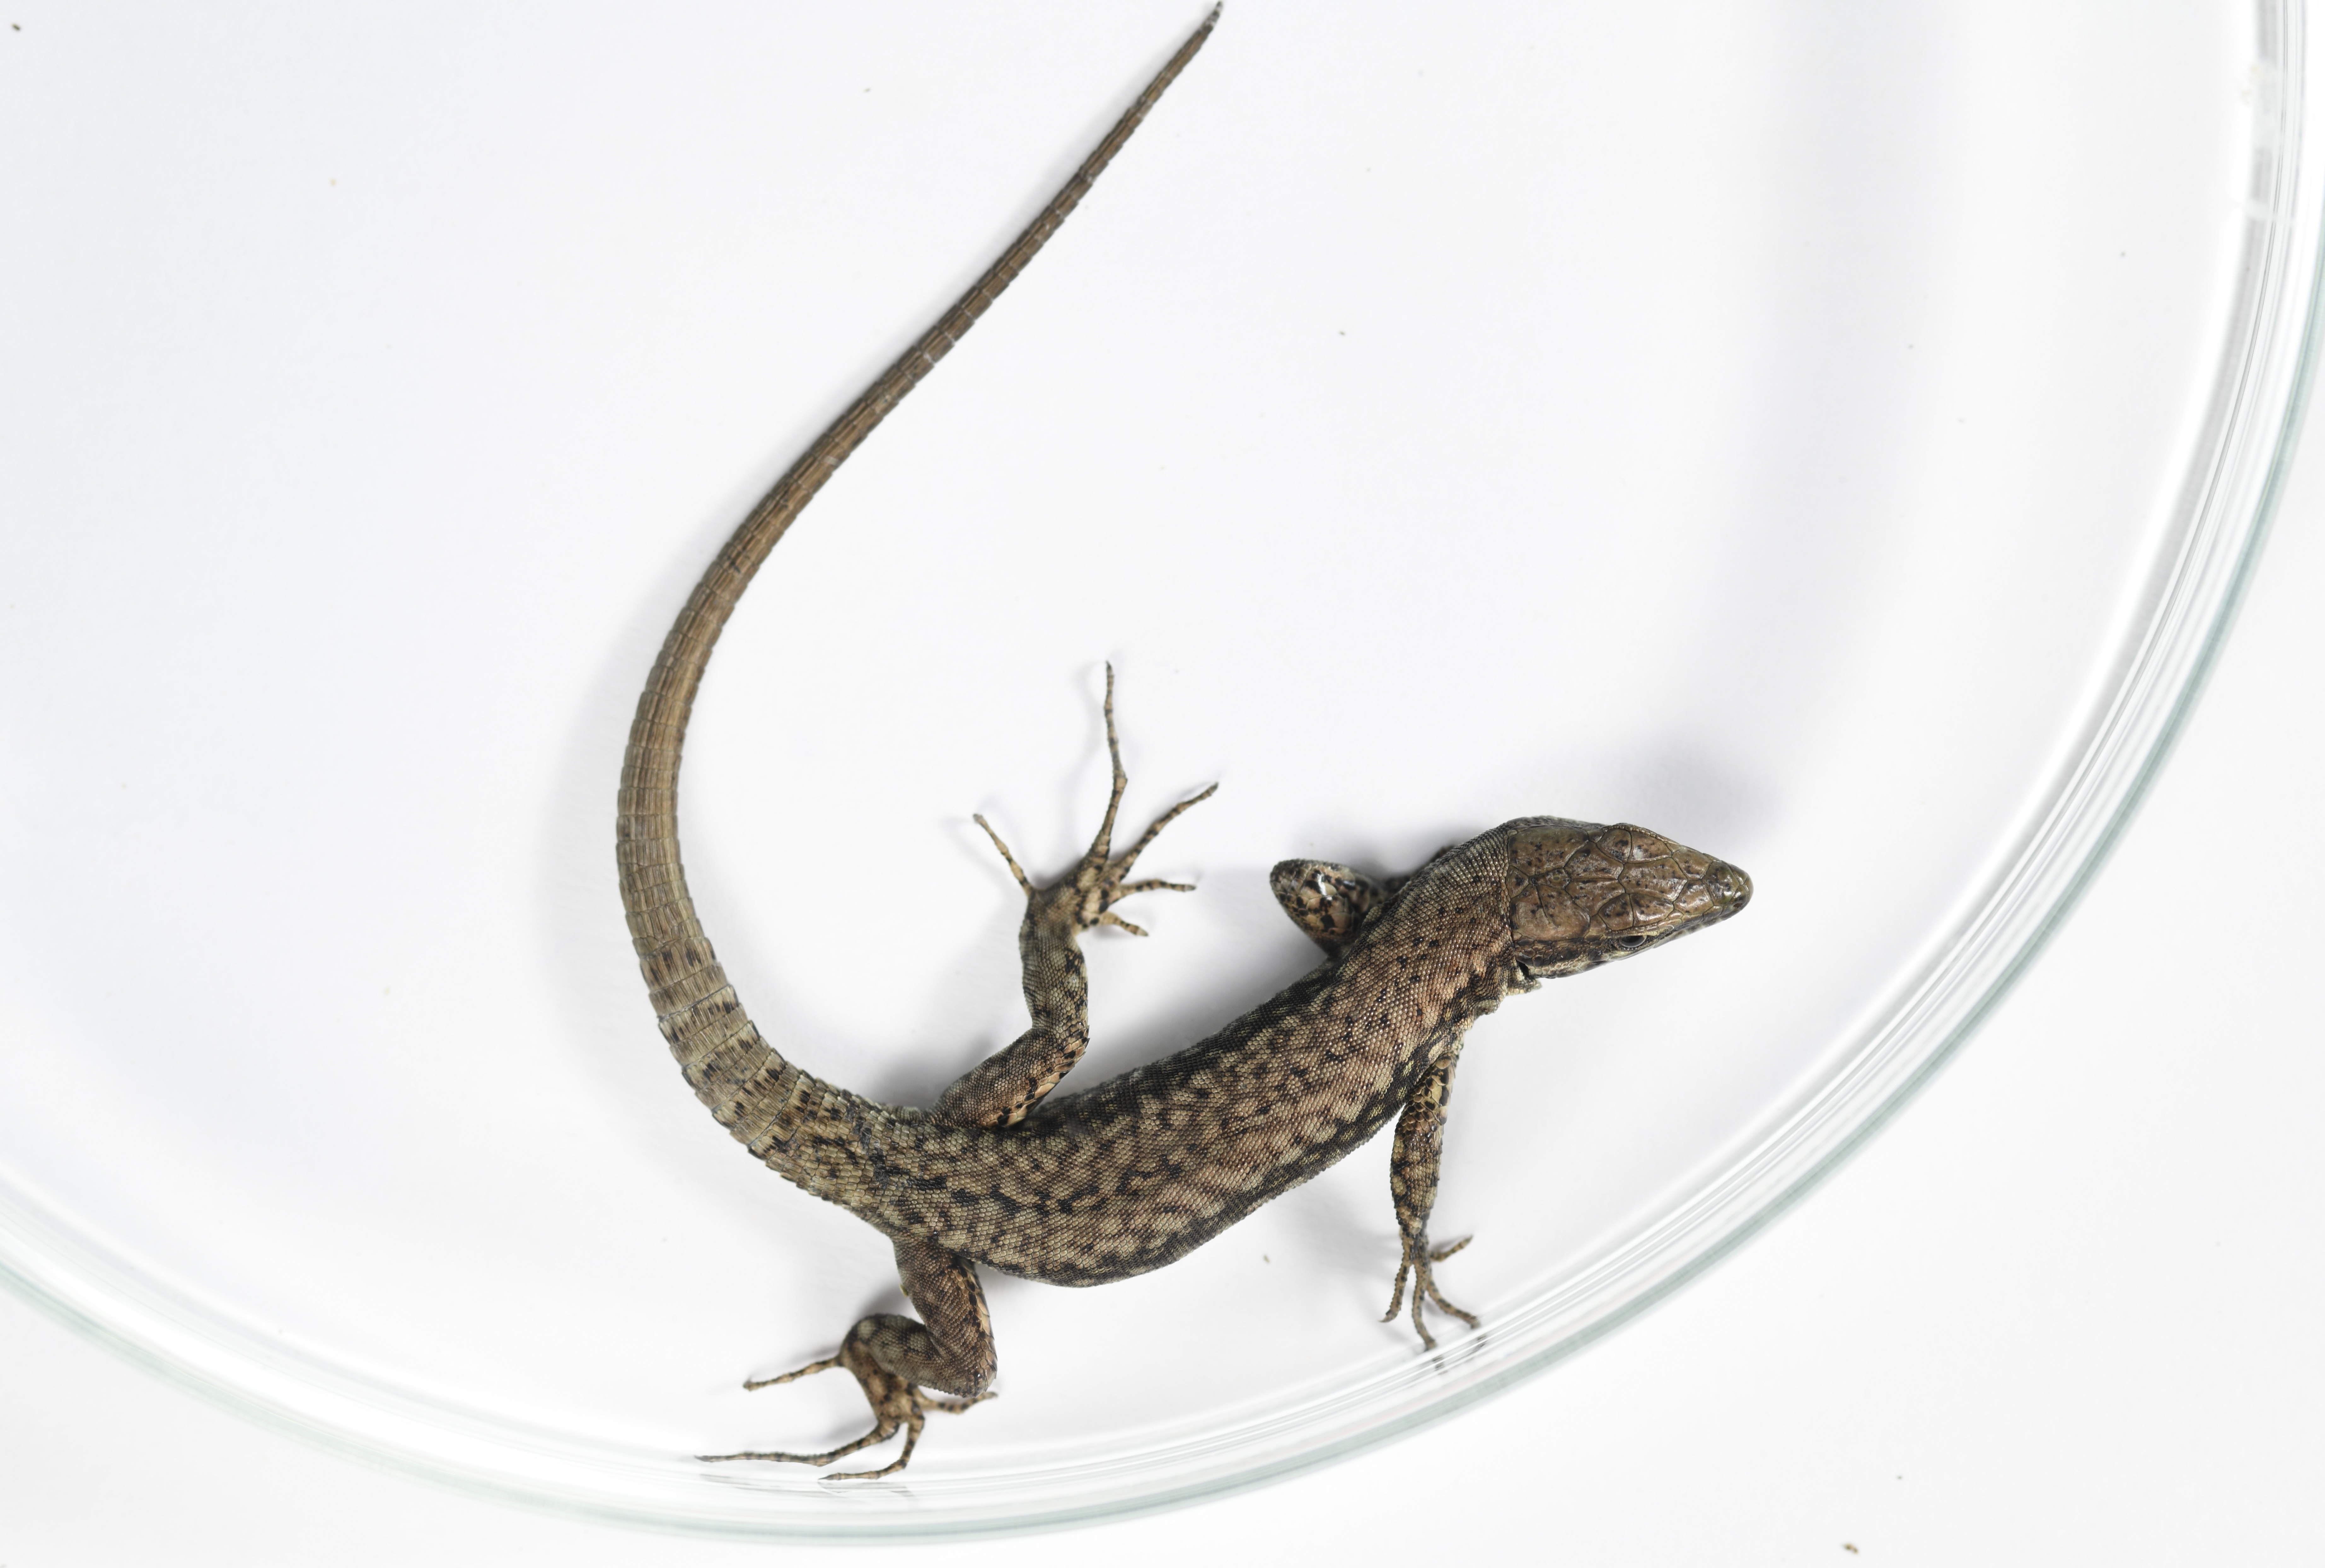
For instance, I wanted to lighten up a bit the shadows on this picture. More precisely, the shadows on the left side of the lizard’s belly:

For doing so, I have added a first spot and I moved it to the first big shadow to lighten up.
As a tool for this spot I have tested: “Shadow hightlight & Tone Equalizer”
Later on, I have duplicated this spot and moved it to the second shadow to lighten up and so on for the third final shadow.
Here is my screenshot:
Here is the final result:
In the past, I was used to work with Gimp where I picked up a brush to “dodge” the shadows in order to lighten them up.
With RawTherapee’s local editing this task is pretty fast to achieve and the results are great even though I am far from being an expert right now…
Once again, thanks a lot for your hard work all these past years!
3 Likes
Thank you for this good example 
You don’t say in “shadows/highlight”, what tool you used ? Shadows /highlight, Equalizer…
All contributors @Morgan_Hardwood
Do you have an idea on how to save this type of example (or video, or…) to serve as a learning support ?
Rawpedia, https://rawtherapee.com/, etc. and how to do ?
jacques
Again some feedback on this tool 
It’s getting better with every commit. Thx alot to everyone!
Still I have some issues.
-
I can’t work with the preview deltaE
 I am color blind (red/green deficiency) and I just can’t see the tint colors. I sometimes get a slight clue what might be in the mask when dragging around the selection dE-intensity slider from one extreme to another but still I get more precise scope with dialing in extreme adjustments (contrast for example). Unfortunately this doesn’t work in every case like local contrast, where the tool itself isn’t working on the entire selection.
Could we PLEASE get a scope preview in the style of sharpening preview, just black and white? Or, even better, some user configurable colors for “negative” and “positive” plus an intensity of the overlay effect? -
The “add tool to current spot” button should be on a more prominent place. It is easy to find if there are no activated tools yet, but as soon as you have tools it disappears in the infinite sea of buttons and sliders
-
While the tooltips are great and really help getting an initial impression of what the dials do they now IMO get in the way. I constantly struggle finding the controls I want to change because as soon as I stop moving the mouse a giant tooltip covers the whole area I am looking at. I had to adjust my usage: move the mouse to the left, out of the tools sidebar, search where I want to do changes, quickly move the mouse over the control and start with my adjustments. Of course I now constantly start zooming in and out when I didn’t scroll the tools panel far enough (yeah, too many options) because the mouse is still over the image.
I see two solutions: 1) add an option to disable tooltips (probably just in localadjustments?). This probably could be also bound to “expert” mode. But I really like the simplicity of “normal” mode and would prefer to be able to disable tooltips just there. Or 2) do not show tooltips on mouse over but place a “?” button somewhere that the user needs to click, then click on the control you want help with, which will pop up the tooltip. -
Please append a number to the default spot name. Currently every spot is called “New Spot”, they appear as such in the history. Renaming spots is really slow, and I have to think of a proper name which distracts me from editing. Having “New Spot 1”, “New Spot 2” could be enough for most people to be able to identify each spot.
-
The way the line in the spot list gets highlighted when I hover a spot in the image editor is cool! Could we get highlighting the other way around, too? Hovering an entry in the spot list highlights it in image editor. I now have to constantly look left-right-left-right because the click requires me to look at the list, then I need to see which spot got highlighted. With many (intersecting) spots it gets difficult to hit the right one when clicking in the image editor, so I want to select it through the spot list. Having a highlight effect on mouse over would really simplify selection.
-
I got some artifacts with an excluding spot:
It depends on where the border of the excludug spot is. artifacts in RT preview and jpeg might look different.
raw file: Dropbox - File Deleted
pp3 file: Dropbox - File Deleted
play with the border of the excluding spot to add/remove artifacts. They always pop up at the edge of the excluding spot. -
An excluding spot always excludes stuff from other spots when the spot center is inside the bounds of the spot. In case of several overlapping spots an excluding spot might exclude stuff from a spot where it shouldn’t leading to unexpected behaviour. IMO it would really help to be able to pin an excluding spot just to one normal spot, e.g. through an action “Add excluding spot to this spot”.
-
Identifying excluding spots is hard. The only difference I see currently is the “Spot method” Combo Box, which requires me to click through the spot list (or give excluding spots a special name ;)). A hint in the spot list would really help (e.g. with 7) excluding spots could be grouped in an expander under the spot they were added to). Also they could be highlighted differently in the image editor, e.g. blue.

I think that’s enough for the moment and hopefully helpful
i have been away all day, friends, the beach … i will examine
@Pandagrapher, could you have a look
jacques
2 Likes
@ff2000
I am working on some GUI improvements, especially concerning the ‘Settings’ expander. Can follow it on that thread:
Points 4, 5 and 8 were actually part of this update. For point 2, I will see how it will look after that because ‘Settings’ expander size will be considerably reduced.
For point 3, this option already exists in preferences window:
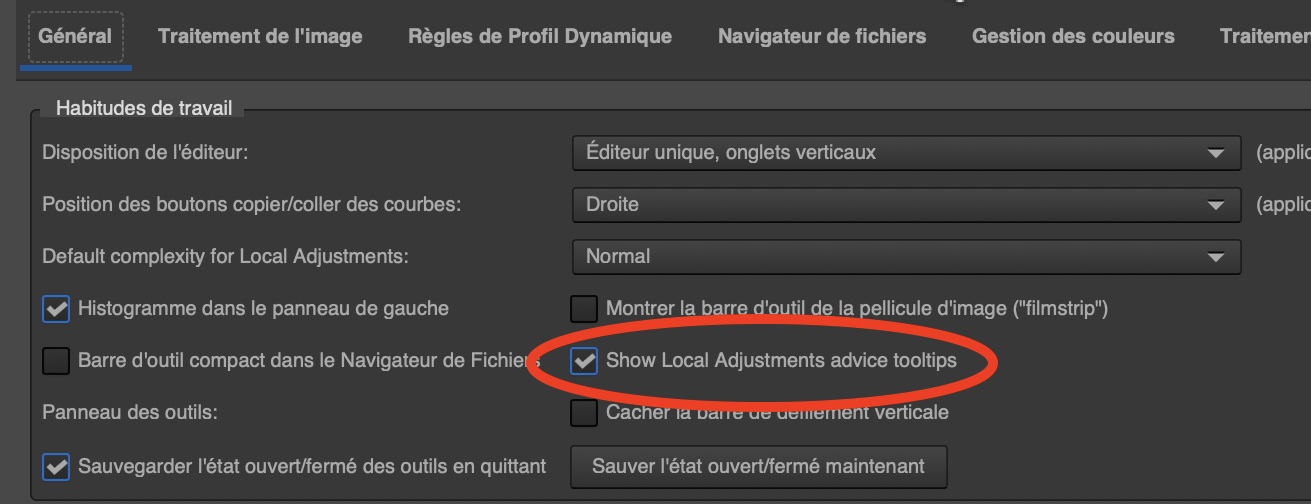
But there is a limitation for the ‘Settings’ expander only: RT needs to be restarted to be taken into account (whereas it’s not the case for Locallab sub-tools).
1 Like
@Pandagrapher great to know there is already some progress. Will those changes land in the locallabGUI branch of your fork? Or dev? Or another branch?
I actually started to look through the code and wanted to start working on some points (4, obviously the simplest one, but also thought that 5 and 8 should be reasonably simple - now there are only the harder issues left…)
Also great to see that you rework the list tree view!
1 Like
I think (I hope) I fixed the point 6 (artifacts excluding spot)…I change parameters of Guidedfilter
I will verify…and tomorrow push a change
For the point 1) difficult to do that in black and white…others users ask me to have colors…
Did you see that we can change this color and its intensity in settings
“Color preview selection deltaE - intensity”…at right “green”, at left “blue”…I can change these colors
jacques
1 Like
Imho this is a request we should work on! At least I (though not being color blind) am willing to work on it.
Edit: @ff2000 Could you create a github issue for this case please?
2 Likes
Hello everyone,
Interestingly enough, there was a similar comment on the Darktable github
Here it is:

1 Like
Hello @jdc ,
I am continuing studying your RawPedia tutorial
I have been testing on Windows 10 (64 bit) the build:
RawTherapee_dev_5.8-2149-g5d4d637cf_20200617_win64
One problem I am facing is the long time I need to lighten up some shadows of my images.
I take all my shots at work with a Nikon D850, in a studio, with a powerful lamp as a light.
For instance, with this picture [1] I have been trying to lighten up the long shadow under the lizard’s belly.
Here is my workflow:
- I add a first spot (Elipse - normal spot)
- I choose “Shadows Highlight & Tone equalizer - 5”
- I only move to the right the button of the Shadows (to reach 60) to decrease the shadow.
- With the Preview I visualize the zones of the images which are affected.
Here it is:
At present both the back and the leg of the lizard are also affected. Which is undesired because I only want to decrease the shadow under the lizard’s belly - To reduce this problem I add 2 excluding spots. The first on the back of the lizard and the second on its leg.
- I visualize the result through the Preview
Here it is:


All in all, the result is already quite good but it takes a lot of time…
Therefore, here is my question.
Is there some settings I could use to only add the first spot. Without the need to add 2 further excluding spot?
If I could rotate (clockwise or anti-clockwise) the elipse spot I could later on change its size in order to follow more easily the long shadow under the lizard’s belly (which is around 45°).
Therefore, this is a feature request for a possible improvement
Another improvement might be having a shortcut to activate the Preview.
At present, from what I have gathered, you need to select the right spot and scroll up-down to activate the preview.
BTW, the logarithms you have devices are really powerful!
At present, in my view, “only” the GUIs needs some improvement as previuosly suggested in this post.
2 Likes
Thank you for testing and report your work
I think there are 2 ways to treat what you expect.
-
as you did, but by changing the transitions, particular try to increase “transition weakening”
remark : you use “preview”, but preview shows the area whitout treatment, in this case try also “show modifications without mask” which takes into account “treatment” and “transition”…(real modifications) -
you can also use “Original Retinex” (cf “dodge and burn”) - add tools “Soft light - original retinex” - expert
In this case
- put the RT-spot in a shadows near “lezard”,
- choose a big RT-spot around the lezard
- try to increase “strength” and “Laplacian threshold dE”, and play with scope
- result is different, but shadows are reduced.
for the improvements you mention
- rotate the RT-spot has already been asked, it’s complexe - especially at the level of the algorithm code, but not impossible
- but I think a better improvement would be the possibility of drawing freehand delimitation curves (with the mouse), Bézizers curve, or polygone…this is basically a GUI problem - which I don’t know how to do
For the “shortcut” you have also “preview” in “Shadows highlight” (mask and modifications)… and then no scroll -up - down
jacques
3 Likes
I don’t know how feasible or difficult it would be @jdc but if you could duplicate a spot with a right click of the mouse in say the spot itself, that would speed things up considerably when you have to use multiple spots.
Wayne
Done:
I spent a lot of time yesterday to try to understand details of deltaE, its highlighting, etc. and to identify the actual issues I had.
The anecdote at the end reflects the state of my understanding when reporting my issues here the day before yesterday…
I also thought of making a video to show what I am writing about, but I don’t know if the extra time is worth it (already sitting here on the issue more than 90 minutes). If you think it’s helpful please ask. Rainy Sundays are great for stuff like that ![]()
but I think a better improvement would be the
possibility of drawing freehand delimitation curves
(with the mouse), Bézizers curve, or polygone…this is
basically a GUI problem - which I don’t know how to do
@jdc,
A free hand lasso or polygon selection would be perfect.

1 Like
Hi!
In mode expert:
Where is ‘shape method’ in 5.8-2180?
Was on 5.8-1964
Regards.
@jdc,
The freehand lasso is a job for @Pandagrapher (Pierre Cabrera)
Thanks Jacques for the excellent job! It is looking great!
J’espère que tu vas bien et en bonne santé.
No, a free hand lasso will be also needed to solved in engine, not only in ui ![]()
I have hide this method, because we ask me…
But I can “show” this method…in one of the expander…
But we cannot show and hide…and with the new GUI…no difference expert / normal in settings.
No problem
jacques