My approach would be to take another image with better lighting/background.
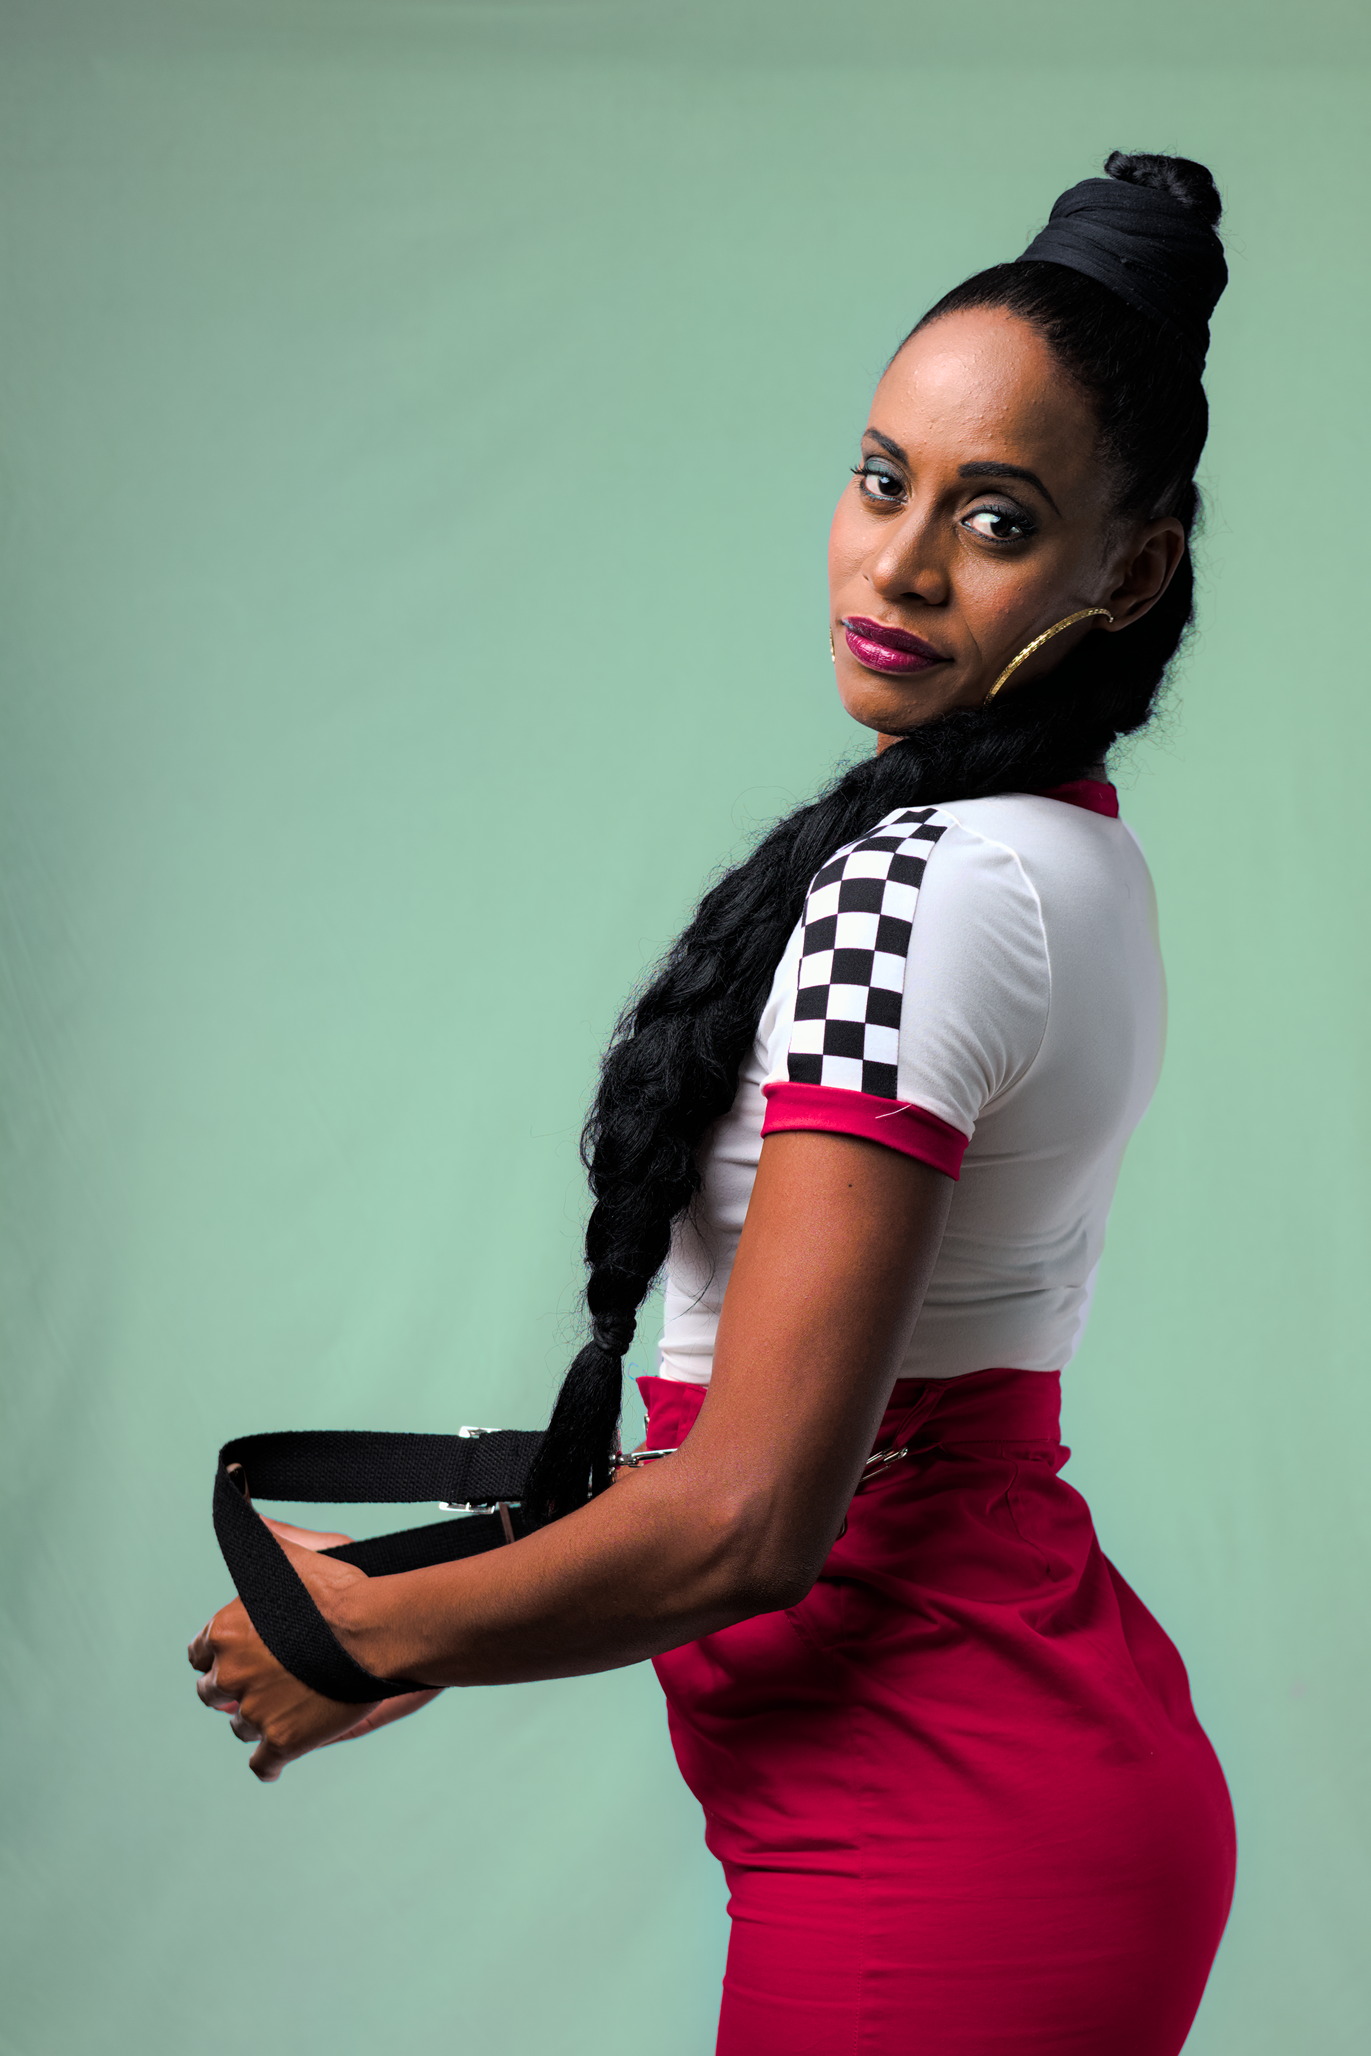
But to practice with your image, I would start with Drawn & Parametric and select Hue Channel (Hz) first. Using the color area picker I select the color area I would use. In this case it was the right side. Tweak the detail and mask contrast, and that’s normally enough for me on most images. But this one was still picking up the hair, so I then used the chroma channel to not pick that up. Lastly I used the drawn area in reverse polarity around her to avoid the shirt being part of the mask.
One of my earlier issues was drawing the mask first instead of using the channels. I ended up with some sharp edges at the drawing areas. Now I default to do the drawing at the end and it seems to give me better results.
I don’t know how others would do it. But I think in this case, with the white blouse, which absorbs some of the background color, it might be good to have part of the mask capture those tones as well. The white gets contaminated by the background color and it’s partly good to change the background color, otherwise it would look strange to crop (I think).
Ps. Sorry for my No English I’m not a native speaker.
Very good results guys. Today I check the .xmp and so I get to learn how each of you have arrived at the solution. Thanks a lot g-man, Boris, Tim, Oscar, Steven and Todd. This is a great way to learn concrete things about darktable and thus better cope with the challenges that different images may have. And especially those of separating objects or people from a background.
I included the develop settings (xmp) in the jpg metadata. In darktable, just load the jpg as the xmp sidecar. I’m not at the PC now, so I can’t generate until later.
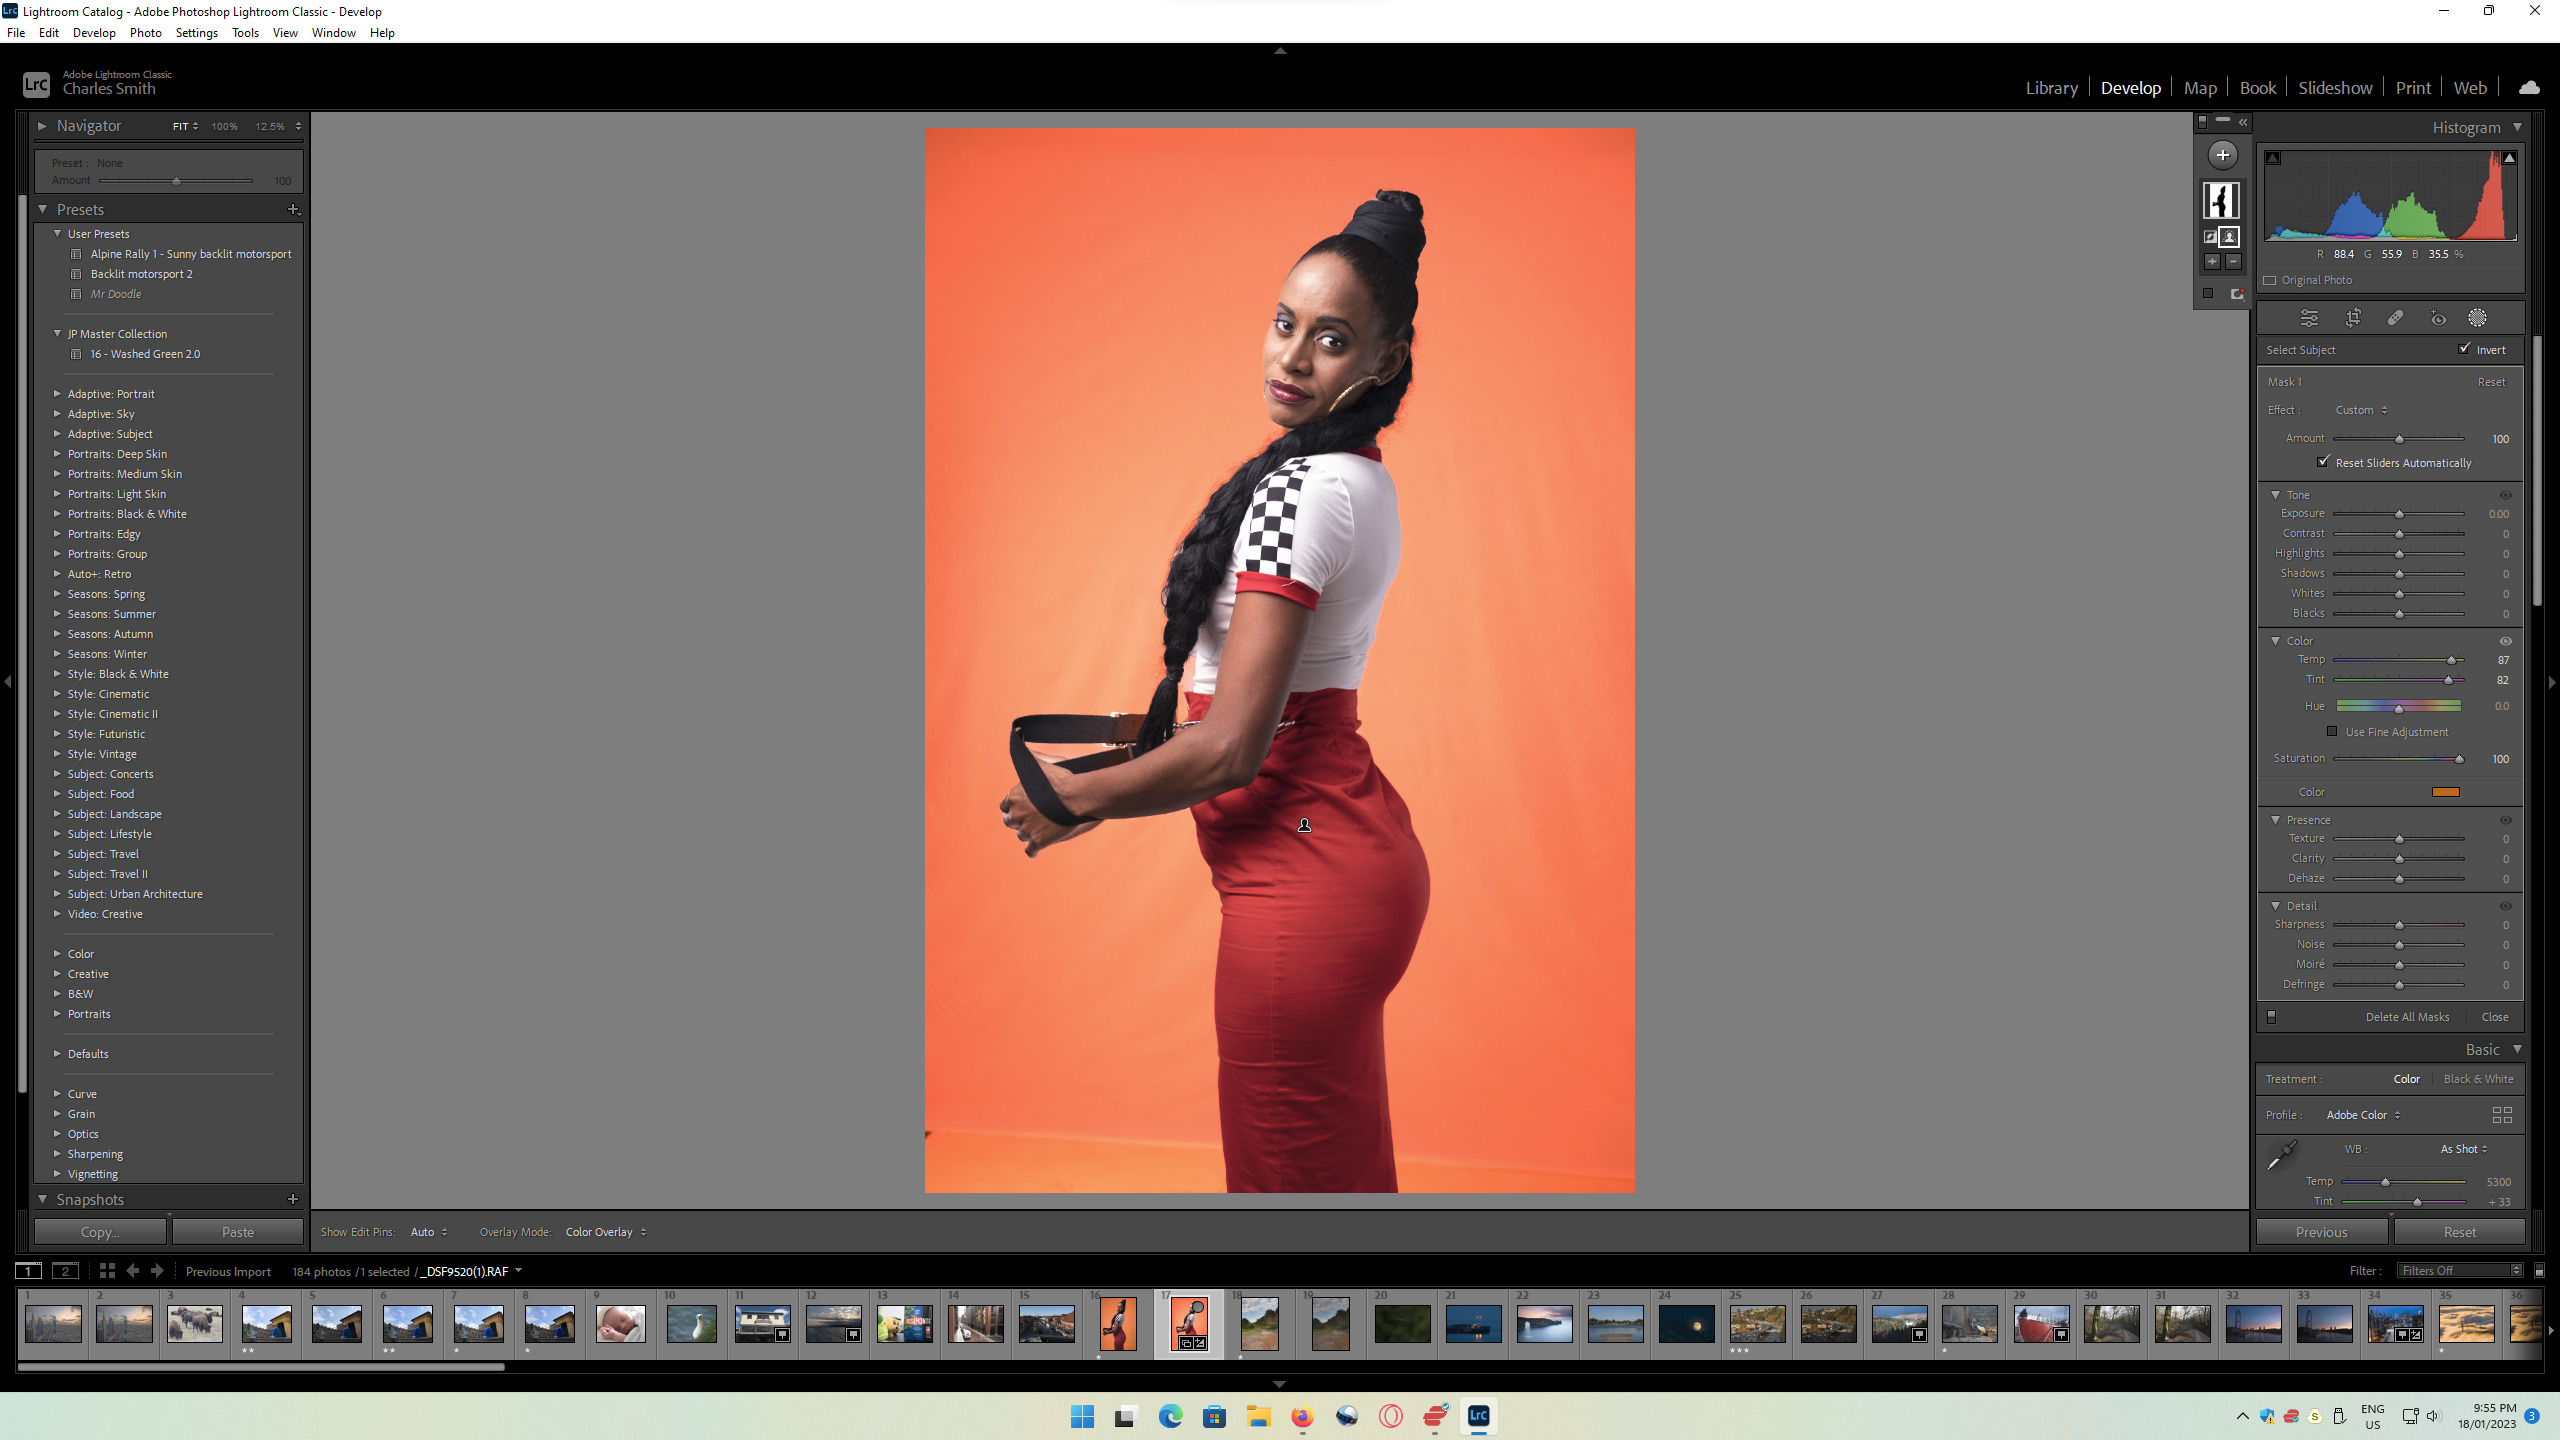
I think it will be interesting to see how an AI tool handles this challenge (eg Lightroom).
But that’s the whole concept of ai. It doesn’t require skills. The algo does it for you and fast.
There is a silver of earring in her face, some strands of hair and some blueish light hitting the fingers that I think could make an AI mask hard to be perfect. That’s why I’m interested.
then I click ‘Person 1’ and you get this, with the mask shown in a reddish overlay. It’s mostly pretty good, but there’s a wonky bit around the hands. Most of the other options work ok, but not the “hair” option.
I know darktable lacks the possibility to use raster masks and I think it is technically impossible in the current development conditions (I’m not a technical guy), if someday the developers (who have done a fantastic job) manage to implement them in the mask selection system, with the use of picels, brushes and erasers to add or subtract parts to a selection, as GIMP and other programs do with quick masks, that would turn darktable into an exceptional tool, even more than it already is.
I clicked ‘create mask’, then found the ‘invert’ mask option, this got just the background selected. To make the masking clearer I just dropped the exposure on the masked area:
So it’s ‘ok’ but not ideal. In the screenshot you can see the add or subtract mask options… short of using a brush I don’t think I can improve on this one.
I found out how to color it like @g-man did…
So my conclusion so far is that yes, it’s easy, I could do it with little knowledge of the software, and it looks, well, ‘good enough’ for some applications. But from this test, dt in the right hands, beats me with Lr hands down. I might try to research whther one can do better with Lr.
It does work - (SG mumbles grudgingly)
The hair is a bit odd though. Although I think many viewers (as opposed to the people working on it) wouldn’t notice.
Glad to hear it. AI works as well but requires skils to fine tune the images. So we are on the right track with darktable. That’s one impression I got with that AI selection thing that still lacks precision and can mess up a selection. I’ve used image compositing programs for VFX like Nuke and it’s complicated the mask selection process even using green clipping backgrounds, because of the contamination of the figure with the background, especially the hairs. With work and by creating alpha channels you can achieve very good results. darktable uses very good selection methods with excellent results.
ON1 works okay. Though I don’t use it much… I think its a bunch of edge aware stuff and not so much AI at least in the 2022 version I have…its a bit more advanced in the latest one… For ON1 you take a brush and draw strokes very roughly over areas to keep and areas to remove and then it calculates a mask. From there there is a refine brush and a chisel brush that you can use on the edges if you get halos. This does help when your run it over hair to clean it up…I think the brushes are refinements or versions of what they call the perfect brush which is an edge aware tool…if I get some time I will post an example for comparison but in this case for example @s7habo Boris’s mask was pretty good and funny enough even the blue channel alone did a lot of work but it really helped with the hair… in this case I am not sure the ON1 mask will be better but maybe faster?? The new version is more sophisticated than what I have…it also identifies items in the photo that you can automatically select as tags…