Mastering color with Lab tone curves revisited

I was looking at the article, Mastering color with Lab tone curves | darktable again and wondering if there is a way to perform the adjustment described of Lab tone curves using the linear modules. I couldn’t figure out how, but maybe someone else can do it.

I don’t want to get in trouble, but it would seem I can post the jpg here. If not, someone correct me.

1 Like

Hi @Underexposed,
Spontaneously, I would look into the color balance modul.

Came across this blog article last year or so and it is a very nice way of manipulating colours.

Just curious: What is wrong with using this specific technique? Is it because it is being done with the L*a*b oriented tone curve module?

This specific module is already outside of the linear modules in the pipeline (which ends with filmic rgb), so using it is fine. As with all the modules (linear included) you need to watch what you are doing.

I let go of the 100% linear approach a while back and my editing became better and more fun after that. Don’t get me wrong: At the core of my editing is the linear way of doing things, but I use those modules that I need for the job and sometimes those are L*a*b oriented.

But, all this doesn’t answer your actual question. Mainly the color balance module, maybe some channel mixer and rgb curve (independent channels) mixed in.

I did play around with color balance and rgb curve, but could not come close to what was done with tone curve. I don’t have enough experience yet with channel mixer to not expect that it would take me a very long time.

Yes, @Jade_NL, because of all the interest in linear rgb, I wondered if tone curve could be avoided. Your comments regarding your approach are informative, and I think I will drop my aversion to Lab.

I just realized that you might be using Uwe Pegelow’s before jpg in darktable to try to match the after result that Uwe posted. Are you aware that darktable is not set up correctly to handle jpgs?

I do believe that you need to move the input color profile module below the exposure module when editing a jpg. Something to do with gamma (1 vs 2.2?). Not sure if anything else needs adjusting though…

Sorry that I cannot be more specific, I do remember @anon41087856 saying something about it in, I think, his tone equalizer video. I did think it is relevant enough to mention 'cause it might influence your results. Maybe Aurélien will pick up this comment and elaborate a bit.

1. What is Lab ?

It is a colour appearance model that aims at predicting what a pixel will look like (for a standard/average human being) with the same chromaticity (= colour, roughly) at a different brightness, or with the same brightness at a different chromaticity.

2. Why is editing in Lab great ?

Because you can really tweak brightness without changing color, or color without changing brightness. At least, this is the promise.

3. Why is editing in Lab not great ?

Lab is not HDR-capable, and even in SDR, its prediction accuracy is rather poor. Well, it comes from 1976.

4. What is a tone curve ?

A tone curve is a graphical interface. It is only a kind GUI widget. A tone curve is not an image processing algorithm. The tone curve is one of many GUI ways to define a 1D → 1D pixel intensity mapping, that will be turned into a 1D or a 3×1D LookUp Table (LUT), and what the software actually does to the pixels is mapping them through that LUT. It’s really just sending pixels intensity to a new address based on a table defined graphically in GUI by users.

But a tonecurve is implicitely display-referred. The right/top edge of the graph are always 100% of the range (camera range or display range, see filmic : improve graph view for user education by aurelienpierre · Pull Request #5996 · darktable-org/darktable · GitHub). How do you deal with scene-referred (aka unbounded values adjusted such that middle-grey = 18% but white = +infinity) ? Generally, you can’t.

This is exactly the same as a levels module, a contrast module, or a lift-gamma-gain/slope-offset-power adjustments. They all define a 1D->1D mapping, but with a predefined shape of curve. However, tone curves are much liked because they are really flexible, so you can mimic any brightness/contrast mapping (provided it’s done in a 0-100% bounded, display-referred, range) with a tone curve, if you know what you are doing. It is just cumbersome.

5. Synthesis : how do you map values in scene-referred ?

So you can’t use Lab because it doesn’t work in HDR. You can’t use a tone curve either because of its GUI design implications and resulting uselessness above 100% (along with lack of accurate control around 0%, sort of overcome with log scaling in UI).

That’s why I did the tone equalizer.

In “masking” tab, if you set “preserve details” to “none”, it falls-back to a simple tone curve (feature-wise), but actually performs a simple exposure compensation (algo-wise), garanteed to preserve color (as much as we can), that you can parametrically tweak depending on input luminance estimator. It scales to whatever dynamic range you get in input though the “mask exposure compensation” and “mask contrast compensation”, and you can choose between several luminance estimators (use the mask display to preview).

You can also use it after the input color profile to get color-adapted RGB at input.
4 Likes

I had no choice but to use it. However, when I matched the tone curves of the article, the result was pretty much dead-on by my eye. When my daughter sends me jpgs from her phone and asks me to fix them or crop them, I convert them to tifs and use dt and GIMP.

@anon41087856
I read what you posted about tone curve awhile back and stopped using it. I had saved a link to Uwe’s article a long time ago, and decided to look at it again. Examining the thimble-full amount of knowledge I have, I couldn’t see how to do what the tone curve did using the linear modules. I’ve used tone equalizer quite a bit, but it didn’t even occur to me that I could get Uwe’s result with it. I’m stumped.

I would use channel mixer.
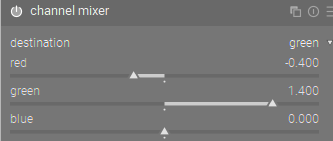
To mimic LAB A channel - green and magenta - use RGB green channel.
To mimic LAB B channel - blue and yellow - use RGB blue channel.

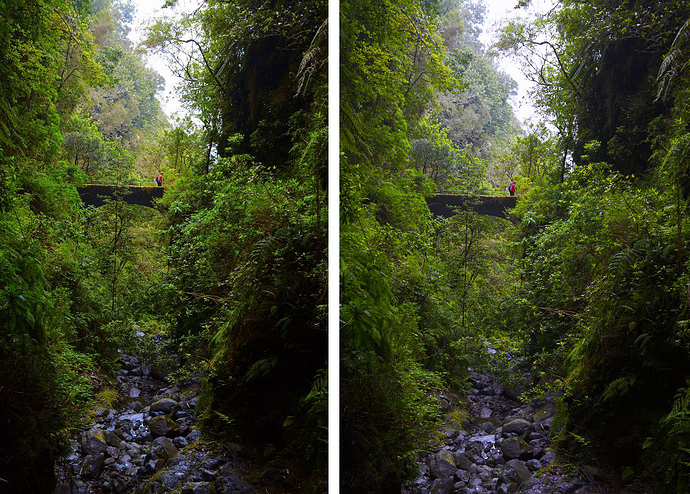
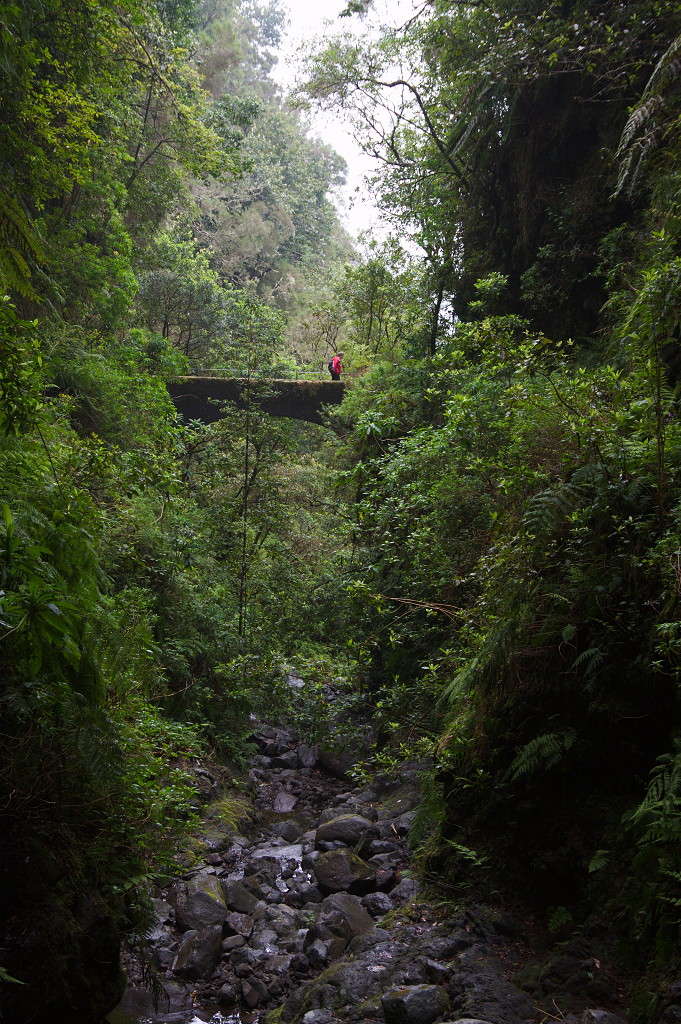
They look to have made the foliage (green) more yellow. Yellow is the opposite of blue. So in channel mixer go to your blue channel, and decrease the green slider. Typically when using channel mixer you want the sum of the three values in each channel to = 1, which keeps your greys grey. In blue channel, sum <1 will give you a yellow cast, while sum >1 will give you a blue cast. So reducing green will not only make foliage more yellow, it will also give greys a yellow cast, which is undesirable. To fix this, either the red or blue slider should be increased by the same amount you decreased the green. This image doesn’t really have a neutral grey reference point, but the rocks at the bottom of frame are close. In the reference edit, these rocks actually become very blue. So it should be the blue slider you increase to negate the yellow cast, and given those rocks become very blue, you might even want to add a slightly blue cast by increasing this slider further so that sum > 1.

The reference edit also makes the foliage (green) greener. So go to your green channel and increase the green slider. Again, this will create a green cast - so to negate this, decrease either red or blue sliders or both (making those colours more magenta) so that sum = 1. Given the rocks in the reference edit don’t look magenta, I would probably choose to decrease the red slider for this.

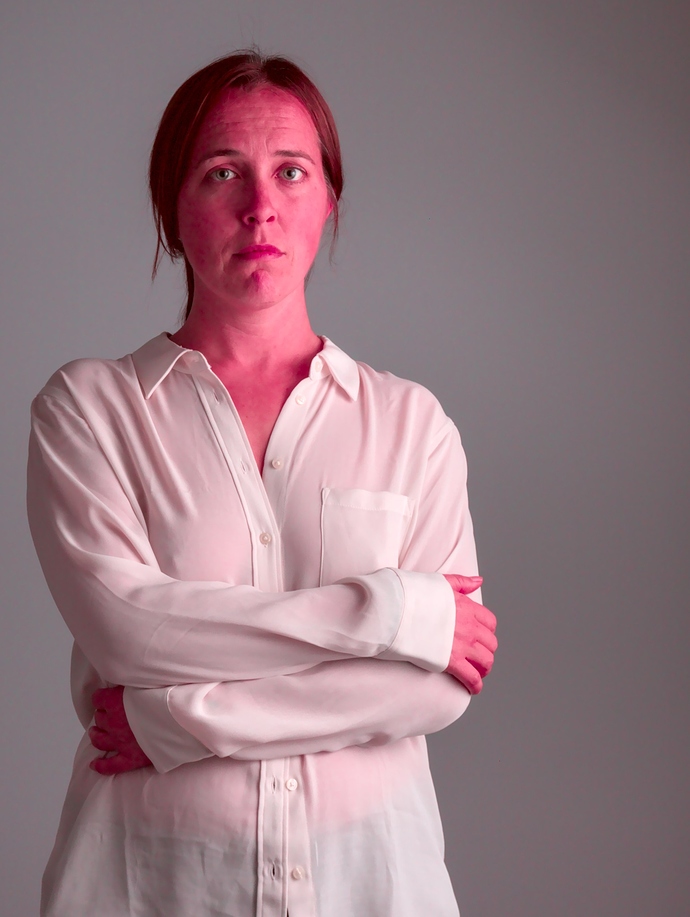
To deal with the mans red shirt, go to your red channel.

Finally, you can use either blend mode ‘normal’ or ‘color’ to your taste.

2 Likes

Here is a side by side comparison of what I got using only channel mixer.


ca3a20a952fbfa49a3431ea61c736f8a723376b1.jpeg.xmp (6.0 KB)

Pretty close. The blue cast may be a touch strong (as evidenced by some loss of colour in background trees up top) so it might have been better to keep sum = 1 in blue channel, and just add blue to shadows using color balance and mask. Mans shirt is also off, caused by decreasing red slider in green channel (making reds more magenta). So perhaps it would have been better to decrease both a little red and a little blue in that channel, or perhaps it too can simply be fine tuned in color balance.

I’m sorry, I don’t understand what you mean with this sentence. I know about tone EQ, I know I can turn off the detail preservation (and then it becomes a pixel-wise curve/exposure change in scene-referred space). What does ‘color-adapted RGB’ mean, and the ‘input’ of what are you referring to?

Thanks,
Kofa

This is Mairi with a proper input color profile (standard matrice) at the usual place:

This is exactly the same, but with input color profile by-passed, so we retouch camera sensor RGB all along:

Camera sensor RGB is what you get before the input color profile module in the pipe. It is wrongly called “RGB” because you have 3 channels (tristimulus), but the nature of the channels has nothing to do with red-green-blue as humanly defined. We need to adapt colors (through the color profile and the white balance) to get some human RGB, and this may change a bit the behaviour of the luminance estimators used in tone EQ.

3 Likes

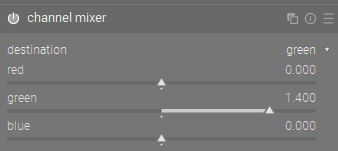
I think, Soupy, that your answer pointed out what I find difficult about using channel mixer. I am not an artist and know only a little about color theory. So, looking at the changes you made in the green channel we have, at the start:

image
image
image
image
image
image

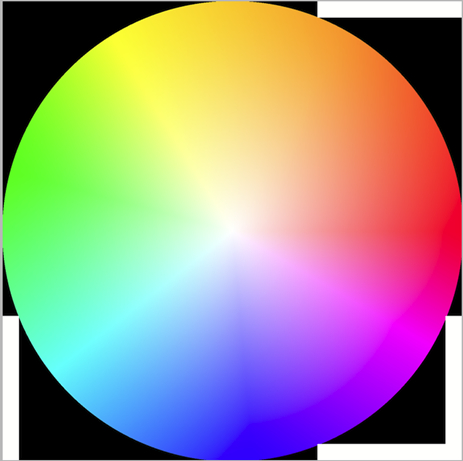
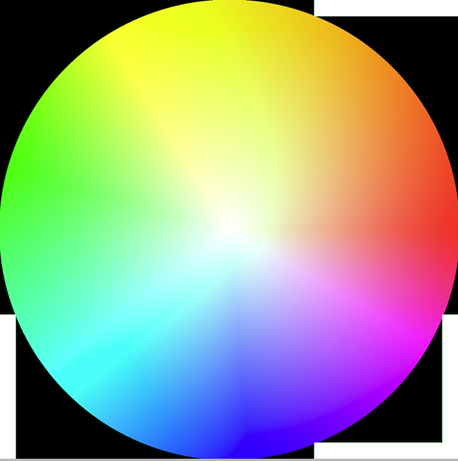
Compare the starting color wheel with the ending color wheel. How much difference is there? What did you accomplish? Now add in trying to make changes to two other channels, and for me, at least, it’s like trying to hit a target somewhere in a completely black room using a BB gun with a bent barrel.

@anon41087856 said tone control is really a GUI device. At least I can use it. I need something as simple as that for channel mixer. The answer, of course, is for me to program it, which is also beyond my ability, and I am not going to ask the developers to do it. They have enough to do without me adding to the workload. So what I am looking for with this post is guidance on how to be able to do what tone control does without using tone control.

There is a way to derivate a such color wheel from a channel mixer through Euler’s angles and polar decomposition. It’s WIP, but see : https://github.com/darktable-org/darktable/pull/4940

1 Like

I think I have seen you comment before about never sleeping, or something like that. You must put in 36 hours a day. Thank you. :+1: :+1: :+1:

2 Likes

Took a while for me to understand channel mixer too. A few simple guidelines:
When youre in R, moving sliders right makes that colour and grey more red, and moving sliders left makes that colour and grey reds opposite, cyan.
When youre in G, moving right makes more Green, and left more greens opposite, Magenta.
When youre in B, moving right makes more blue, and moving left makes more blues opposite, yellow.
Within each channel, the three sliders have to sum to 1 to retain neutral Grey’s, and thus no cast.
How do you know which colours they will produce? Check the hue wheel. When add colours, the resulting colour is in between the two on the hue wheel. Eg. If you are in R channel, and move Green to the right, thus adding red to Green, then greens will become more yellow (as yellow is between Red and Green). They will actually go from green > lime/olive > yellow > orange > red, pending how far you push the slider. If you are in G channel and you push Green right, you are adding Green to Green, thus increasing saturation of green. If you’re wondering why it didn’t seem to have an affect on green in your hue circle image, it’s because that Green is already fully saturated. It can’t be saturated > 100%. But you will notice it did turn the yellows and cyans more Green. Why? Because yellow is made from half Green half red, and cyan is made from half Green half blue. Because the green in those colours is not fully saturated, you see boosting Green in channel mixer have an effect. To test this, desaturate your hue circle by say 50%, then try boost Green in the green channel. You will see it increase saturation in the greens. This is what happened in the example image I gave. Hopefully this has helped. I love channel mixer now i understand it.

2 Likes

Thank you for the explanation, @Soupy. I have been trying to learn how to use channel mixer, studying various resources, including https://www.youtube.com/watch?v=zgTLw31PVNs. Even so, it is like playing three-dimensional chess to me.

In the folder that holds the starting jpg I have the base xmp made by just opening the jpg in darkroom and closing it, a duplicate of that, 01, which I modified using tone curve to match the article’s final version, and two duplicates to which I loaded your xmp, 02 and 03. Opening 03 in darkroom, I used duplicate manager to compare it to 01. I then tried to change 03 to match 01. Basically, I just floundered around. Never came close.

I tried rgb curve too, using independent channels. But what hampers me is the lack of the tone curve ability to manipulate red/green and blue/yellow on the same axes. And that’s the crux of the matter.

In “masking” tab, if you set “preserve details” to “none”, it falls-back to a simple tone curve (feature-wise), but actually performs a simple exposure compensation (algo-wise), garanteed to preserve color (as much as we can),<<<

That somehow makes TE much more useful to me (and maybe more understandable as well)

I used to do it in the GIMP with LAB curves.

Not technically correct, as you can only increase/decrease one of three channels - red, green or blue - but the idea of colour mixing is right. Instead of saying “increases” yellow, I would use “creates” or “hue shifts to” yellow. Because if there is yellow in the image, and you increase green slider in red channel, it will create orange. Of course if you increase red in red, then red won’t hue shift to anything, it will simply increase in saturation. In that scenario the word increase makes more sense, at least to me.

Why do you pick only on yellow? You could equally say the same thing about cyan and magenta.