My bad, sorry: should have been options (corrected in the original, too). Thanks for letting me know about the mistake.
Can you share the raw? Also, see my (our) struggles at:
My bad, sorry: should have been options (corrected in the original, too). Thanks for letting me know about the mistake.
Can you share the raw? Also, see my (our) struggles at:
Has been under devel for almost a year and been pushed as a pr this morning 
There aren’t any, all channels blown.
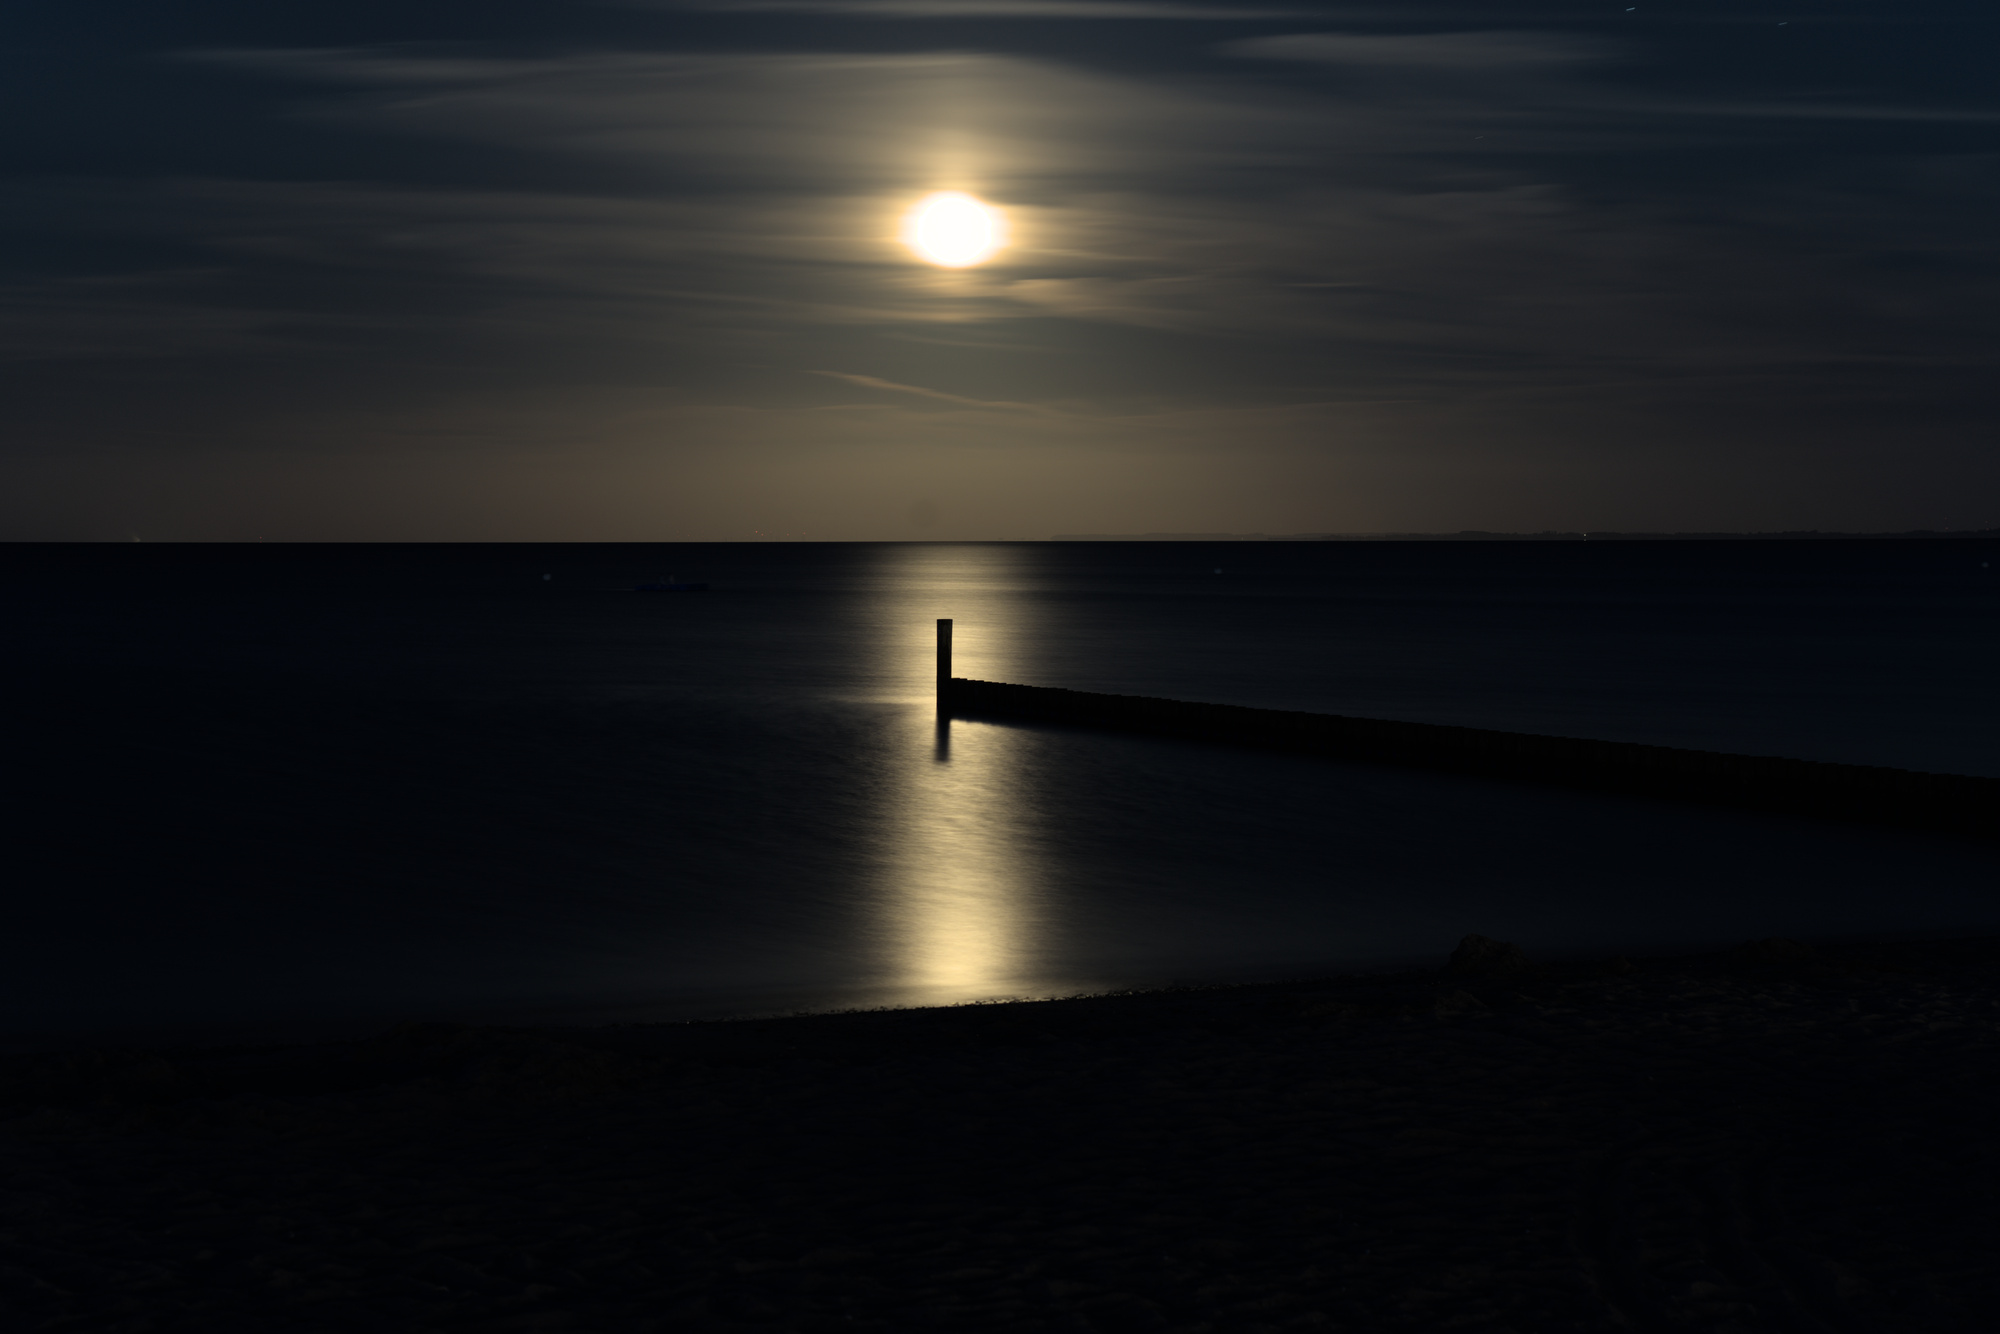
I had a similar situation shooting directly into the sun. It’s not a great image but I did it as an exercise. Using filmic rgb and color balance rgb I was able to get it to a point of not being too nasty, but the highlights are blown regardless. I think the best you can hope for is to minimize the damage, as it were.
Here’s how it looked in darktable:

Here is the RAW file:
_DSC3128.ARW.zip (25.8 MB)
This file is licensed Creative Commons, By-Attribution, Share-Alike.
My quick edit:
_DSC3128.ARW.xmp (6.7 KB)
Here’s a very basic adjustment, with highlight reconstruction set to color and filmic set to luminance Y. It’s dark, as it is meant as a minimalistic quick starter using a less complex method that can also work in some cases. It needs more work done, of course:
_DSC3128_01.ARW.xmp (6.3 KB)
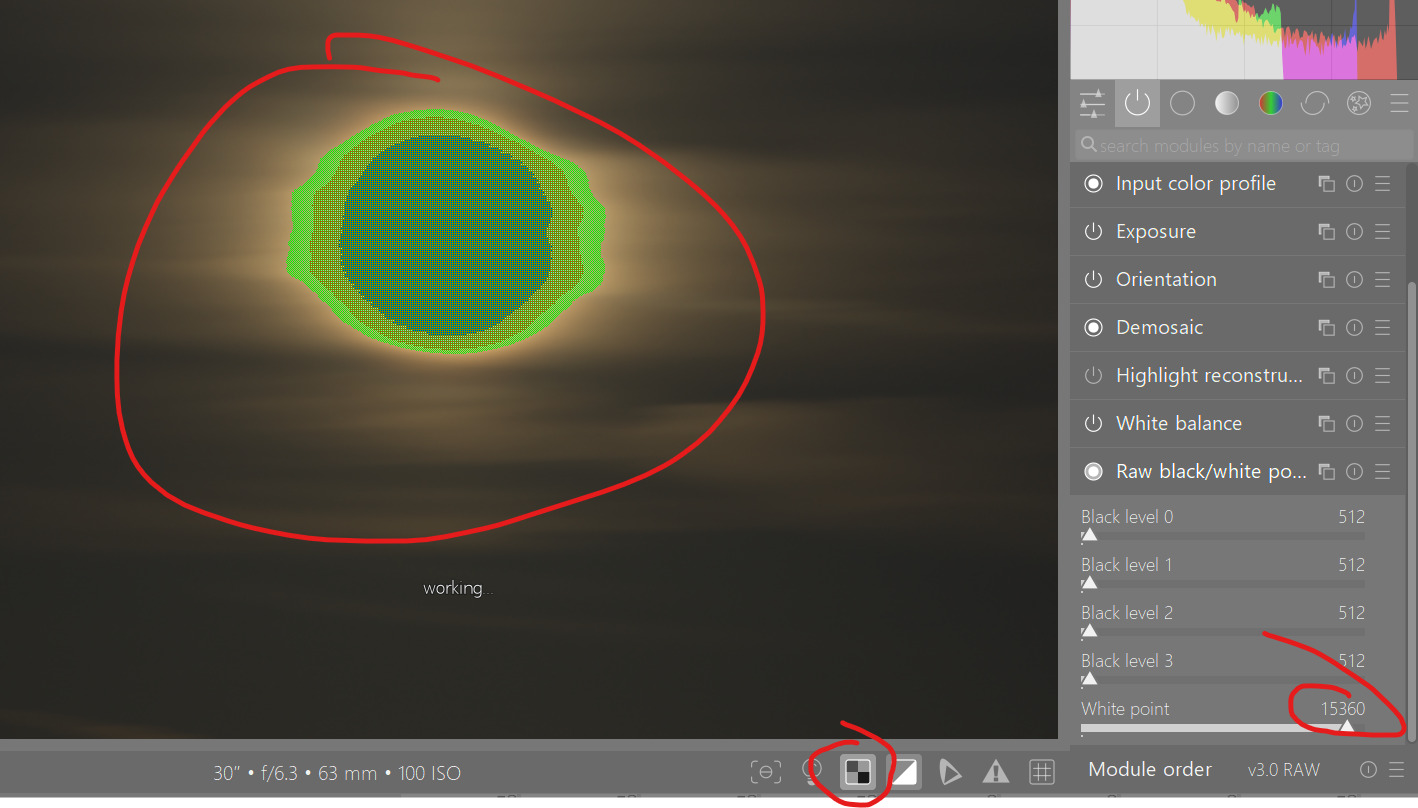
I opened your raw in rawproc, my hack processor, so we could see the unmodified rgb (except for display profile). Here 'tis, zoomed in on the sun:
Magenta is where the highlights are blown in all three channels and the whitebalance yanks the three pile-ups in different directions. This has to be mitigated somehow, usually with a purpose-built highlight reconstruction operator. But notice the orange border around the magenta; that’s really your “gradient”. I found out something working your image; I had been adding the highlight reconstruction tool after scaling the data from the raw range to the 0.0-1.0 display boundaries, but that was glomming both the magenta and orange into one blob. I tried moving the HR tool to before that scaling, and things looked much better. Learn something new every day…
filmic curves by default tend to push high pixels like these to the top, but I think darktable’s implementation lets you pull that back. I used my simple filmic curve with that in mind, and got this rendition:
This is quite nice!
I’ve shot few direct to the sun and struggled with it too. Tried with laplasian reconstruction but for some reason it often pushes towards reddish tones instead of yellowish. Will try your method too.
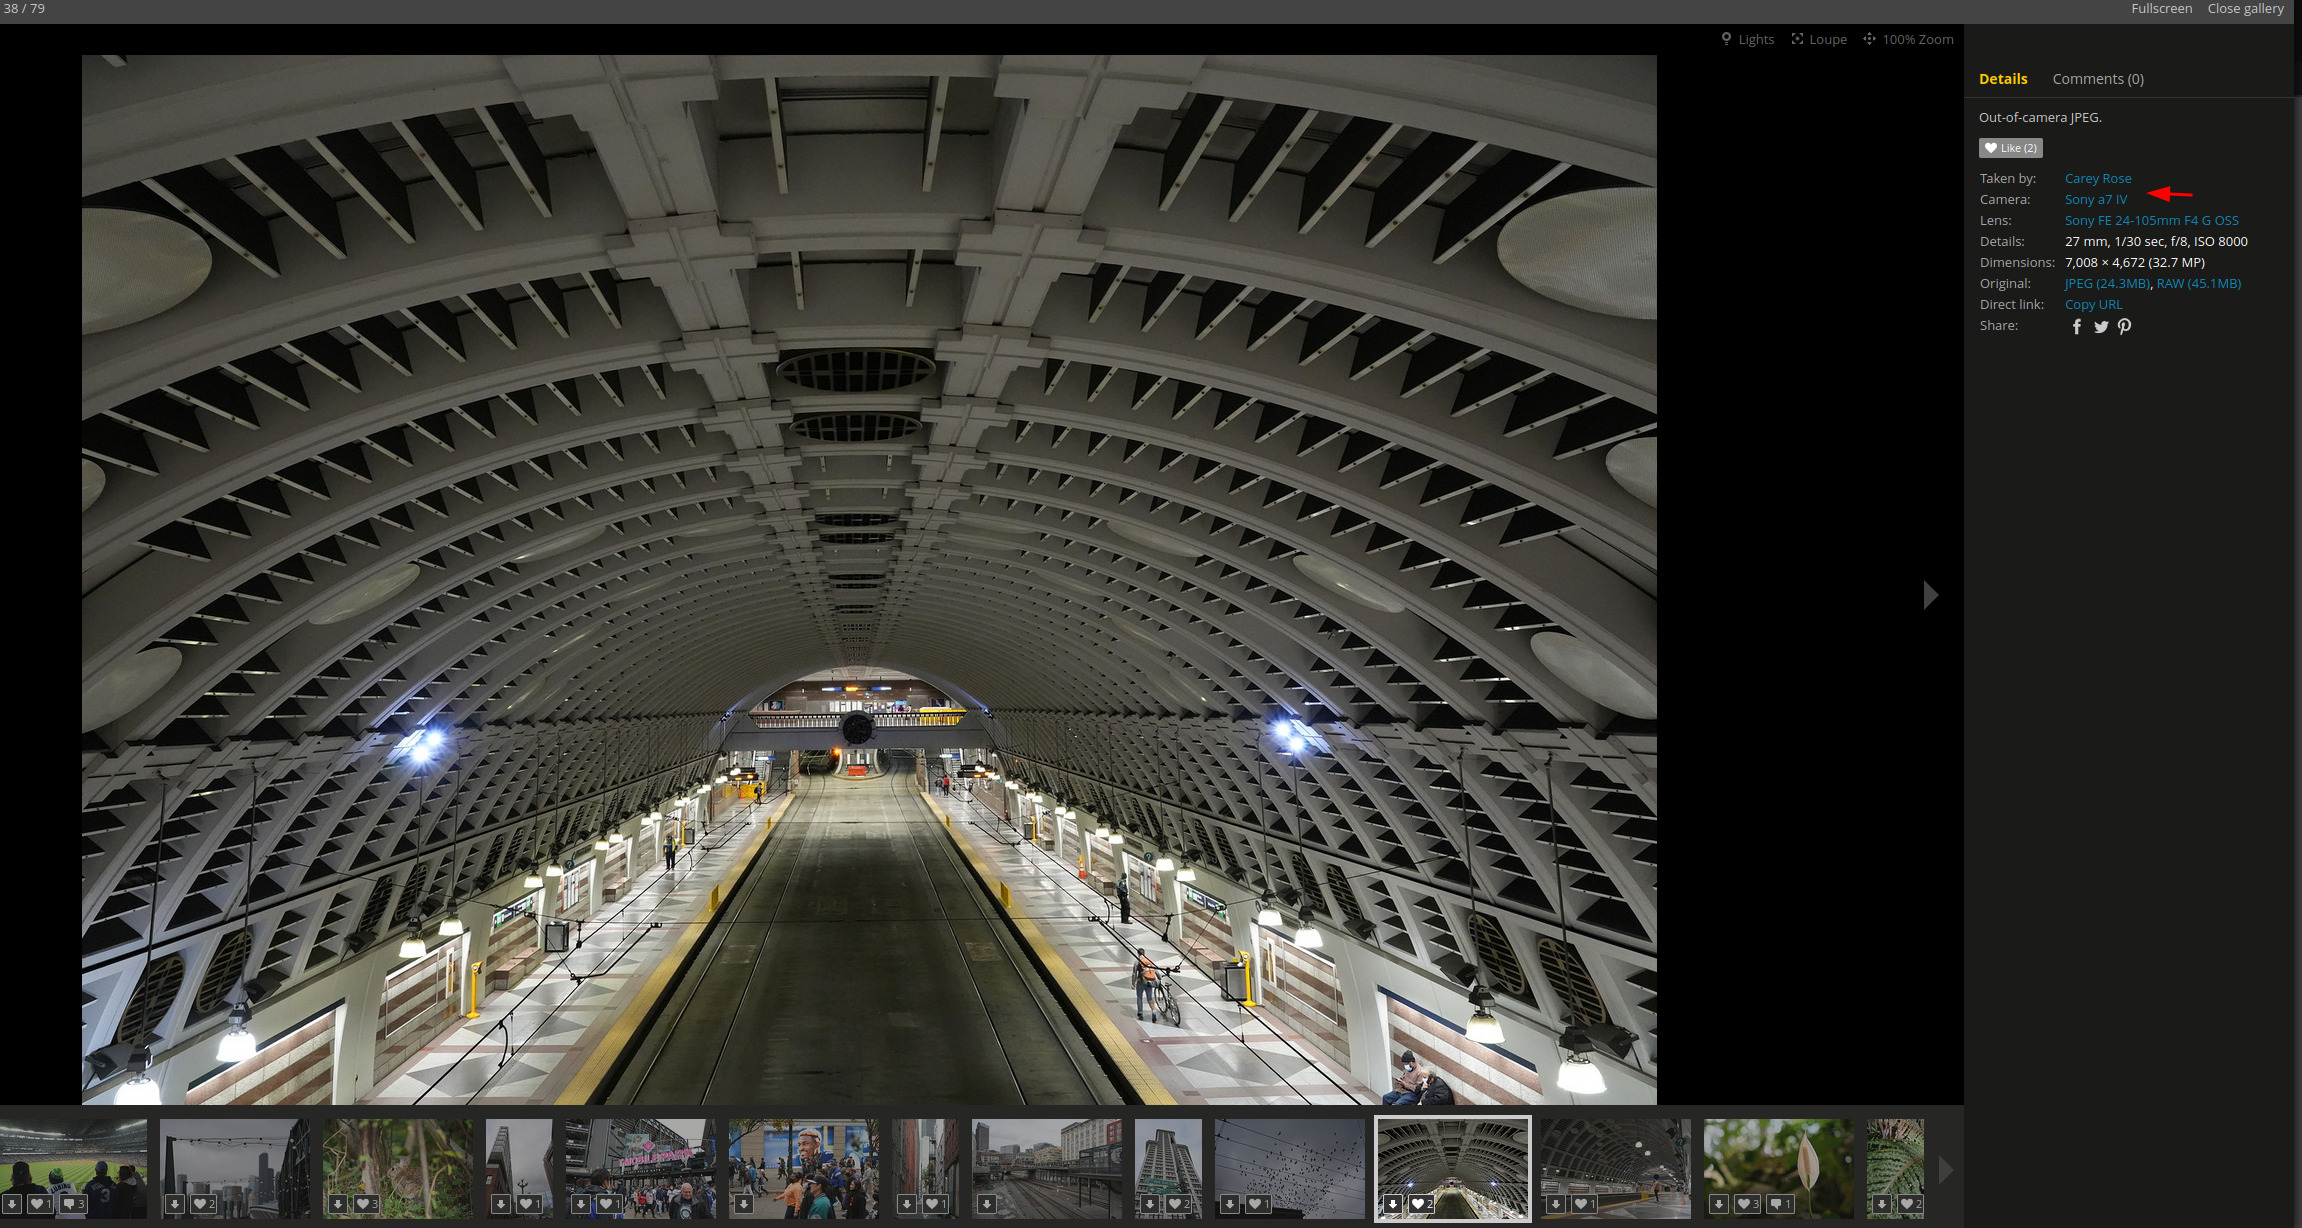
Guys, I don’t want to hijack the thread but I noticed @OrcLex is using Sony Alpha 7 IV
I was checking the DP review site for samples and for some reason some images (same camera) can’t open.
For example - this one
https://www.dpreview.com/sample-galleries/9601355361/sony-a7-iv-sample-gallery/1070088232
cannot
While the one from @OrcLex works well.
Do you know if it is some specific with how the image is saved? Or have you seen it before?
I don’t have the camera but it is on the “dream list”.
I look forward to trying out your new highlight recovery method. I have struggled with the lapalacian highlight recovery despite watching the videos about it. I accept that in many situations there is little you can do and it will be ‘damage limitation’ but some methods limit the damage in more pleasing ways than others.
My guess is uncompressed vs compressed .
I agree. I’m working with compressed RAW files, what’s good enough for me and I didn’t test uncompressed RAW yet. Compressed RAW files are working good. Uncompressed RAW is new in latest Sony firmware, so that’s probably the reason it’s not supported yet.
Thanks for all of your comments and explanation!
I’m going to reproduce it…
Oh, I was thinking somewhat the other way around.
Uncompressed RAW is often working fine (I’m using it on my Sony A7 m2), and the old lossy compressed-Raw that Sony used for years is working fine (it has been around for ages now).
The newer lossless-compressed Raw (so compressed without drawbacks) is maybe not supported yet. I say maybe, because I have no idea since I don’t have a camera that can use that format.
There are 3 RAW in total
What are you using?
Would you be able to confirm what works and what does not in DT 4.0.0?
Hi @vbs,
I just tested all three RAW file type options from Sony Alpha 7 IV for you. Uncompressed (~70MB/file) and compressed (not lossless) (~35-40MB/file) is working with darktable 4.0. Compressed lossless (~50MB/file) currently is not working/readable in darktable 4.0.
Kind regards
Alexander
There can be multiple things going on, which I’d like to (still, after 8 days) point out. I’m guessing most has been addressed, but just to be sure:
exiftool -a -u -g1 _DSC3128.ARW | find /i "white" under Windows - and exiftool -a -u -g1 _DSC3128.ARW | grep -i white under Linux-like systems - will show you a white level of ‘16383’ (which Darktable is using), but also ‘15360’ for all three channels, which I’m guessing is the more correct one.Setting the ‘white level’ in Darktable to 15360 will show the center of the moon as ‘clipped’ if you use the RAW-overexposure indicator.
That being said, most ‘highlight reconstruction’ methods actually secretly use a bit of a lower clipping threshold than the 1.0 UI will show (at least, I’ve read this somewhere. Or it’s only one of the algorithms,  ). So it might not really matter.
But, to show the ‘problem’: Disable everything that you can disable, except for ‘white balance’, ‘orientation’, ‘exposure’ and ‘color calibration’ (if it’s enabled). Particulary: Disable ‘highlight reconstruction’ and ‘disable filmic’. Now you get a more ‘raw view’ of your whitebalanced data.
Now, lower exposure, until everything is easily visible in the histogram. This already shows the magenta cast, caused by clipped highlights:
Setting the whitelevel to 15360, will show the sun as clipped (otherwise it will not) when viewing RAW-overexposure:
Now, in this view, you can enable ‘highlight reconstruction’ and see if you get a better rendition of the sun. But… none of them really work, except:
You’ll then see the sundisc neatly fixed and a good gradient, even before doing anything to your data:
Now, raise exposure back to where your middle-grey should be. Ignore any clipping on your screen, filmic will roll them off later. Just focus on the mids (and shadows).
You could also compress dynamic range a bit, by using the tone equalizer and picking the compress shadows/highlights (eigf) preset. As an example, I go for a ‘night to day’ kind of look, by picking the ‘strong’ preset here. Then I drag tone-equalizer to before exposure (so under it):
![]() . I set exposure quite high to almost +3.2ev.
. I set exposure quite high to almost +3.2ev.
Then finally enable ‘filmic’, and hit the picker after the ‘white relative exposure’ slider to auto-set it, then directly disable the picker again.
It could be smoother, but it’s also not so clipped as the original jpg version:
Now, you can play with different ‘preserve chrominance’ modes - in the options tab - to see how they turn out (powernorm for example):
Less color but smoother without messing with other parameters.
You could also leave it at ‘max rgb’, set the ‘bloom <-> reconstruct’ parameter in the ‘reconstruct tab’ all the way to the ‘bloom’ side, and then carefully lower the ‘threshold’ till it hits a point which you think is OK:
Enable lens correction, chromatic aberrations, color balance rgb on ‘standard’ preset, local contrast.
I’m amazed by the pretty much absence of noise with things boosted like this. Still, I enable ‘denoise profiled’ to be sure, but enable a simple mask set to ‘chromaticity’ mode, to only apply the chroma part of it, leaving the luma alone.

To get closer to the dark out-of-camera jpeg look, I made a duplicate, and disabled tone-equalizer, and lowered exposure to 0ev. Disabling the ‘sweeteners’ like color-balance-rgb, local contrast, diffuse and others, I completely reset filmic to defaults, click the white-exposure picker again to auto-set it, then switch the norm to ‘power norm’ again, and call it a day :).
As an alternative - that the others probably explained as well - you can work this without using the ‘highlight reconstruct’ module at all. Normally the highlight-reconstruct can be needed if not all channels are clipped, and you want to get details back from the clouds for example. But in this case, the sun is a big bright ball, and you don’t want details, you want a smooth gradient into the sun and no magenta cast…
So, disable highlight reconstruction. And set filmic to ‘luminance Y’ norm mode. That one is way less prone to displaying the magenta (because it doesn’t try to preserve color in very bright areas, I’m guessing).
As yet another alternative, you can leave filmic’s norm to ‘power norm’ (or whatever you picked) and use filmic’s reconstruction. It’s less good as ‘using details from partially clipped’ channels, and more to ‘replace blown out parts with something a bit nicer’ as far as I know, but here that’s perfect. Leaving everything to default in the reconstruct tab, but lowering the threshold until it looks OK is enough in this case. If you have problems with it, raising the transition (to be smoother), raising the number of iterations in the options tab, or playing with the bloom / gray sliders can help. As i said, not needed here. Just lowering threshold to around 0ev seems to be fine:
day-style, guided laplacians:
night-style, guided laplacians:
night-style, filmic reconstruction:
What an awesome image to play with. Nice shot and a lot of ways to take it, and also a good way to test Darktable skills  .
.
Why go through all the trouble with the ‘highlight recovery’ module? Because
Actually, the clipping itself doesn’t cause the magenta cast; it’s when the clipped channels get skewed around by applying the white balance multipliers.
I opened the raw with default processing, then changed the order around to illustrate. First, here’s the black-subtracted, demosaiced image cropped to around the sun so the clipping shows up in the histogram:
Note the color of the sun (white), and the three-channel pileup at the data max in the histogram. White balance is turned off; now here it is, everything else the same with white balance turned on:
Note the magenta cast, and note the three channel pileups - they’re moved in accordance with the as-shot white balance multipliers, R=2.024, G=1.00, B=1.841.
Clipping just piles data in the same place, R, G, and B. White balance is what introduces magenta…