negadoctor challenge - old negative scanned with a DSLR

I’m not sure if there are any negadoctor experts out there other than @anon41087856, but I thought I’d pose this challenge to give you all some fun and to help me out with my workflow. Many of the negatives I’m scanning were taken decades ago on a budget camera with poor photography skills. But I still want to keep them for posterity.

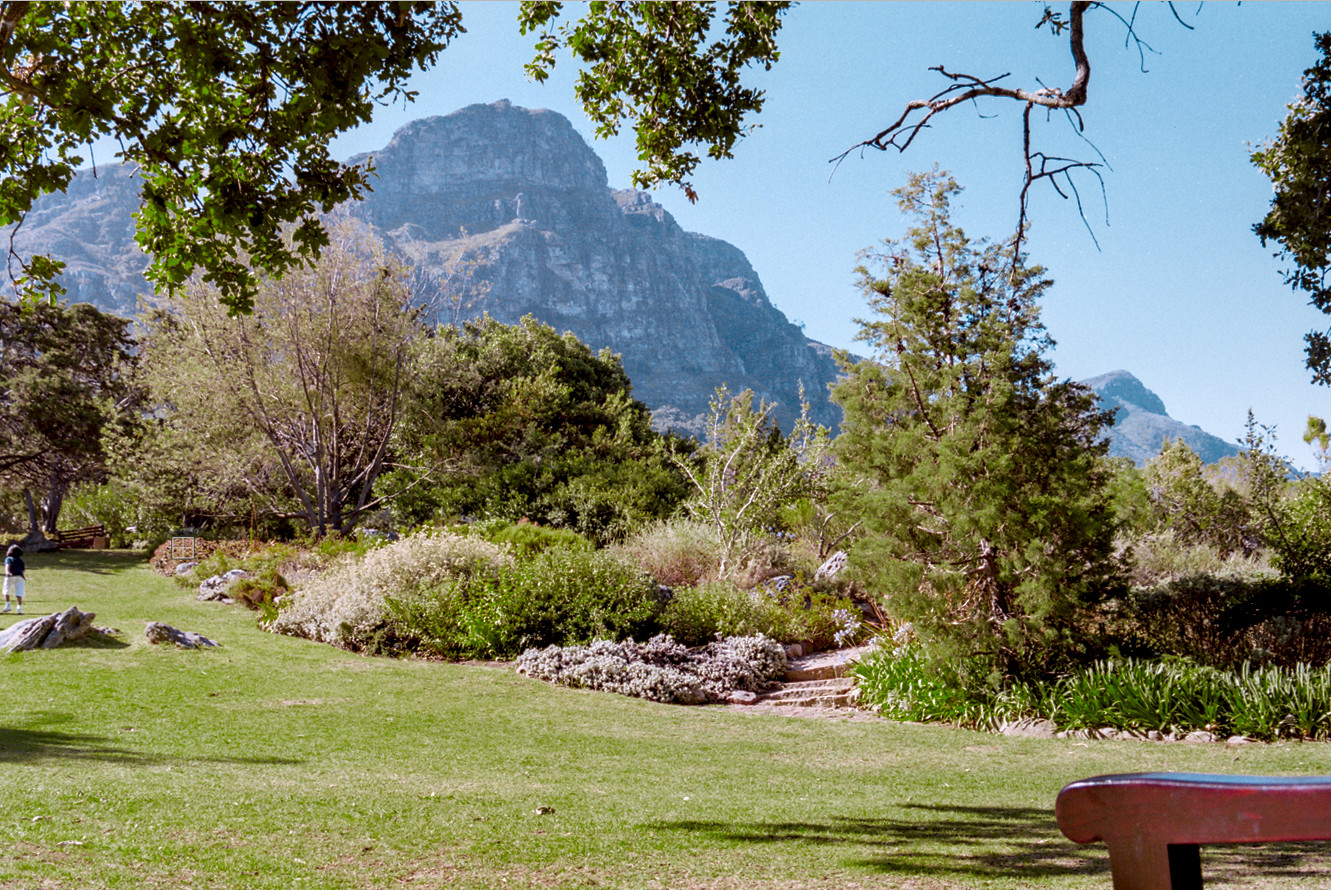
This photo was taken in South Africa in harsh midday sun, so there is strong contrast and washed out colours. The composition is pretty poor with a random bit of bench occupying the bottom right corner. But it poses a challenge for negadoctor and colour correction, so I thought it would be a good one to submit. Read on for my own workflow and some questions.

Raw file:
Kirstenbosch Neg 35.CR2 (23.6 MB)

My attempt with darktable 3.6:
Kirstenbosch Neg 35.CR2.xmp (13.8 KB)

This file is licensed Creative Commons, By-Attribution, Share-Alike.

Here is my workflow with some questions added:

  1. First, I turn off anything automatically applied (filmic RGB and automatic exposure adjustment)

  1. I then set color calibration to my LED light source temperature (4998K). I had previously taken a picture of the light source and taken a spot reading.
  2. I enable negadoctor and use the film base color picker to sample the unexposed film. At this stage, the white balance seems way off.

Q: At this stage, should I be trying to adjust white balance? If so, is it best to do this in negadoctor using the D min sliders or in color calibration or somewhere else?

  1. I then straighten and crop the image. This ensures that the 98% bounding box of all the other color pickers in negadoctor will only apply to the exposed part of the film.
  2. Back to negadoctor and I click the color picker for D max (setting the white point). This brightens the image, but I notice that it doesn’t get anywhere near the 100% line of the waveform/histogram. As there are certainly bright parts in this photo, I feel it should be filling up more of the histogram. So I draw a new bounding box to just capture the brightest parts of the image. Sometimes dust and specular highlights can cause problems with white point setting, so a smaller sample of the image can mitigate this.

Q: Do I adjust the D max manually to push up the white point? Or do I wait until I’ve completed the other tabs in negadoctor to judge the dynamic range? If I adjust D max manually at this stage, the highlights compress but still don’t go near the 100% line of the waveform/histogram.

  1. In negadoctor, I click the color picker for the scan exposure bias. This sets the black point and it looks ok. The image still has a flattened dynamic range and the colors are way off.
  2. On to the corrections tab, I click the color picker for shadows color cast at default settings. I then click the color picker for the highlights color cast at default settings. It’s done a decent job of removing the green cast and the dynamic range has expanded, but quite a bit more needs to be done and a new blue cast has been added.

  1. On to the print properties tab. I click the color picker for paper black. The image gets a little brighter. I usually leave the paper grade and paper gloss sliders alone (as per the manual, adjustment is not usually needed).
  2. Finally, I click the color picker for print exposure adjustment and another automatic adjustment is made. The image gets a little darker again. For this image, I personally don’t notice much difference after going through the properties tab, but it does depend on the photo I’m working on.

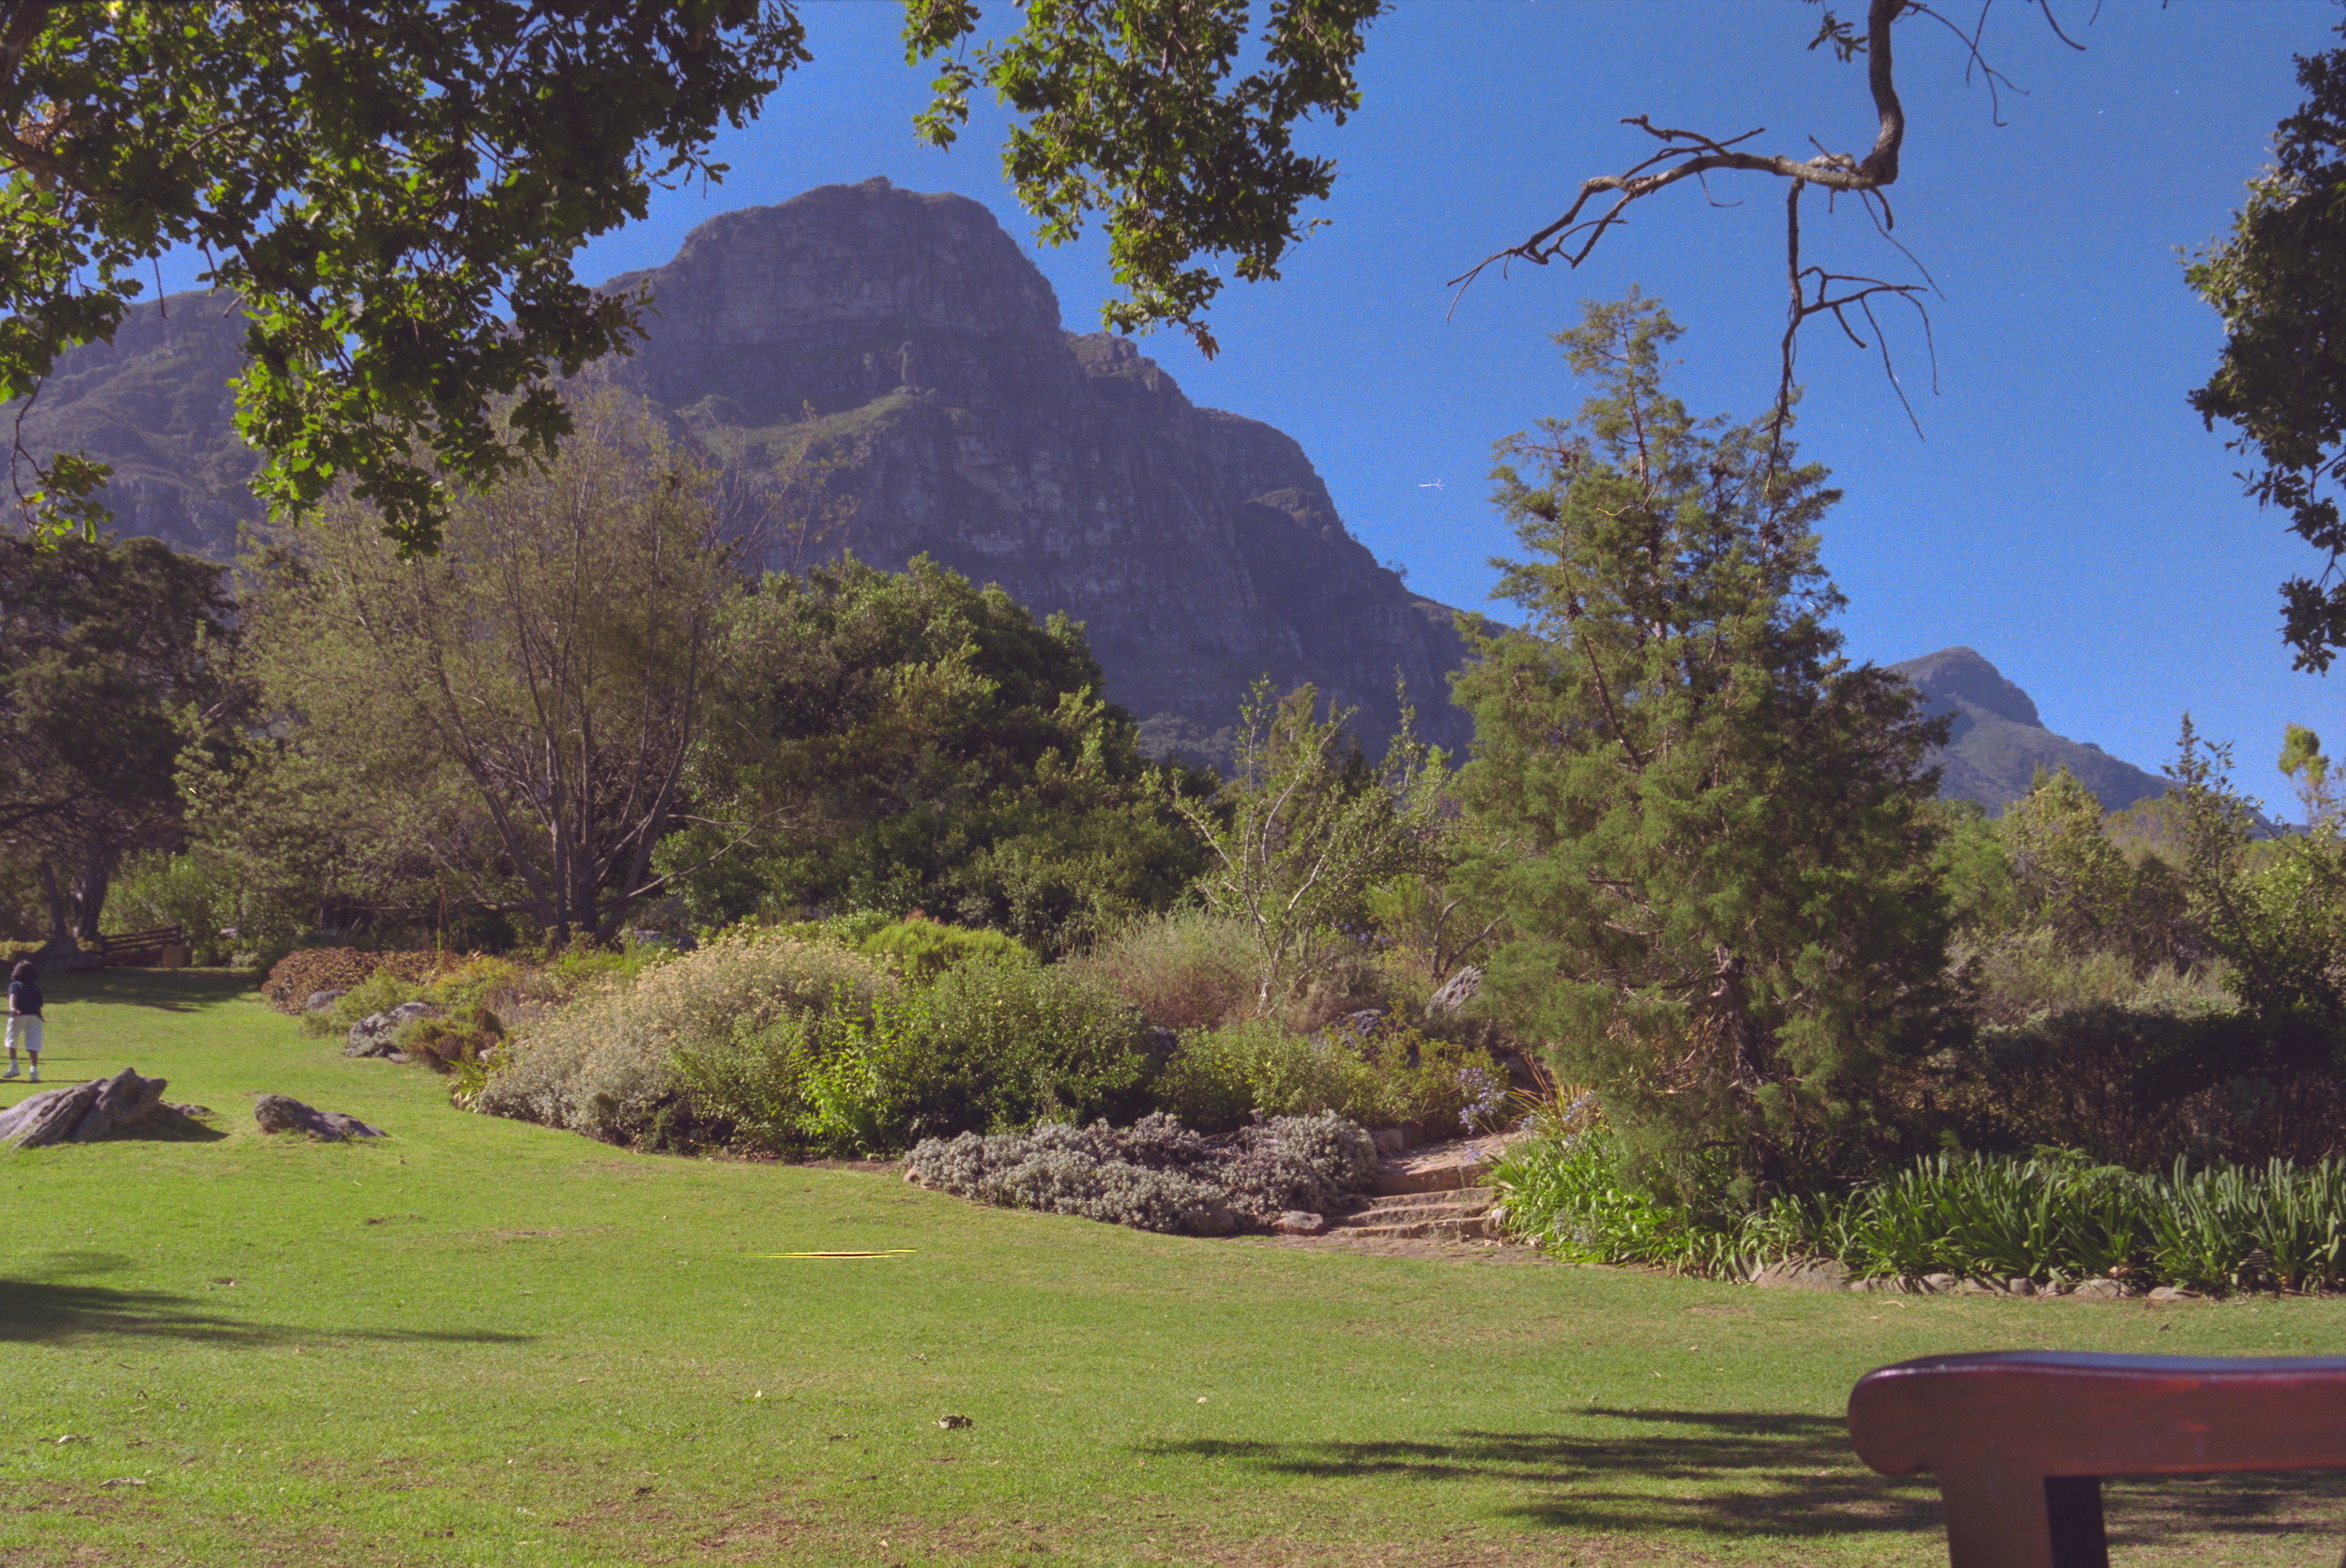
  1. I’m still left with a flat image and a strong color cast. So, I obviously need to adjust the tone curve to expand the dynamic range and then do some heavy colour correction work.
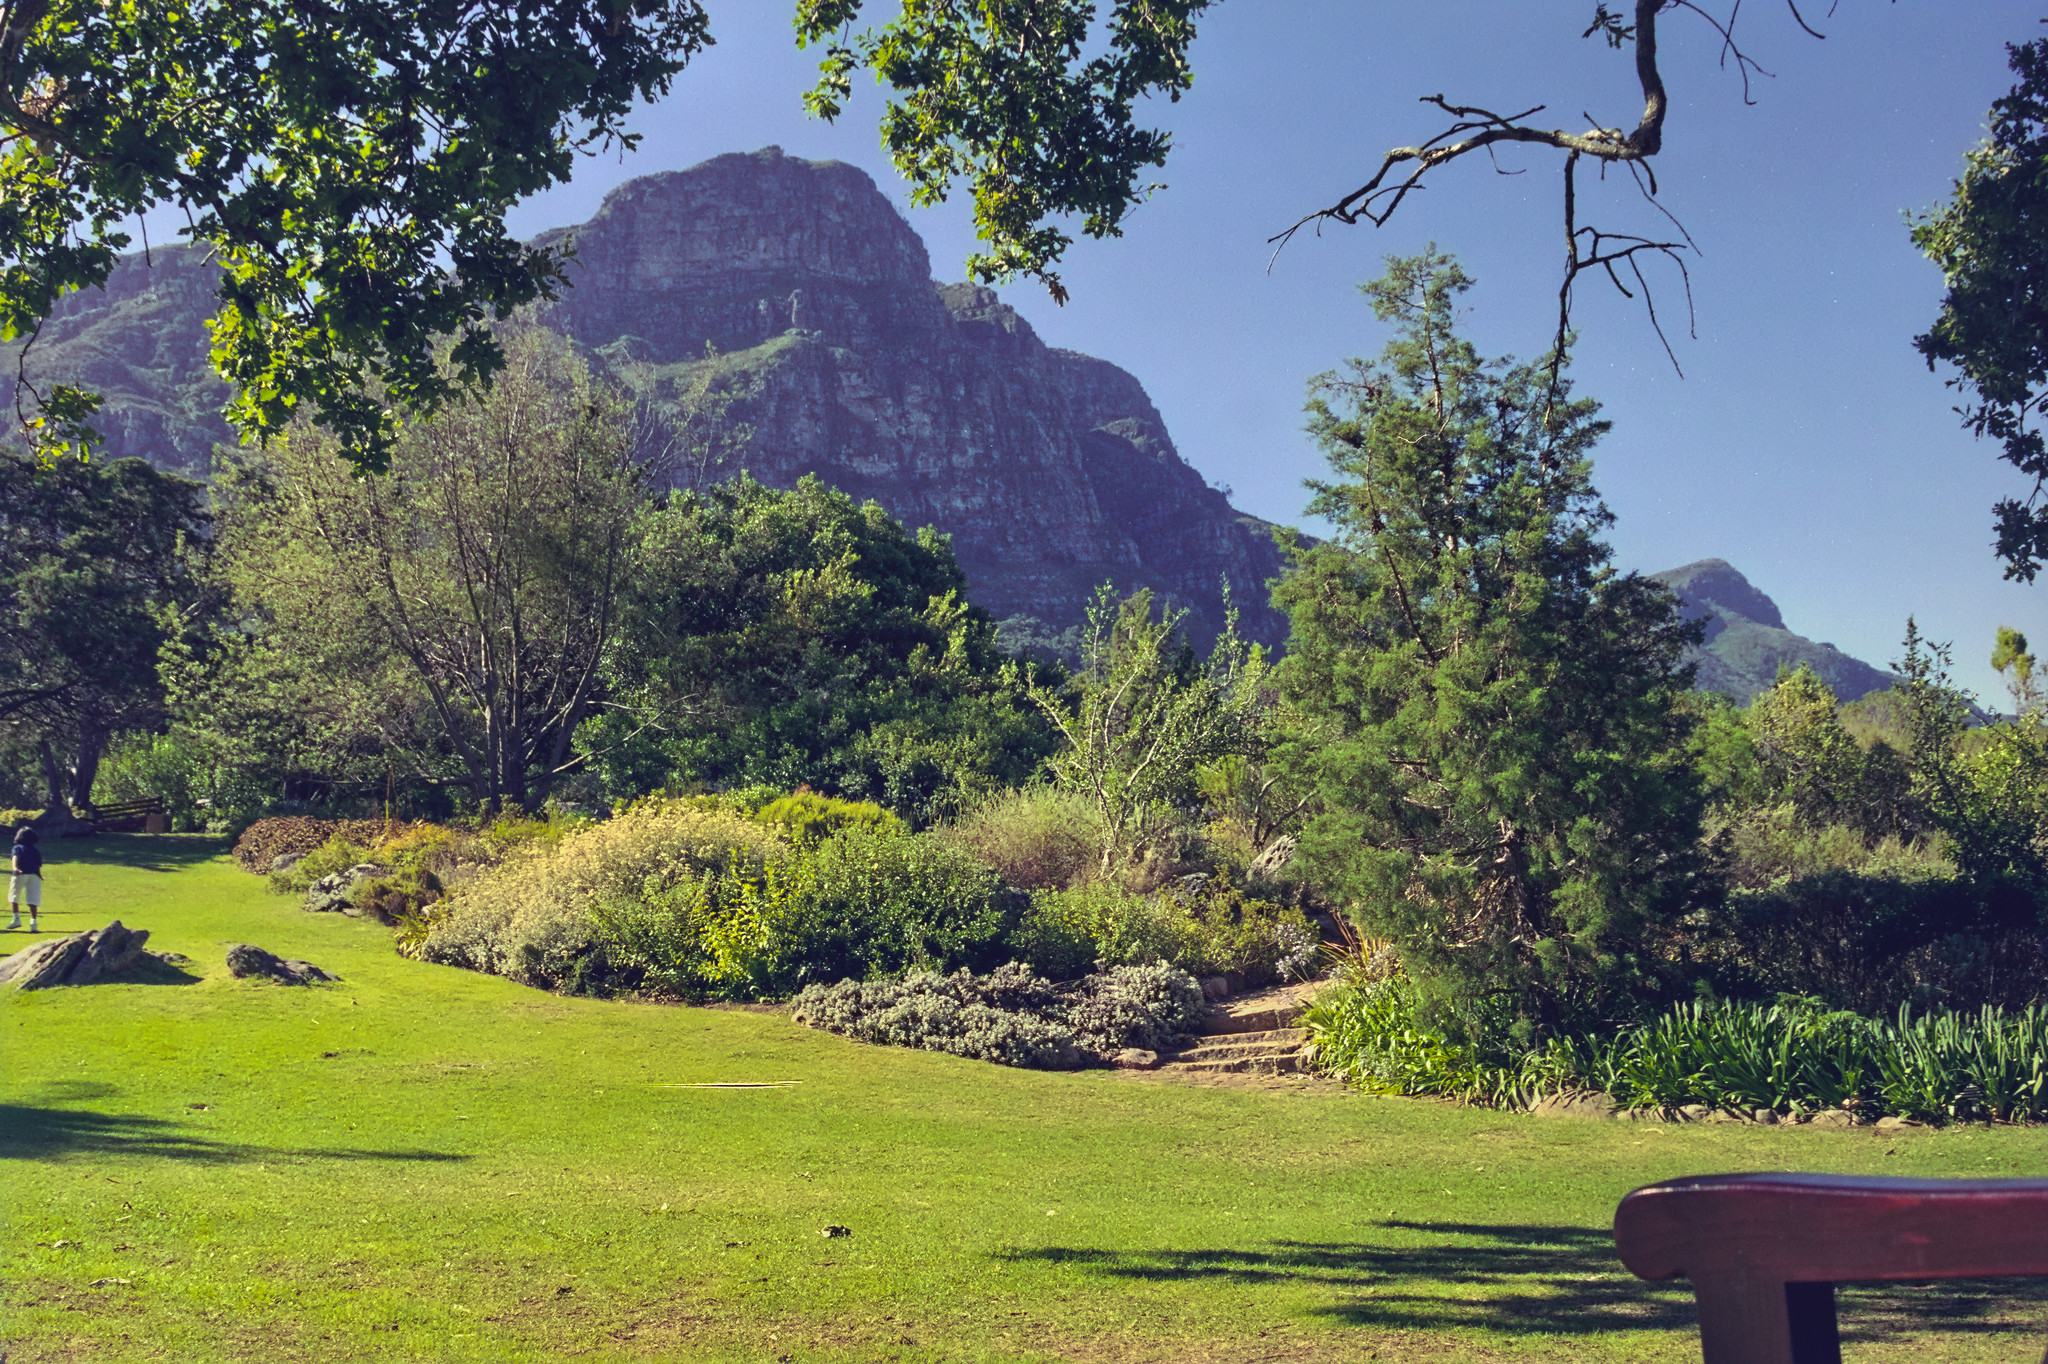
    This is what I come up with after lots of work in color balance RGB and also applying local contrast and some sharpening.

I feel this final image is a good representation of the original print. The problems that remain are all from the original capture and conditions. So overall I think darktable has done a fantastic job.

But I guess my main question can be summed up as:
“At what point and where is it best to adjust 1) white balance and 2) dynamic range?”

I’m not always sure when to do these various adjustments and whether they should be done as much as possible in negadoctor or to leave it to other modules like color balance RGB, color cablibration, etc.

Have fun!

Update for anyone interested: I am now using a second instance of color calibration above negadoctor in the pixelpipe and performing another white balance adjustment after negadoctor. This is great for fine-tuning the white balance. The manual supports this special use case and the warning that CAT has been applied twice can be safely ignored. I’ve turned off the warning in preferences. Tonal adjustments can also be done with tone equalizer as long it is also placed above negadoctor in the pixelpipe.

4 Likes

A very simple edit in RawTherapee (development build) only making use of the Film Negative module and some Capture Sharpening. I must say, I was pleasantly surprised with the (very basic) result!


Kirstenbosch Neg 35.jpg.out.pp3 (14.7 KB)

Edit: sorry if you specifically wanted negadoctor processing :upside_down_face:

1 Like


kirstenbosch.neg35.pp3 (14.9 KB) RawTherapee 5.8 Development.

Thanks for sharing this negative. Always nice to have a go at those!

2 Likes

Not at all! I actually realized after posting that I didn’t mean it to be specifically for darktable users. Great job with the colours!

When I DSLR scan my negatives I tend to set a custom spot white balance in the camera before I scan from my light table. After that I don’t usually touch white balance or color calibration in Darktable and things seems to turn out fine.

I also think it’s cool that you have an actual print to compare to. Unfortunately I don’t have prints to compare to, so when I scan color negatives I always wonder if what I produce represents what a print from the drug store would look like back in day or if what I am making is a more “clinical” representation of the image on the negative. Although, I also understand that DSLR scanning isn’t the most ideal, so that may affect the results as well.

I actually do that too, and then make sure it matches in color calibration. Maybe I could just set it to “As shot in camera”? The negadoctor module was developed and implemented before the color calibration module, so I’m not sure if there would be any changes to the workflow since this new module was added.

Yes, I’m lucky that I have prints for most of my negs. But then I’m always deciding between matching the print and coming up with my own interpretation. The labs I used back in the day were rarely high-end ones, so they didn’t always produce the best prints. Sometimes the colours were off and I’ve scanned/processed better versions. I also enjoy the fact that I get a bigger picture, literally, because the prints were often cropped quite a bit from the negative. Overall though, I’d say that the prints are better about 80% of the time. There’s just something special about the film/print medium.

While dealing with negatives, I often find the default settings of “input color profile” not working well. Setting the “input profile” to something like “linear Rec2020 RGB” gives much better results IMO.

Thanks for this nice negative!
This is the first time I used the negative tool in RT, works really nice!


Kirstenbosch Neg 35_RT-1.jpg.out.pp3 (15.0 KB)

ART

That was too much saturated. After seing the reference print, I suppressed saturation

first version // … wasn’t sure about the green


Kirstenbosch Neg 35_01.CR2.xmp (30.4 KB)

… so i did a 2nd one


Kirstenbosch Neg 35_03.CR2.xmp (30.4 KB)

@europlatus i did (1) and not (2), three as well … :thinking: … guess i just used the calibration sliders first from the negadoctor to eliminate greenish tint. then after, the ones from the color calibration module :slightly_smiling_face:

2 Likes

I actually like your 2nd one better. The first is probably a bit too nuclear (which you recognized), and the 2nd is a little more true to life. Personally, I’m guilty of edits and scans like your first one because I see too much of it on Instagram, lol.

1 Like

This was an interesting one to play and I was able to learn a lot. I had to change the input color profile to “standard color matrix” to get something useful out of the data.

Thanks for sharing :smiley:

… it’s a fine line between nice colors and :cry: colors 8)

I’ve calmed down the yellows a bit and I feel this is even closer to the original print. The shadows are a bit lifted and it’s less contrasty than the original, but I like it. I also feel the colour rendition is more accurate.

Here’s a scan of the original print for reference:

I think on balance I prefer the processed negative.

6 Likes

I tried to match your result as this looks way more natural than most of the other attempts, and in particular my other attempt. I think I succeeded (it’s not exactly the same but close), but only by massively tweaking the color zones module. How did you achieve this look?

1 Like

@chris Nice job!
To get my result, I did lots of work in color balance RGB and some tweaking in color zones. I feel I can usually get an excellent result after spending lots of time in these two modules, which is good on the one hand, but on the other I’m trying to reduce the amount of time per image. I feel I should get closer to what I’m looking for after negadoctor, and I usually do with images that have less green in them. For some reason, it’s the green images that cause the most problems or at least images with just one or two dominant colours.

I’m still learning colour balance RGB. I’m getting some great results from it, but sometimes I’m taking a real trial and error approach to it. Nothing wrong with that per se, but I’d prefer to be a bit more targeted with what I’m doing. For example, I want to look at the image, see what’s wrong with it, and know which sliders to turn to. I feel I can already do this with the 4-ways tab, but not as much with the master tab. But I’m slowing getting the difference between chroma and saturation. Brilliance, on the other hand, I’m still working on…

Here’s my latest xmp for this image.
2000_xx_xx S.Africa Roll 2 Neg 35.CR2.xmp (12.0 KB)

I wonder if the approach is correct. Analog photographs are already in a non-linear representation, and the tools made for linear data such as all the *RGB modules may face some issues working with tone-mapped pixel data. Maybe that is the reason why color zones works well.

True, although I’ve found that some negatives do come out looking great just after negadoctor. But there’s usually a little tweaking to be done afterwards and that’s ok. I think my main struggles are with white balance, although it could just be the limitations of my setup. I’m using a phone screen LED and older DSLR to capture the negs. It’s probably not ideal.

Edit: I’m getting better results with WB after creating another instance of color calibration and moving it above negadoctor in the pixelpipe. A warning is displayed that CAT has been applied twice, but this is a special case that requires it. Incidentally, the manual does mention this as a suitable use case.

Hi,
my try:

10 Likes

My attempt to develop in GIMP
Kirstenbosch Neg 35-GIMP LAB