That’s were I really need advice/feedback. I am trying to make the tool as simple as possible, yet flexible enough to provide a good output in all conditions. Do you find the DT filmic tool more intuitive?
I really need to get this sorted out! Wayland might be the issue on Linux, for in the windows case I have no clue…
No, the sRGB tone curve is an encoding curve. It maps [0,1] to [0,1], but re-shuffles the bit allocation so that more bits are used to describe the dark tones, for which our eyes are more sensitive.
The tone mapping instead compresses the scene-referred values (which can easily exceed 1 where highlights are above diffuse white, or above 5x mid-grey) into the hardware display range of [0,1]. It therefore changes the appearance of the image, while the sRGB curve only helps avoiding banding effects at small bit depths, but does not otherwise change tonal distribution in the image.
It is combined, because the tone curve flattens the image in some tonal regions. Therefore I am offering the possibility to apply the tone mapping to a blurred image, and re-inject the local contrast at the end.
More what I’m asking is: does this replace or augment some other tool in a pipeline you create with PhotoFlow? Or in another editor?
(In Filmulator this would involve ripping out the whole core of Filmulation, which has the same purpose of reducing dynamic range without destroying local contrast.)
That is precisely what I meant by my previous comment. Different devs approach the dynamic range and local contrast problem differently.
And partially why I was originally skeptical about incorporating other tools into the filmic tone mapper. Of course, I could ignore those parameters.
As filmic tm is currently, I don’t see it as general purpose, whereas the OCIO modules appear to be more viable since they act as another layer of abstraction on top or beneath the existing pipeline.
I’ve been messing with a filmic tone curve in rawproc, specifically the HP Duiker definition:
R(x) = x *(6.2* x+.5))/(x *(6.2* x+1.7)+0.06
Not at all parametric, but it gives me an idea of what it is supposed to do compared to some of the other scaling curves. On my test image with the locomotive headlamp, it does leave me with a decent amount of tonality in the lamp itself, while spreading out the lower data in a pleasing fashion.
This post, and others in this author’s blog, may be of help:
As you know I have been playing with filmic related ideas for a long time, I just don’t have the programming chops. Perhaps, it was the magic lantern ufraw-mod that got me thinking about this subject.
The good thing is that PF has been accumulating several filmic related tm tools, two of which are implementations of Filmic Worlds’ examples that @ggbutcher just linked. They are currently under Tone mapping old among others.
In fact, the latest TM curve I’ve been working on follows the same principle as the Filmic World’s one, but IMHO with more intuitive parameters…
All this curves, including the OCIO-filmic ones, are intended to be used as the very last step, to prepare the image for display. They serve the same purpose, but in more or less different ways.
In some ways yes and in other ways no. I know what they are intuitively but I haven’t put my thoughts to words yet. I would say that dt’s filmic often gives me better results but the interface is trying too hard to be accessible, which has sort of backfired given the amount of posts about it.
PS It might be unfair to make a one-to-one comparison because it seemed that @anon41087856 was constrained by dt’s pipeline and workflow philosophy, which he is currently working hard to unravel and perhaps modernize.
PPS dt’s filmic and PF’s filmic (OCIO) are based on Troy’s work. If filmic (OCIO) is my #1 and dt’s filmic is in some ways better than #2, then it would be logical to say that I like the adaptations of Troy’s implementation more than the adaptations of Filmic World’s.
Today, I encountered a case where I couldn’t close a mask layer floating window. I could close the others but not that one. Also, I encountered a situation where PF was stuck at caching, eventually crashing. Let me qualify the word stuck by saying that the GUI was still operational. Unfortunately, I cannot reproduce either issues.
Both cases happened as I was editing my latest PlayRaw. Second case was when I started moving the module layers around and toggling them.
I have done some further work to improve and simplify the tone mapping tool.
Instead of a general “compression” adjustment, it is now possible to specify the “white” input level, which is mapped to 1 in the tone mapping output. This “white” level is not affected by changes in the slope parameters, so it should be easier now to precisely define the values above which the input will be clipped.
The white level is represented in a 10 * log10(white) scale, so a value of 0 for the white level means that 1 is mapped to 1. In this case the tone mapping can be used as a classical S curve.
The maximum value of 100 means white = 10^10, which can be considered as infinite in practical terms…
There is also a new slider to adjust the de-saturation of highlights, if needed (it defaults to 0, that is no desaturation).
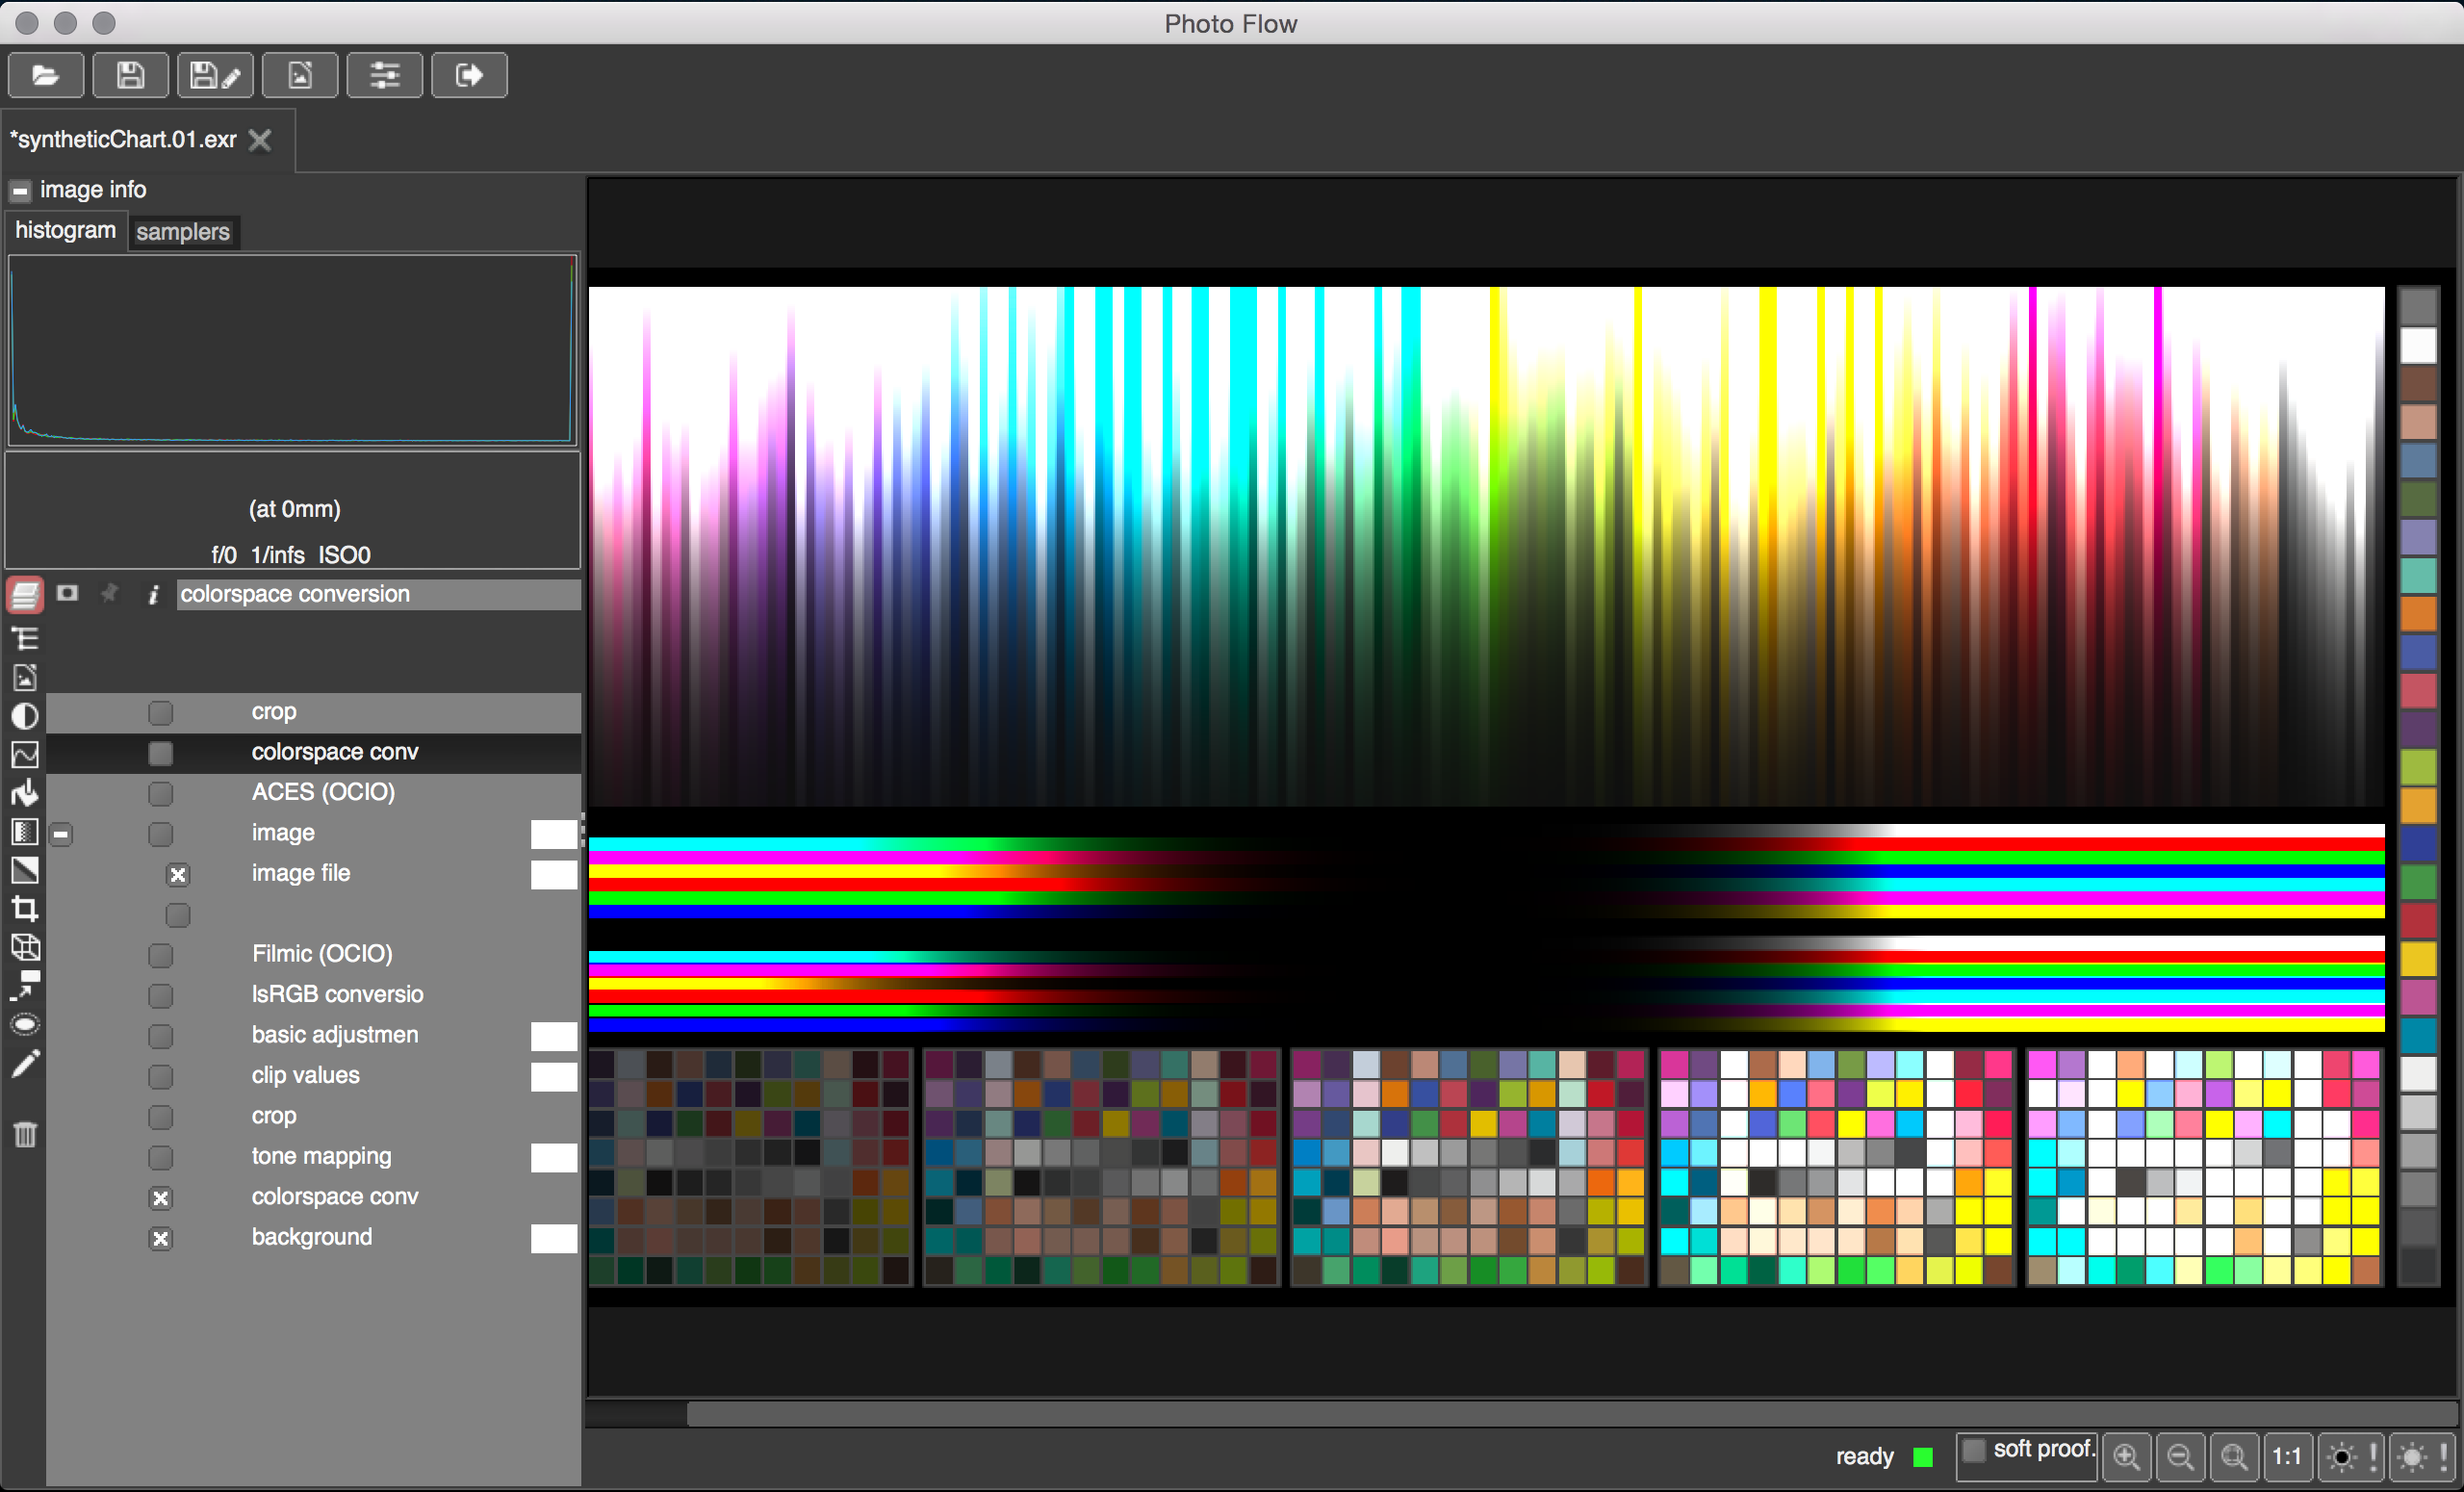
Here is an extreme example of a conversion to sRGB through a combined use of the tone mapping and the gamut mapping tools. The input is a synthetic ACES-P1 image with gradients that reach extreme RGB values, and which are usually rather difficult to gracefully compress into the sRGB gamut:
You would have to gift me with a pro monitor with a powerful rig first, which I would then have to colour manage properly. All I can say is that they look better and that my eyes are way more sensitive to tone than colours.
I realise I have asked a rather mis-placed question… Anyway, I am trying now to provide presets that are very close to the OCIO filmic ones, and that can be used as starting points for further tweaking.
That would be a good decision since OCIO filmic has been battle tested. However, I think that they also deserve their own, since they have a different character to them.
Dear all, here comes the next improvements in the tone mapping tool.
The main new thing are presets, that is user-selectable pre-configured sets of values for the parameters that give “good starting points”. Actually, the presets have been tuned to reproduce very accurately the OCIO-filmic ones. The agreement is very good, with just a little discrepancy in the deep shadows where my presets are a bit brighter.
Once a preset is selected, the user can further tune the parameters to achieve best results, if needed.
There is also a new slider to control the saturation of highlights. By default it is set to “0”, which matches the OCIO-filmic behaviour. Moving the value from “0” to “100” the highlights will progressively retain more colors
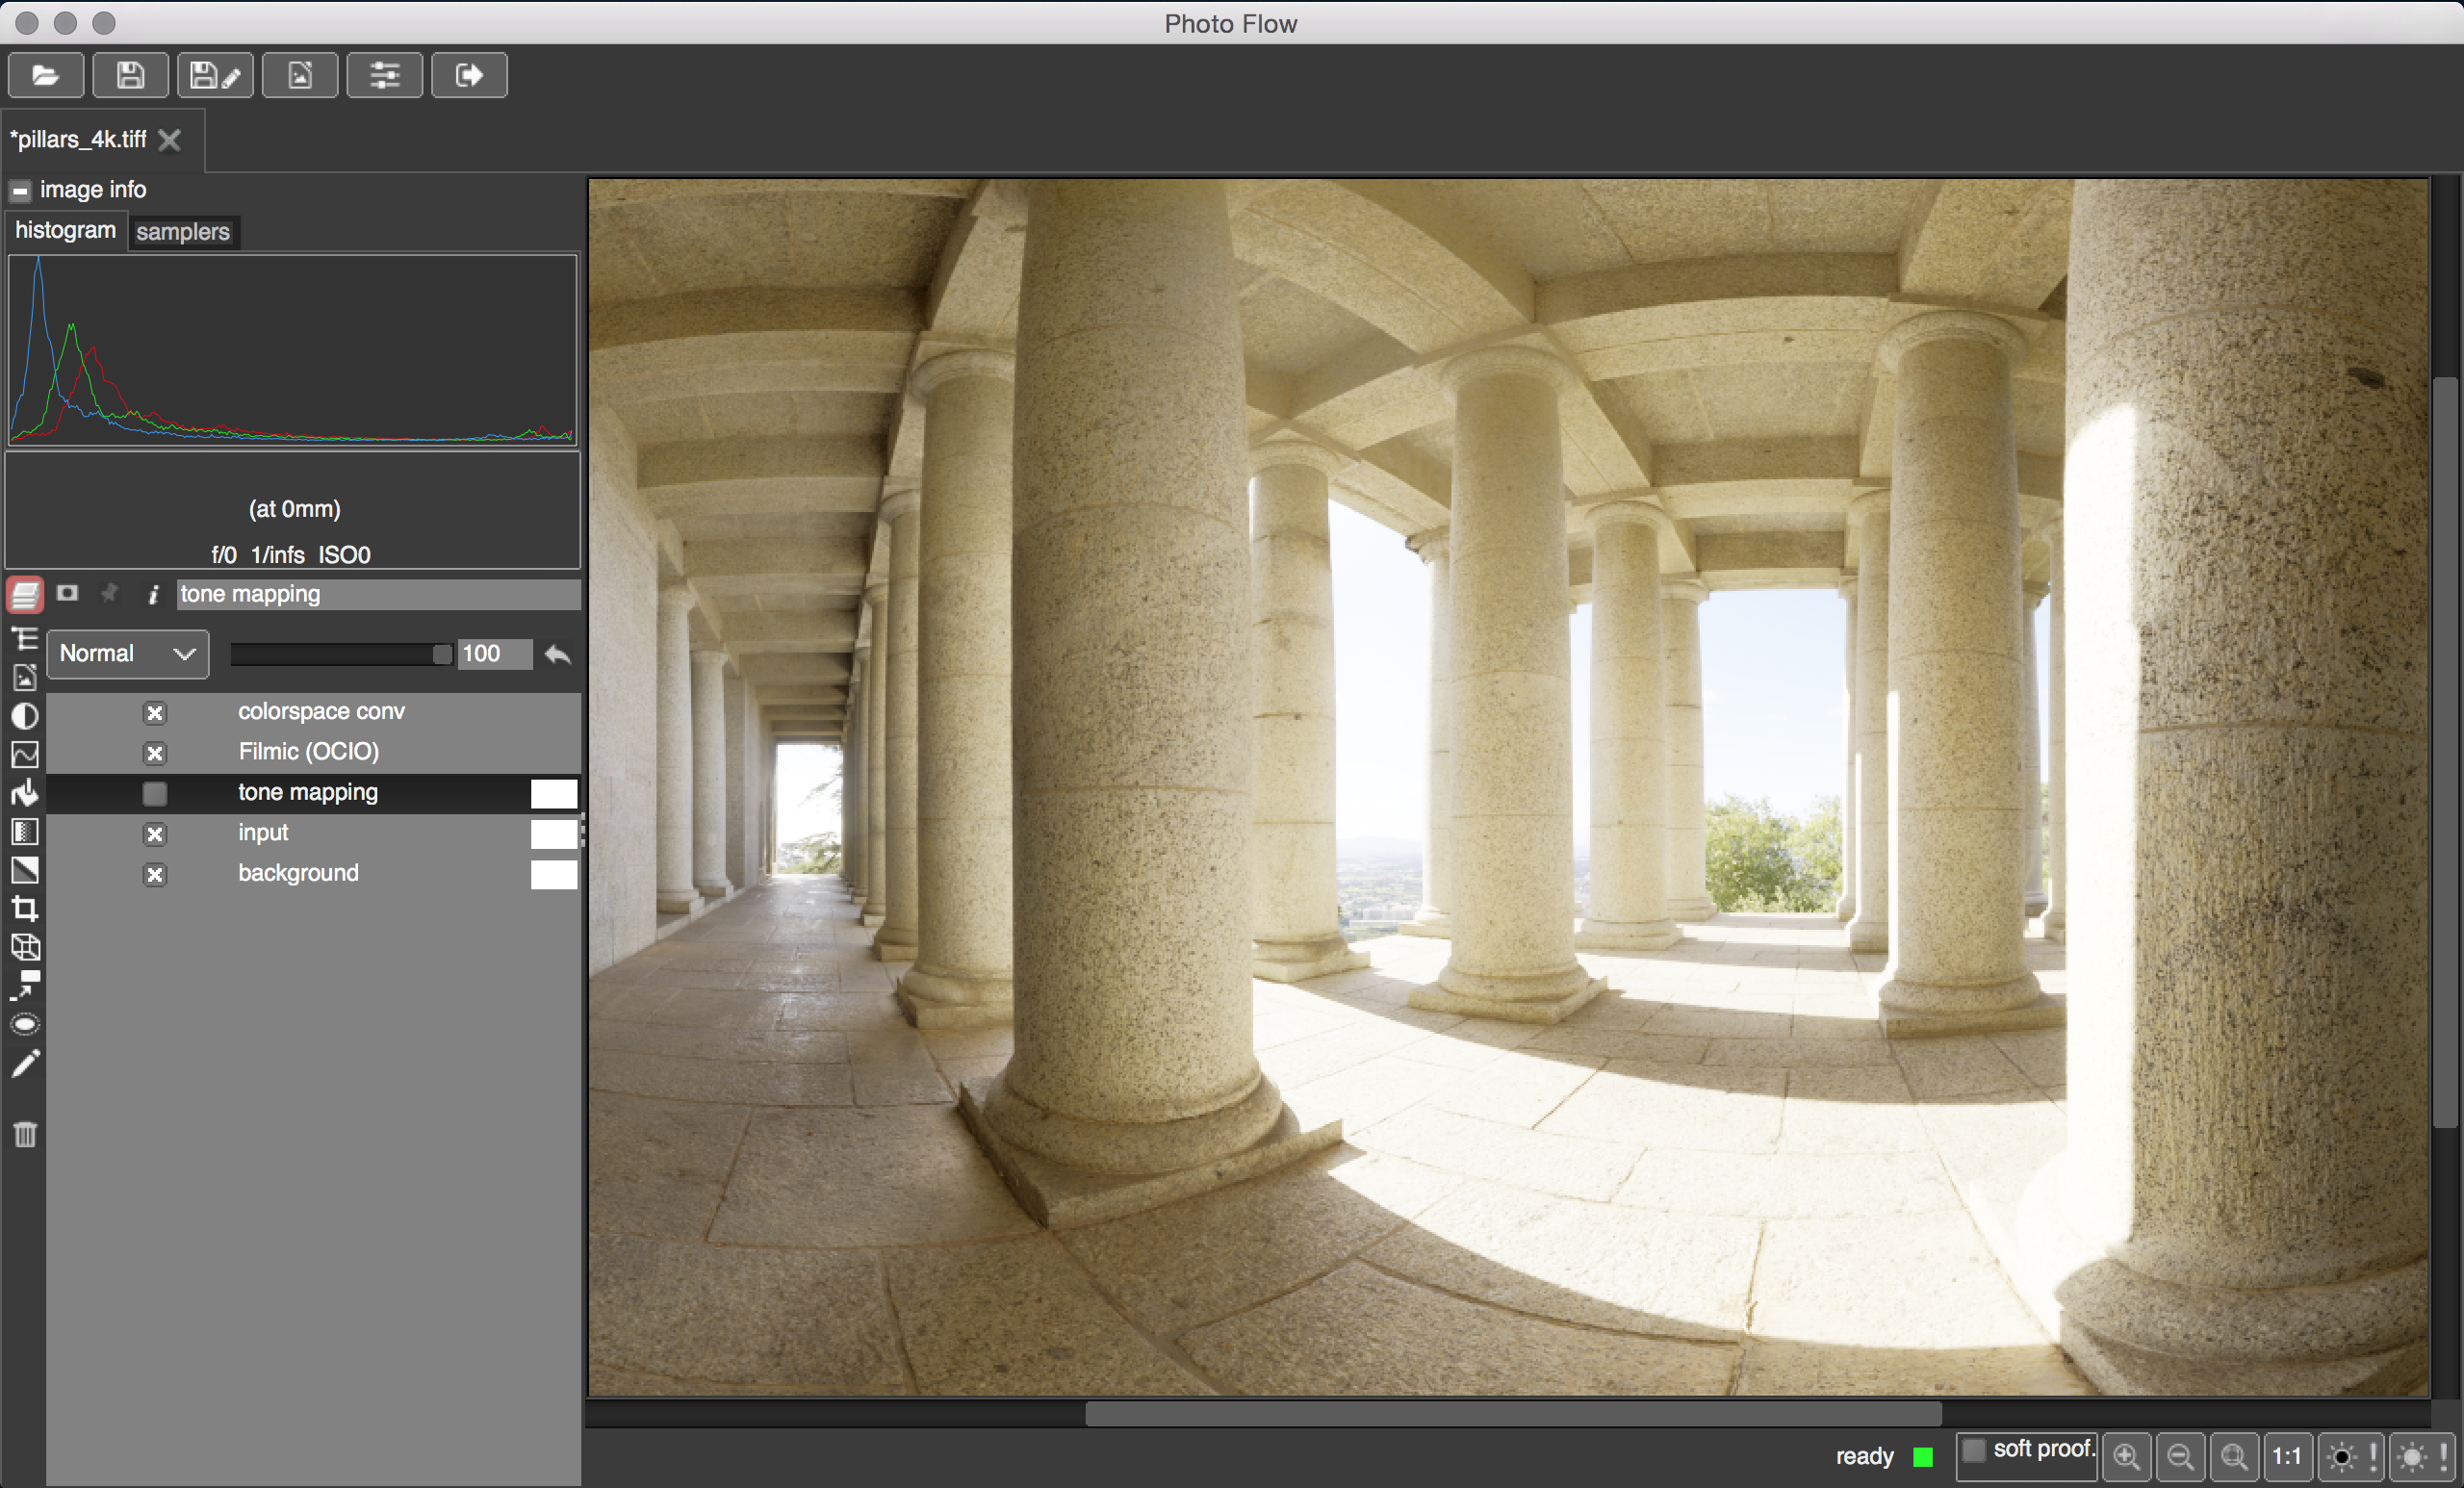
Here is an example of comparison between OCIO and my own.
Incidentally, I have discovered a bug that made the OCIO-filmic output look brighter than it should. That means that existing edits using the OCIO-filmic module will produce a slightly darker output when re-opened with the latest PhF version. This can be corrected with a power-like adjustment after the OCIO-filmic layer, if needed.
Sorry for that, but I could not really ignore such type of bug…
Noticed it right away but didn’t want to bother you about it since it didn’t bother me.
Could you please provide your PFIs for examination, and a link to the source image?
I find the saturation a bit uncanny and unnatural, esp. in the centre where the sky meets the highlighted pillar.
Could you also add tool information to the info button of your tone mapping modules? Even though I have been testing all along, the parameters still give me pause. Info readily available would be nice.