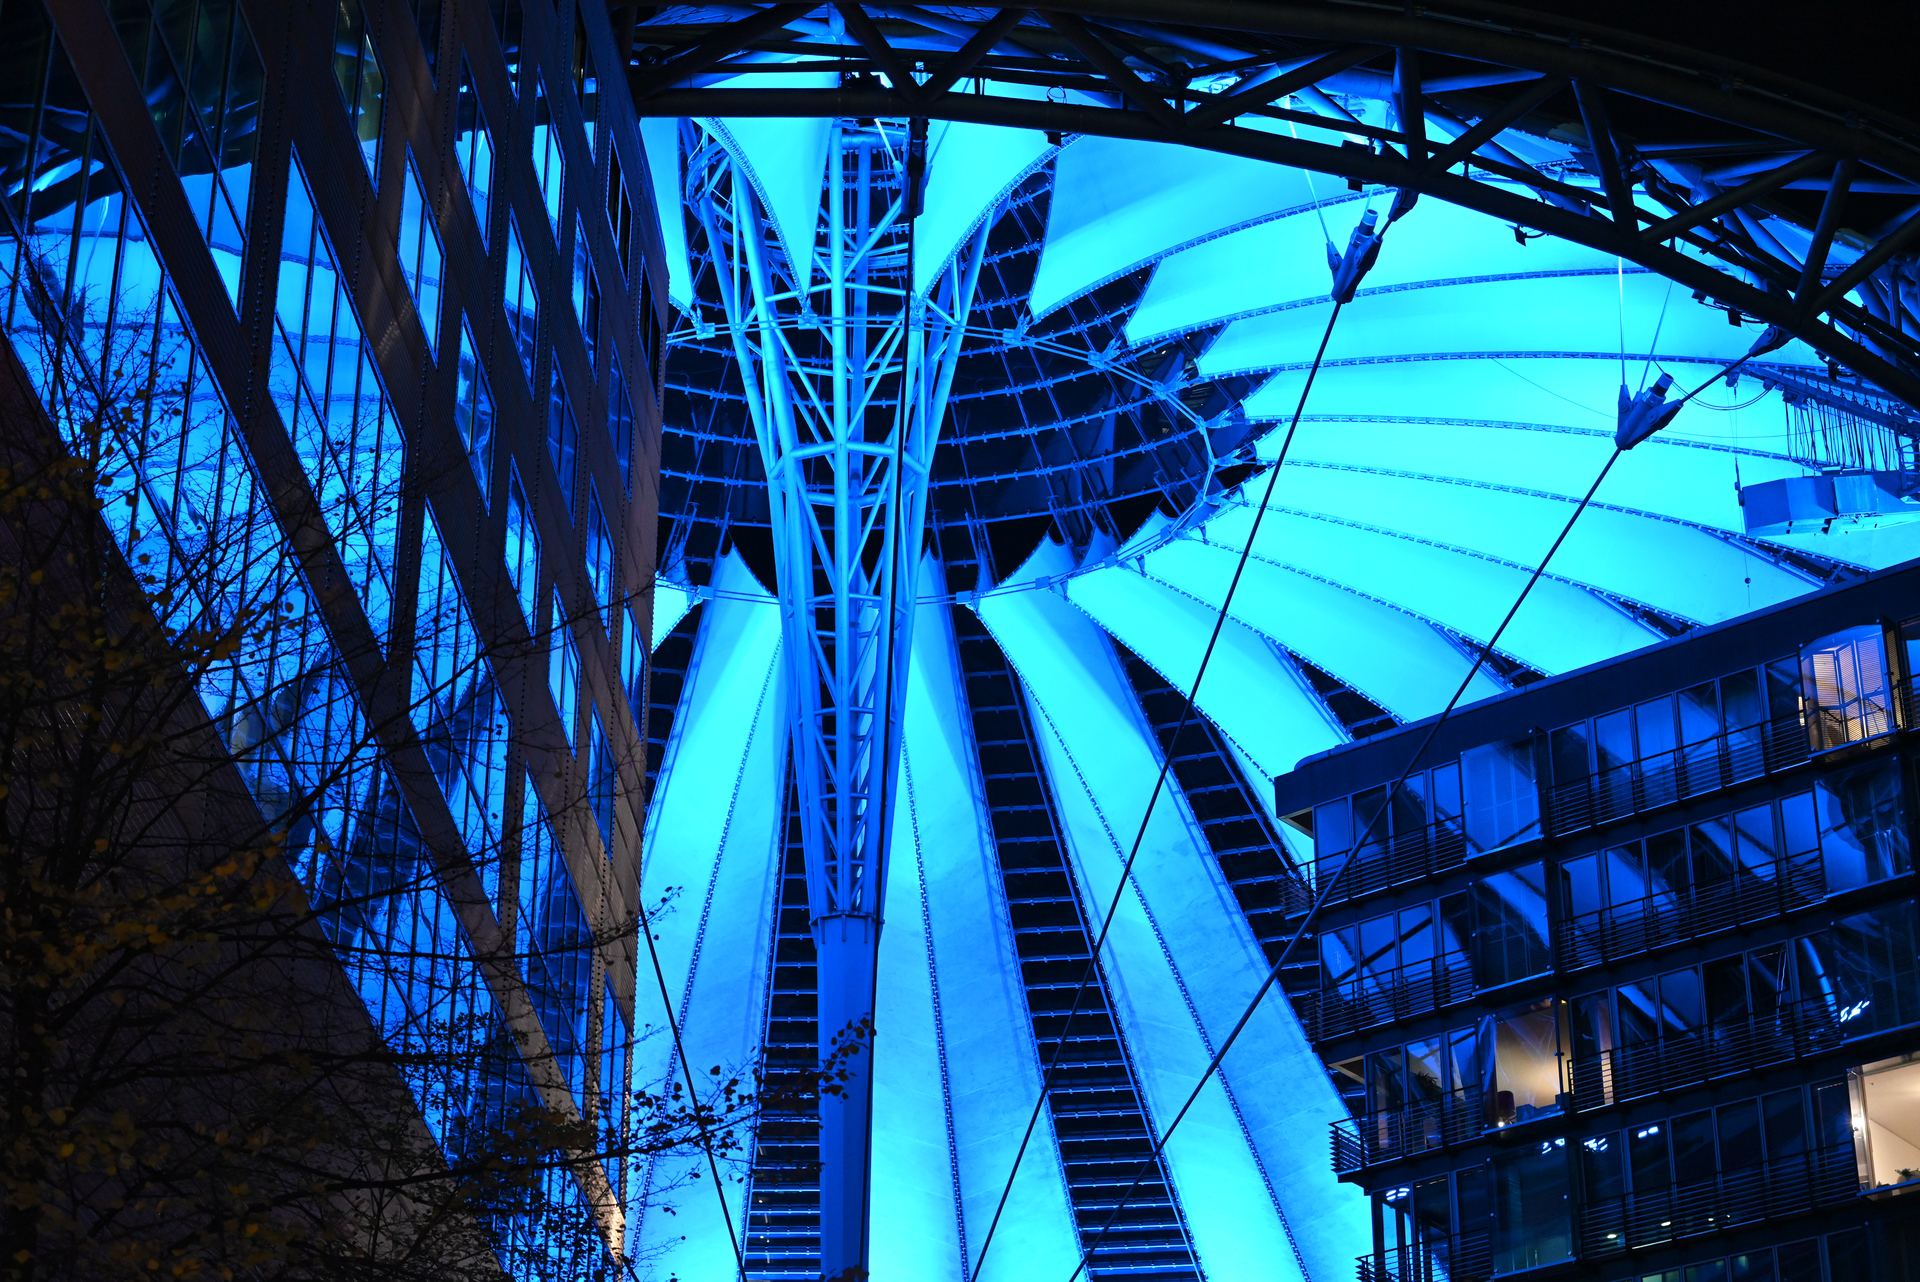
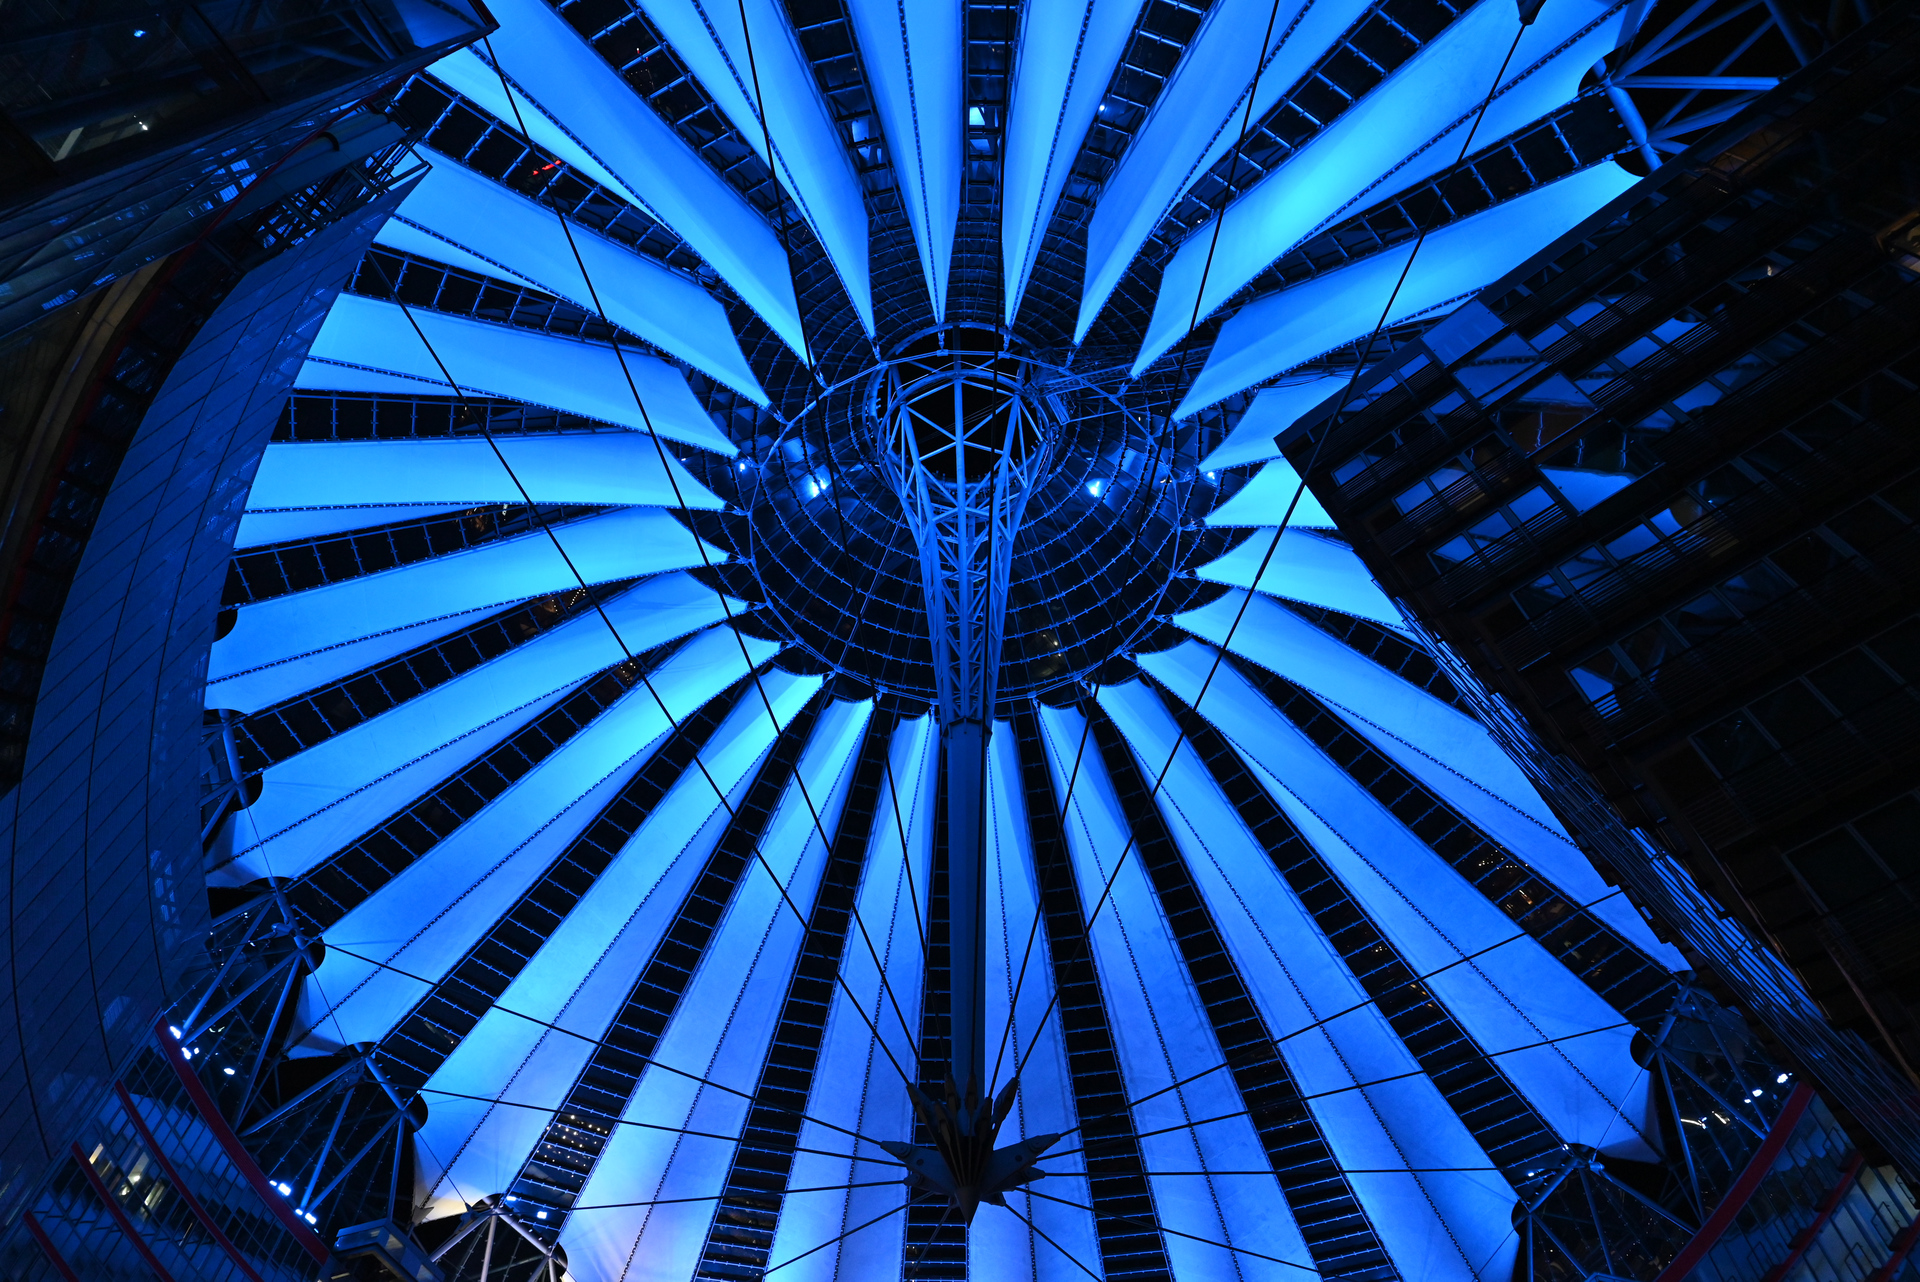
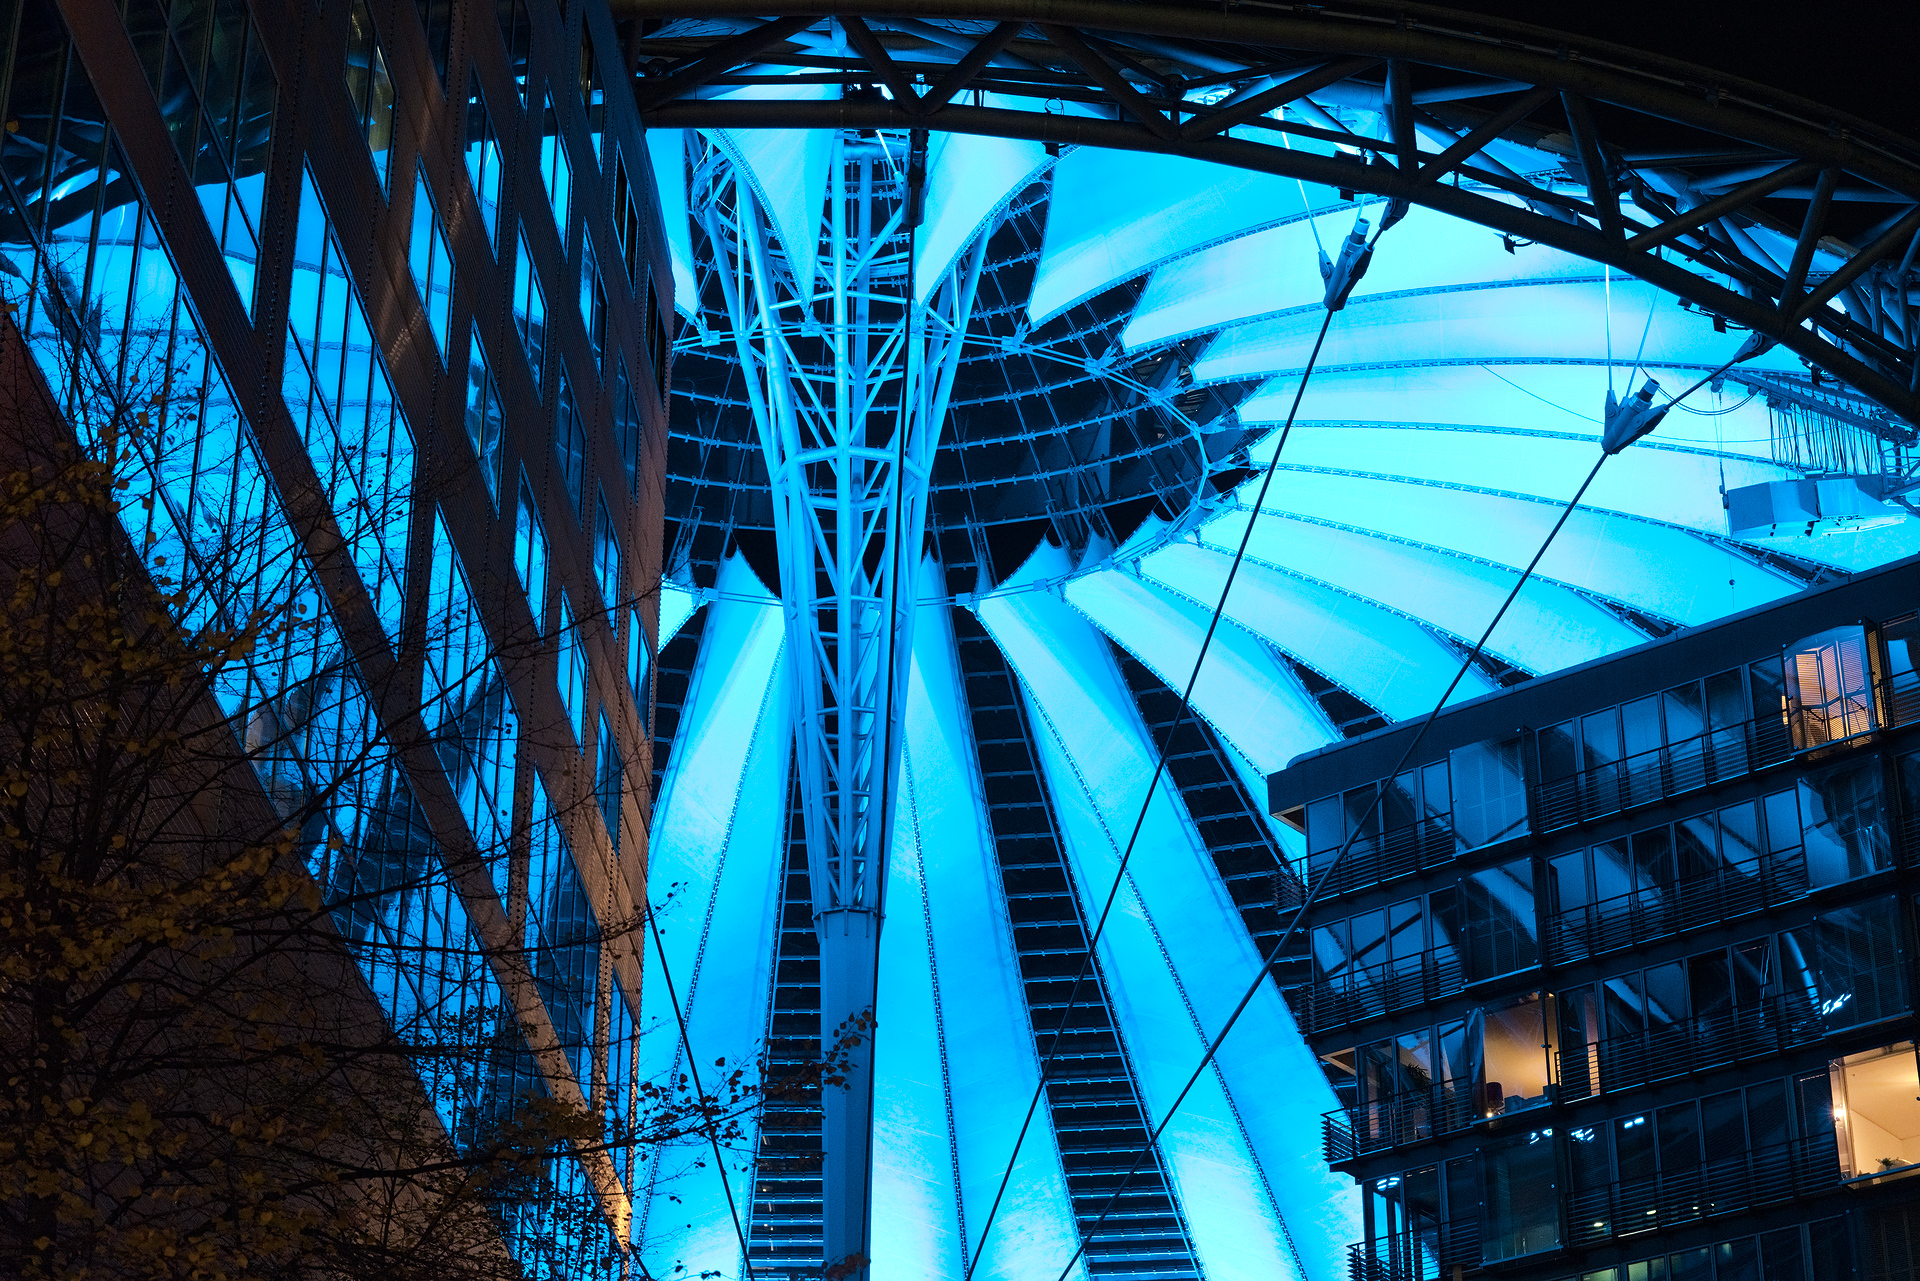
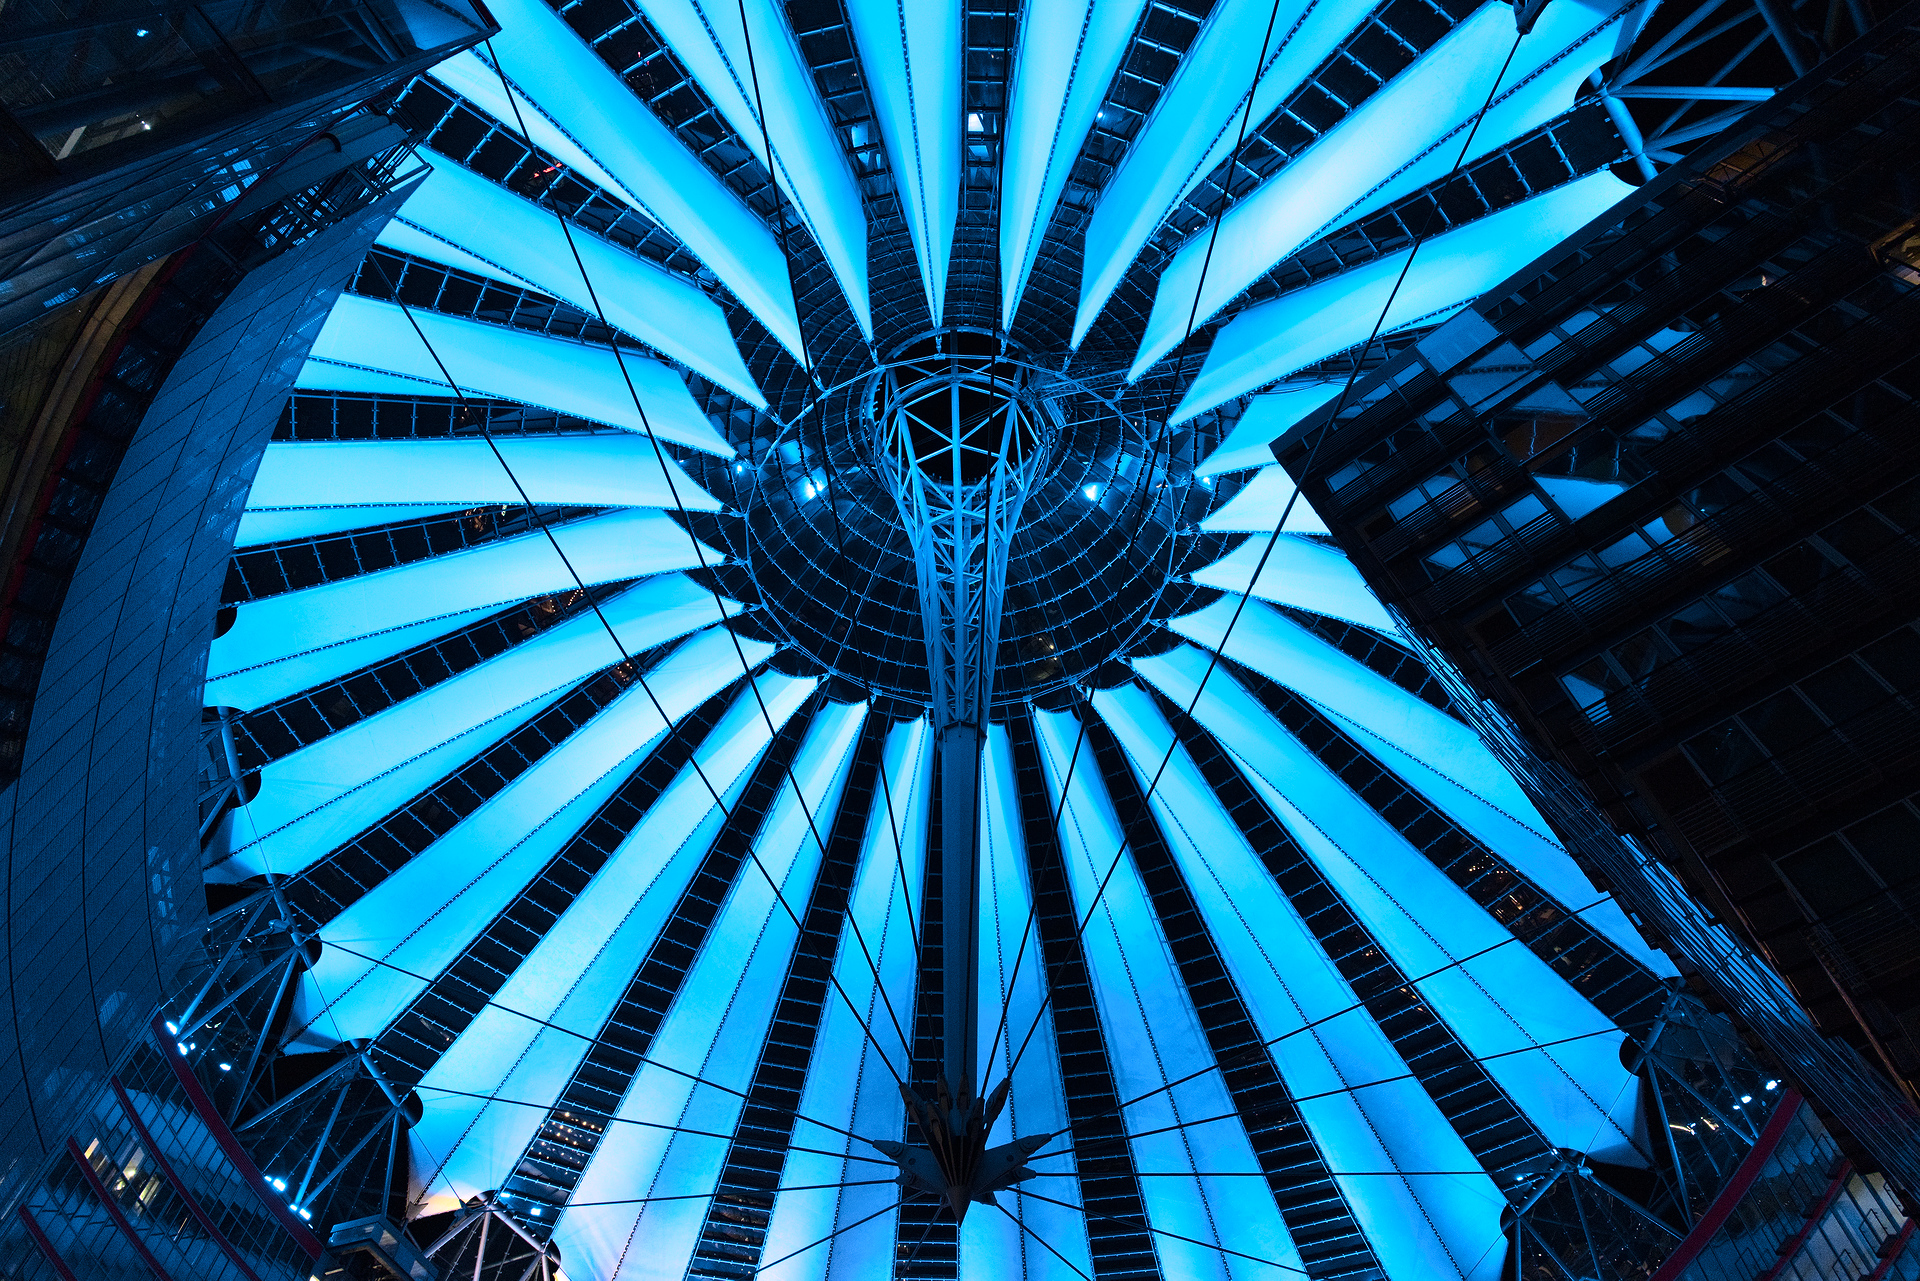
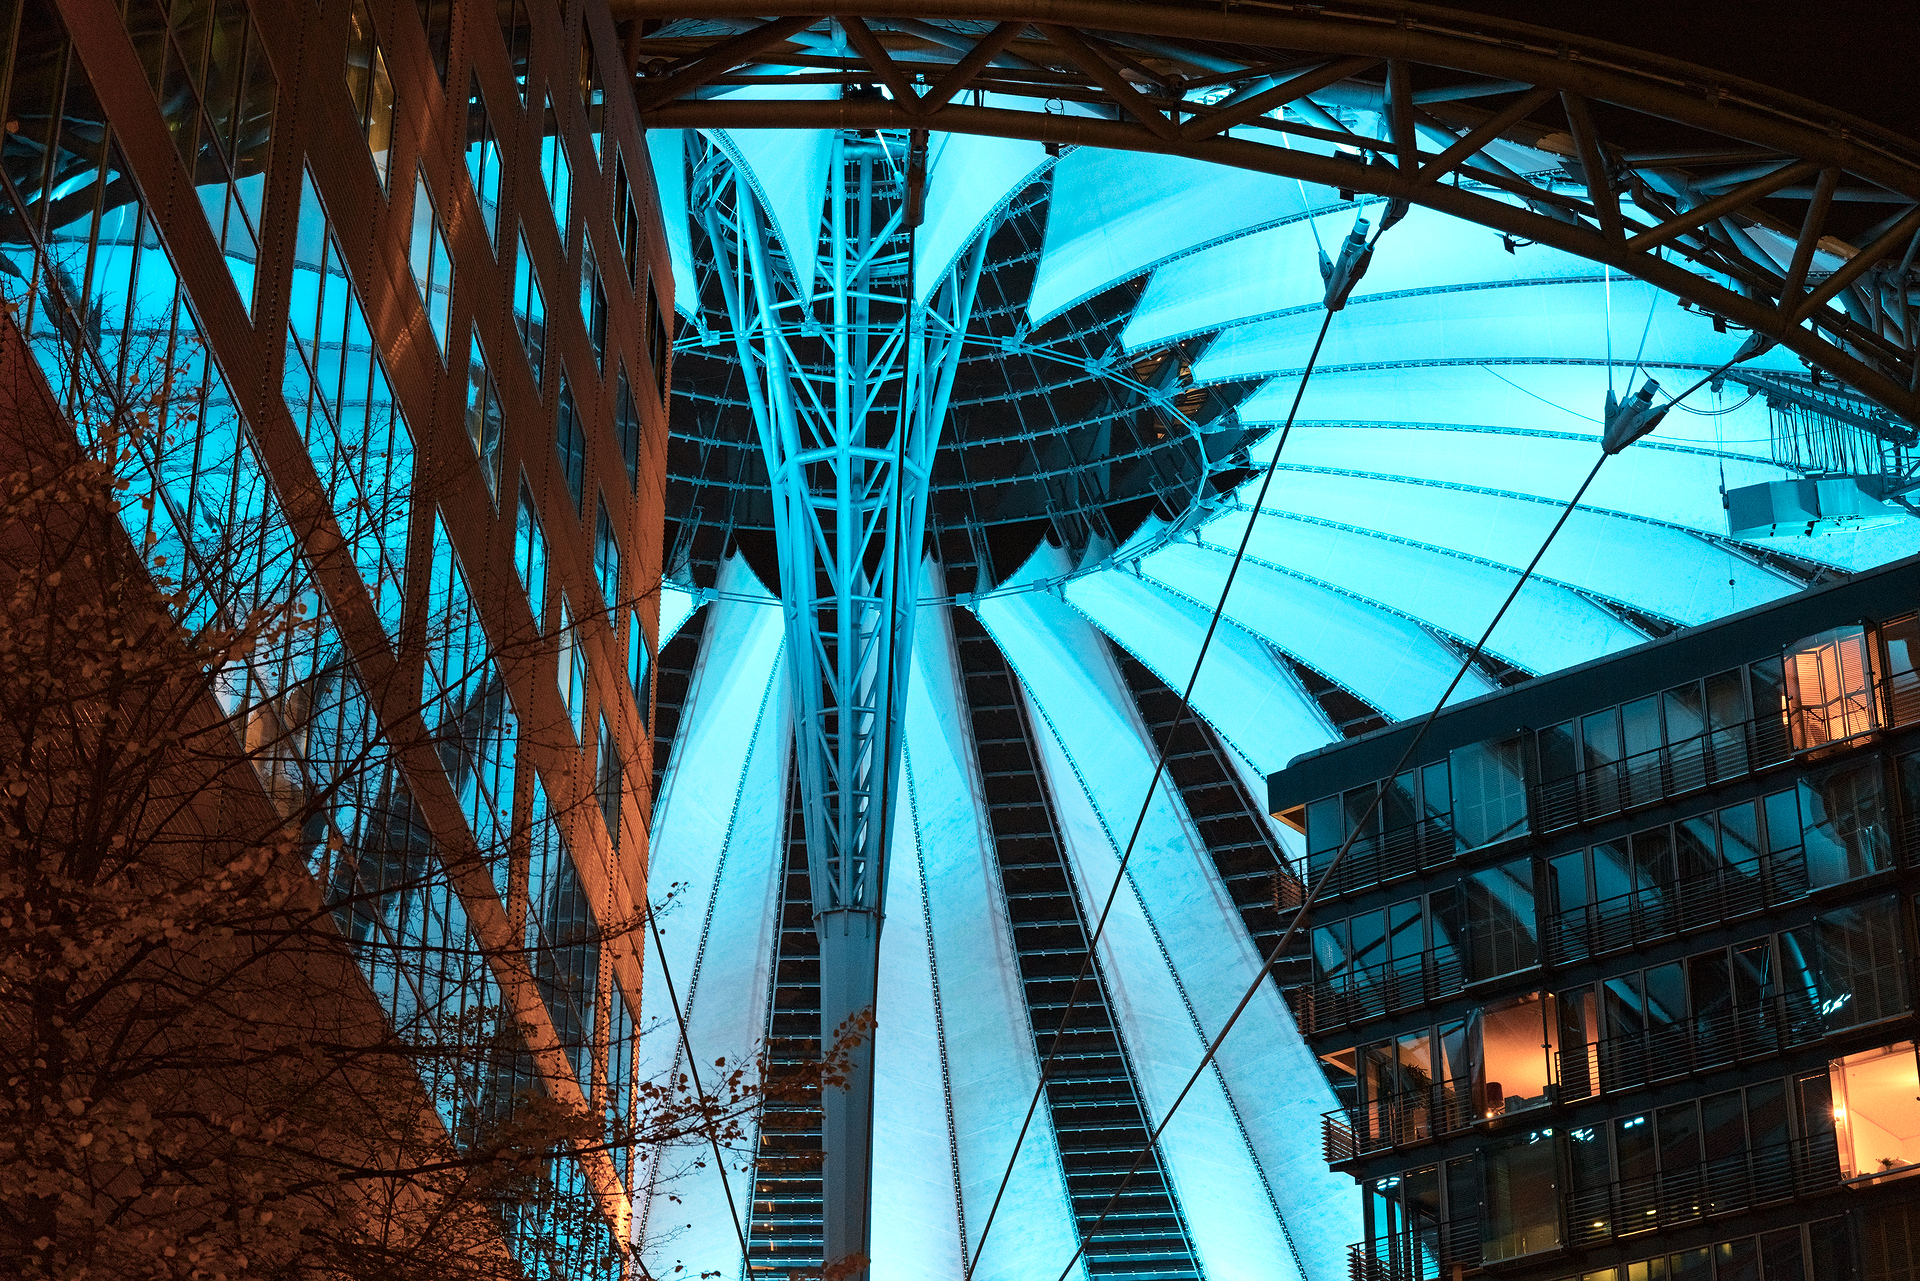
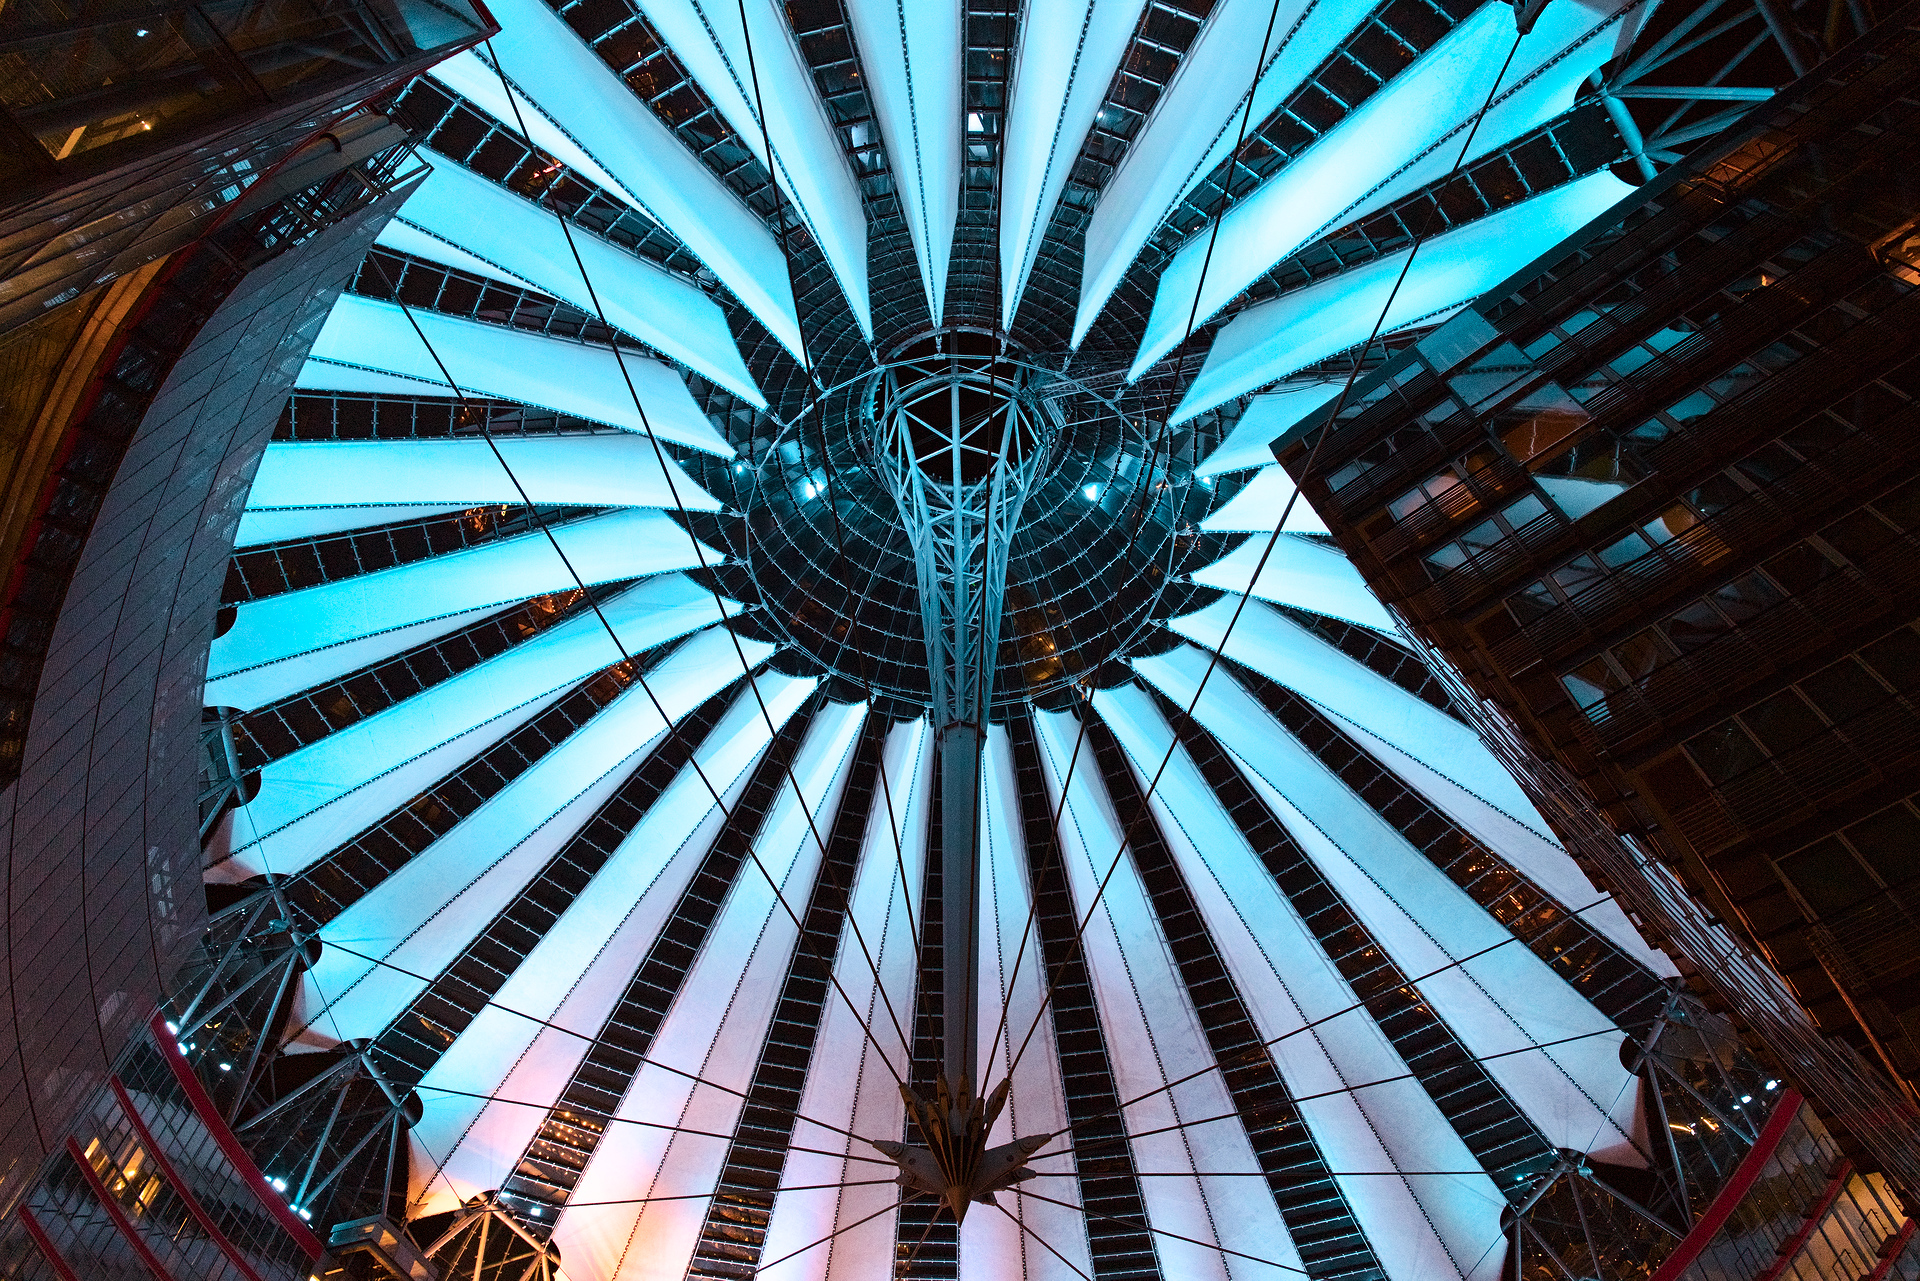
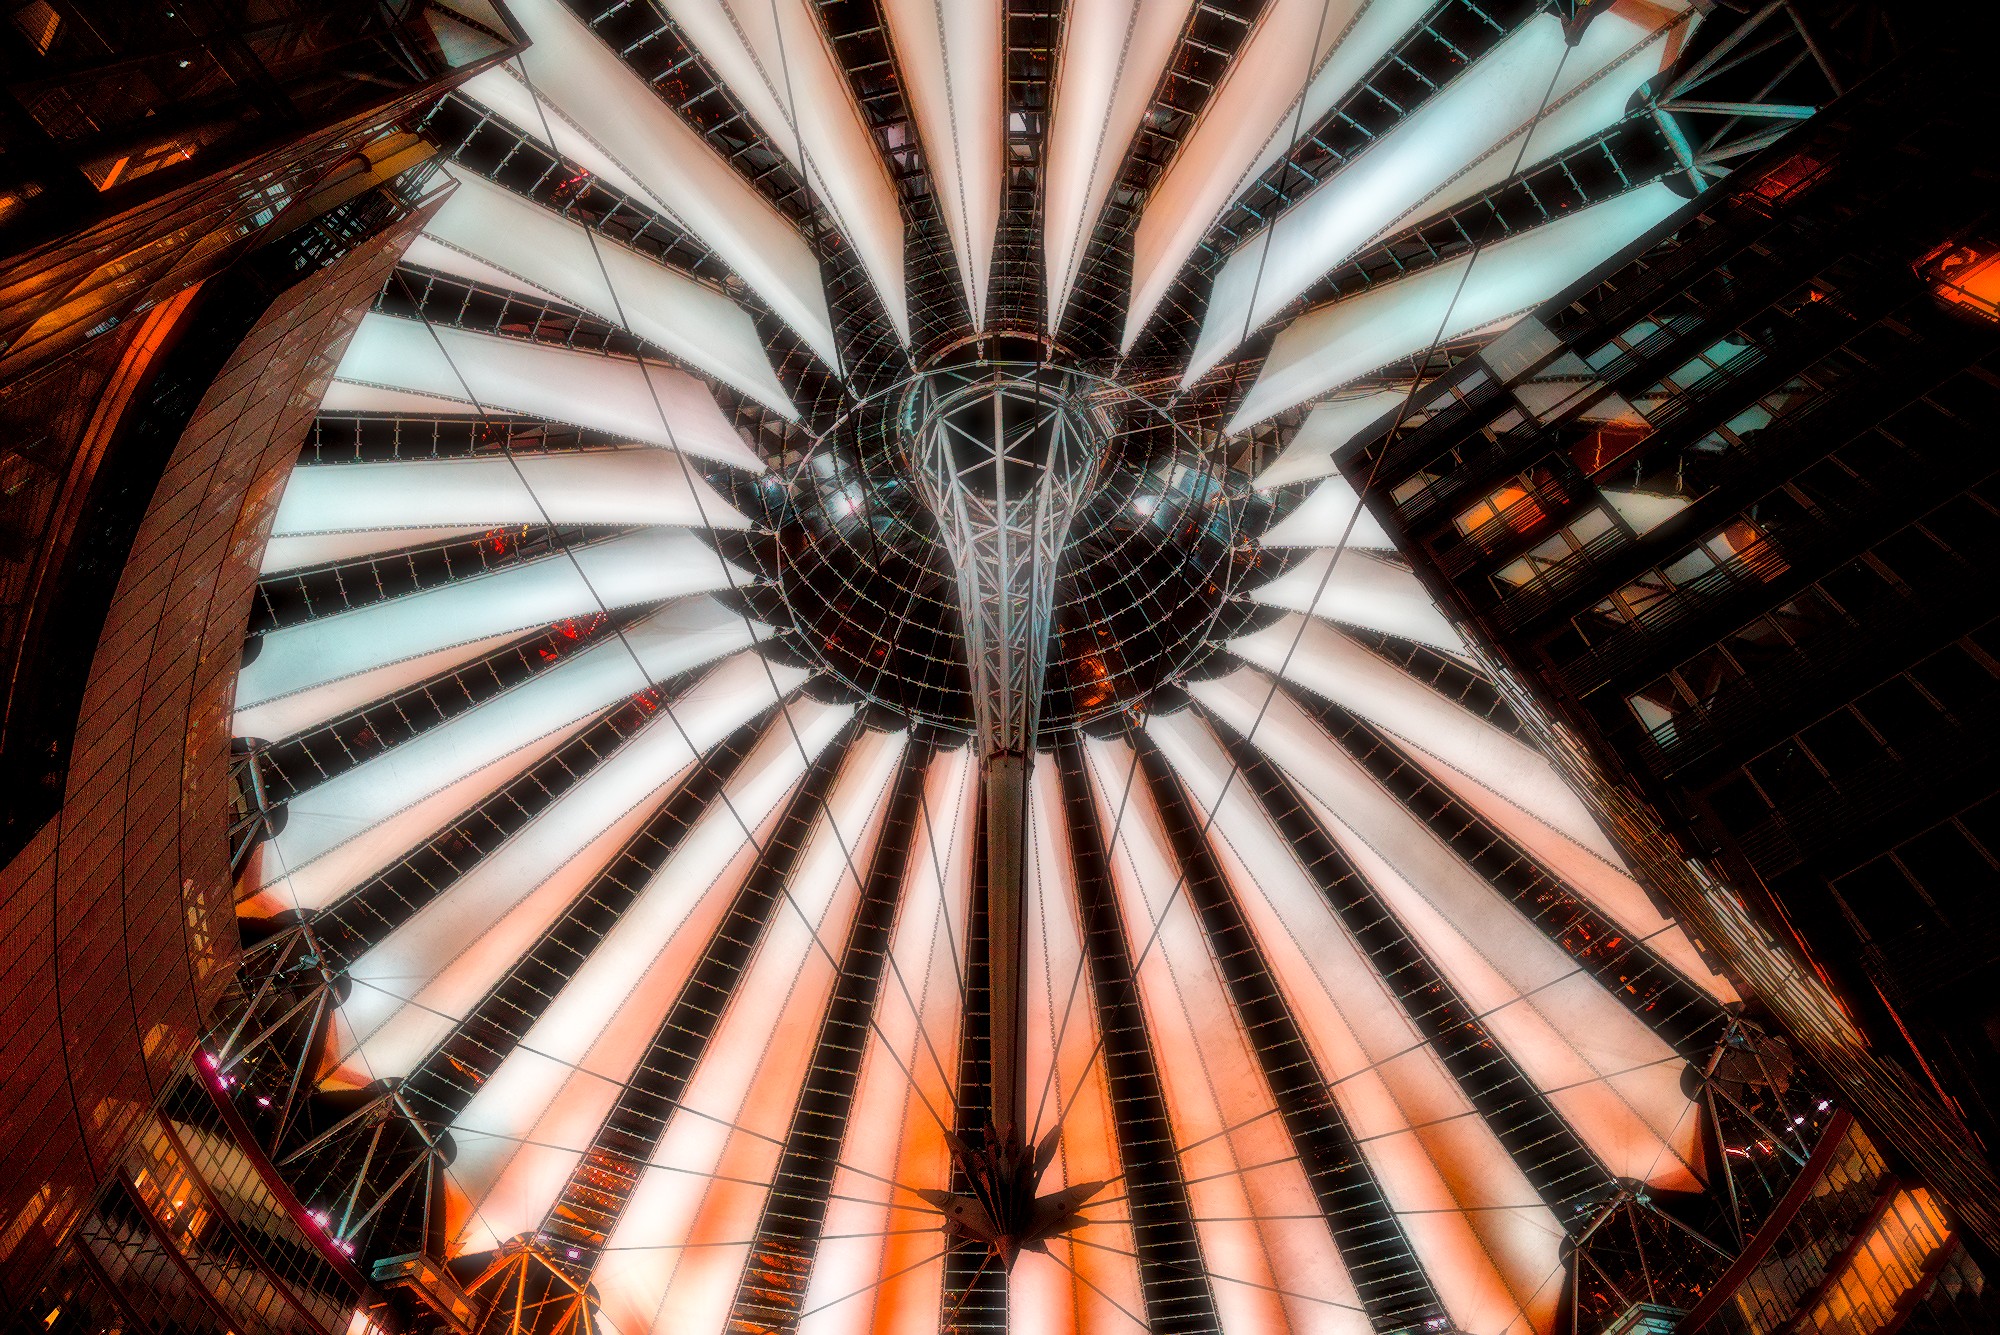
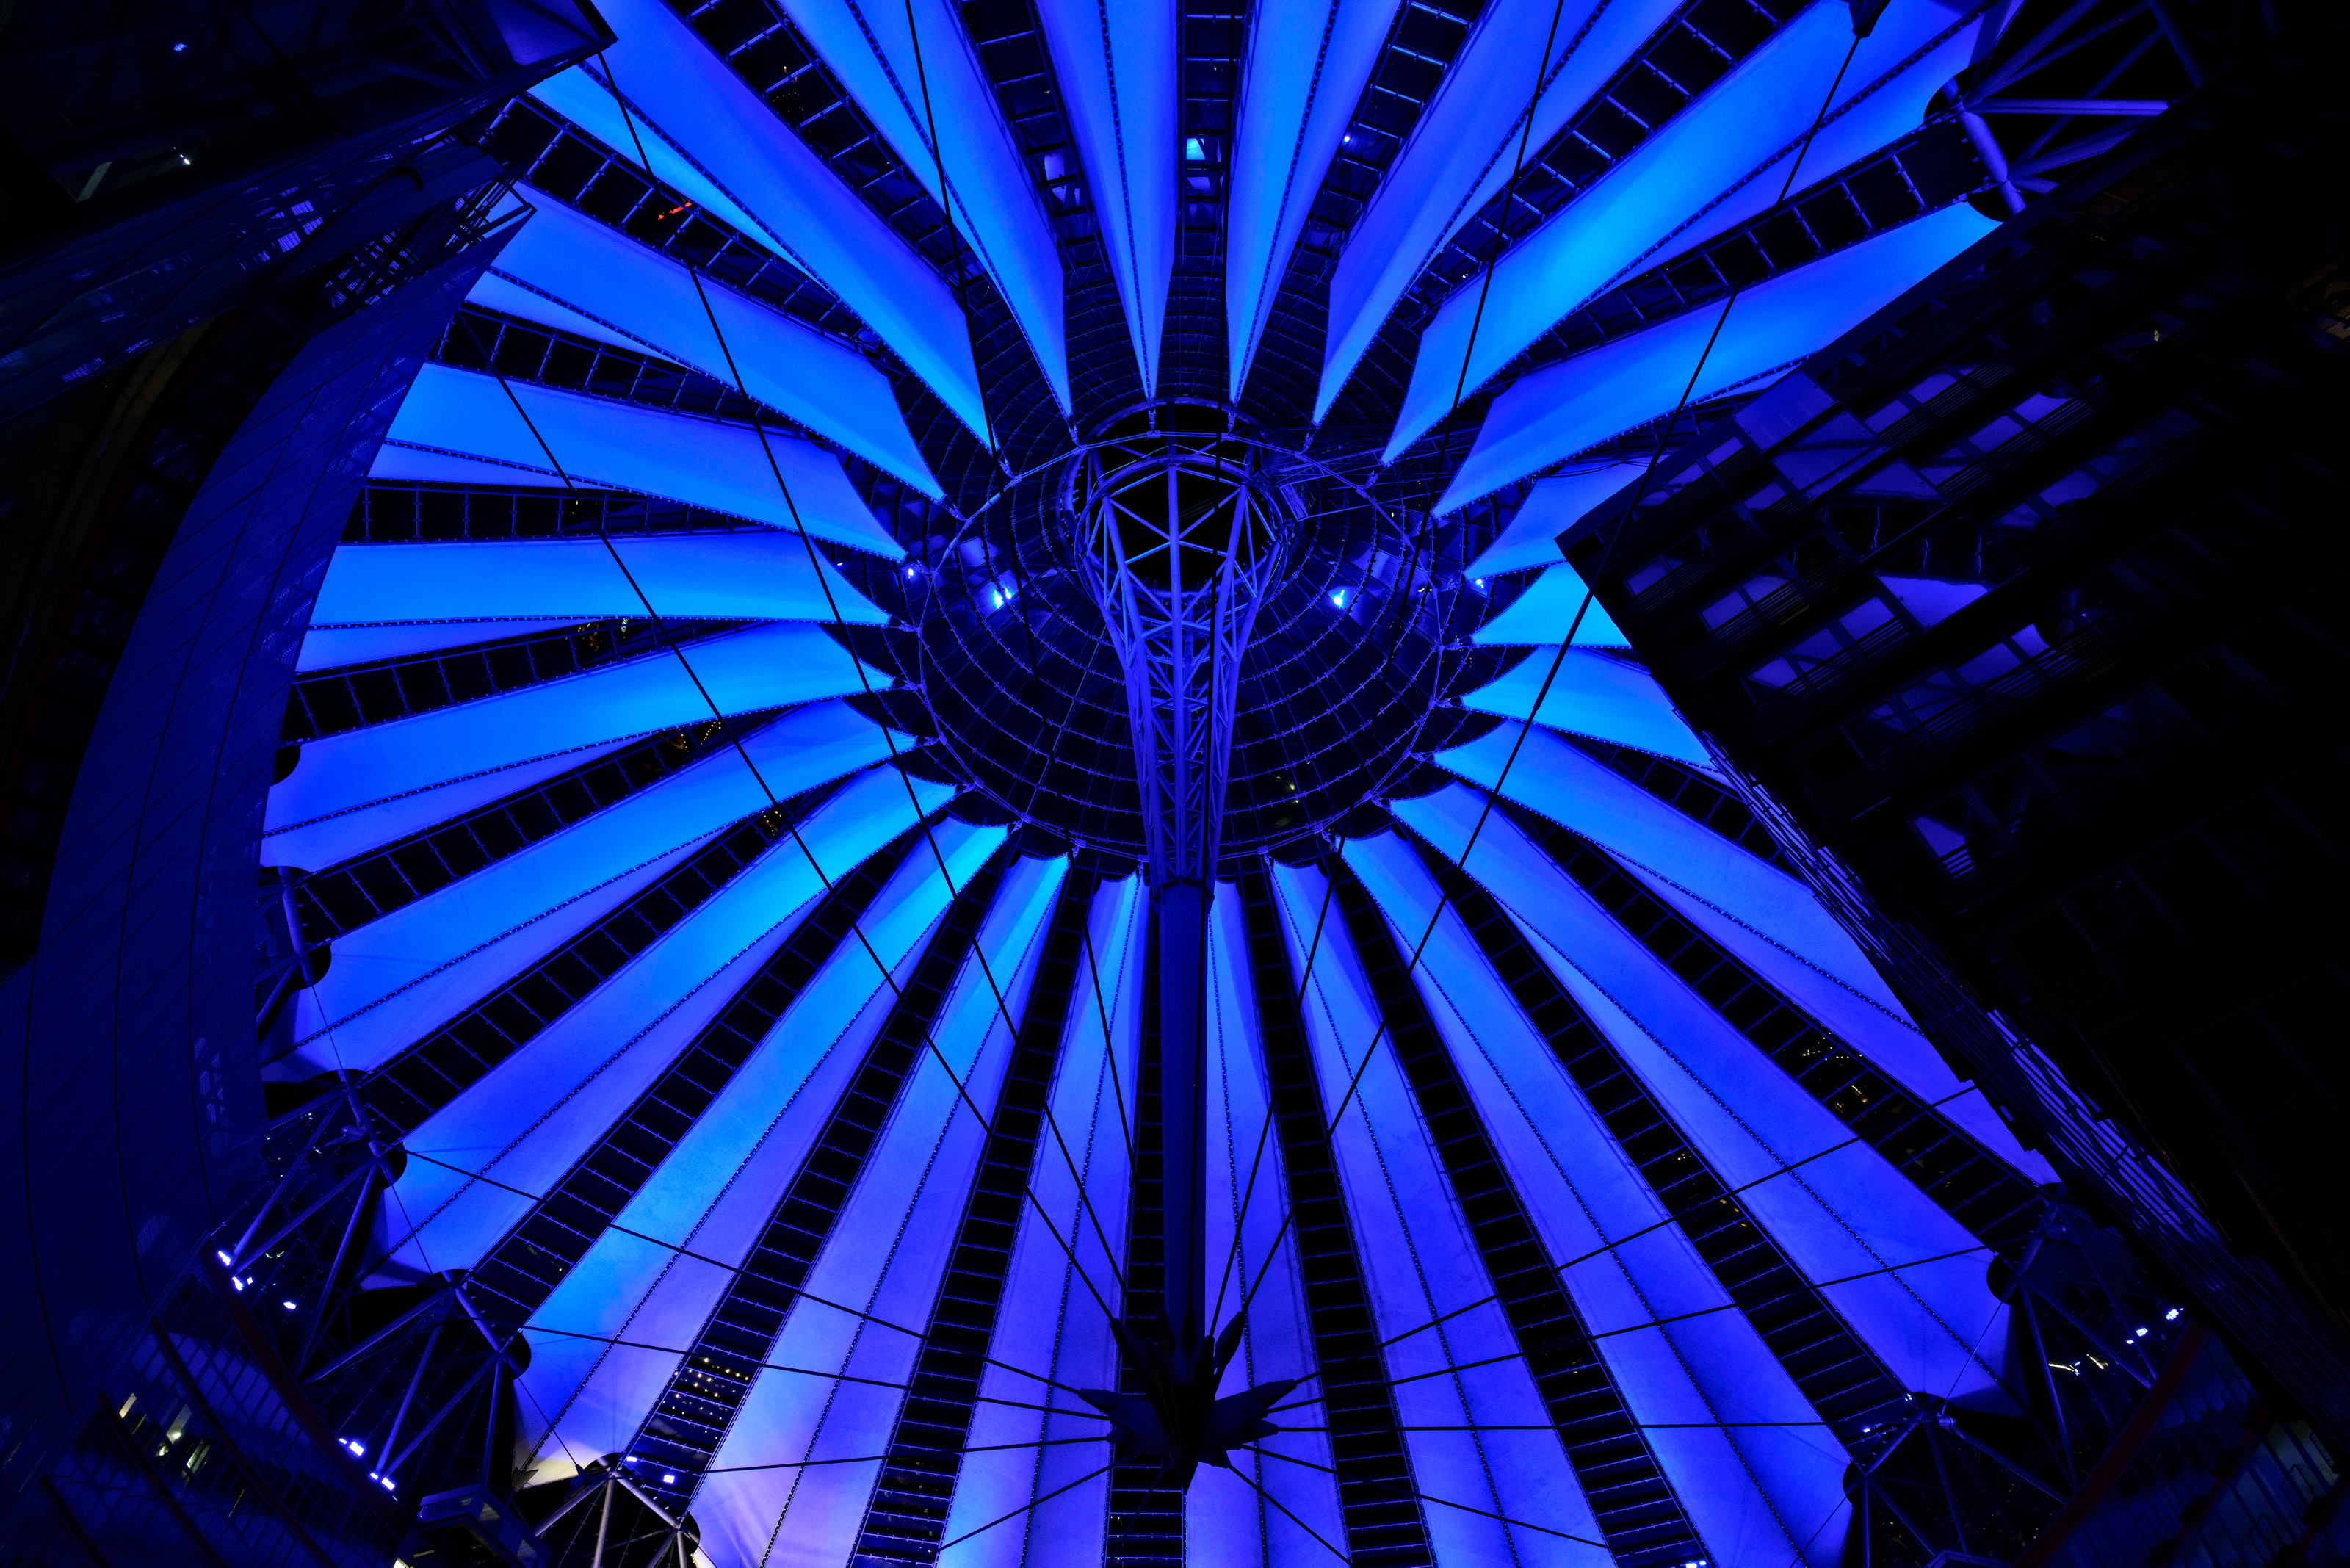
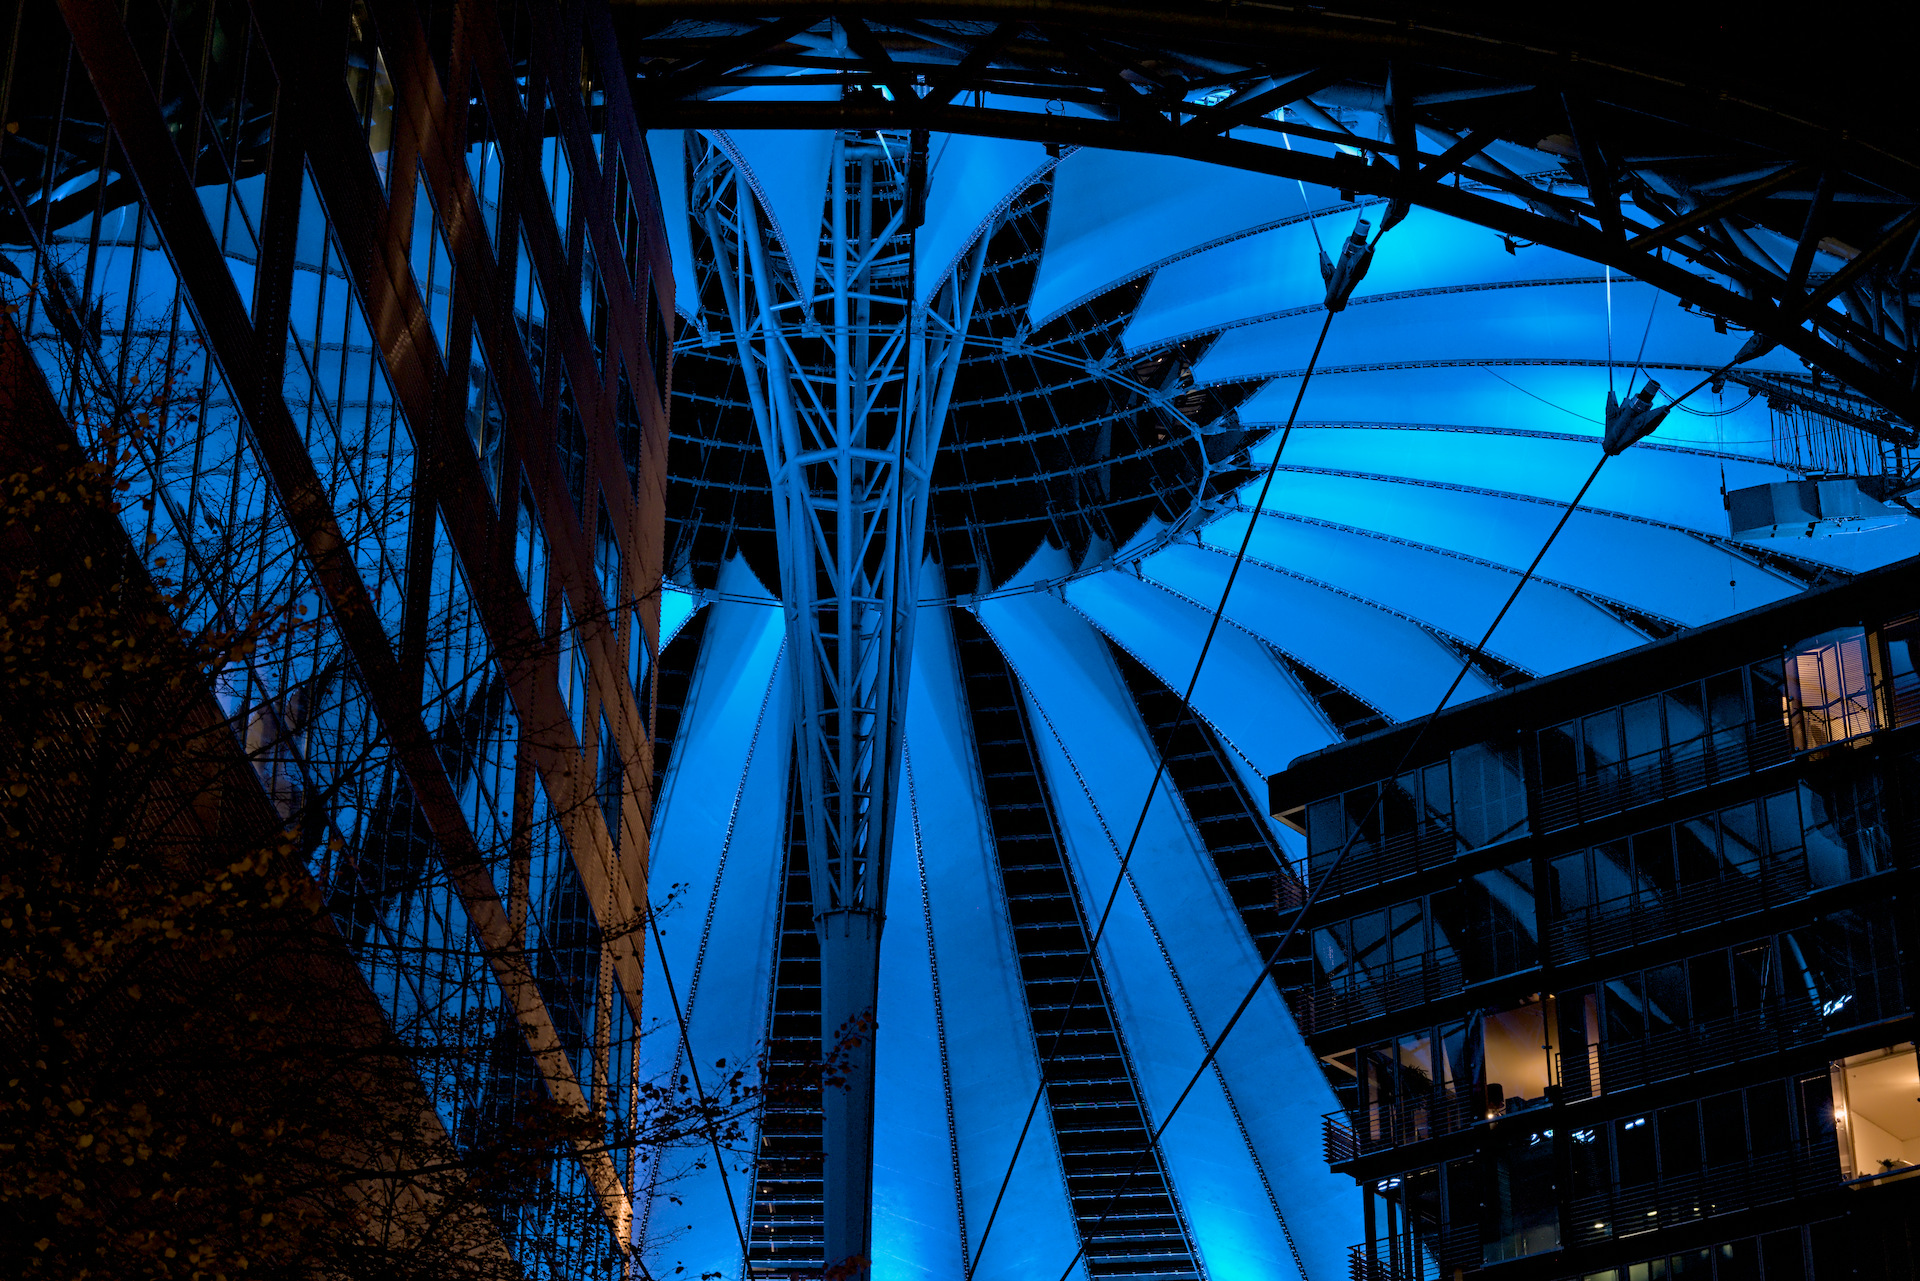
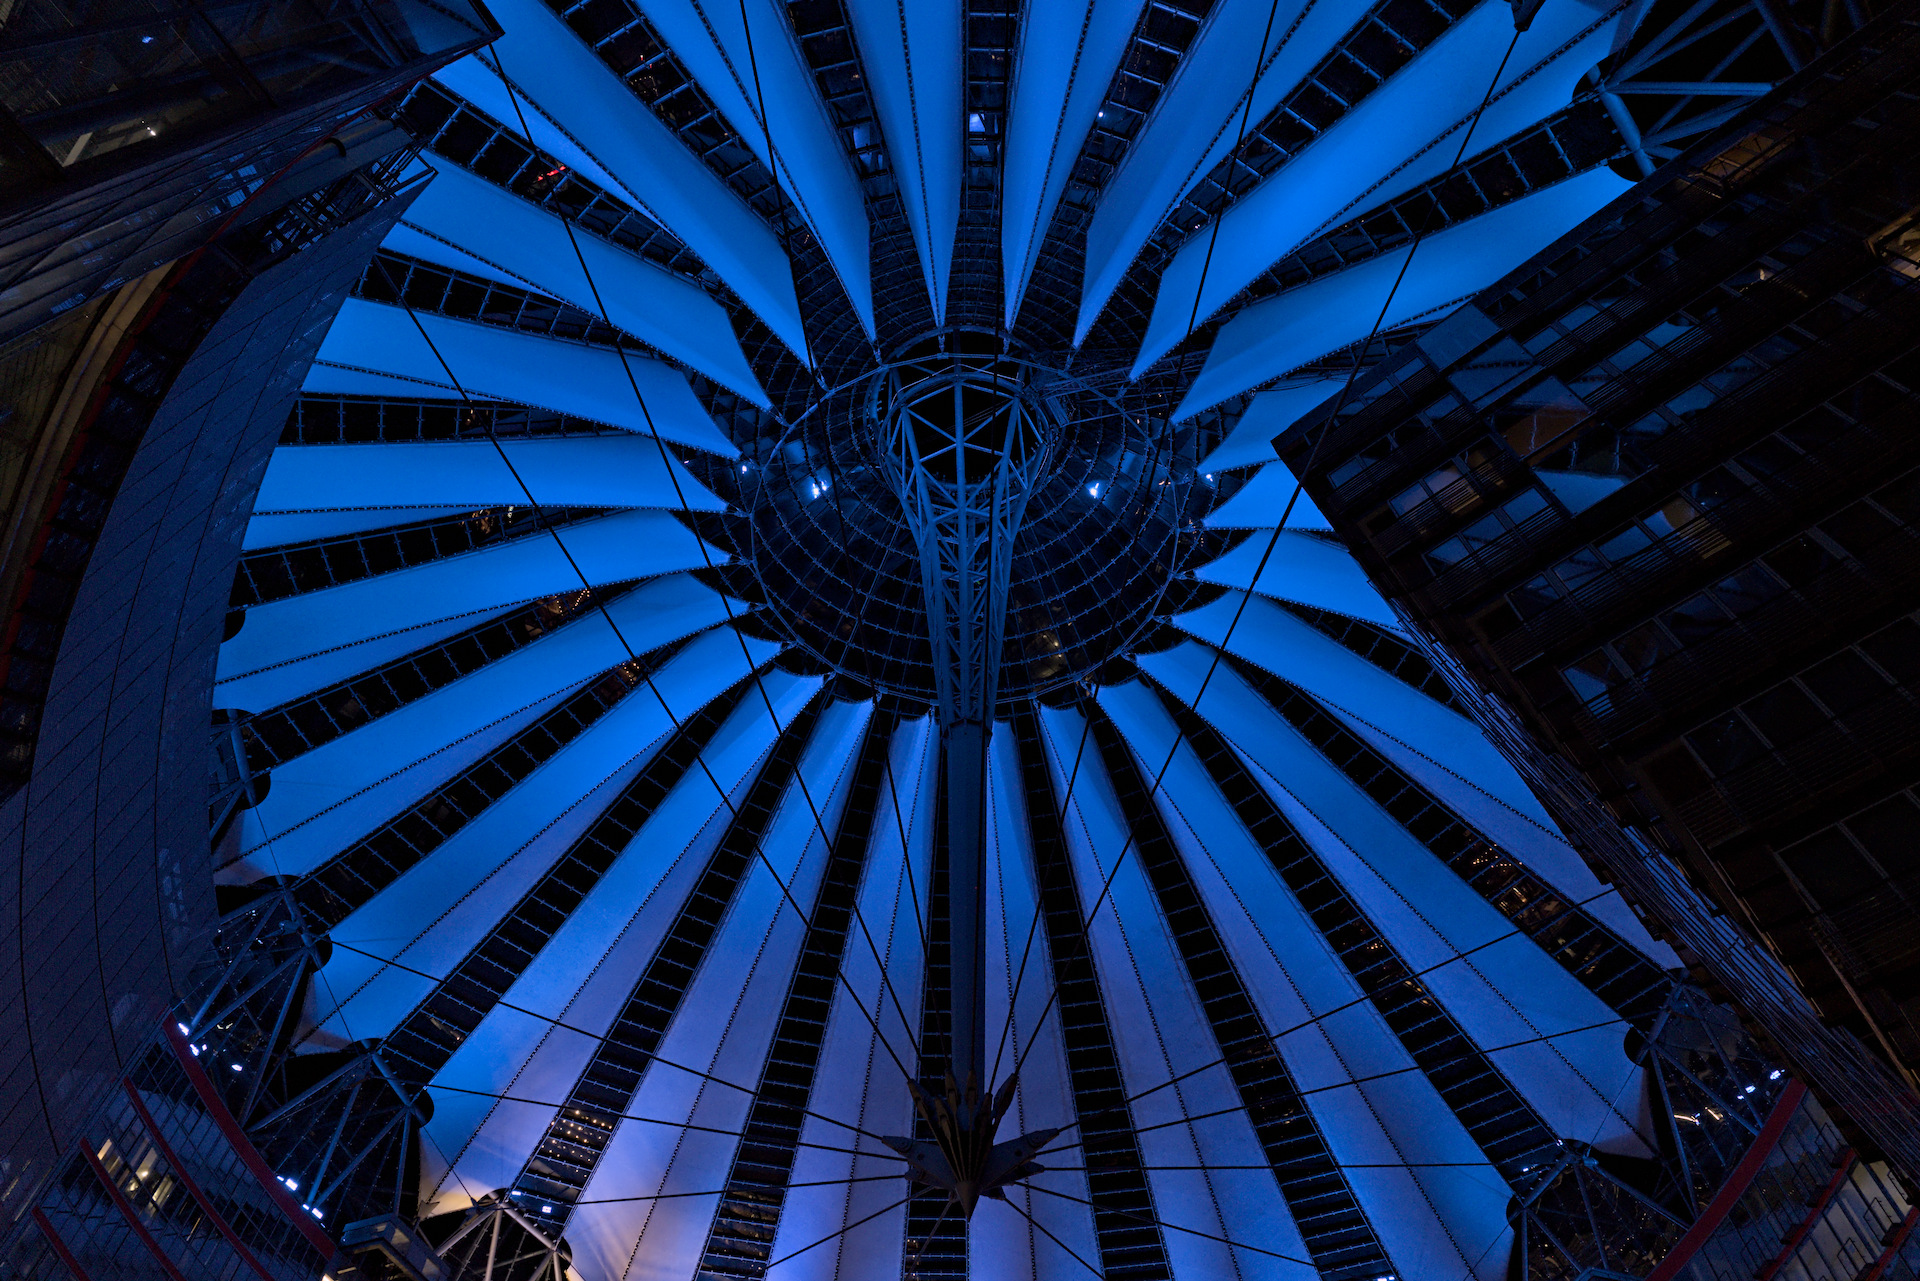
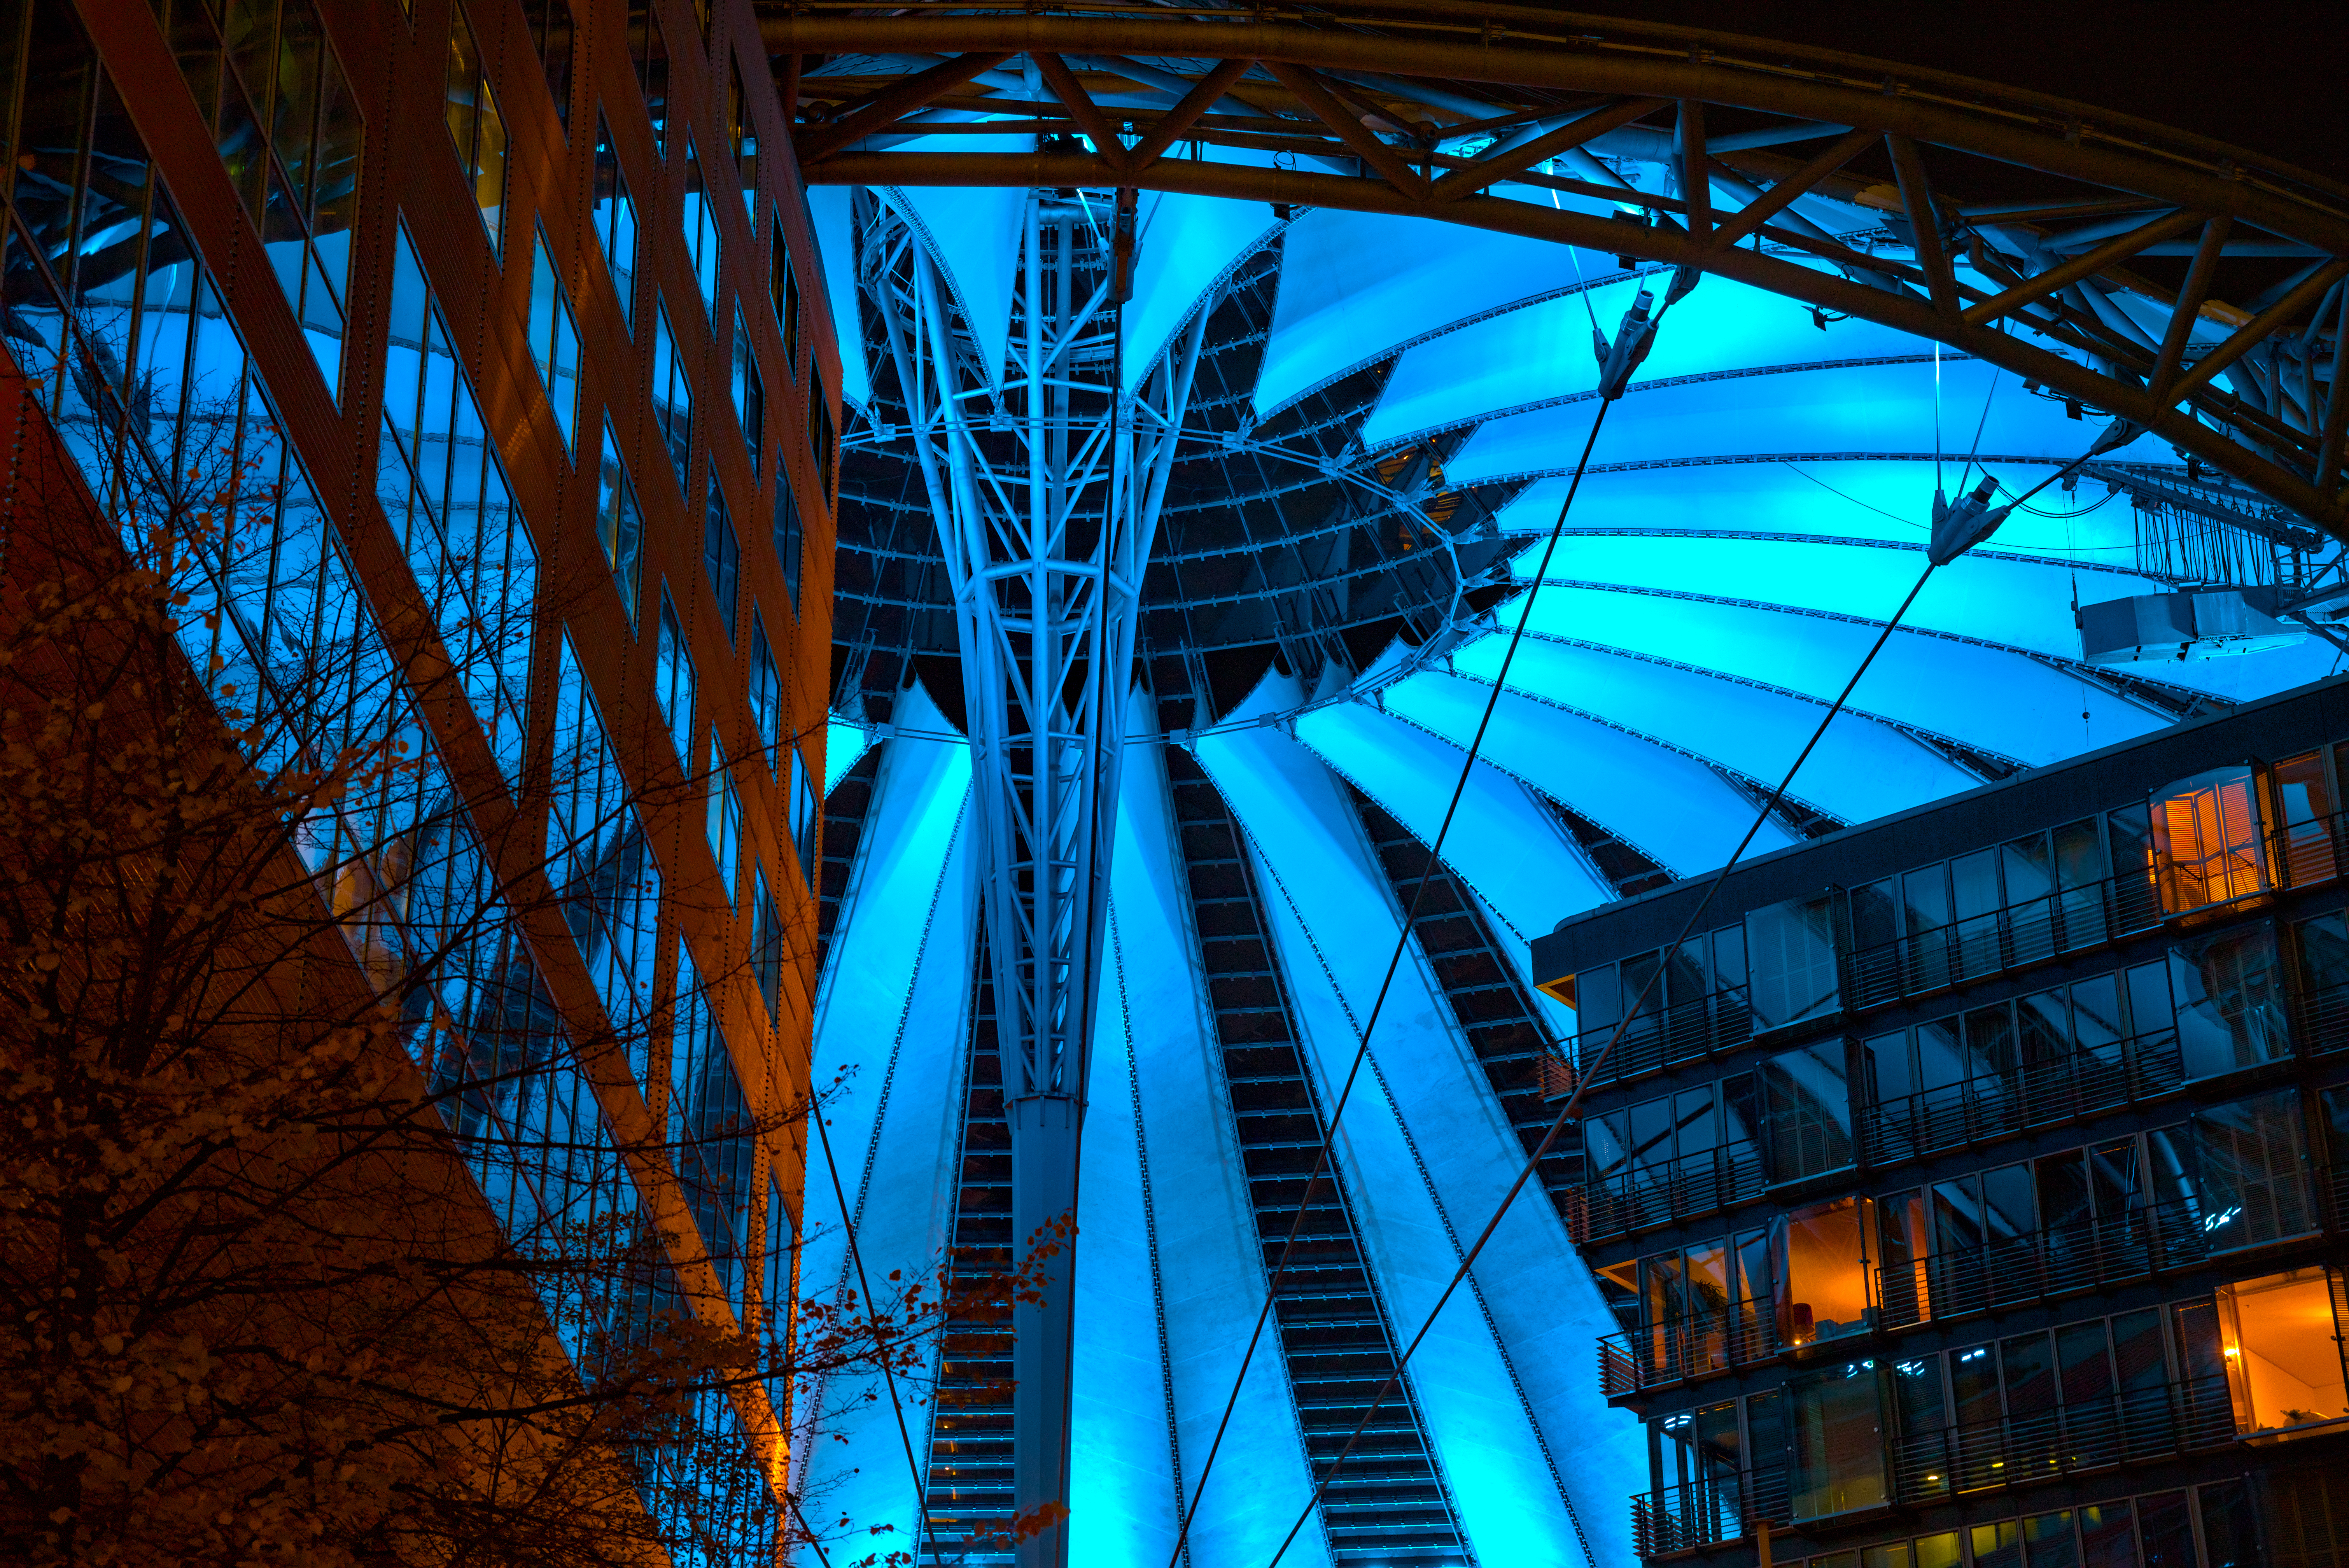
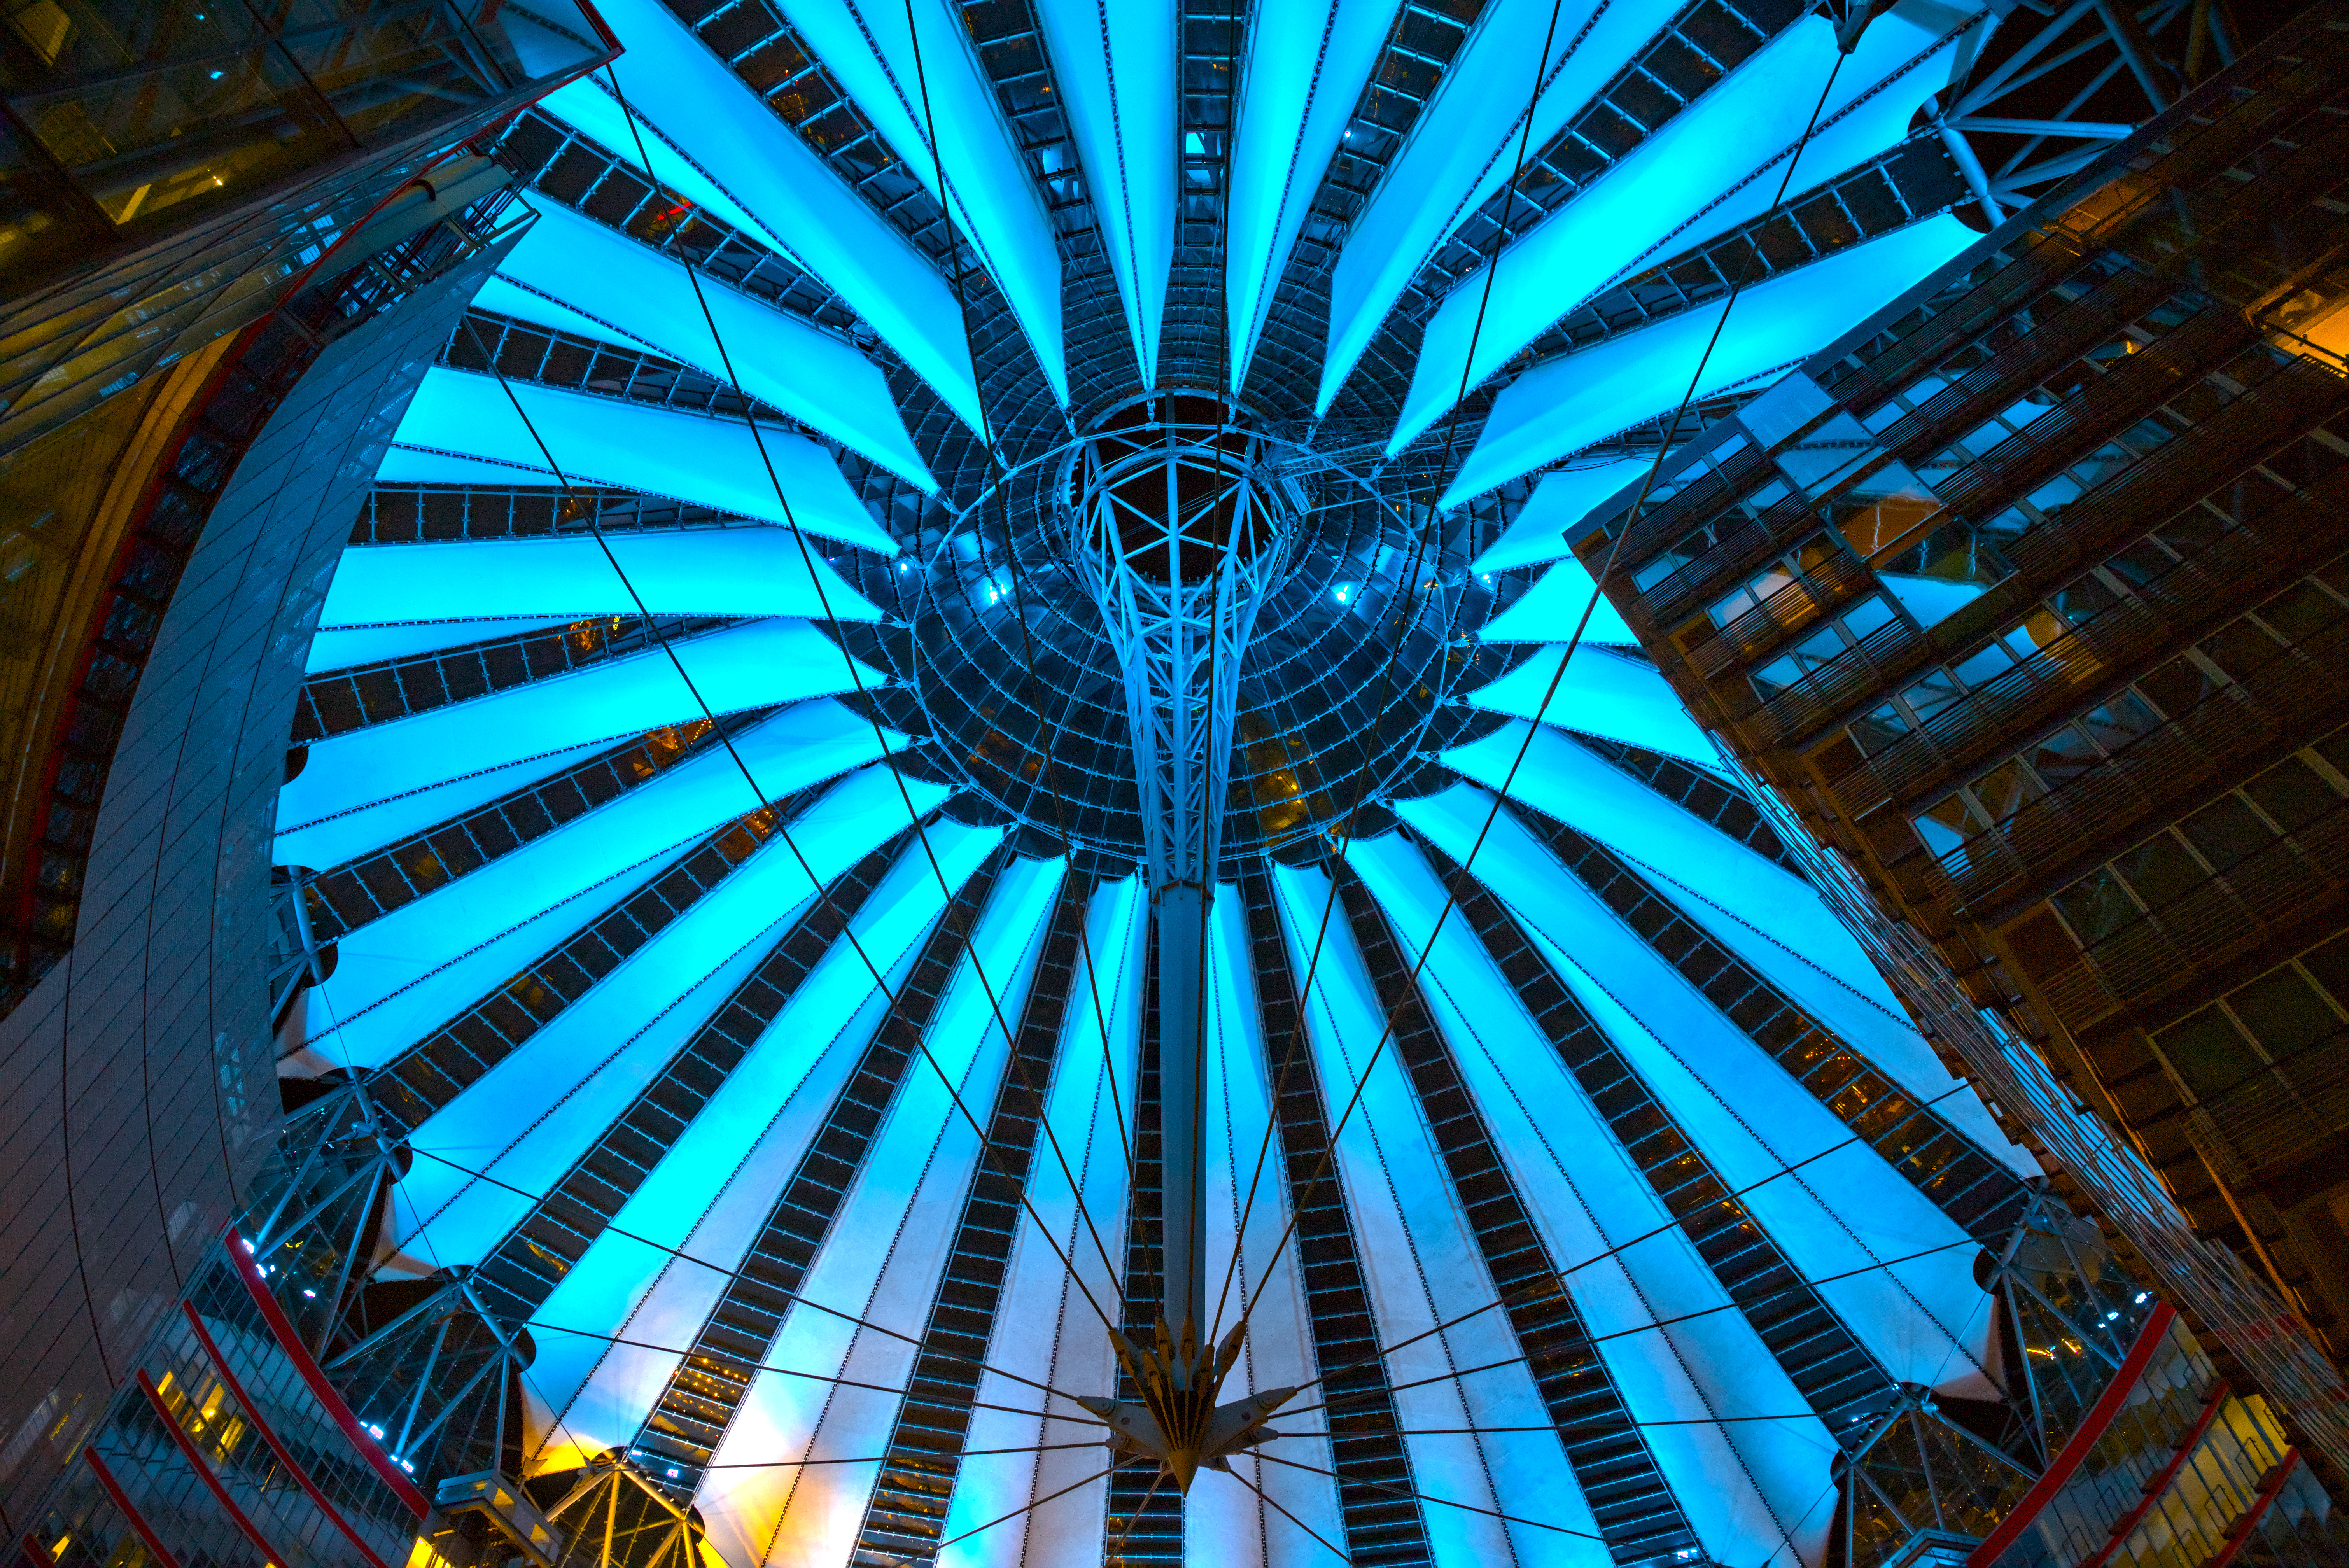
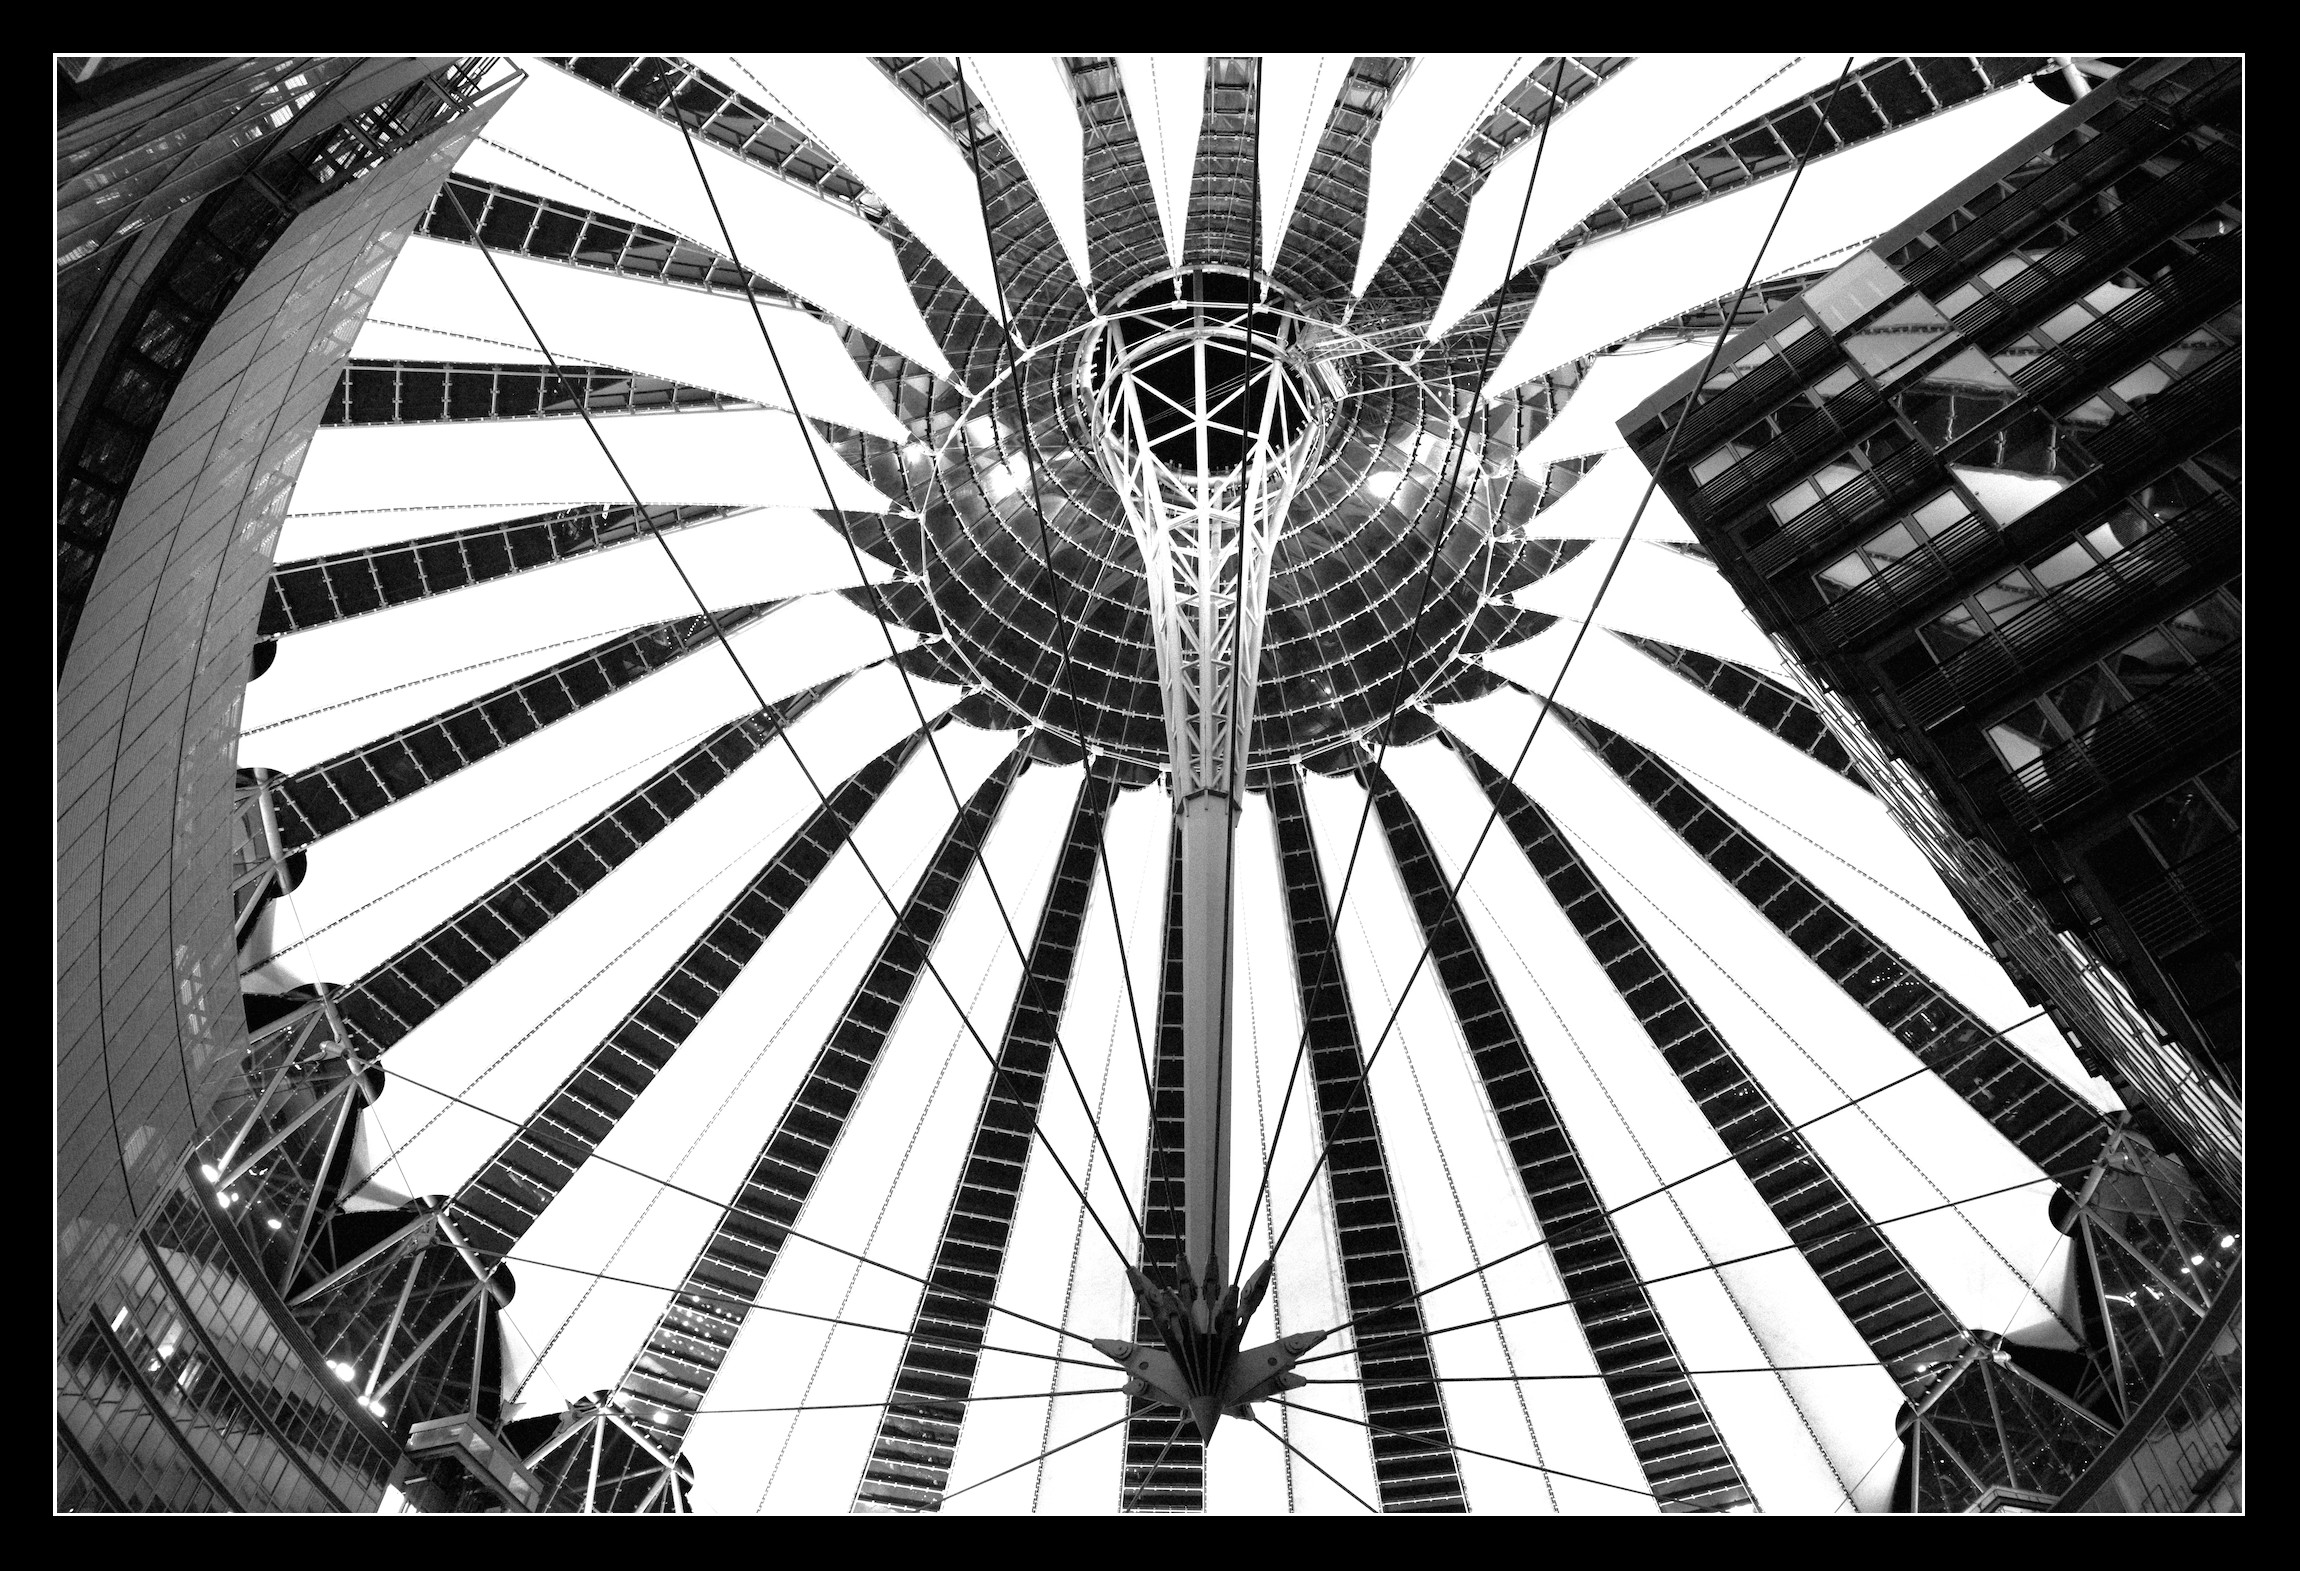
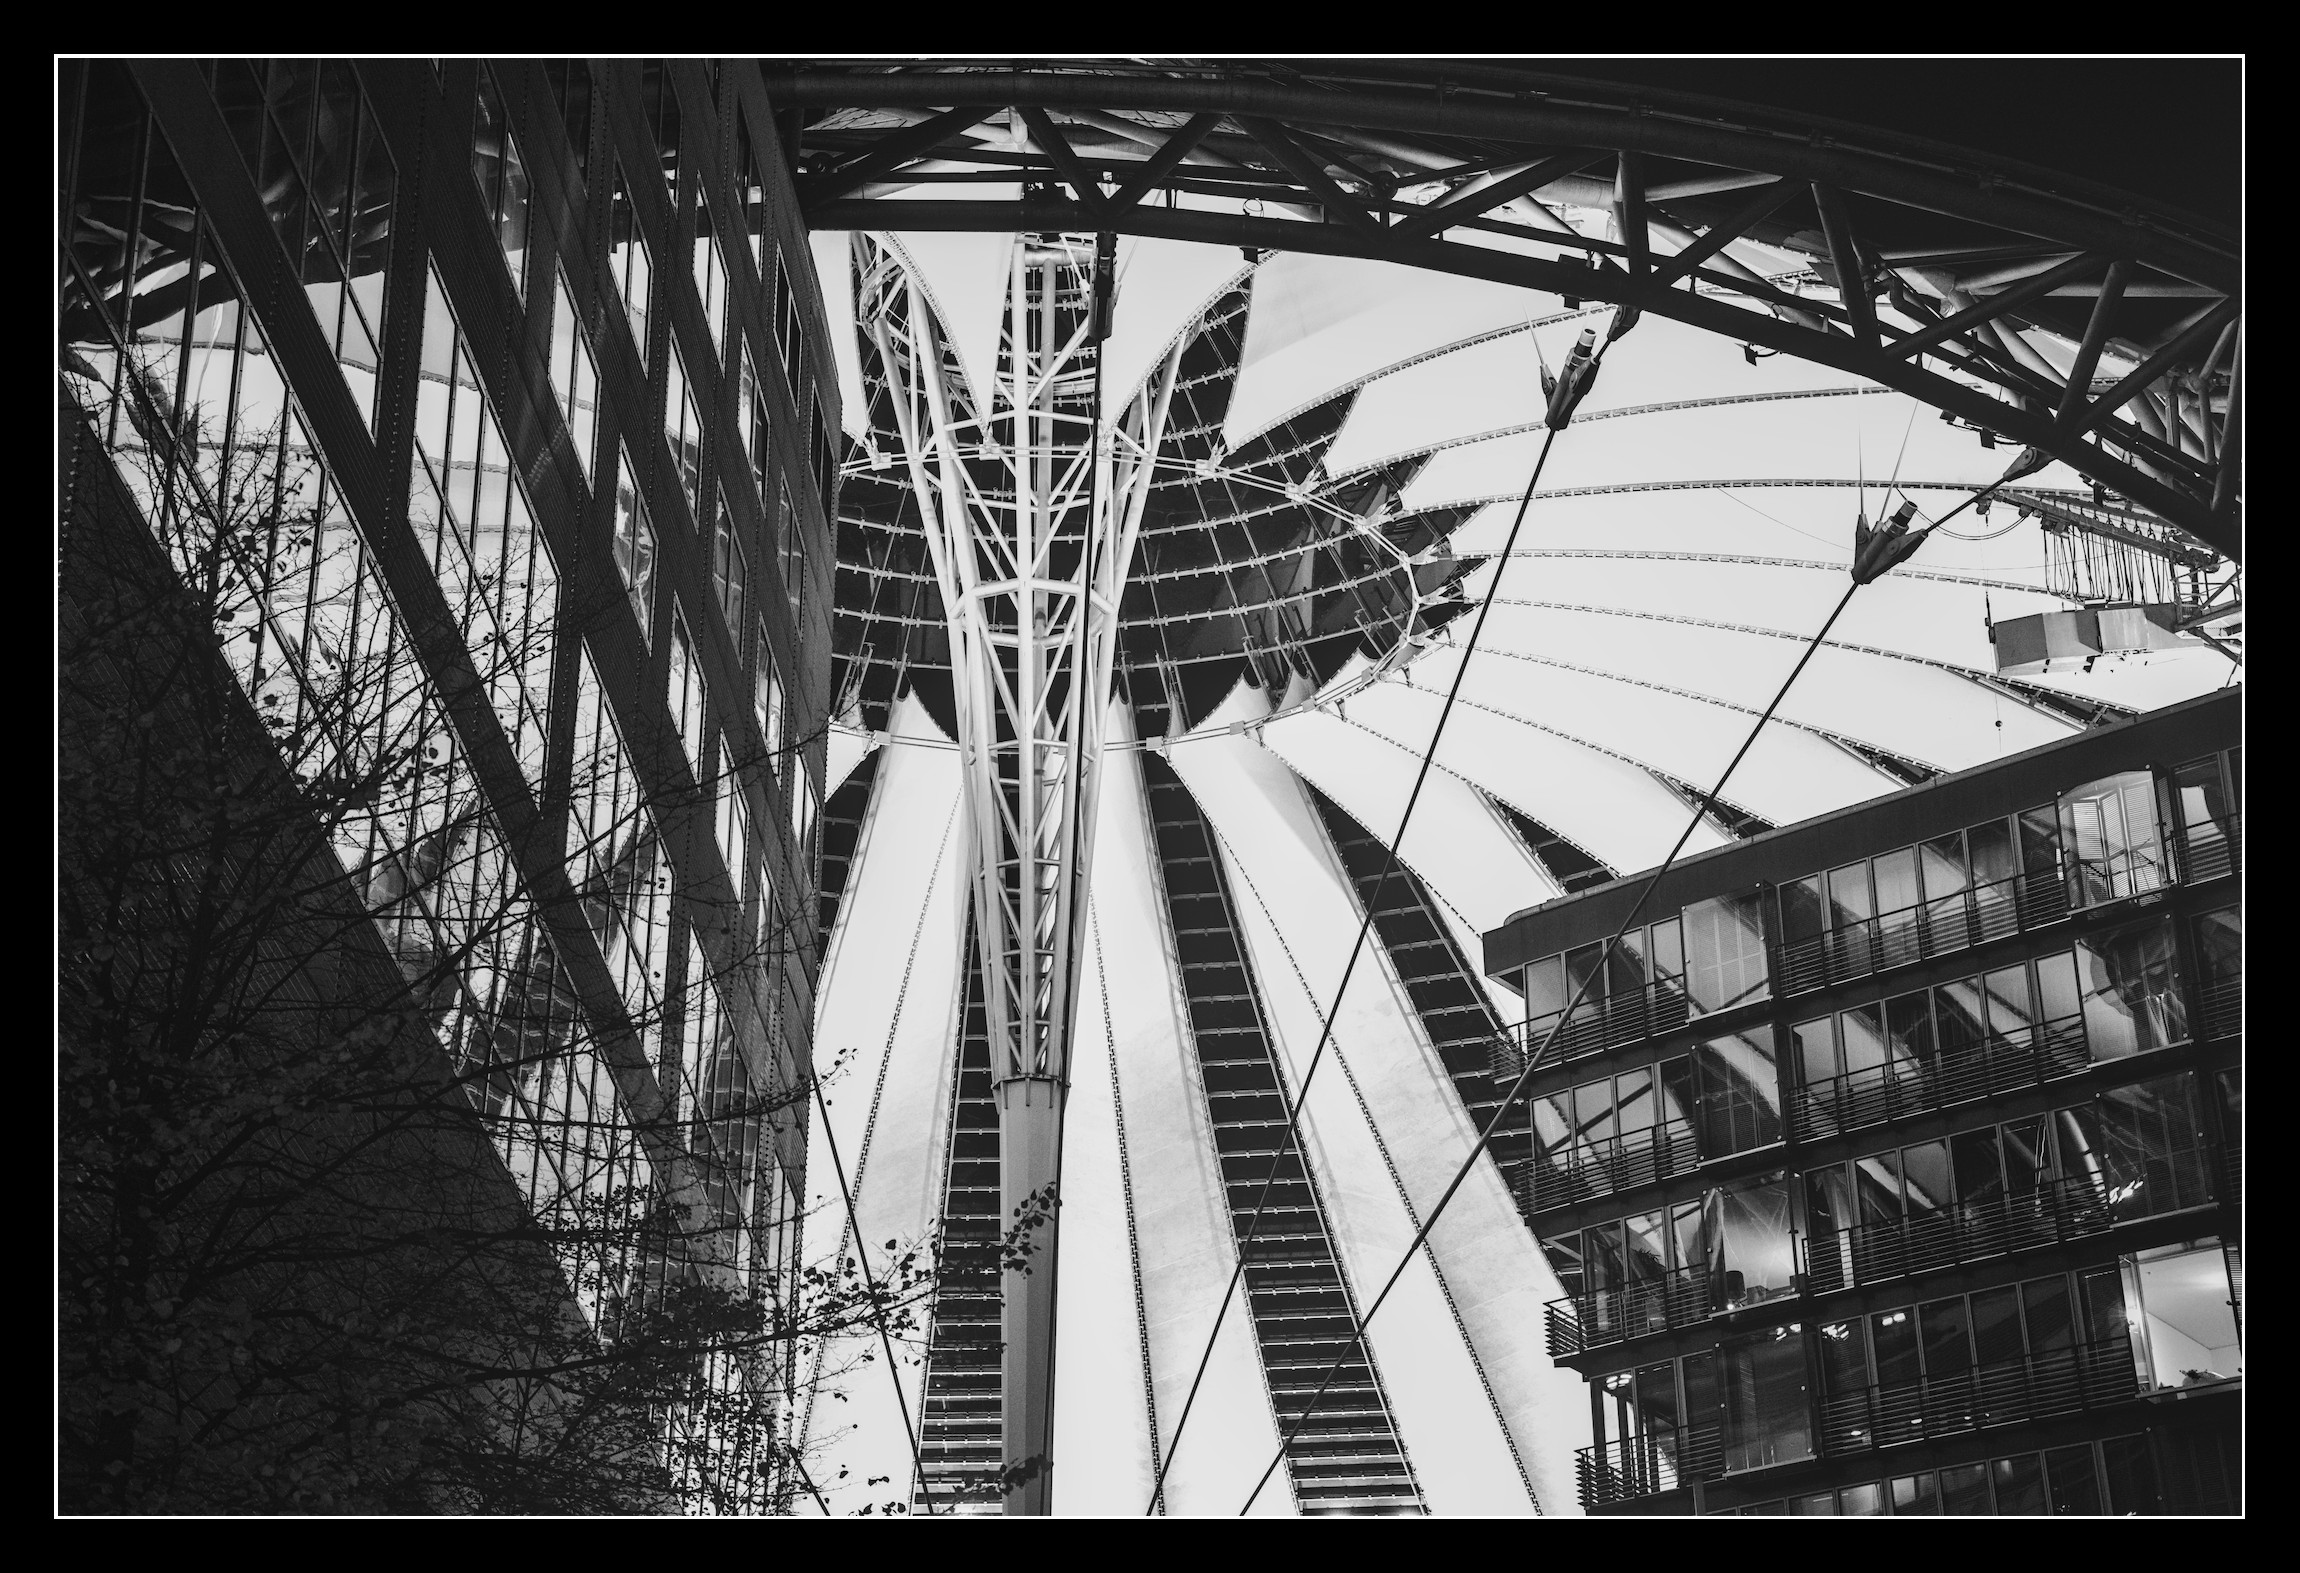
I’m posting two images in a single PlayRaw which I hope is okay since they are “siblings” in that the editing challenge is basically the same, which I found to be rooted in how to deal with the illuminated ceiling and keeping the color alive while making the image overall less monochromatic than the JOOCs.
Two years ago I faithfully followed my Nikon Z5 as it cheekily decided to invade the Sony Center in Berlin.
Since then, the images sat on my computer undeveloped because I felt that I couldn’t get better results than the Nikon JOOCs.
A couple of days ago I fired up RT 5.12 and first tried to use the JOOCs as a guideline but I remained unsatisfied. I finally did something a bit crazy with the white balance and set it near the upper limit for both images, which imho worked out great.
Since the light in the scene is all artificial anyway, these images lend themselves to anyone’s personal preferences. The ISO is 3200 on both, which is a step beyond what looks clean out of the Nikon Z5 (it handles anything up to 1600 reasonably well); I haven’t figured out the denoising module in RT yet and only use it at standard settings, but tbh noise is rarely a primary concern of mine.
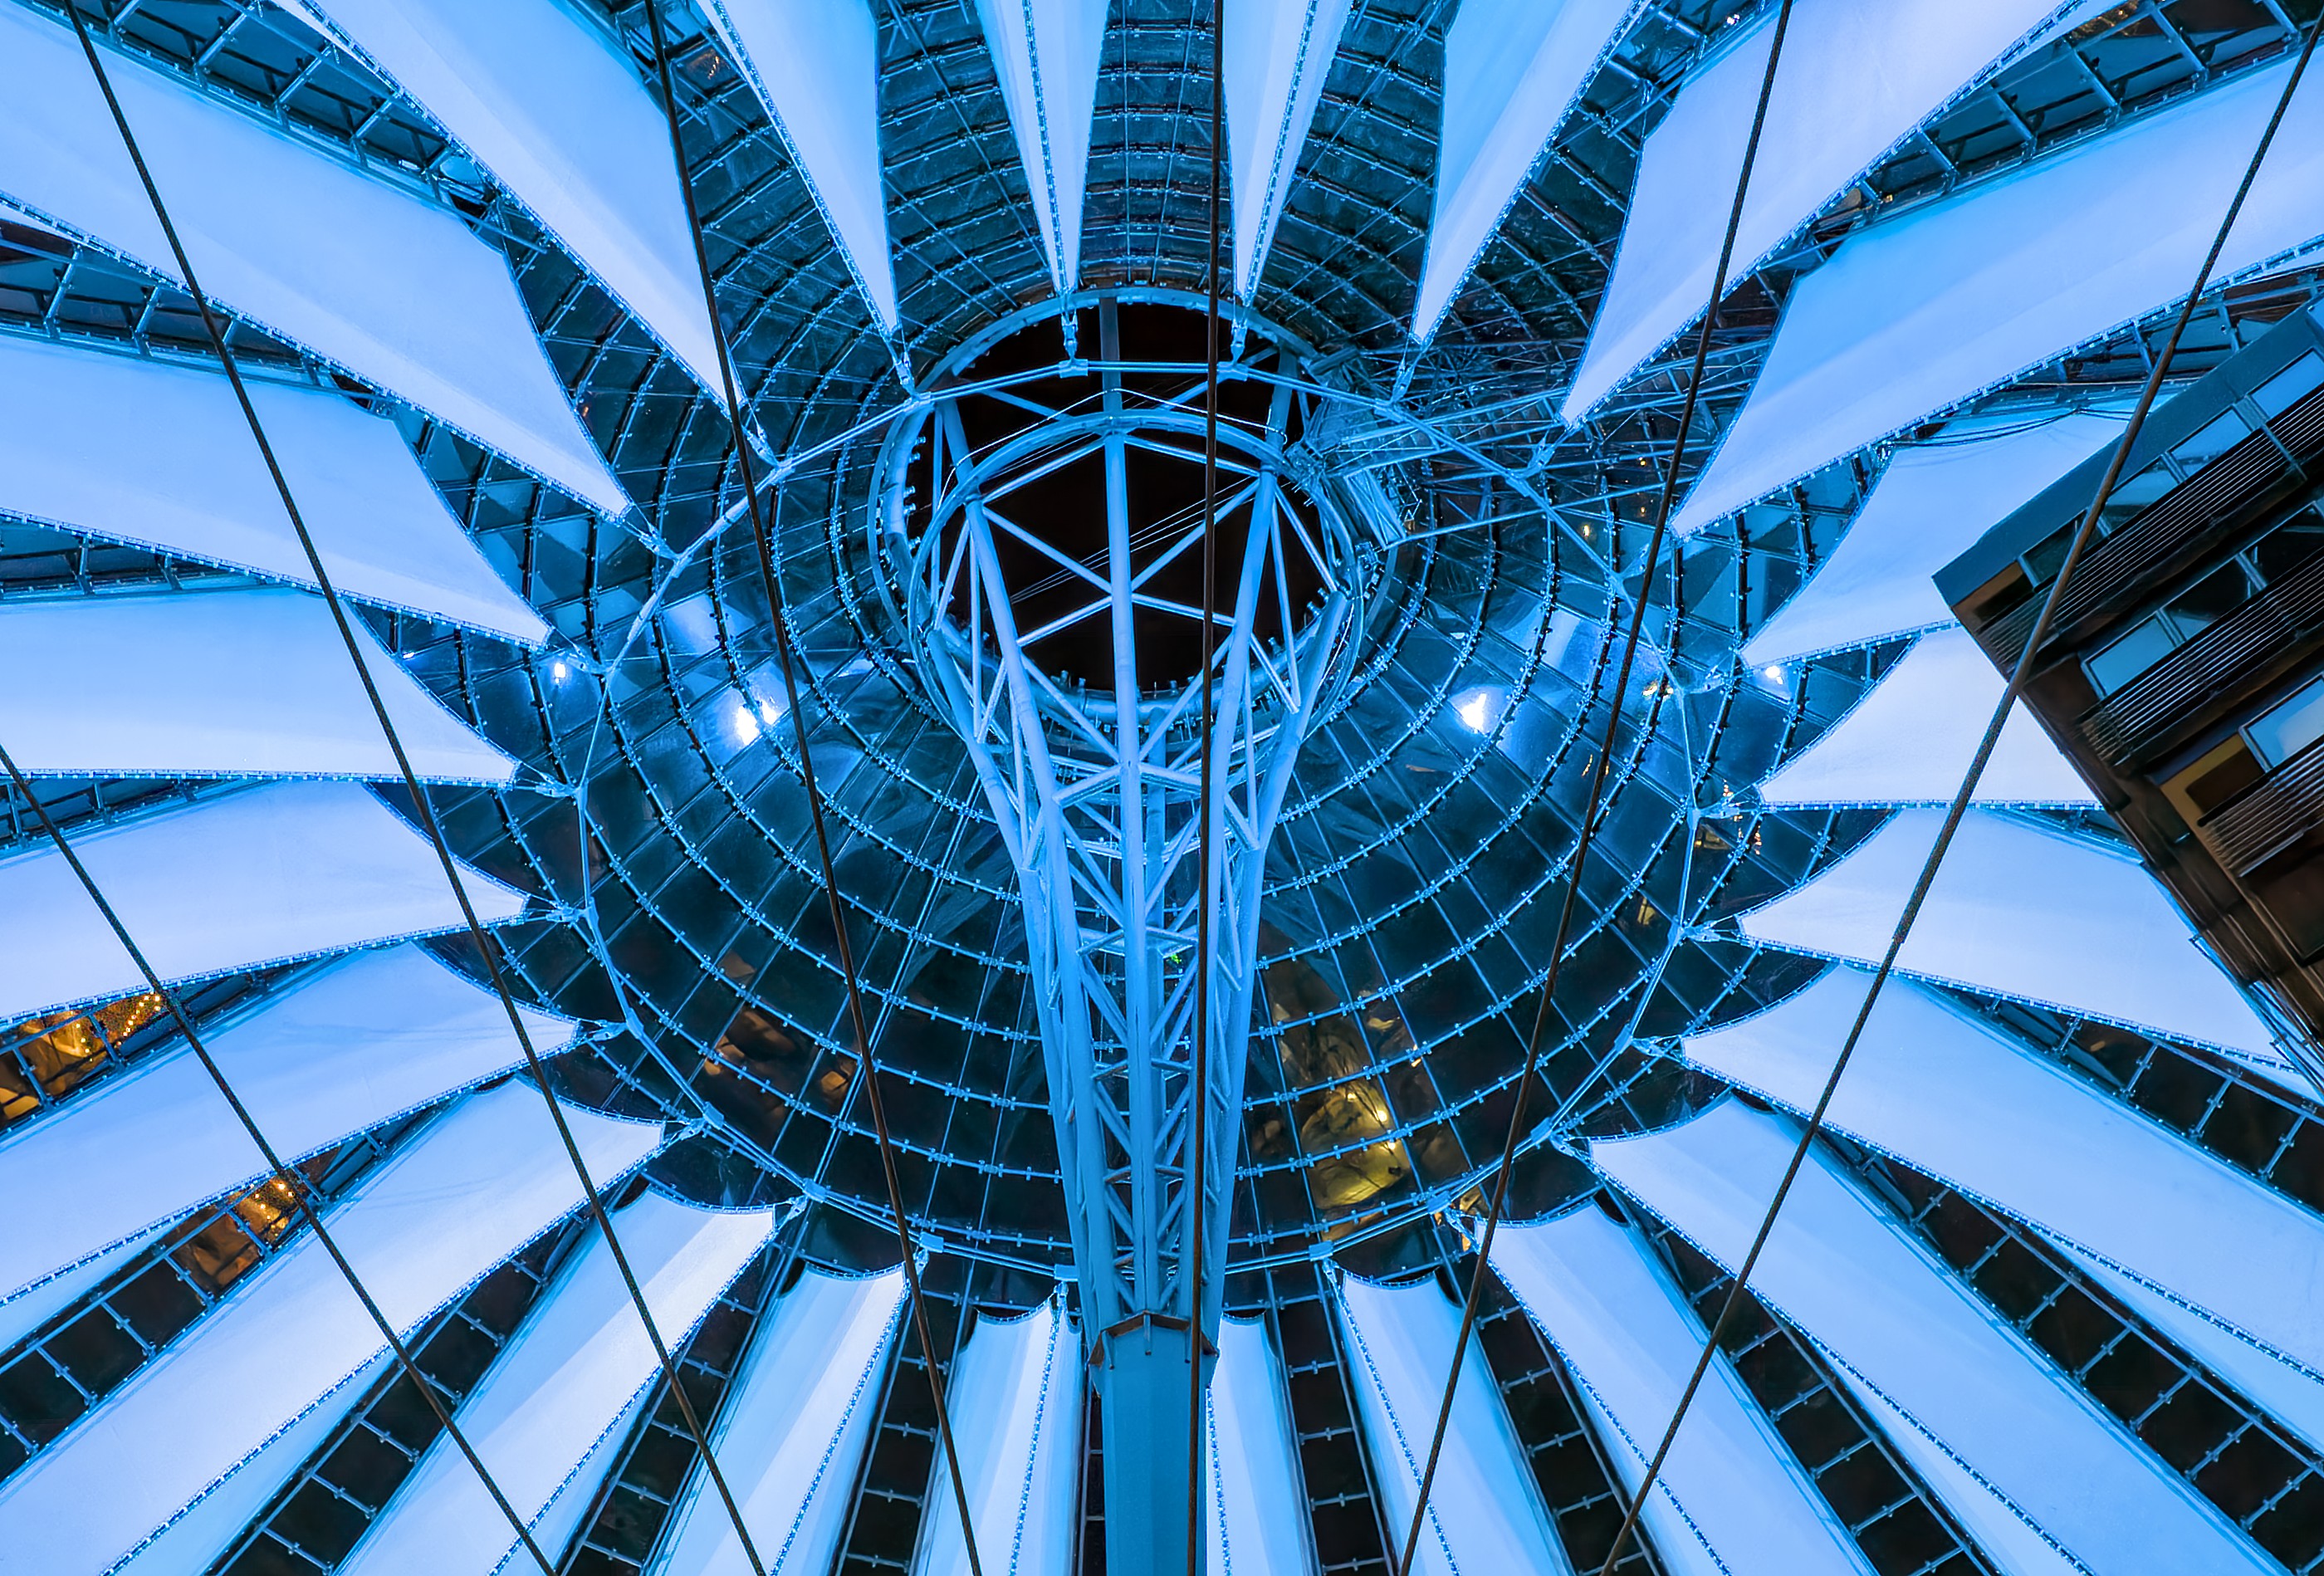
Your edit with the diffusion effect gave me the idea to try something in GIMP.
After a few more very minor adjustments in RT (e.g. decreased intensity of the circular vignette filter), I loaded the image in GIMP and created a duplicate layer with a greyscale copy as the layer mask. Then I blurred the layer (but without blurring the layer mask), and overlaid it over the base image in grain merge mode at something like 20% opacity. This creates a cool illumination effect, with the unblurred layer mask preventing the overlay from bleeding out of the illuminated ceiling installation’s “blades”.
I kept the effect subtle because I’m a subtle and sophisticated person but I think it massively improves the edit overall and actually makes it more faithful to the scene as I remember it.
Edit: Re-did the downscale in RT because I had forgotten how terrible scaling looks out of GIMP because GIMP unforgivably hasn’t included Lanczos3 since 2012.