I think I’ve finally got the user-experienced ironed out to the point it merits it’s own post.
Based on the academic works of @trougnouf, and the scripting pioneered by @sillyxone, this is a modern denoiser that rivals the best commerical offerings. I actually think its better, but I’ll let you be the judge.
It’s not completely integrated into darktable - but it’s about as close as I could get it. You’ll have to download a single file. Everything else is done in Darktable itself, and the installation beyond that one file is completely automated. Details in the readme.
Fingers crossed that it works. I don’t have a Mac, or and AMD gpu, or plenty of other variations of hardware/software - so: if you run into trouble, please let me know by creating an issue, or opening a seperate thread. I’d like to avoid having this thread from getting consumed by tech support.
I am on a Windows 11 computer. I installed the Lua script into the lua folder and started it in the script manager. It appeared as an export option which I selected. When I click on the setup python environment option I get an error message saying “Error: please set nind-denoise directory first”. Sorry to ask, but how do I do that?
Thanks all for the reports! In case it wasn’t obvious I’m primarily a Linux user - anyway I’ll take a look at the windows/mac issues and post back here when they’re resolve.
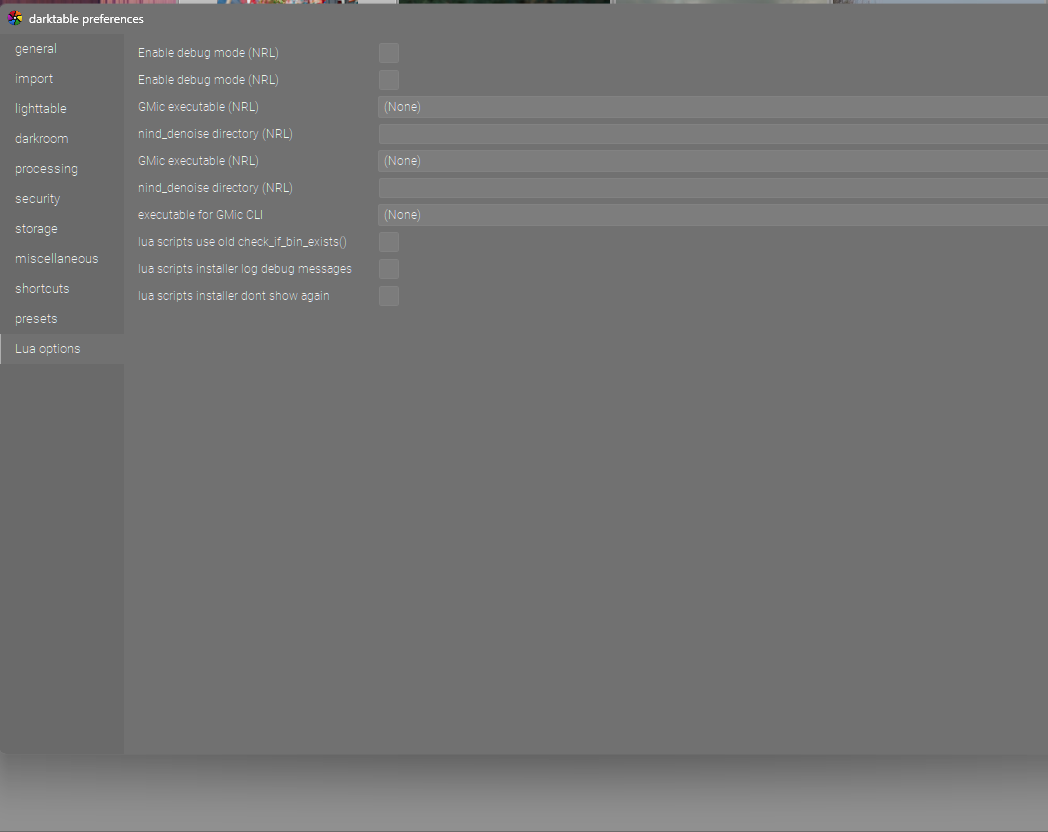
When I tried to start it it did not start…shows as stopped but it also seems to have added multiple config steps to my lua preferences and it disabled the 3 or 4 lua scripts that I had running by default…
I am trying to install on linux (Mint) and have the same issue as @priort - there are multiple config setups in lua preferences. This is with the nightly build (689b709) of darktable.
This problem can be solved by closing darktable removing the nind_denoise_rl.lua file from the lua contrib folder (just put it on your desktop) then restarting darktable. nind_denoise will be missing from the lua scripts. Close darktable and move the nind_denoise_rl.lua file back to where it belongs and restart darktable.
83c83
<   if success then
---
>   if success and value ~= nil and value ~= "" then
These lines change in nind_denoise_rl.lua will help in fixing the loading error
The complete changes for this to work in Macos
(base) ➜  darktable diff nind_denoise_rl.lua lua/contrib/nind_denoise_rl.lua | more
83c83
<   if success then
---
>   if success and value ~= nil and value ~= "" then
92a93,98
>   local gmic_path = df.check_if_bin_exists("gmic")
>   if gmic_path then
>     return gmic_path
>   end
>
>   -- Fallback paths
101,103c107
<     local f = io.open(path, "r")
<     if f then
<       f:close()
---
>     if df.check_if_file_exists(path) then
733a738,739
>
>     local darktable_path = df.check_if_bin_exists("darktable-cli")
740c746,747
<                        " --quality "..extra.jpg_quality_str
---
>                        " --quality "..extra.jpg_quality_str..
>                        " --dt "..escape_fn(darktable_path)
Though in macos, I am getting tiff error
2.8574 [tiff_open] error: TIFFFillStrip: Read error on strip 0; got 18446744072894649248 bytes, expected 31516
     2.9009 [rawspeed] Canon7dii_s1_denoised.tiff corrupt: rawspeed::RawImage rawspeed::RawDecoder::decodeRaw(), line 334: const TiffIFD *rawspeed::TiffIFD::getIFDWithTag(TiffTag, uint32_t) const, line 242: failed to find 1 ifd with tag 0x828e
Magick: Read error at scanline 4294967295; got 0 bytes, expected 31516. (TIFFFillStrip).
     2.9027 [GraphicsMagick_open] ReadImage failed for 'Canon7dii_s1_denoised.tiff'
     2.9067 [imageio_storage_disk] could not export to file: `Canon7dii.jpg'!
I had to change the activate command from activate_cmd = "source \"" .. extra.denoise_dir .. "/.venv/bin/activate\" && "
to activate_cmd = ". \"" .. extra.denoise_dir .. "/.venv/bin/activate\" && "
to get the export starting.
Nevertheless I still get an error in line 227 of the nind-denoise/src/nind_denoise/denoise_image.py script
Edit: I am getting the same errors also when calling the script from the command line
Edit2: It was missing the model. After downloading it and placing it in the correct directory it looks like it’s working now.
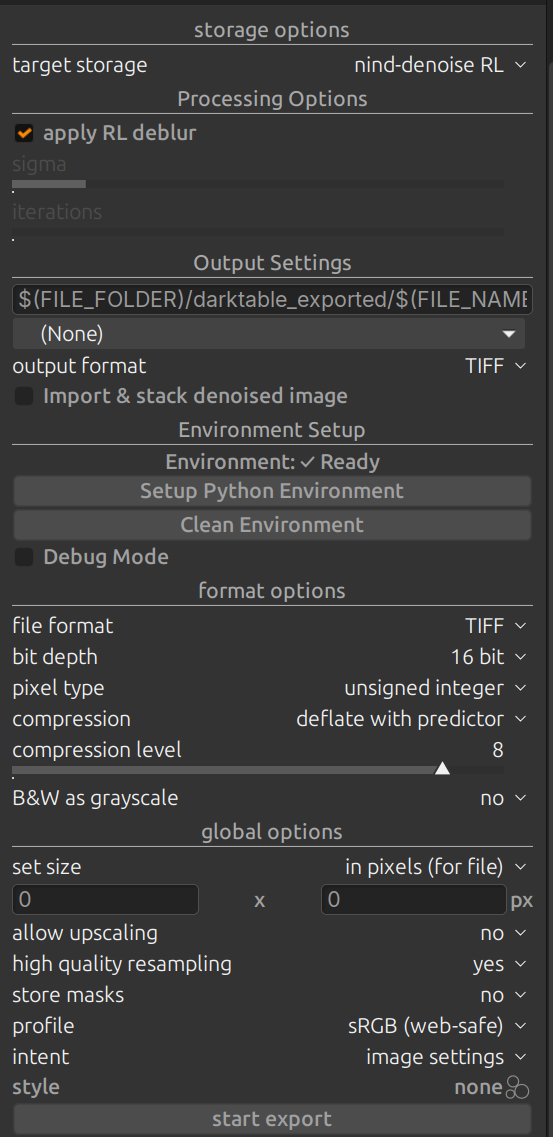
I have included a screen grab of the settings that I am using - if anybody has any suggestions I would appreciate their input.
The only thing obvious to me is that I cannot input settings for the RL deblur. I have put a copy of the GMIC executable in the nind_denoise folder and pointed to that location in my LUA script settings - not sure if that is the way things should be done.
Based on the comments in this thread, it sounds like a few issues need to be sorted out and a new release made, but just wanted to say well done for getting it to this point, and I look forward to trying it out soon.
Had the same problem. If I can get this to work I can finally say goodbye to Lightroom because after years I got a preset I’m happy with (thanks to AGX, darktable has this washed out greyish can’t explain look without it).
For the more technical people: my graphics card is older (AMD 5700 XT which has gfx1010), but apparently ROCm works with 1010 but I need to do some hack/tweak. Will test later.