There’s no out-of-the-box setting that tackles all your noise related needs. The Noise Reduction module does a reasonable good job on its own when dealing with low(er) level noise, be it Luminance and/or Chrominance related.
My first tip would be to have this module turned on by default, make it part of your auto applied base profile, with its standard setting: Luminance off (=Slider) and Chrominance on (=Automatic). Switching from Slider to Curve is often enough to get a decent result without having to adjust the curve itself. One heads-up: Most of the times the auto Chrominance setting works, but there are situations where it will make things worse, do be mindful of that.
But this is for normal, low(er) level noise. Things get a bit more complicated when noise is (very) high throughout the image.
My approach is as follows:
- Make sure that the Sharpening module is turned off
- Make sure that the Capture Sharpening module is turned off
- Zoom in to 400/500%, if at all possible to an area that has a full Luminance range, otherwise start with the darker parts and switch between areas (or use RT’s multiple detail windows).
- Select the Demosaicing module and try some of the methods that are available. There’s no specific one that always works, but LMMSE and IGV are rather good when dealing with noise images. But in the case of the image you put up as an example it turns out that VNG4 is the best one, with a bit of False colour suppression applied as well.
- Go back to a normal 100% view
- Select the Impulse Noise Reduction module, turn it on and dial in a setting that gets rid of the individual spots (don’t overdo this).
- Select the Noise Reduction module, set Luminance to Curve and dial in a setting that mostly works, but do not overdo this, better a bit too little then too much.
The above might be enough, if more is needed:
There are ways to fine-tune the noise levels even further:
- Select the Wavelet Levels module and then use the Denoise and Refine tool. Good to tackle noise on a detail level (noise is often much worse in certain detail levels). The image you provided has the most noise in levels 1 and 2 for example.
- Use Local Adjustments with the Blur/Grain & Denoise tool to target specific areas/colours. This one is not so much for a global reduction. It is ideal for targeting specific, though. I did not use it below, but you might use this one to target the light wall and a second instance to target the (darker) browns.
Once you are satisfied you can now start playing with the Capture Sharpening, Sharpening and other sharpening/contrast tools to get (some of the) details back. This is a back-and-forth between what is done previously and fine-tuning and it is always a compromise between sharp and noisy, one cannot have both in a very noisy image. Well, maybe Topaz can, but that one isn’t free…
OK, enough with the theory, here’s a reasonably quick noise edit that implements a lot from what I wrote earlier:
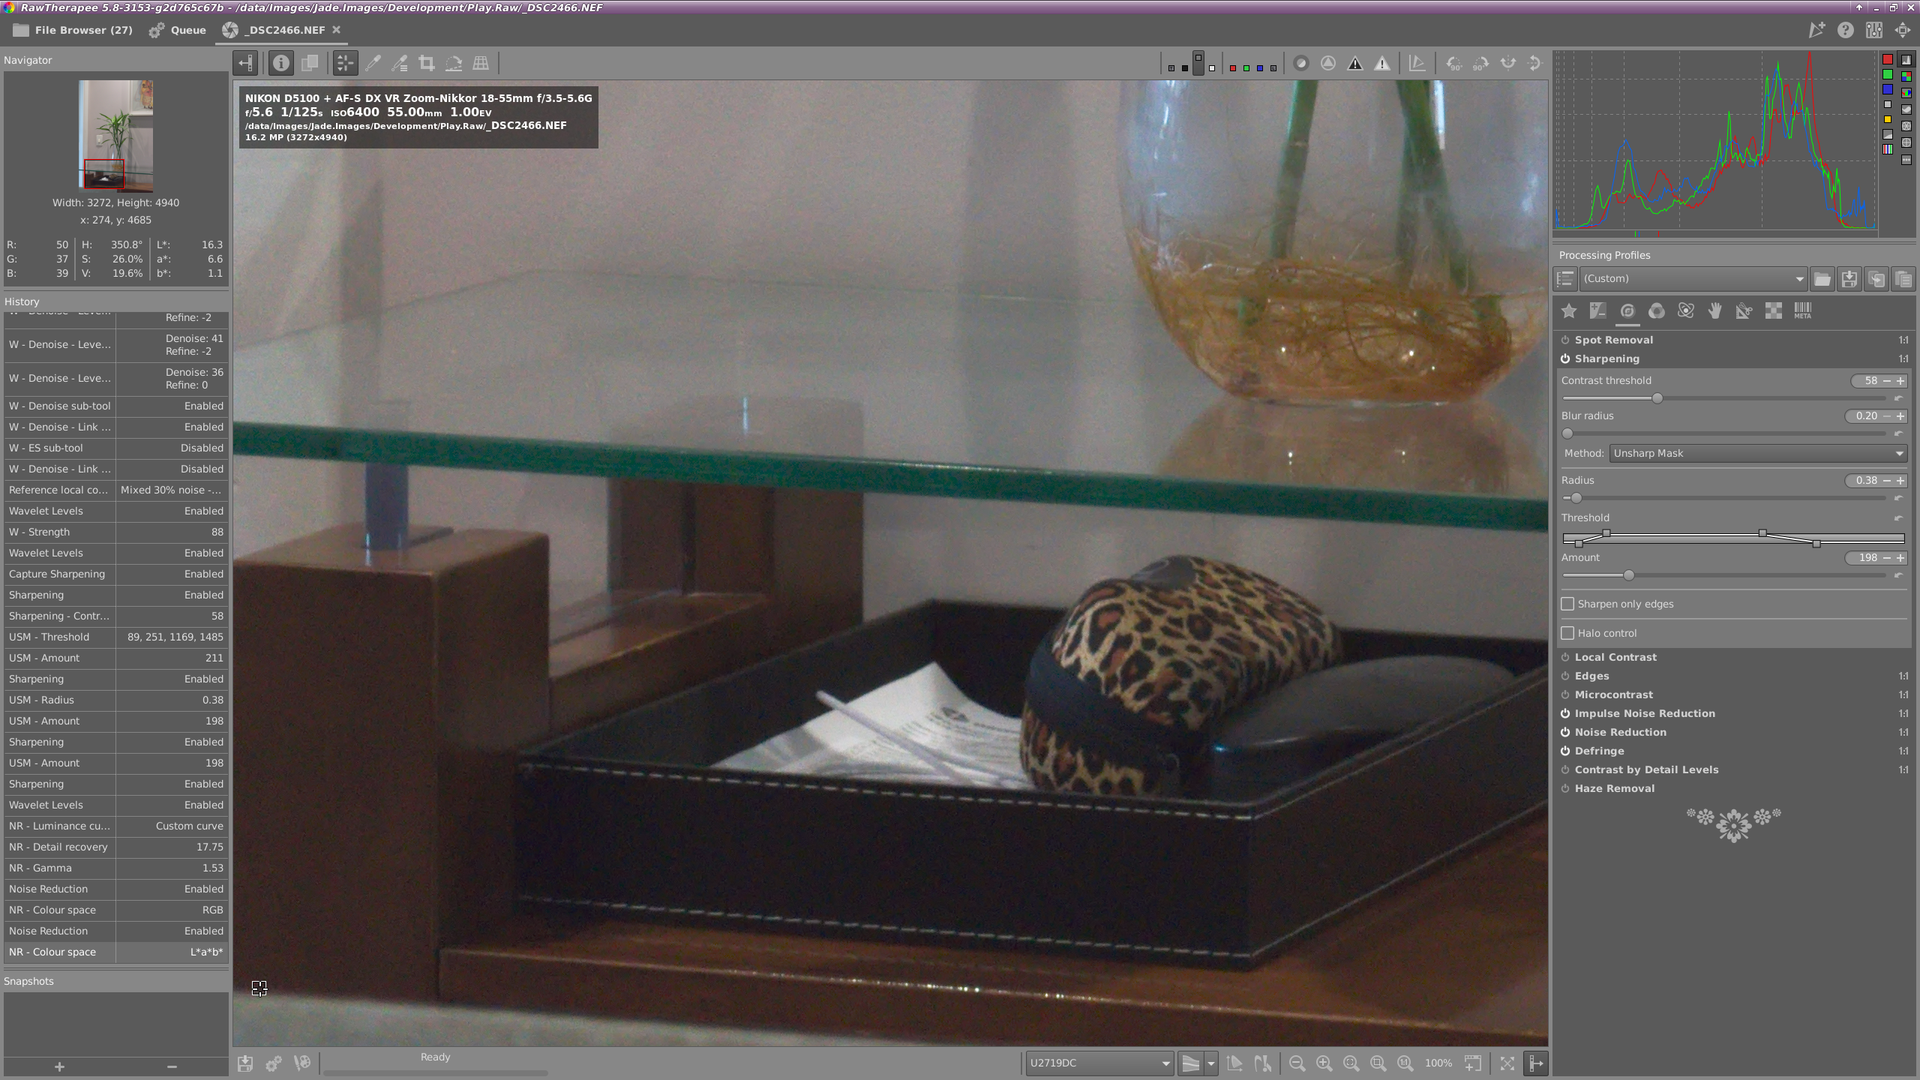
Imported with basic profile (@100%):
After a broadly applied denoise (@100%):
The sidecar for this edit (18.2 KB)
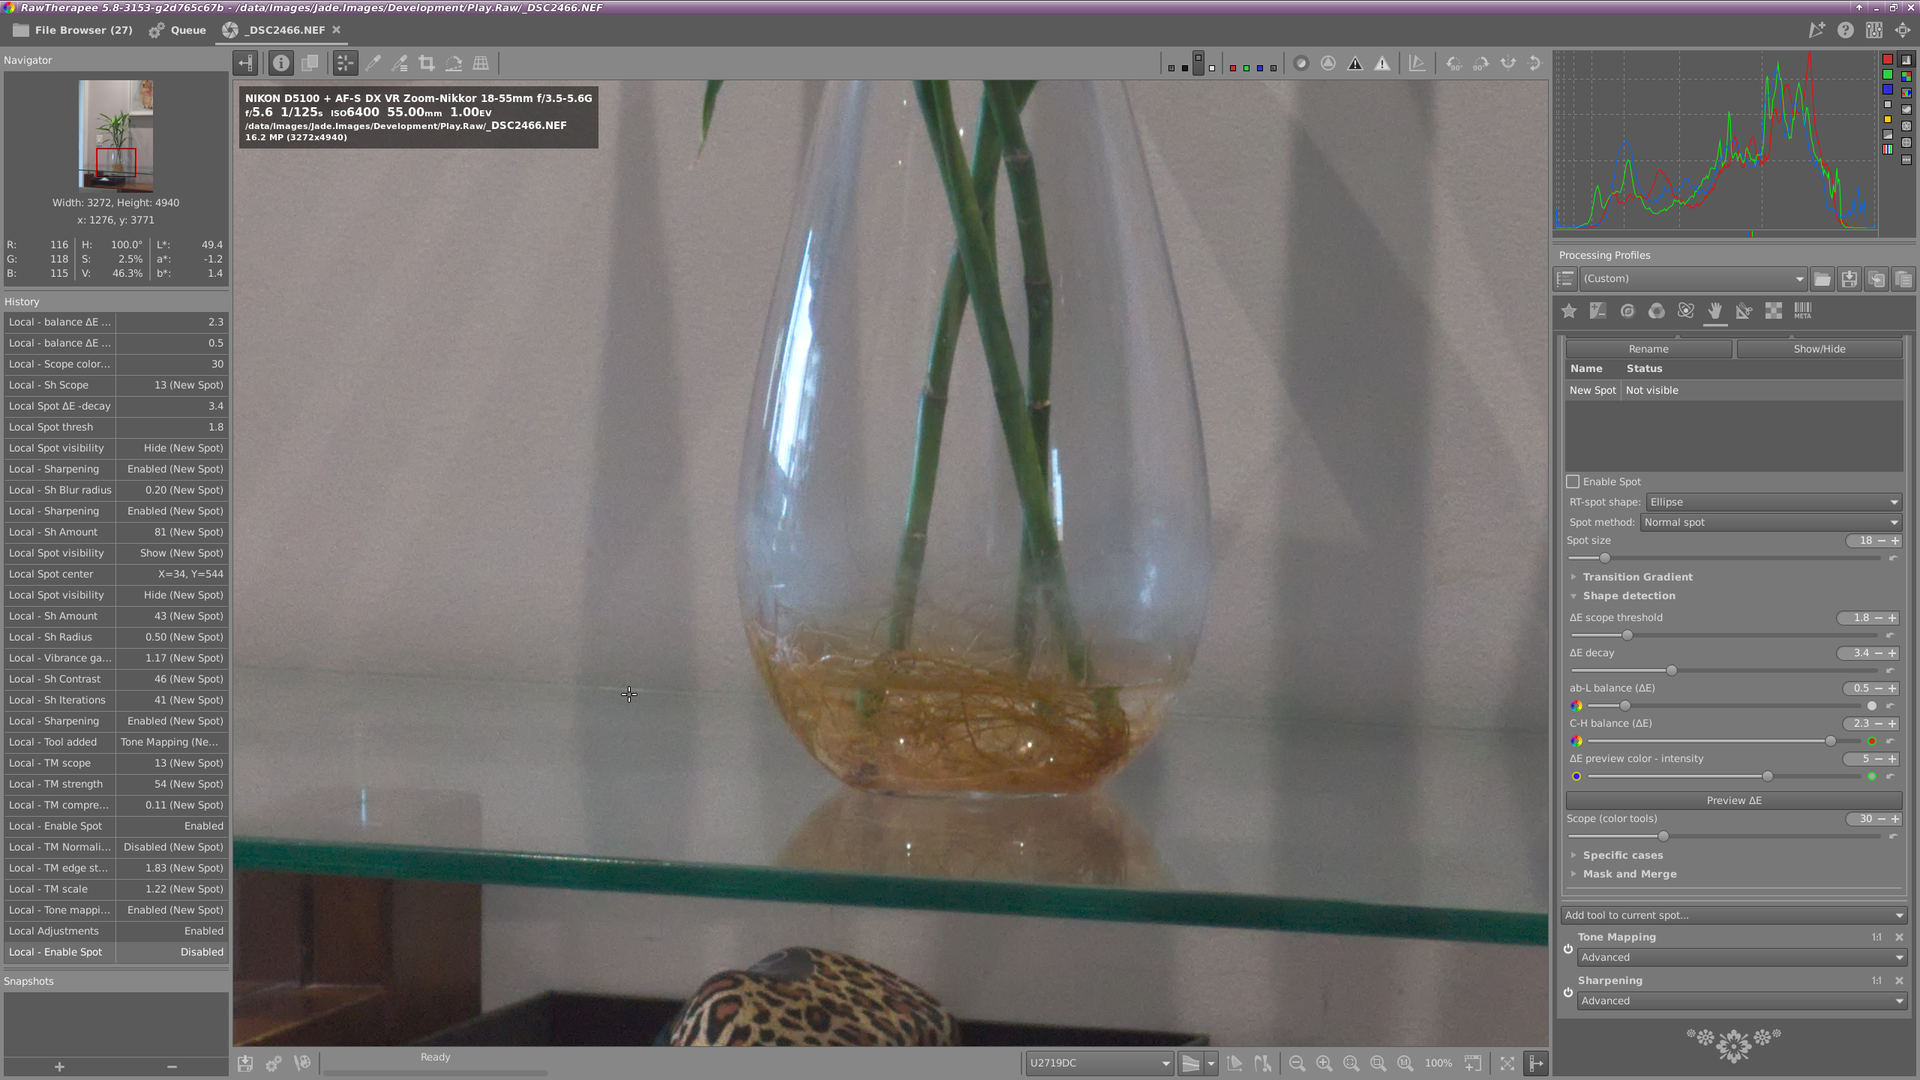
As you can see there’s sharpness degradation visible (look at the brown roots in the vase). A back-and-forth between the dialled in setting will probably make it a bit better but this is what I was talking about earlier: The balance between sharp(er) and/or noise(-ier). You could use the Local Adjustments tools to specifically target that part of the roots/vase and bring back some (always at a cost):
Before LA (@100%):
After LA (@100%):
I used Tone Mapping and Sharpening in this quick example, maybe the Contrast by details and/or Local contrast tools might have been the better choice.


 Very nice option to have in your noise toolbox, though.