Hi!
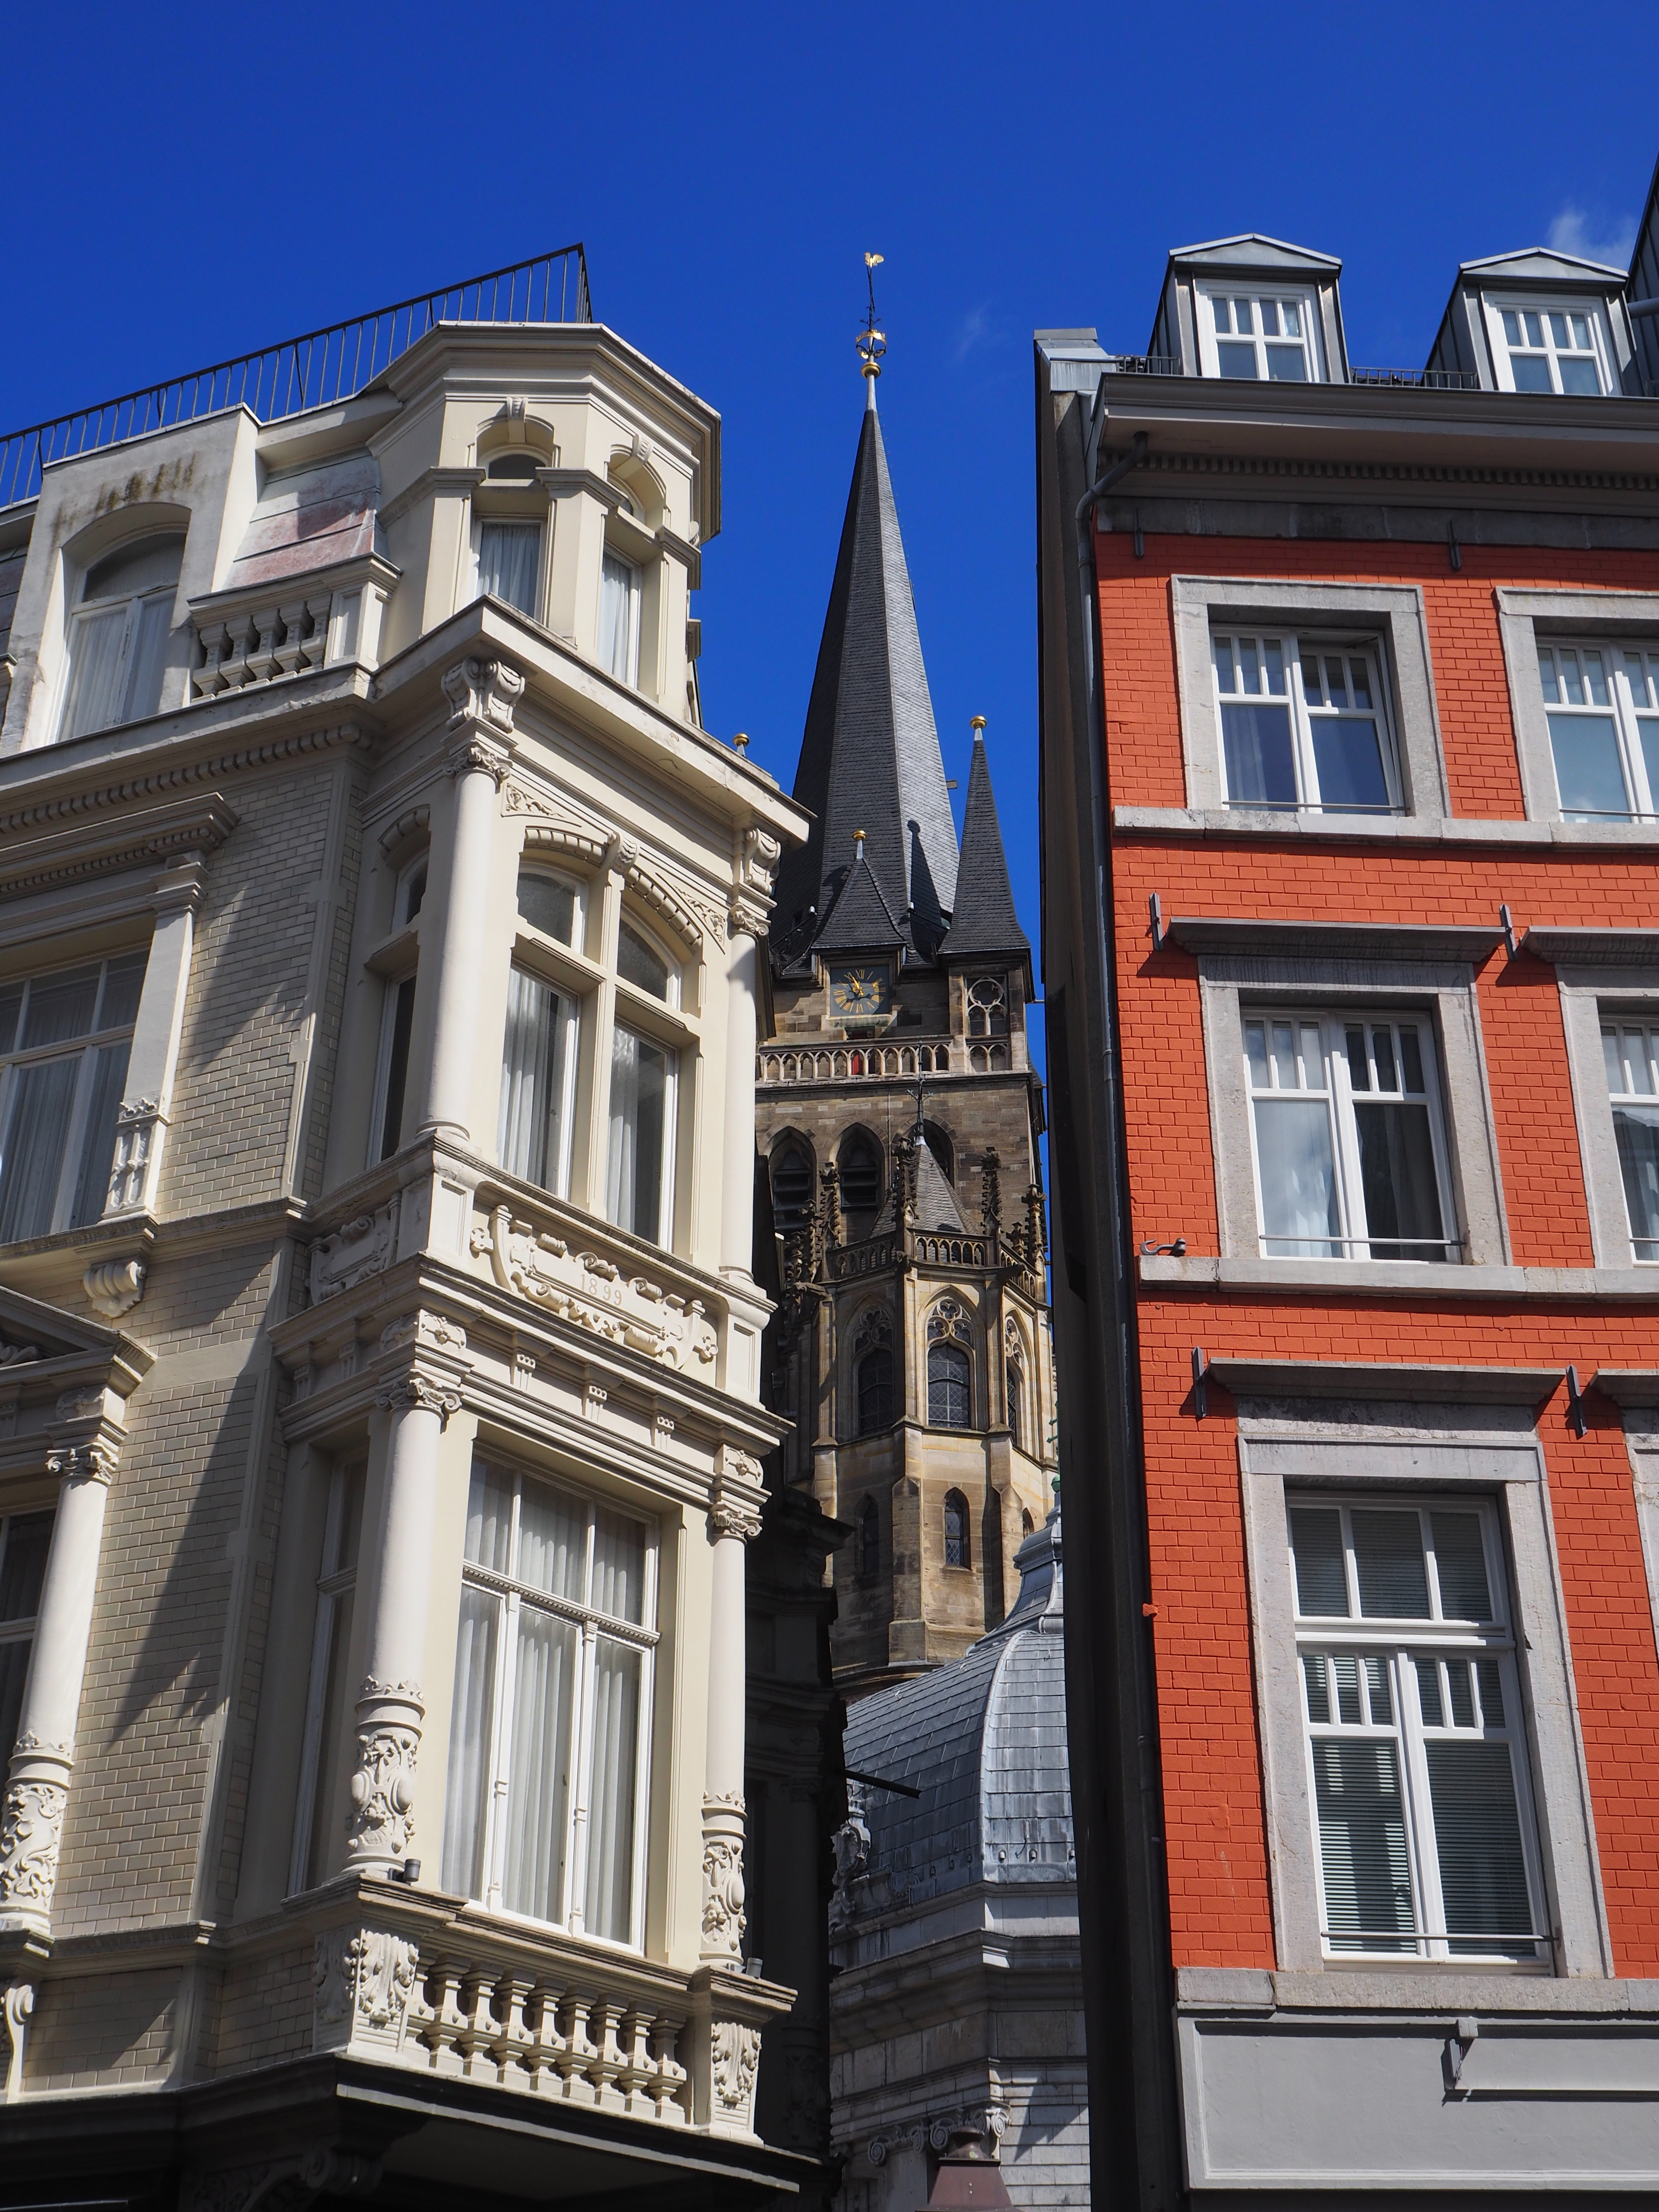
I need some help understanding what went on inside my camera as this image was generated – Specifically, the golden highlights on the top of the church tower. The OOC jpg does not have the haze/halo around it, but I cannot identify what darktable module would help me mimic that cleanup. (First image is processed raw)
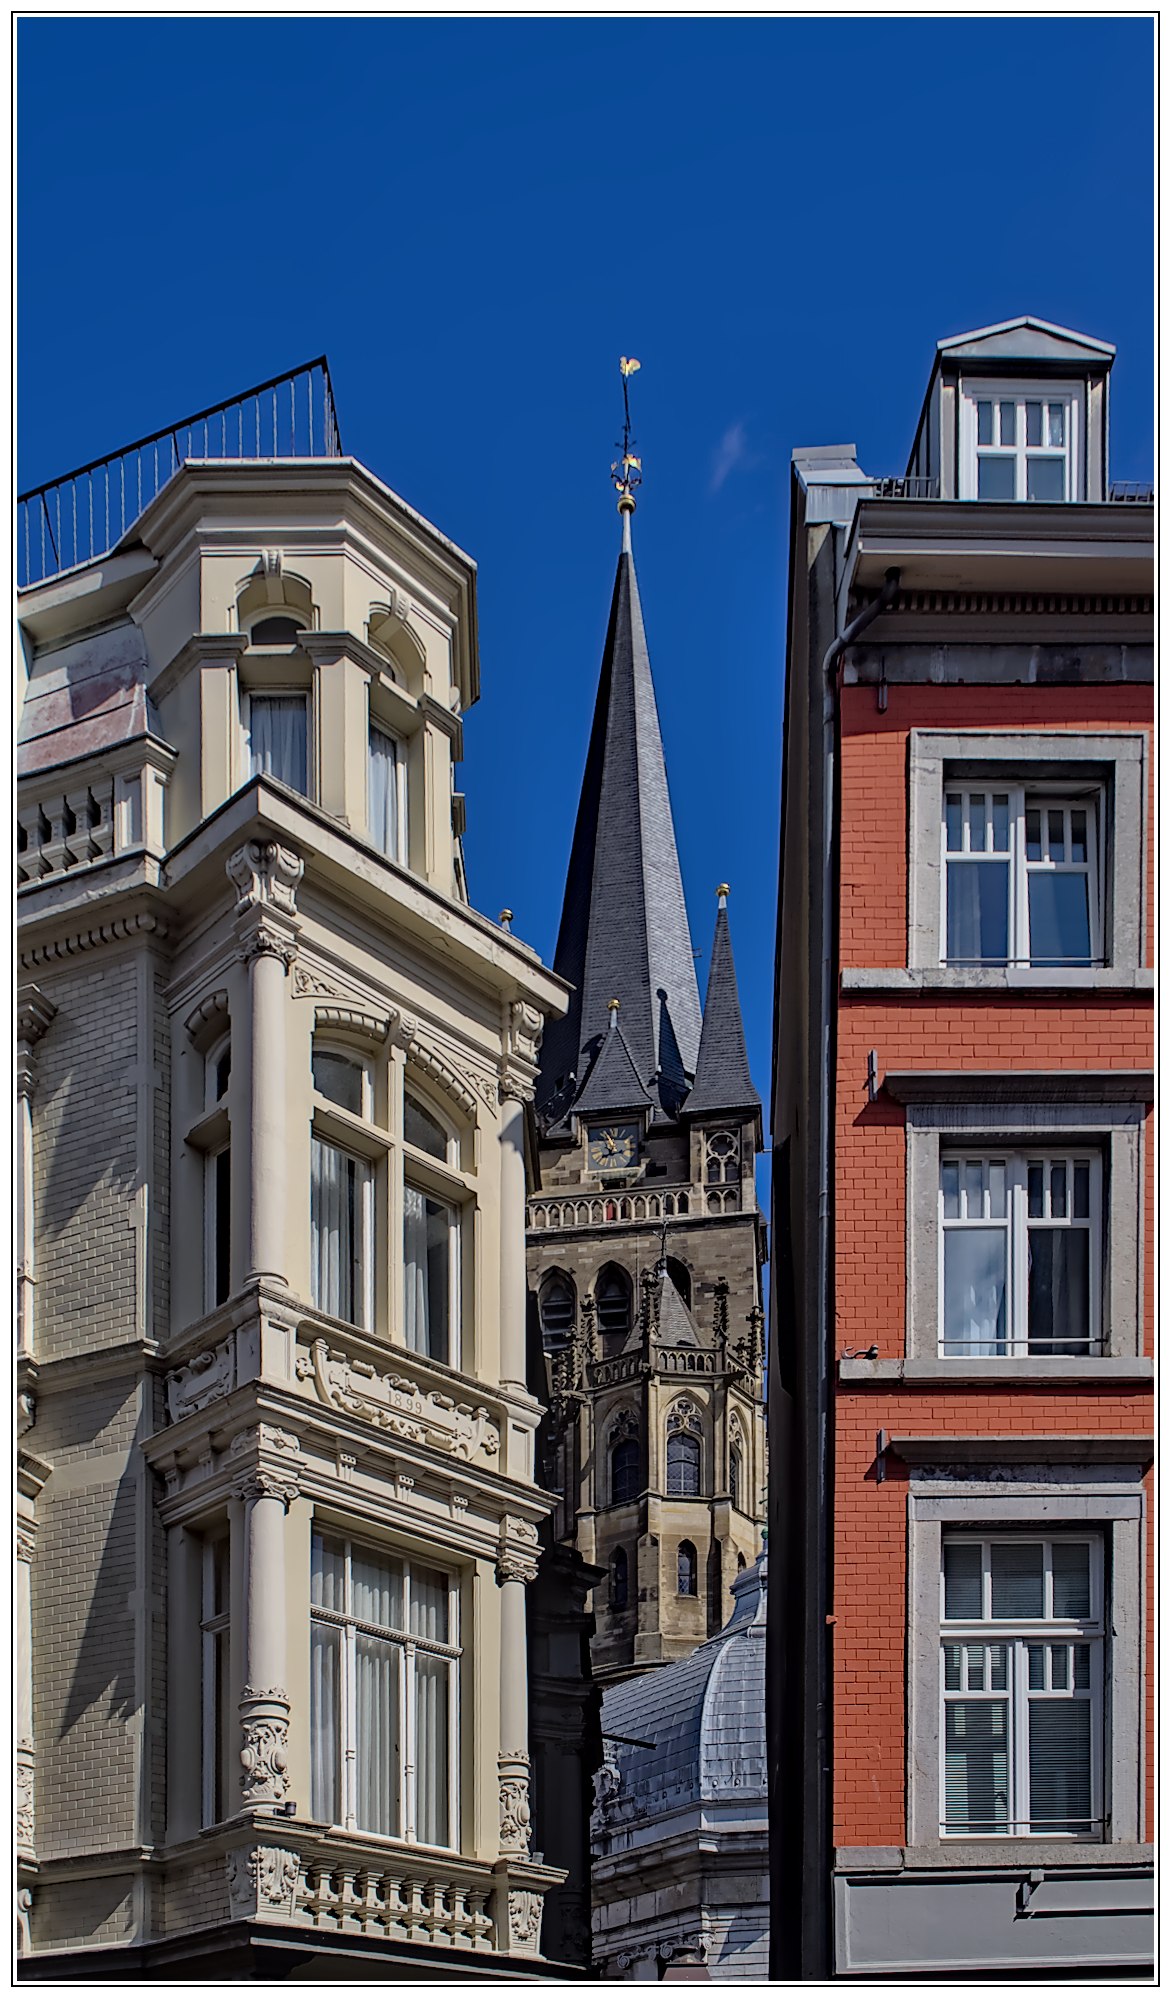
I loaded your jpeg from DT as xmp, as it looks like the xmp posted belongs to the jpeg (didn’t confirm) and had a look through your modules in use.
The bloom (for want of a better word) seems to be being produced or emphasised by the two instances of diffuse or sharpen acting on local contrast. I switched those two off, and added my favorite local contrast/sharpness preset instead. Looks like this. I don’t have a full enough understanding of the D&S to say what was making it behave that way though.
The chromatic aberration module also seems to be involved a little, but doesn’t look too bad with out the D&S modules.
Edit: I didn’t like the effect of that chromatic aberration module, so switched it off and used the TCA overwrite in the lens correction module instead. P7160024 (2023_08_27 19_03_17 UTC).ORF.xmp (37.3 KB)
And – thank you calling out those modules!
I got so stuck with filmic and highlights and all that, I didnt even try the obvious “turn off modules 1 at a time”. Or in this case…2 modules.
I spend so much time trying to get a good “starting point” (OOC jpg ish), that the preset i eventually made is very cluttered. I look at yours, and its half the modules. Of course, you didn’t leave defaults either. I have never used the “automatic” exposure. Its yet another setting within settings… I like it though.
Man this program continues to exceed my skills.
But! I have a new, simpler collection of settings to mess with. Thank you for the xmp
Sometimes ‘less is more’ (unhelpful I know ) but at the same time trying to match a given result can be quite educational.
My starting point usually consists of just:
sigmoid (or filmic)
exposure
possibly a couple of minor saturation tweaks in color balance rgb (essential if using filmic as unlike sigmoid it doesn’t increase chroma at all)
lens correction
profiled denoise
a diffuse or sharpen preset
I think that’s about it… using just these, it usually possible to get the overall impression pretty similar to the jpeg. Not identical, but reasonable.
Then as needed I will also use tone equalizer (very useful to rein in highlights and shadows if you like pushing contrast as I do in sigmoid), color zones for more delicate color adjustments, more diffuse or sharpen instances… and so on… but often not much!
The glow was mainly caused by the chromatic aberrations and local contrast DS modules. Raw chromatic aberrations worked fine, however. Using the Sharpen demosaic AA filter DS preset also helped to tighten it up a bit.