I’m having an issue where my clouds become overexposed when I either zoom out in LightTable or export at a lower resolution. Is there a way to fix this issue?


I’m having an issue where my clouds become overexposed when I either zoom out in LightTable or export at a lower resolution. Is there a way to fix this issue?
Many behaviours in DT will depend on what modules are in play and if you are using the HQ preview. It is slow but it is the most accurate view of what your image should look like when you are zoomed out or full screen…
Just make sure that you also export using the HQ reprocessing set to yes…again slower but it will be more accurate esp with some modules like dehaze which is a buggar at times and Diffuse or Sharpen.
There could be other reason’s…maybe share an image and as this question or submit a playraw just so that all the moving part can be examined…
DT also has more than one preview pipeline…it could be this as you are mentioning that you see this in Lighttable view??
IMG_2268.CR3 (19.6 MB)
IMG_2268.CR3.xmp (32.5 KB)
Thanks for sharing I will take a quick look…you are using filmic and sigmoid and a tone curve after that…normally you would use one tone mapper to optimize the dynamic range…but I will see if I can reproduce what you see and if any of your module choices are contributing…
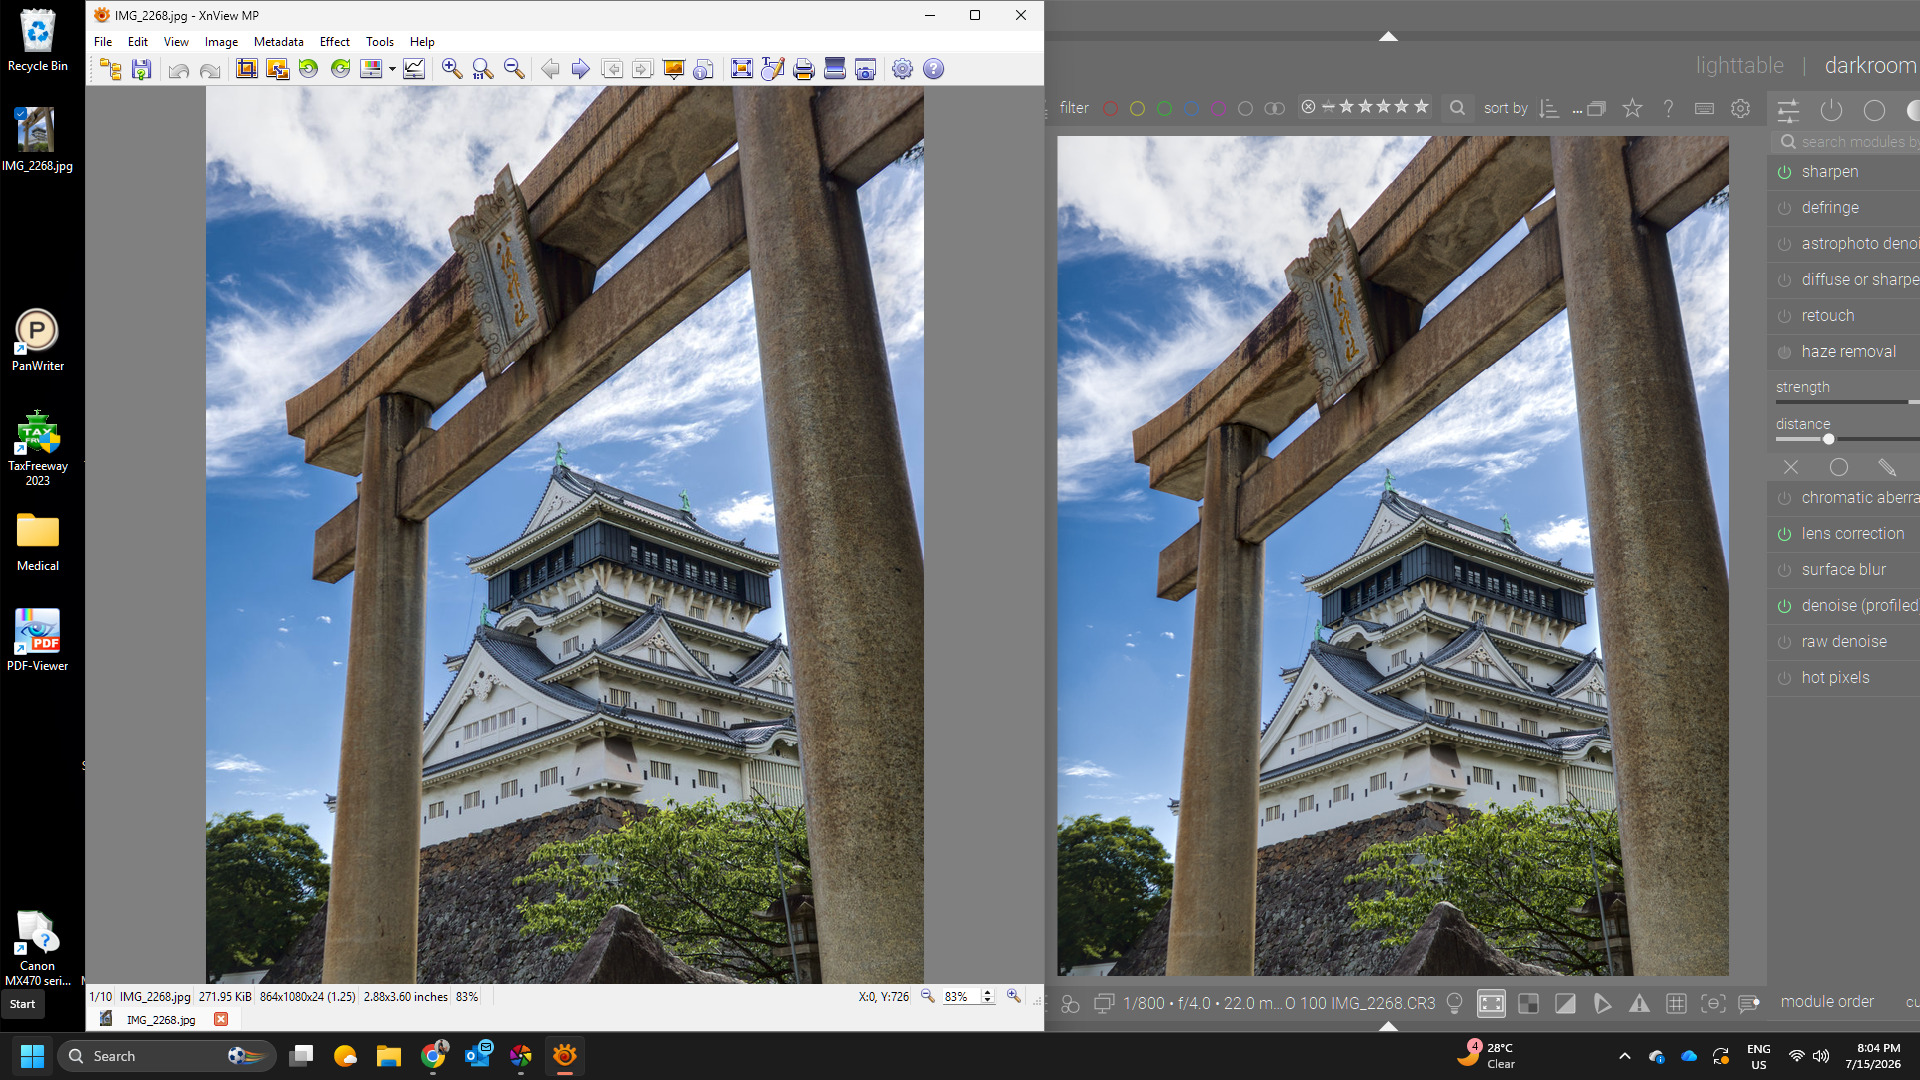
Edit…My viewer is XNview (color managed)… I exported your image using HQReprocessing set to yes and as provided by your sidecar… zoomed out to fullscreen…they look pretty similar…DT, On the right is the edit in DR view using the HQ preview and to the left is that edit scaled to 1080p on the vertical… This is not maybe helpful to what you are seeing…But for a lower resolution export I didn’t see anything in it. The clouds do lighten up and perhaps seem to be a tad less detailed in HQR mode compared to DT’s default preview…If you preview in one and export in the other you could maybe see a difference in some images…
Basically HQpreview should be exported with HQreprocessing to ensure a match and if you use the default then setting HQreprocessing to no will be a closer fit for images with edits impacted by the modules used and the downsampled preview…
As for the zooming out…just to confirm did you mean while in culling mode in Lighttable view?? I think that is its own pipeline…I would have to check and that could behave a little differently??
I noticed the same as Todd. Have a try in this direction…
IMG_2268_04.CR3.xmp (18.9 KB)
I noticed a couple of other things:
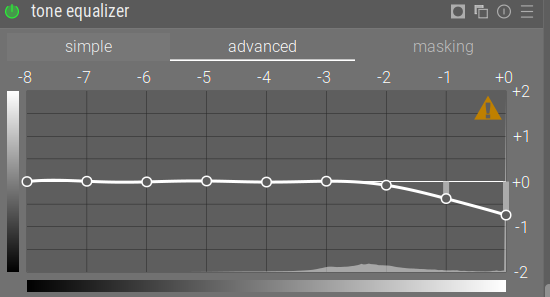
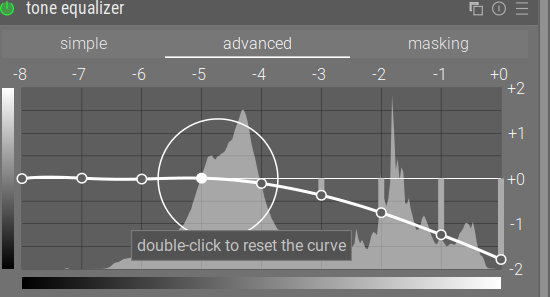
you used tone equalizer leaving out the high tones, thus leaving them over exposed, please use ‘O’ key to see where overexposure is the case. See:
subsequently you used local contrast not protecting the highlights thus making them even lighter. see:
I just copied some modules you used to get more or less the same feeling.
All done there is no need whatsoever to like this version better then your own… 
Thank you for all the tips and suggestions. I implemented the changes, and the weird behavior went away. I’m pretty new to darktable so I didn’t realize I was doubling up on some the tone modules
Darktable does have a learning curve…
Please have a look at the tabs here above your modules in the darkroom:

They may help you a great deal in offering the most used modules in a handy way. Or showing all presently active modules. The manual is your better friend here.
And if you like to have fun and learn lots quickly at the same time: submit pictures to play_raw
Sounds like you may get some value from my beginner guide: How to Get Started with darktable, 2026 Edition — Nis' Notebook