It has just came to my attention that the finished product of my RawTherapee images are larger than the originals and also the product of any of my other programs.
Original size = 5472 x 3648
RawTherapee size = 5488 x 3662
I caught this when I tried to stack a DxO image on top of a RawTherapee image and discovered there was a margin of uncovered territory showing.
This got me to checking pixel dimensions of images. both original and from various other programs and the size of all agreed except for the slightly larger RT images.
Am I doing something wrong to cause this or is that just the nature of the beast ?
Thanks for reading and all help is appreciated.
Some raw editors crop the image a bit, RT does not. You can set a crop size and activate it automatically.
Dome raw editors? Some raw editors, I suppose.
The issue is that most cameras has larger sensors than are advertised. Depending on the mechanics of the camera and lens, some sensels can be shadowed, causing black margins. The “standard crop” from the camera will remove those pixels.
I just looked and the original RAW files measure 5496 x 3670; so, bigger by 8 on each side than the RT files and the RT files are 16 longer and 14 wider than the original jpegs and also the converted RAW from all my other programs.
So, I can set a given finished size in RT, right ?
Do I just specify the length/width of the finished product; or, do I say “take x-many pixels off this side and X-many pixels off that side” ?
I suggest you run exiftool on your raw image. This may give various sizes that are used for different purposes.
(I can’t advise on RawTherapee.)
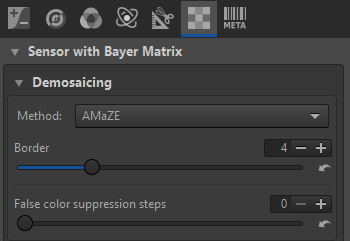
Change Border then crop. There might be other factors such as lens correction. Overlay them in GIMP, for instance, to see the difference.

I will first say this: the explanation of “Crop” in RawPedia leaves a lot of uncovered territory.
I went to the Crop tool, unchecked “Lock Ratio”, and entered my desired width and height.
I could see no means of centering my choice on the image.
I have no idea what the “Left:” and “Top:” are all about.
I first assumed that they were to enter how far from the left and how far from the top; but, when I entered half the difference, it moved the crop a lot more than that.
I never did figure out how to “Commit” the crop; “Select” didn’t seem to do anything.
The directions said “use the “Fit cropped area to screen” keyboard shortcut”; but, seek as I might, I never saw any such thing in the list it linked to.
Pressing “f” just fits the whole image to the screen, cropped area and all.
My plan was to simply include this crop in my preset so that all images from that camera would match the dimensions and line up with copies of the same image from other sources.
Locate your camconst.json file and add an entry with the raw crop for your camera.
If you can provide a raw file I can make an example entry.
Thanks; I wouldn’t know where to begin looking for that file.
I managed to arrive at a mostly workable solution when I chose 3:2 ratio and locked it with my dimensions entered in the appropriate spaces and half the difference entered in the other two boxes.
I added this to my saved profile and two test images came through automatically as I was wanting with no further interference on my part.
One minor glitch I am noticing is, although I am fairly certain I don’t have any perspective altering features turned on, the RT product, while although now being the same pixel dimensions, sort of “expands” when compared to the original jpeg underneath.
Thanks.