[PLAY RAW] Vulcan stone sunset

Many thanks Mica, now there is no pressure on me :wink:

I can understand why @asn is proud of this image. Look at it, the photo is sharp from foreground to background (I am sure f/13 helped but I suspect focusing at hyperfocal distance also might be involved!) It is exposed perfectly and the horizon is straight and at the top 1/3 line and the timing is perfect (sun is touching the horizon). Further, the scene has foreground interest. I mean, is there anything left to do?!! I really think that he should put this photo in Showcase category too, explaining all the care he has taken during the shoot. Cheers mate.

Here is my attempt with RT giving all due respect to the photographer
2018-07-27__7M33870.jpg.out.pp3 (10.9 KB)

And here is another where all his careful thinking has been thrown out of window :anguished:
2018-07-27__7M33870-1.jpg.out.pp3 (11.3 KB)

I am not happy with the way sun has come out in this rendering. As it is observed by @afre, it is the only blemish in this otherwise flawless photo (possibly due to such small aperture). One can fix it in GIMP but I refrained.

4 Likes

Basics in RT, exported one for the sky and one for the ground, then into Gimp and lot’s of brushing:

4 Likes

filmulator on the bottom, rawtherapee on top, gradient mask in gimp.

2018-07-27__7M33870.ARW.pp3 (10.3 KB)

2 Likes

I really like the picture, so I went for another version, using even more stuff that’s not in dev :stuck_out_tongue:

8 Likes

This photo is so nice. Thanks for sharing it. Here is my try.


darktable 2.5.0: 2018-07-27__7M33870_01.ARW.xmp (6.4 KB)

3 Likes

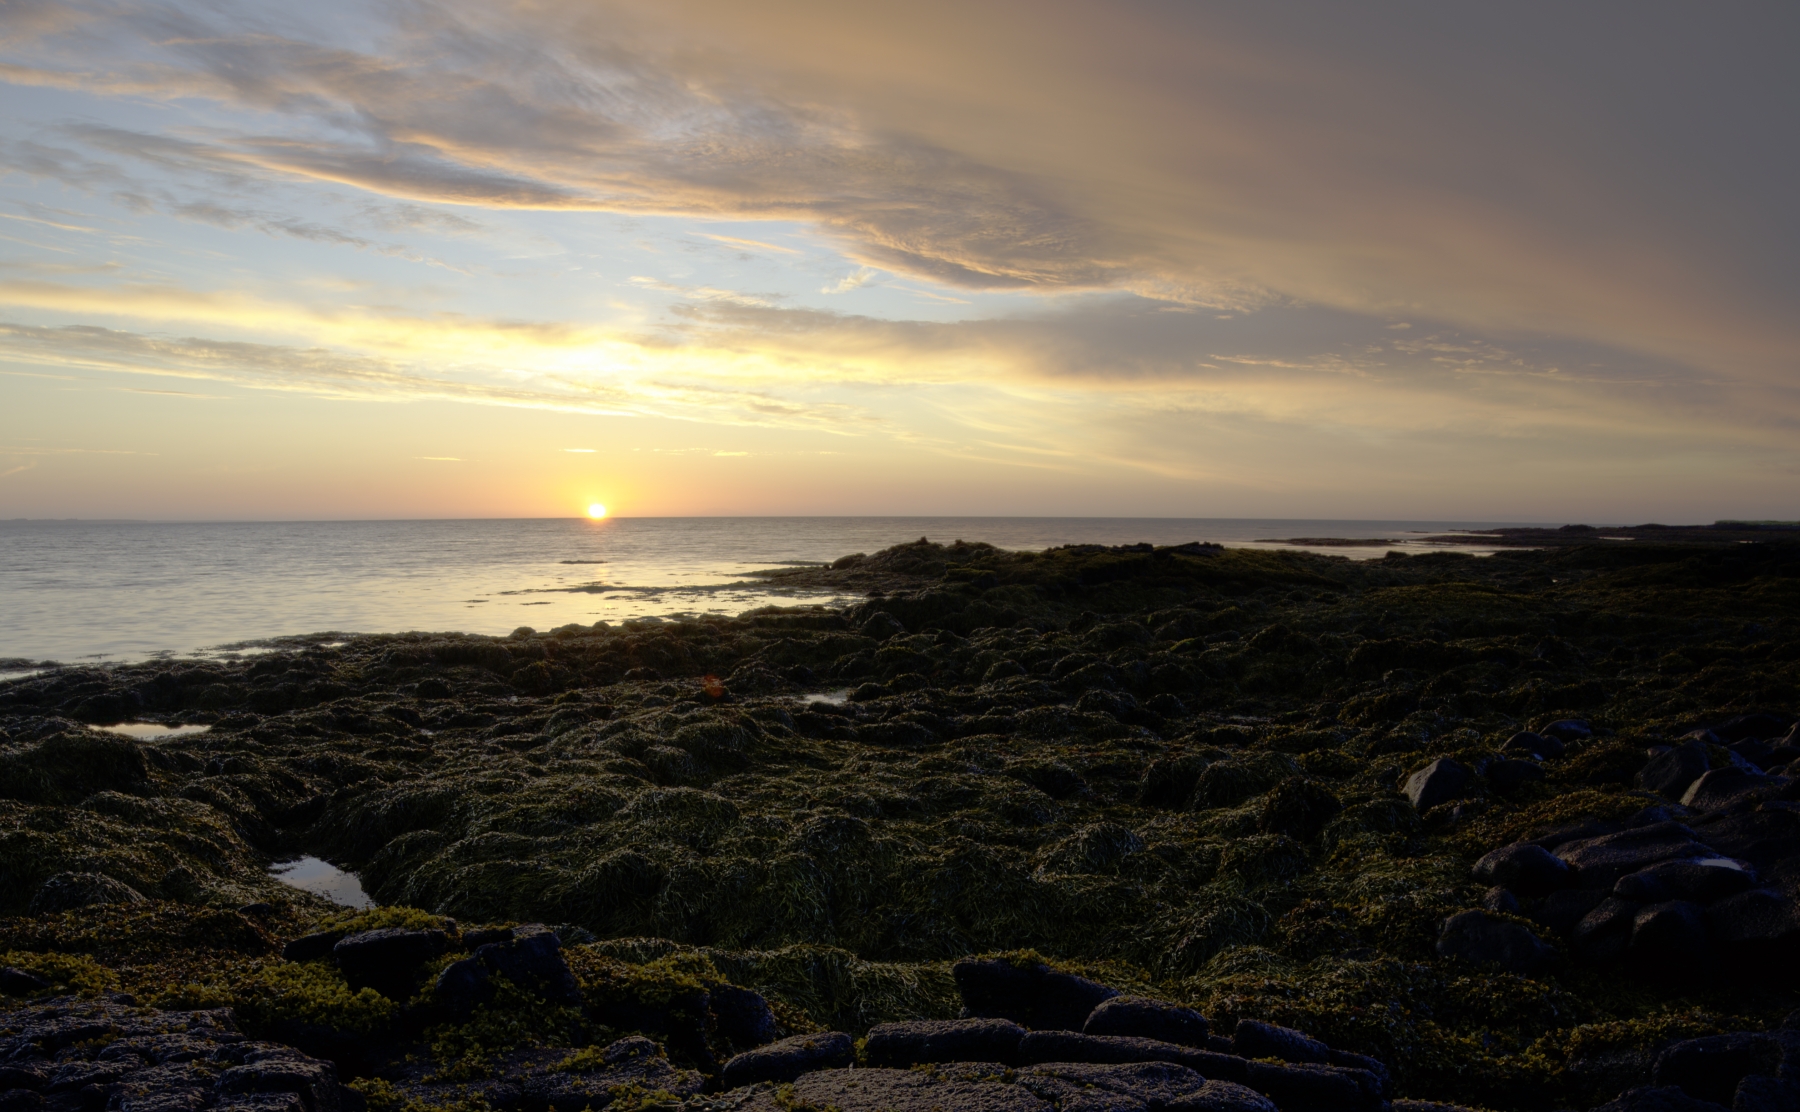
My take. I didn’t fix the sun or the flare; I typically don’t make any local edits. If I do an alt, I shall consider it.

1. PhotoFlow → HL mode (blend) → linear Rec2020 (no clipping) → 32f
2. gmic → filter pixels → adjust brightness, contrast (curves) → do that on two copies: one optimizing the highlights, the other the shadows
3. enfuse → blend the copies
4. gmic → enhance contrast (edges) → rotate → crop → adjust brightness, contrast (curves) → adjust chroma (curves; C) → sharpen → resize

I thought I’d just throw in my two cents’ worth… What a nice photo! // RT only

1 Like

Further examination on the vertical lines crossing the sun. They appear in the brightest parts of the image and the top edge. Might be due to the filters.

lines

I cannot clearly grasp if you’re playing along or if you’ve started torturing baby-sea-lions if the second they hate to be blown air in their tiny sensitive ears.


:monkey: you don’t retract, you (are) miscalculate(d)… then you amend, you perfect or you fall sleep whichever comes first :duck: tak master mono
Anyway, I cannot pretend to know why other people go and develop someone else’s picture, can be many reasons, sometimes even contradictory; personally I take it as a challenge, an exploration, a trip with no pre-set destination; if along the sharing of the journey someone learns (or is triggered) something, it’s double rewarding, I do learn (enrich) from others. Well, that’s the :poop: :sweat_drops: intro.

After a little bit … it started to feel strange; then it settled.

The result I posted is okay, but the thing is not about getting a better one, but a truer one, I think.
In that sense, I feel I’d betrayed my first instinct of going with a more natural looking processing; got lost in the playing. The good out of this is that then the objective or better said the motivation / focus was clear.
So, how do I look? je je je, I mean, how do I perceive light in general, how do my eyes and brain scan a given place and then a 2D image. That helps me in the taking of the decisions that leads to a processed image. And so I tried to tonne down the cramming of DR and colourfull details and went for softer, calmer “interpretation” – here a quick bow to @McCap master naturally coolio – Then, I emphasized the Z made by the triangle of the left patch of sky and inverse on the rocks. I gave some attention to the yellow flora, they punctuate perfectly the darker tones of the rocks and algae and partners with the :sun_with_face:

The borders were very distracting (love the tripod leg though) so after correcting vignette, went back to reinforce the vignette. I also found annoying the rocks on the top being dark… one approach can be like @shreedhar which feels (to me) coherent, despite I very seldom like to use dodge and burn, here went on dodging for a bit. I used portra film emulation as luma curve and blurred / soften a bit mainly HL. Pushed everything to what I consider the limits… it is funny, but more seemed to make the picture less interesting… here my rating is super simple: how long can I look at it?

In total fairness, I also watched Gaugin portrayed by the always great Cassel. Which made me a bit sad too, {otto’s samba acabo de entrar na solidão} aswell as a refreshed perspective 'bout many things.

Cheers
 
PS
@afre you know you can put more colourful flavours in the ice-cream’s cone with no extra charge? :stuck_out_tongue:

6 Likes

I think he’s playing along… nobody has banned him (except himself, which we can’t control :wink:)

I like editing other’s photos because I’m not bound by my own vision so much. When I make a photo, I try very hard to see the end result while I press the shutter and record what/how I feel at the time. When it is someone else’s , I’m not bound to that previsualization. I can try new things that I don’t demand in my own work. It is freeing in a way. I also hope someone else enjoys it, though that is not a requisite.

4 Likes

All I know is if @chroma_ghost is writin’ I’m readin’. Always a good ride.

2 Likes

Here is my own take on the image using Rawtherapee.
2018-07-27__7M33870-test1-screensize

2 Likes

Had a hard time processing the image. I prefer minimalist global edits but I supposed that that isn’t enough to satisfy the masses. Been trying different things since my first take. Nothing seems to work. And despite the warm reception of the photo, I don’t like it as much as the others do. In sum, I don’t have a vision of what it could be and I don’t know how I could tame the raw.

so I heard

I prefer minimalist global edits

earthquakes and such, goin’ about like a god inni?

I supposed that that isn’t enough to satisfy the masses.

I like when you call me a whore, softly

Nothing seems to work

almost in tears, wait, need a handkerchief

I don’t like it as much as the others do

you, you moby dick hunter!!!

I don’t have a vision

you can borrow my monocle and doctor says 2 drops of :rainbow:

how I could tame the raw.

who knows… a stick and honey, good music (?) I’m leavin these butterflies helpers
Case need more, check also Leon Bridges, Jorja Smith, Lianne Havras, Marc Miller (RIIP), Tash Sultana (all npr - live)
 

tamos juntos

 
:palm_tree::palm_tree:

@asn Thanks for this beautiful picture! Here is my photoflow take. I started by compressing the dynamic range, and then added back contrast locally using exposure/gamma and curves adjustments coupled with opacity masks. I have also tried to “repair” the blown-out sun by blending a solid yellow color on the brightest parts of the sun and surroundings:


2018-07-27__7M33870.pfi (72.9 KB)

6 Likes

That’s a wonderful result, @Carmelo_DrRaw

2 Likes

Okay, I spent way too much time on this, :stuck_out_tongue: but I like to solve problems, obsessively. :crazy_face: I used heavy processing, at least for my ancient laptop, so I had to wait :timer_clock: every time I tweaked things or changed my workflow. :man_facepalming::woman_facepalming: That is what I get from doing things from bottom up. Fortunately, I did come up with new techniques along the way. :test_tube::+1: Here is my alt.

1. PhotoFlow → HL mode (blend) → linear Rec2020 (no clipping) → 32f
2. gmic → filter pixels A → optimize brightness and contrast for sky and land, respectively B C (curves; from half-size stats: less outliers than full-size)
3. enfuse → iterate step 2 until fusion (contrast) results in < a certain % of out-of-gamut or -range pixels (NB I am still not good at handling them)
4. gmic → filter pixels → sharpen (enhance high freq. contrast) → adjust brightness and contrast (curves) → add yellow → output 2 copies D E
5. pnmclahe → enhance saturation (E)
6. gmic → combine A D E to taste → sharpen (LoG) → resize → crop

Zoom 100% and enjoy. :slight_smile:

First attempt ever with a raw file…

2 Likes

darktable 2.7

2018-07-27__7M33870.ARW.xmp (14.8 KB)

7 Likes

Hey y’all,
may I?

2018-07-27__7M33870.ARW.xmp (10,4 KB)

4 Likes