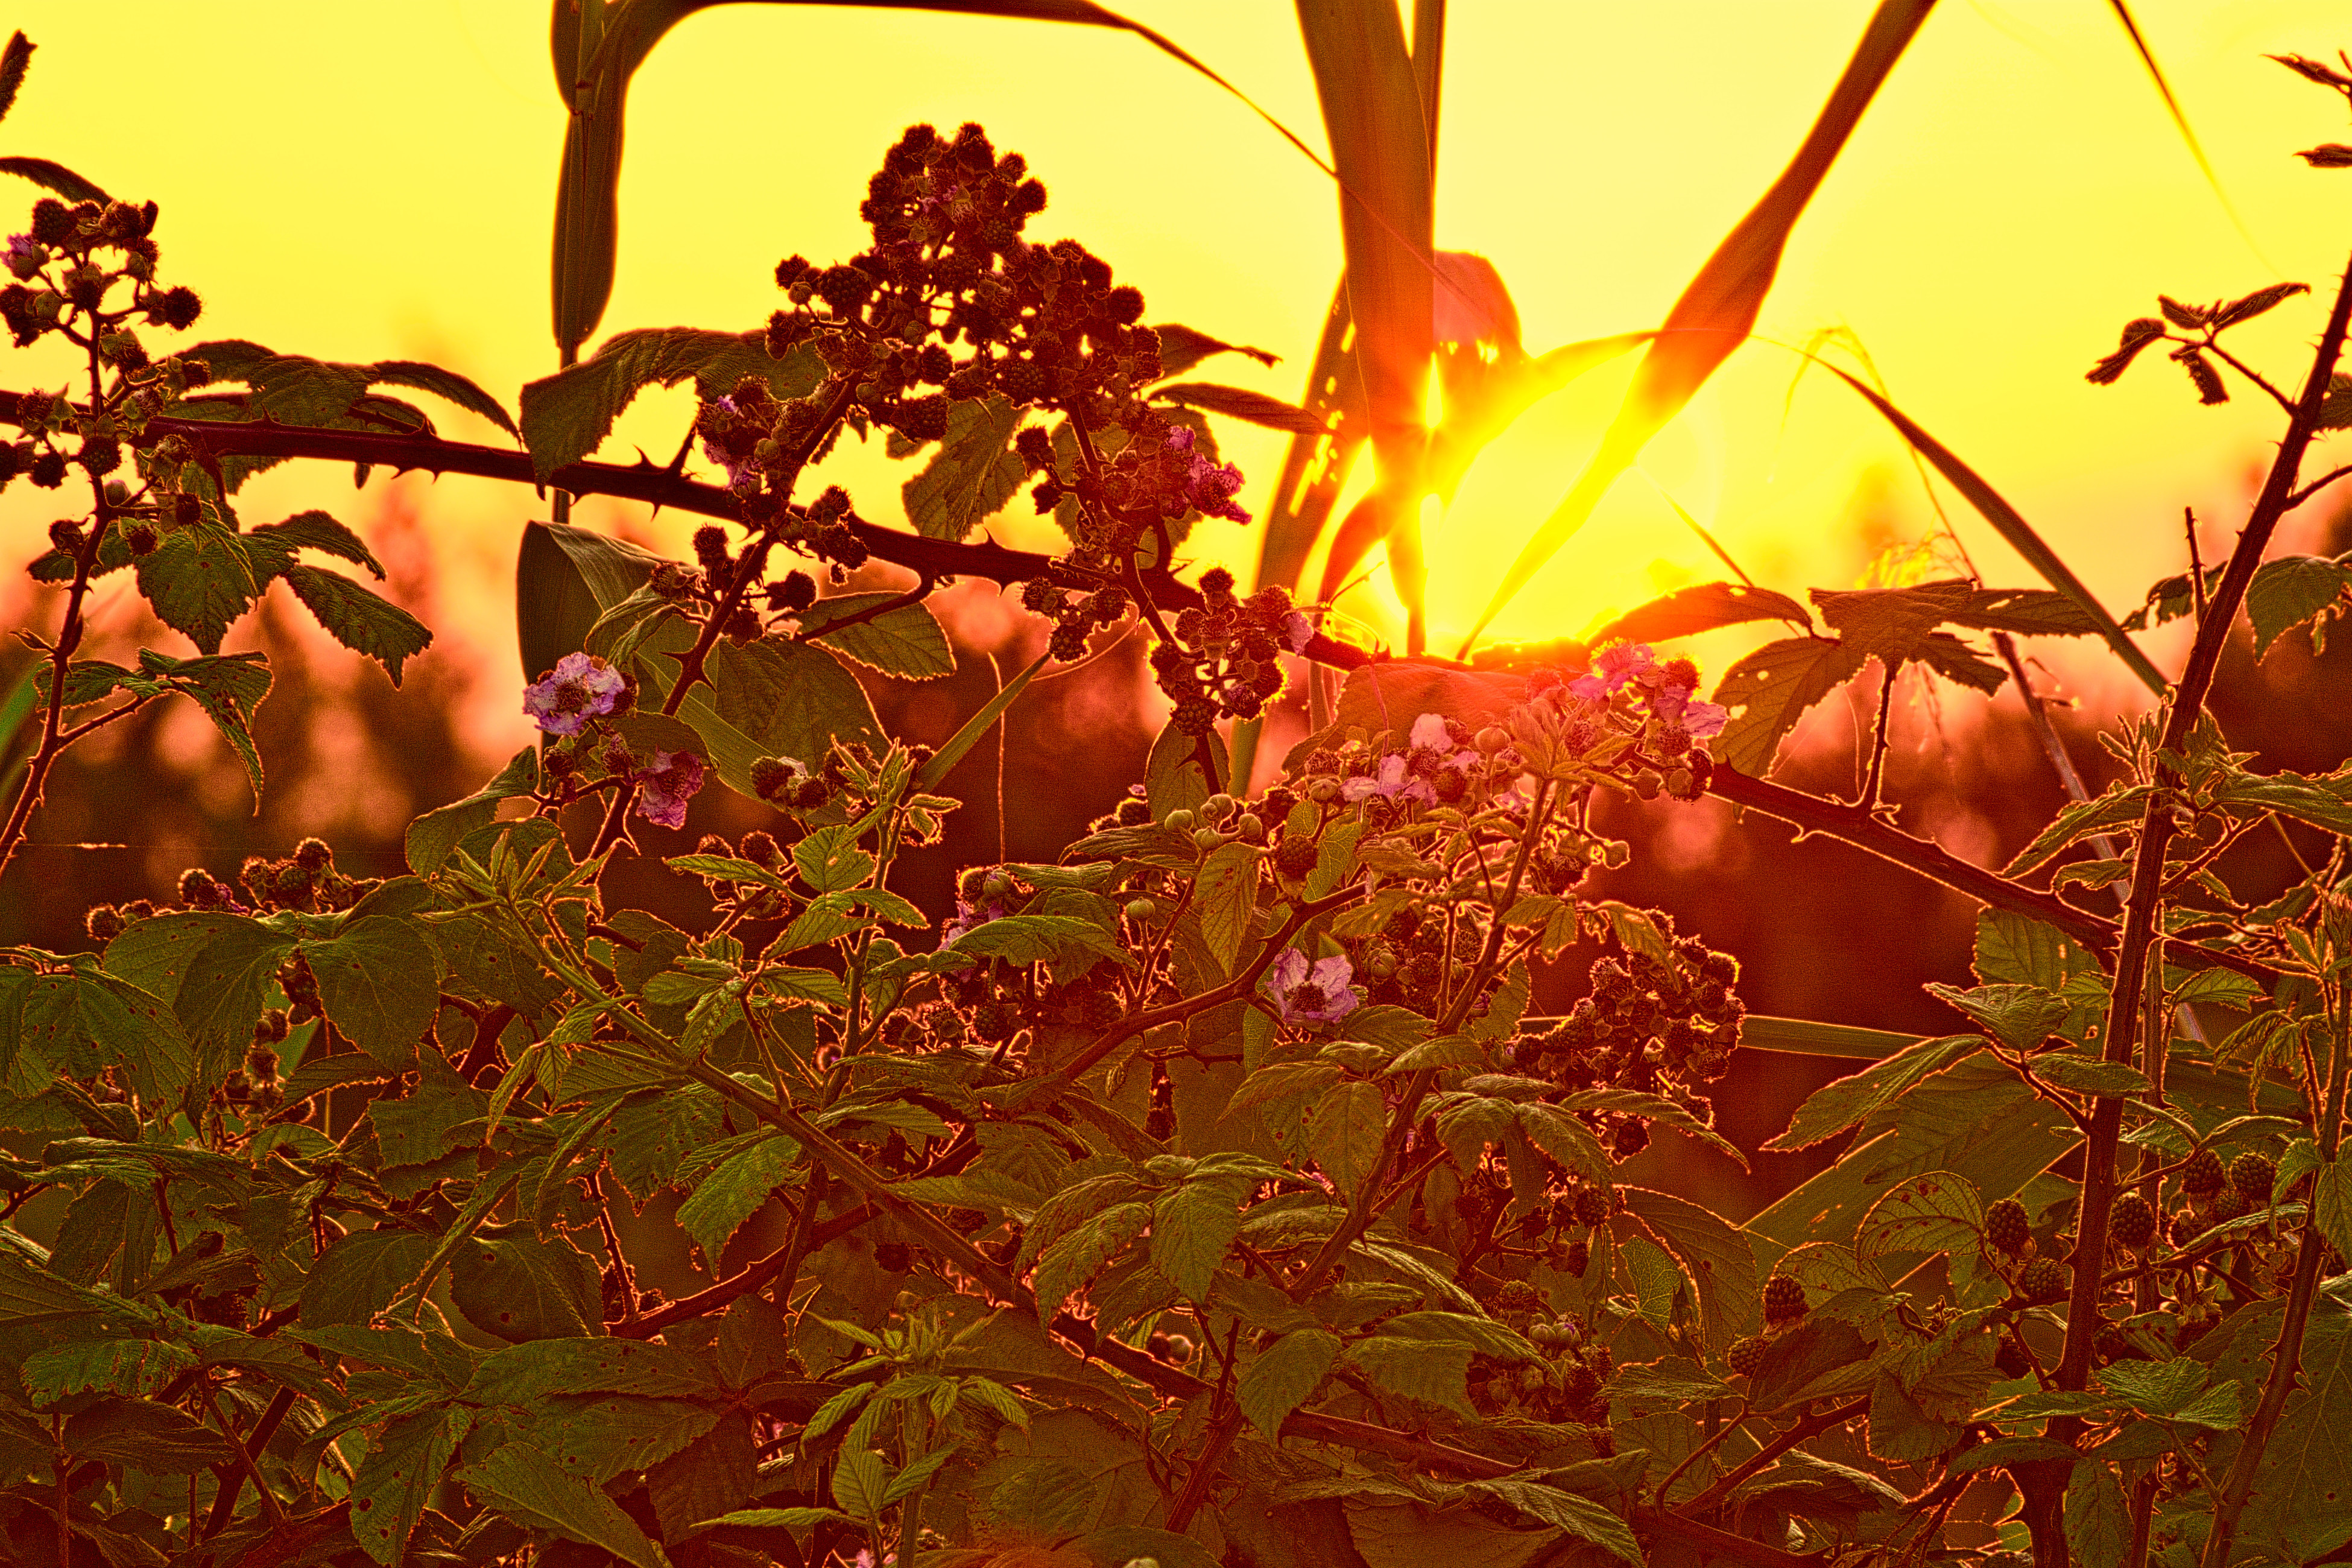
This is another shot from the same shooting (see [PlayRaw] A House in a Fairy Sleep ). Sun was going down and using a 210 mm Tele on my Sony A6000 I shot directly into the setting sun with some blackberrie bushes in the foreground.
The the blackberries are bathed in golden sunlight making the edges wonderful glowing. Unfortunately shooting directly into the sun produced a lens reflection. In darktable my only solution was to do a crop. I would be also very curious if anybody has a better solution to cope with the sun and the branches being in front of the “glowing disk”.
I used the clone tool in the GIMP. Pick a likely area and clone it over the problem. Tidy up with a few odd clones. Also used soft light layer on it. Probably made the greens too rich.
It looked like a candidate for the GIMP’s auto levels so I did something similar in RT. Used the RGB curves to align each colours peaks more than they were. The GIMP’s tool is better and easier. Also bought in as much of the historgam as I could with a curve.
Then some messing about in Fotoxx.
One day I may find some way of replacing a washed out sun.
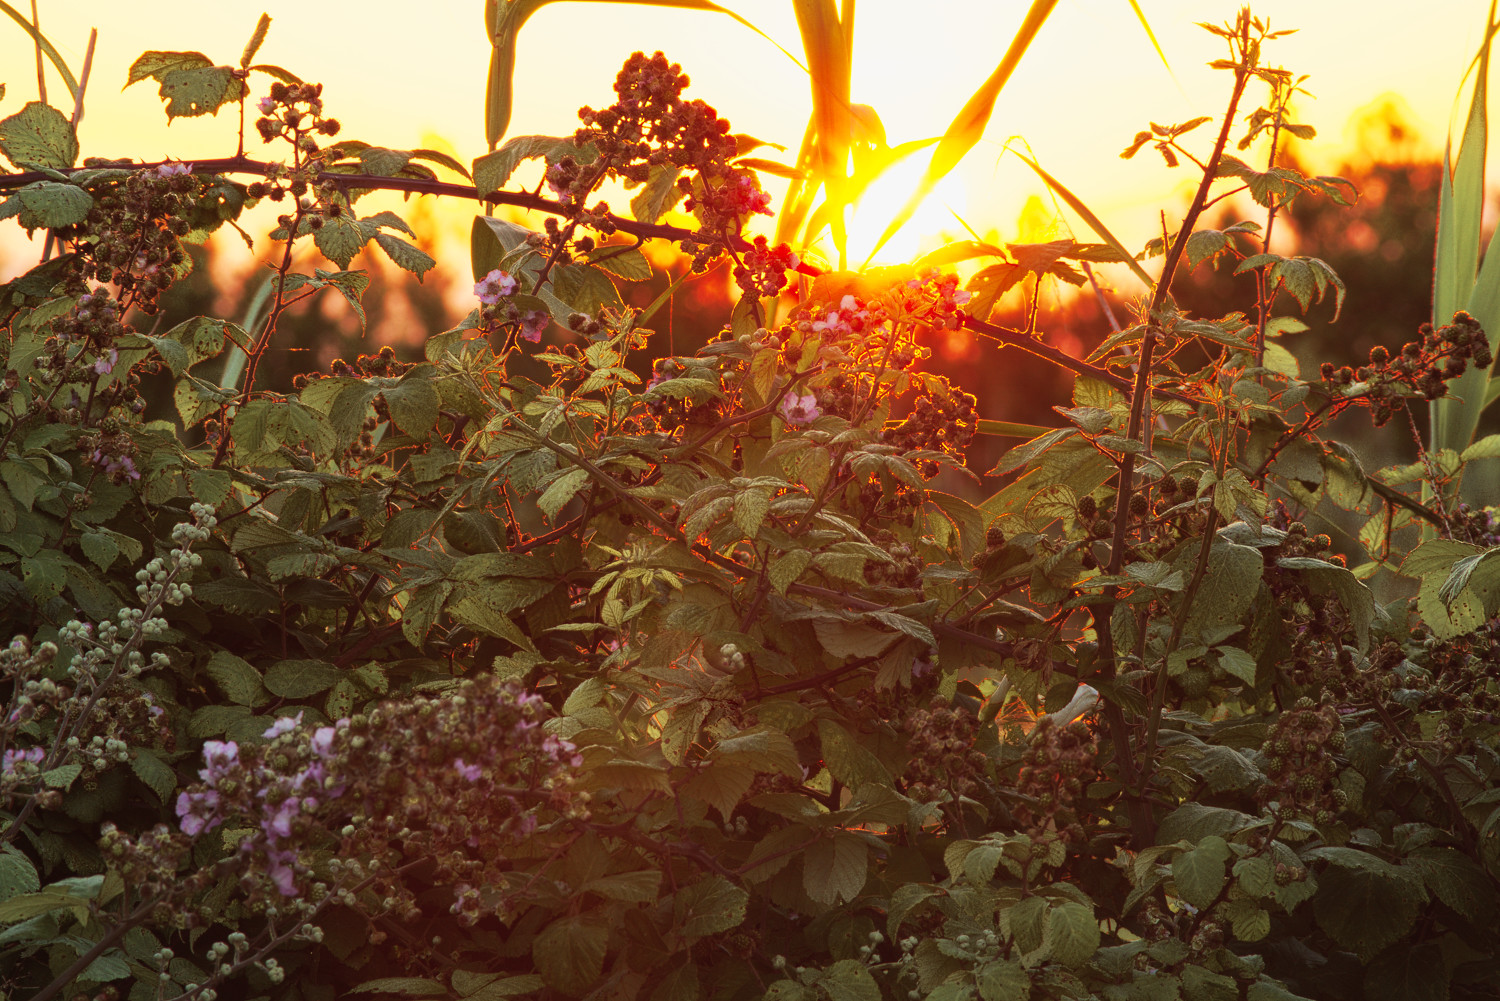
This is a heavy crop with Filmulator to avoid the flare and concentrate on the backlit leaves, plus CA correction, 70 Drama, black clipping point 0.0093, white clipping point 0.7265, and shadow brightness 201.
hi John, that’s interesting, please could you explain a bit what you mean, maybe post up some before/after curves screen grabs? You got a very colourful result, nice. Was that the “aligning”?
Here is my first attempt with PhotoFlow. For the moment I have not tried to fix the lens flare, and I instead focused on the improvement of the clipped highlights and on the overall tone/contrast.
To improve the bright sun spot, I have added a uniform yellow layer above the image, masked so that the yellow color only replaces the brightest areas. I used the blue channel as a starting pointer the mask, because other channels are clipped in the rest of the sky as well. Then I adjusted the brightness of the yellow layer until it visually matched the color of the sky surrounding the sun.
Then I applied some highlights recovery to bring back some detail in the foreground, followed by an RGB curve to further increase the contrast in this region. The curve adjustment is masked with a diagonal gradient such that the sky and the top-right part of the image is not affected. I also darkened a bit the bottom-left part in a similar way, to help guiding the eye toward the center of the image.
Finally, I applied some local contrast enhancement using a bilateral blur filter, and here is the final result:
just some basic dynamic range adjustment with Relight module.
In GIMP:
removed lens flair with healing tool
increased greens (duplicate layer, colorize duplicate layer with colorize filter to something greenish, blend with soft light, adjust blending with opacity slider of duplicated layer, merge layers)
Applied Orton effect (duplicate layer, enhance lightness and contrast of duplicate layer and apply small amount of gausian blur, change opacity of that layer to your liking, merge layers)
brighten dark parts with curves and enhanced overall saturation with saturation filter.
Some of the colour change will be down to adding a softlight layer in the GIMP. I think I have been a bit OTT on this shot and should have set the transparency to a lower figure. Easiest way to explain that technique is for you to do it yourself. Simply open a photo in the gimp. Go to the layers panel and right click and select duplicate layer. That will put another layer on top of the original one that will be selected. Set it’s layer mode to softlight and play with the opacity slider. On some shots it can give them a postcardy look - if that’s what you want or it can be very subtle. It can also be used selectively via new from visible and painting or layer masks etc. Much easier to do than some may think.
Messing with the colour channels alignment is more tricky. The GIMP has an auto levels button. It basically messes about with both the span and the alignment of the peaks in the histogram. It may also play with the position of the central slider on each channel. There is an old video on using this here.
On that shot I would probably play with each channel manually if needed after using auto and also reduce the output range to allow space for further work,
This one too - manually
The same thing can be done with the channel colour curves in RT but it’s a lot harder to do. Easiest way to show what I did to this shot is the pp3 file.
I also use a curve to bring as much of the colour detail in the shot into jpg colour space. This is what came out.
Looking at the greens it needs more adjustment really but trying to do it completely with curves can be a truly tricky. This is why I requested gimp style levels in RT some time ago. It allows simple quick black and white point setting and mid tone contrast adjustment - easy on a curve too except when it’s applied differently to each colour channel. GIMP’s auto also usually does a decent job of making the adjustments.
As to why I did this - gut feeling down to extreme lighting. It can also be very useful in mixed lighting situations. The problem using the gimp is 8 bit. It usually results in gaps in the histogram. Not a problem unless further work needs doing - that is very likely to bring out banding. A problem for me as I take shots in any old conditions.
Here’s a version. RT develop with a neutral pp3 then the gimp. Auto levels raising the output by 20 to brighten it a bit, Then a curve lifting the black point further, higher slope to increase contrast, lower slope over the last say 20% reducing contrast in this area as it doesn’t matter. Heavy 5 pixel sharpen while full sized as some of this is a bit soft. Then reduced and sharpened again, 2 pixel rad, threshold of 1 and level of 0.25.
Thanks John for such a full reply! - I will look at what you’ve said when I get some time. One immediate thing, where you say 8 bit Gimp, I do use Gimp a little, 2.9.5, and you can set the precision up to 32 bit floating point.
I wonder if that applies to all of the functionality? Sometimes I need to match what ever PS users can do technique wise. What I have found on Linux is that several packages need using. Fotoxx gets round that in lots of areas but sometimes layers are a must. Usually 8 bit isn’t a problem but sometimes it is.
Just tried installing a 2.9.5 from my distro. It builds but comes up with errors when it’s launched. Rumour from the grape vine is that V3 will handle deeper colour depth. Sounds like it may be closer but to match PS it needs something else as well.
I have been a few days AFTK (as already remarked in my other raw-post). Thanks to all for your work. Especially the version of @HIRAM very well matches my personal intention (but is technically far better). When moving to RAW capture, I started initially with rawtherapee then moved to darktable because of spot healing and other functionality. I think I will have a look at the pp3 provided.
The version of @ajohn is also nice: keeping the colors a little bit cooler in the lower parts enhances the visual effect of the “glowing”.
I hope you enjoyed this and thanks for all your efforts!
@ChasingShadows That’s truely golden. One (among other) thing I learned is, I should have applied a color recovery for the sun. I like also the idea of @msd to connect the flare by a track of light to the sun to make the flare more “logical and natural”.


 One day I may find some way of replacing a washed out sun.