POC : Introduction to a new experimental module: "3D Colorimetric Film (3DCF)"

Edit : 13 june 2026 : For your information, I have decided to rename this module “3D Colorimetric Film (3DCF)” following numerous changes to the code and some feedback from purists.

Hello everyone,
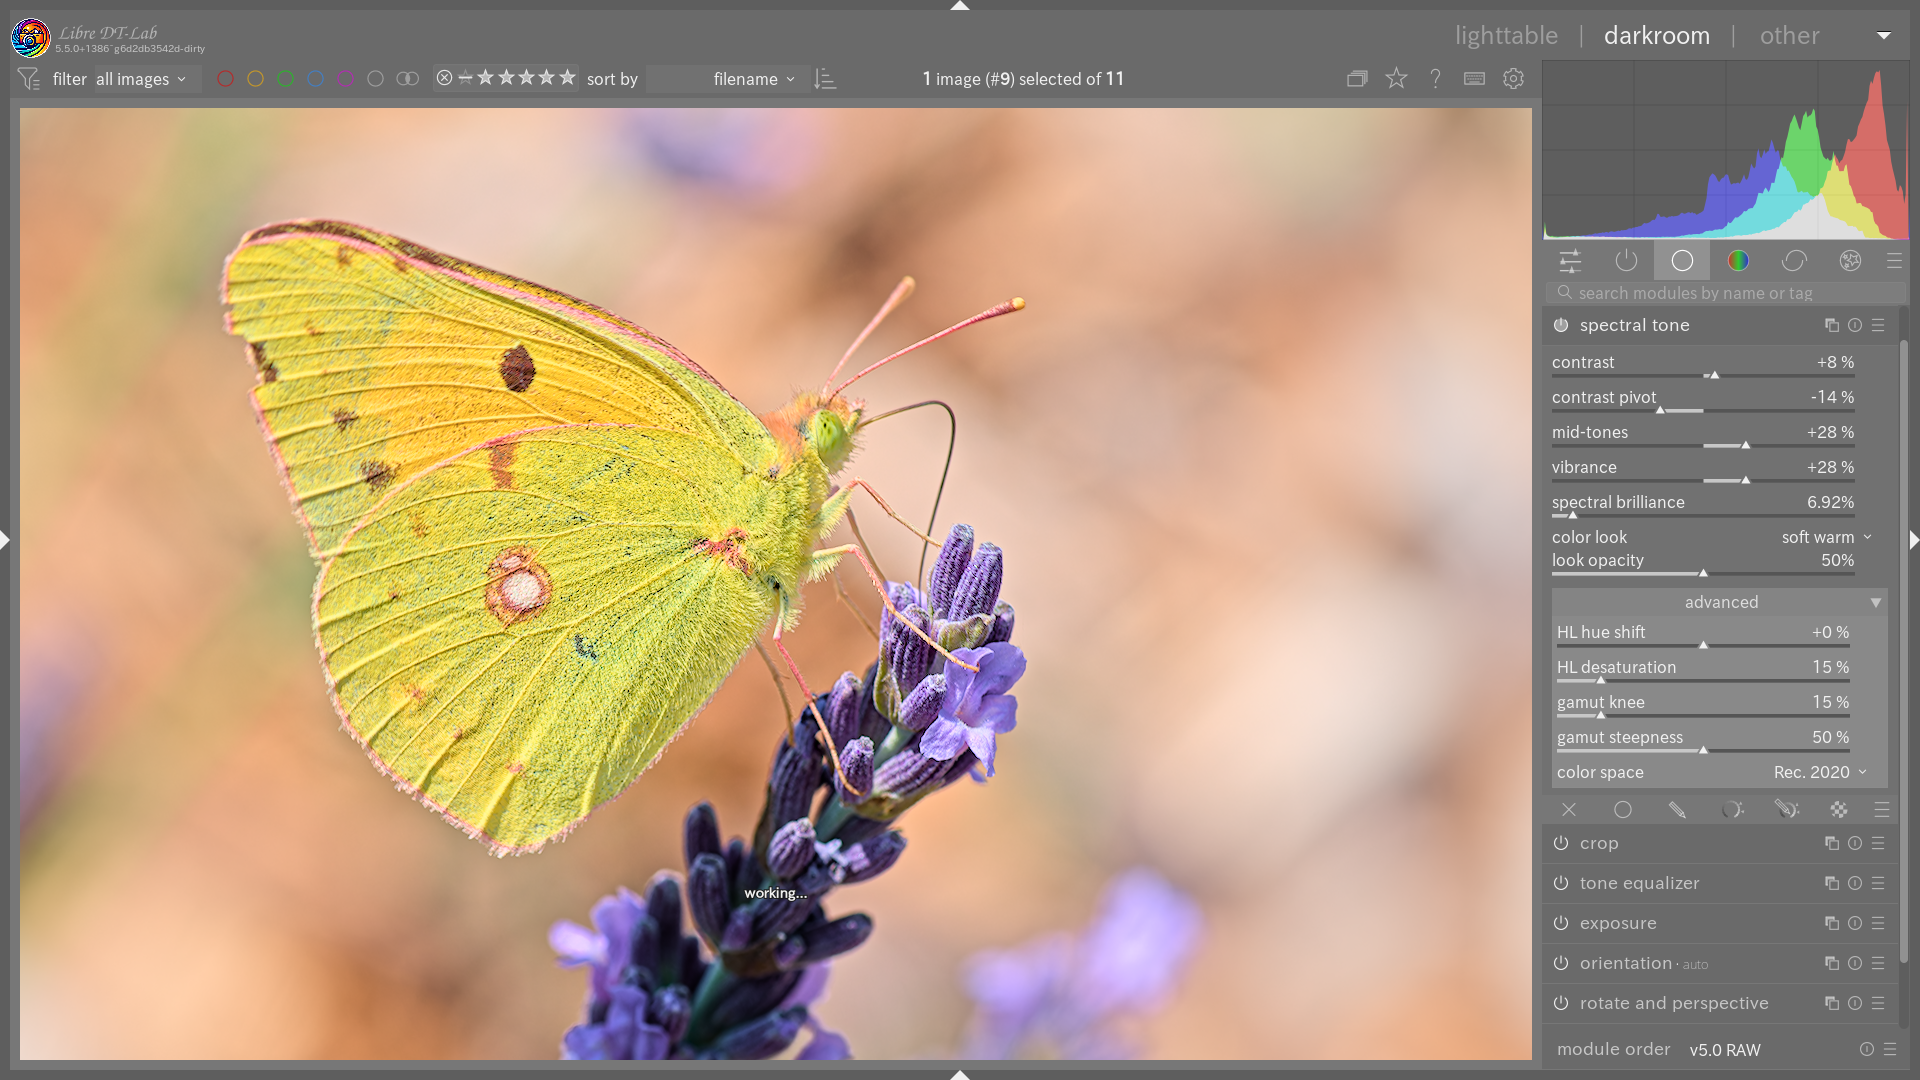
As part of my experiments with the Libre DT-lab edition, I’m pleased to introduce a new tone and colour management module: spectral tone.
Unlike conventional tools working purely in RGB or through perceptual models (JzAzBz, Oklab), spectral tone takes a physically grounded approach, it stays in XYZ colour space throughout the entire pipeline, the canonical CIE 1931 space founded on the spectral integration of the standard observer’s colour matching functions. This is not dressed-up RGB processing; it is colorimetry in the strict sense.

Why “Spectral”?

CIE XYZ is the reference spectral space: every XYZ triplet is a direct measure of the human eye’s response to a light spectrum. The module works in this space (Rec.2020 Bradford-adapted D65→D50) and only converts back to RGB at the very last step. Gamut management is directly inspired by the physics of silver halide dyes (spektrafilm), simulating the asymptotic spectral absorption of film emulsions — the “film” character is inherent to the spectral representation, not artificially grafted on.

ACES 2.0 rendering engine

For dynamic range management, the module integrates the SSTS (Single-Stage Tone Scale) curve from ACES 2.0. This parametric Michaelis-Menten curve provides:
• Precise control of the “texture of light”.
• An extremely smooth and natural roll-off, mimicking the behaviour of film emulsions.
• Automatic exposure stabilisation via the “spectral brilliance” parameter — a single slider controls both the character of the tone curve and perceived brightness.
• A post-SSTS contrast curve with adjustable pivot, plus an independent mid-tone control.

“Physical” gamut management

Inspired by the work of spektrafilm (Andrea Volpato), the module handles colour boundaries via asymptotic compression in CIE xy chromaticity space. Instead of simply desaturating, it simulates the physical absorption of film dyes: the brighter an area, the more naturally it trends toward white.
Highlights additionally benefit from progressive desaturation with Abney effect correction (adjustable warm/cool hue shift), and a safety gamut compression net ensures no negative channel values survive to the output. The knee and steepness parameters allow fine-tuning of the compression aggressiveness.

Creative controls

• Vibrance: intelligent saturation that protects already-saturated colours while boosting pastels.
• Colour looks: 11 colorimetric presets (natural look, portrait, vibrant, nature, blue sky, soft warm, soft, deep cool, authentic cinema, bright atmosphere), with adjustable opacity for subtle blending.
• Configurable output space: Rec. 709, Rec. 2020, Display P3, ProPhoto RGB, Adobe RGB.

In summary

Spectral tone is an organic and physically coherent alternative that remains simple to use. It is ideal for those seeking a rendering faithful to the physics of light, with a natural film touch straight out of the box. Available now in the experimental Libre DT-lab edition, fully integrated into the scene-referred workflow.


Edit June 1, 2025,
Due to a stubborn bug on Windows, I created a new branch for this development.
Updated 06/05/2026,
The Windows bug has been fixed

Here are the different compiled versions

Many thanks to Andrea @arctic for his work on spektrafilm, which led me to this development.
Feedback very welcome!

Greetings from the Lubero, :herb:
Christian
translated into English using AI

13 Likes

Hi Christian,

Thanks for this new module.
I installed the win64.exe version on Win 11 and it seemed to run smoothly (as did your previous versions). But on startup the below screen is shown but then execution stops.
Any idea what could be the problem?

Extremely interesting. If Spektrafilm is the Filmbox equivalent, perhaps Spectral Tone could aim at doing something similar to what The DaVinci Resolve “Film Look Creator” is doing.

The Film Look Creator gives you the ability to develop film like looks, but does not try to emulate any specific film. Spektrafilm goes the Filmbox way where it tries to emulate specific film stocks, papers etc.

Film Look Creator also emulates other film properties, like halation and grain.

The problem with emulating grain via a darktable module is that this effect should be added post-interpolation. If we size up an image for print, we should not scale up the grain (as it will turn to mush). If grain is added after upscaling, it can effectively mask interpolation artifacts.

What we need is post-interpolation modules or making the export module sit at the top of the other development modules in the darktable.

3 Likes

Thanks Christian for your continuing efforts with DT. I look forward to seeing the feedback and demonstration of this feature from users in this thread.

1 Like

I usually use the zip file and it also has been good but I am seeing the same thing…I tried to create a log file but I can’t find it…

Thank you, I’m definitely interested in this module! I can’t wait to play with it but I installed the win64.exe version for windows 11 and nothing happens.

2 Likes

Hi Christian … you made it again , a new module :wink: :grinning:
Installation went fine on macos .
Module does look interresting , at first look i can´t figure out what is it made for …
In the module stack it does sit above the tonemappers … ?
Does it mean it is more display referred … but you said in the intro it is staying in the scene referred order ?
Would be good to clarify …
I hope you will go more into depth … how and what we " should/can do " with the module .
At first look it is just about another " contrast modifier " … i might be well wrong though .
Are your two other modules … ready and finished ?
As i can see no further changes in them ?
Another thing is the UI of color equalizer is back to " normal " right ?
Nio more option for multi layout ?

So mayn questions , LOL .

All the best Andreas

1 Like

Downloaded the latest version … now the sliders in the new module does not work at all .
Does not matter which slider in the module !!!
At least here on the macOS arm version

Just to ,let you know

1 Like

Hello,

Thank you very much for the information.
I’m currently running some tests to debug the Windows version. Could you let me know which version isn’t working—and, more importantly, which one is working properly?

Many thanks for your help,
Christian

Just dashing out but for me it was the intial version you posted so that was the May 29 I think?? but I downloaded the May 30 and it was the same…I tried to delete everything a couple of times and still no go…I have been using the zip file versions all along…

Later I can try to do my own build and see if that shows the same issue…

I can’t seem to trigger a log file or maybe I just cant find it…DT ones go to the Documents\darktable folder but there was no subfolder for DT-Lab…

1 Like

I’ve tried both the win64.exe as well as the portable version (zip). Both stop after the initial launch screen. Version 16ffcacd95e. Win11.

1 Like

Same for me.

1 Like

I also tried to build it myself but I got an error…

Run CPack packaging tool…txt (8.6 KB)

I also tried again to build it…this time I enabled the ai and it seemed to proceed to the end… still can’t make the Win install package but I could install it in msys2 and try running from there…

I get this and it doesn’t run…

1 Like

The latest version from some 20 minutes ago (38719ec3bb, portable and exe) still doesn’t run. It seems to install correctly though.

1 Like

Hi Christian …
at first look latest build installed with no issues .
Sliders in module do work .

Mac OS ARM running on M1 with latest Tahoe

1 Like

Excuse me, but are you sure you understand what spectral means?
You mentioned that XYZ encodes a light spectrum, so it is spectral. However, to truly work with spectral data, you need more than three channels. What you’re describing is simply trichromy.

This paper explains one method to do that

Hi Jiyone,

You are absolutely right, and I appreciate the precision.

What the current module does is colorimetry, working in CIE XYZ (a tristimulus space) throughout the pipeline rather than in a perceptual or device-dependent RGB. That is not spectral processing in the strict sense you describe, and I should have been clearer about that distinction.

The paper you linked, and Mallett & Yuksel 2019 (“Physically Meaningful Rendering using Tristimulus Colours”), which takes a similar approach , is actually exactly what the module was originally heading toward. My first implementation embedded the Mallett 2019 spectral basis functions (81 wavelengths) to reconstruct a full spectral power distribution from RGB values before any processing. That is genuine spectral upsampling, the same family of methods as Jakob & Hanika 2019.

I had to pull that stage out because the gamut handling after spectral reconstruction produced artefacts I couldn’t resolve in time, the exact problem your linked paper addresses in its gamut-mapping sections. The spectral data is no longer included in the code, because in order to fix the bug I’m having with Windows, I cleaned up the code and consolidated everything into a single file.

So “spectral” in the current name is admittedly aspirational: it describes where the module is going rather than where it fully stands today. A more accurate description of the current state would be “XYZ-native colorimetry with film-physics-inspired gamut management.”

Greetings from the Luberon,
Christian

5 Likes

Hi Christian … I tried to use the module in different scenarios , with mixed success . Mostly it was working well .
I do See the biggest issue with the highlight tone areas … out of the box or better said at default setting , the highlights are already loosing some definition or details in cases when the image was exposed to the right . Which isn´t ideal IMO .
All around quite nicely done …

But now the big question … the module is a " alternative " to what ?
It does sit above the tone mapper in the pixel pipe , right ?
So it is not scene referred workflow , right ?
Maybe I have not found the way so far … how to make this useful for my workflow ?

I hope you can bring some more light into the scene

KInd regards Andreas

Hello everyone,

I’m sorry I haven’t taken the time to answer everyone’s questions, but over the past few days, I’ve been buried in work trying to fix the Windows bug, which I still haven’t been able to resolve. I need to take a step back and review all my notes.

I’d like to thank @Christian_Pfister, @priort, and @Cristian for your feedback and apologize for not having found a solution for Windows. I’d also like to thank @helgeschneider for his feedback regarding macOS.

It’s simply a tone mapper. So it shouldn’t be used in combination with AGX, Basecurve, Sigmoid, or Filmic.

My goal here is purely experimental: to learn and, above all, to achieve a different look, one that’s closer to film without trying to copy it.

I’d really like to find a way to easily select a tone mapper based on the image we’re working with and the look we want to achieve.

Greetings from the Luberon,
Christian

4 Likes

No problem, take your time, I’m sure you will solve the windows bug.

1 Like