Hi,
I have written a new GIMP 3.x python plug-in, named “Histogram Equalization”.
The “equalize” command in GIMP has a very strong restoration effect for faded color film images. Unfortunately, in the result image, we can find many tone jumping. The reason I suppose is that the number of bins of histogram in this command may be fixed to 256 (8-bit).
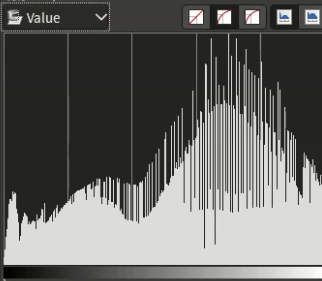
[The result using “equalize” command]
Therefore, I made this plug-in whose number of bins is variable. This allows users to adjust the number from 256 (8-bit) to 65536 (16-bit) and to be able to get the result which has a more smooth tone in spite of the look being the same as using the “equalize” command.
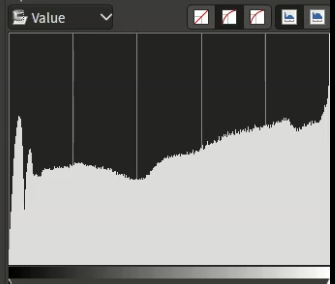
[The result using my plug-in with 65536 bins]
Instalation:
This plug-in uses numpy, therefore users need to set up the Python virtual environment first. Users can make it with any tools, however I recommend using uv, as it is easy to control the Python version with it. And also making the virtual environment under the standard GIMP’s user setting directory is recommended, like /home/username/.config/gimp/3.2/.venv or C:\Users\username\appData\roaming\gimp\3.2.venv etc.
In the following explanation steps, I will show the example using uv to make the virtual environment.
Set up the Virtual Environment
1. Start GIMP, and confirm the version number of Python-fu, like 3.13, 3.14… etc.
2. Open the terminal console of your OS, and change the current directory to GIMP’s standard user setting directory like /home/username/.config/gimp/3.2 etc.
3. Make the virtual environment with the command below.
$ uv venv – python 3.*
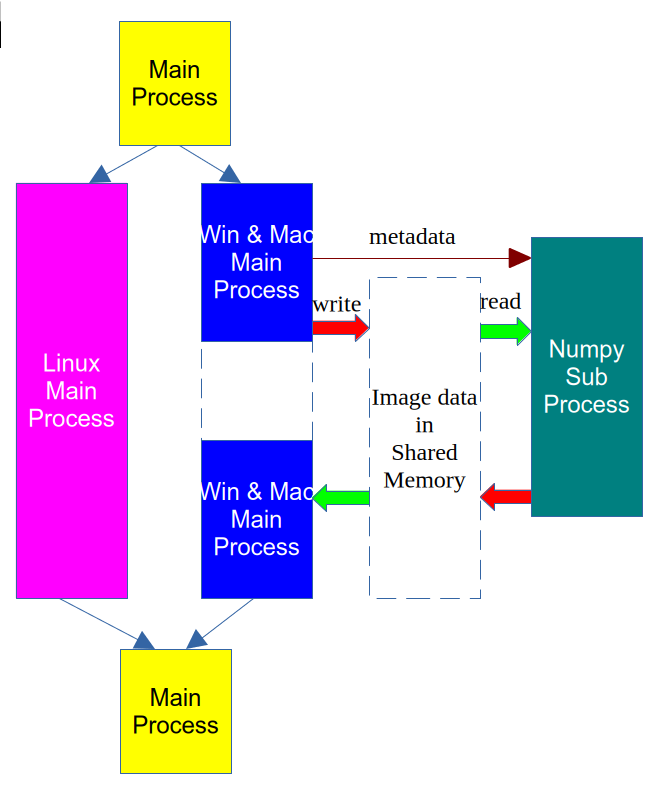
In Linux, users must specify the python version number same as the Python-fu. In Windows and Mac OS, there is no need to specify the Python version number to make venv.
4. Install numpy
$ uv pip install numpy
5.Confirm the directory path numpy is installed
It may be like /home/usename/.config/GIMP/3.2/.venv/lib/python3.14/site-packages etc.
Installation of my plug-in
1. Download and copy
Download my plug-in from the link above and copy its files with the directory under the plug-in directory of your GIMP’s user setting directory.
2.Plug-in setup
Edit config.ini under my plug-in directory depends on your system environment.
Linux example
[Numpy installed Directory]
NUMPYPATH;$GIMPDIR/.venv/lib/python3.14/site-packages
[Python installed Directory]
# For Linux
DIRPYWIN;
“$GIMPDIR” is usable instead of the path name of GIMP’s standard user setting directory, like “ /home/usename/.config/GIMP/3.2”.
In Linux, “DIRPYWIN;” key must be followed by no strings.
Windows example
[Numpy installed Directory]
# For Windows
NUMPYPATH;$GIMPDIR.venv\lib\site-packages
[Python installed Directory]
# For Windows
DIRPYWIN;$GIMPDIR.venv\Scripts
Mac OS example
[Numpy installed Directory]
NUMPYPATH;$GIMPDIR/.venv/lib/python3.10/site-packages
[Python installed Directory]
# For Mac OS
DIRPYWIN;$GIMPDIR/.venv/bin
Usage
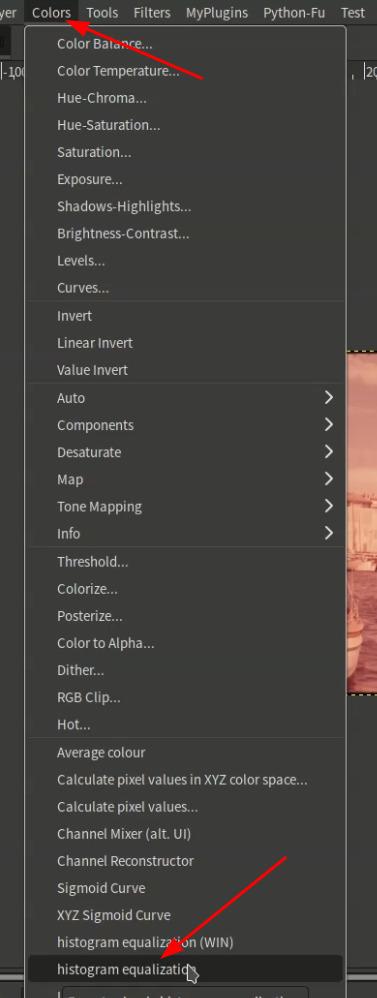
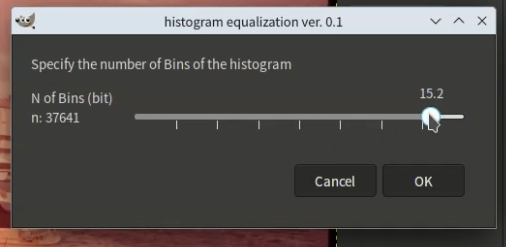
Users can start this plug-in under [Colors] in the GIMP menu. And specify the number of bins of histogram and click the OK button.
Attention
Between Linux and other OSs, the algorithms are different and in Windows and Mac OS, the processing speed is a bit slow.
And for 8 bit images, this plug-in has no effect, as the number of color gradations is limited.