I realized that GIMP doesn’t really have a feature for creating parametric masks. So, I created a plugin for creating parametric luminance masks, similar to the one in darktable.
Once you install this plugin, similar to the relative RGB color mask creation plugin, a menu called [Add luminance mask] will appear under [Layer] > [Mask] > [Parametric Mask] menu, and clicking it will launch the plugin.
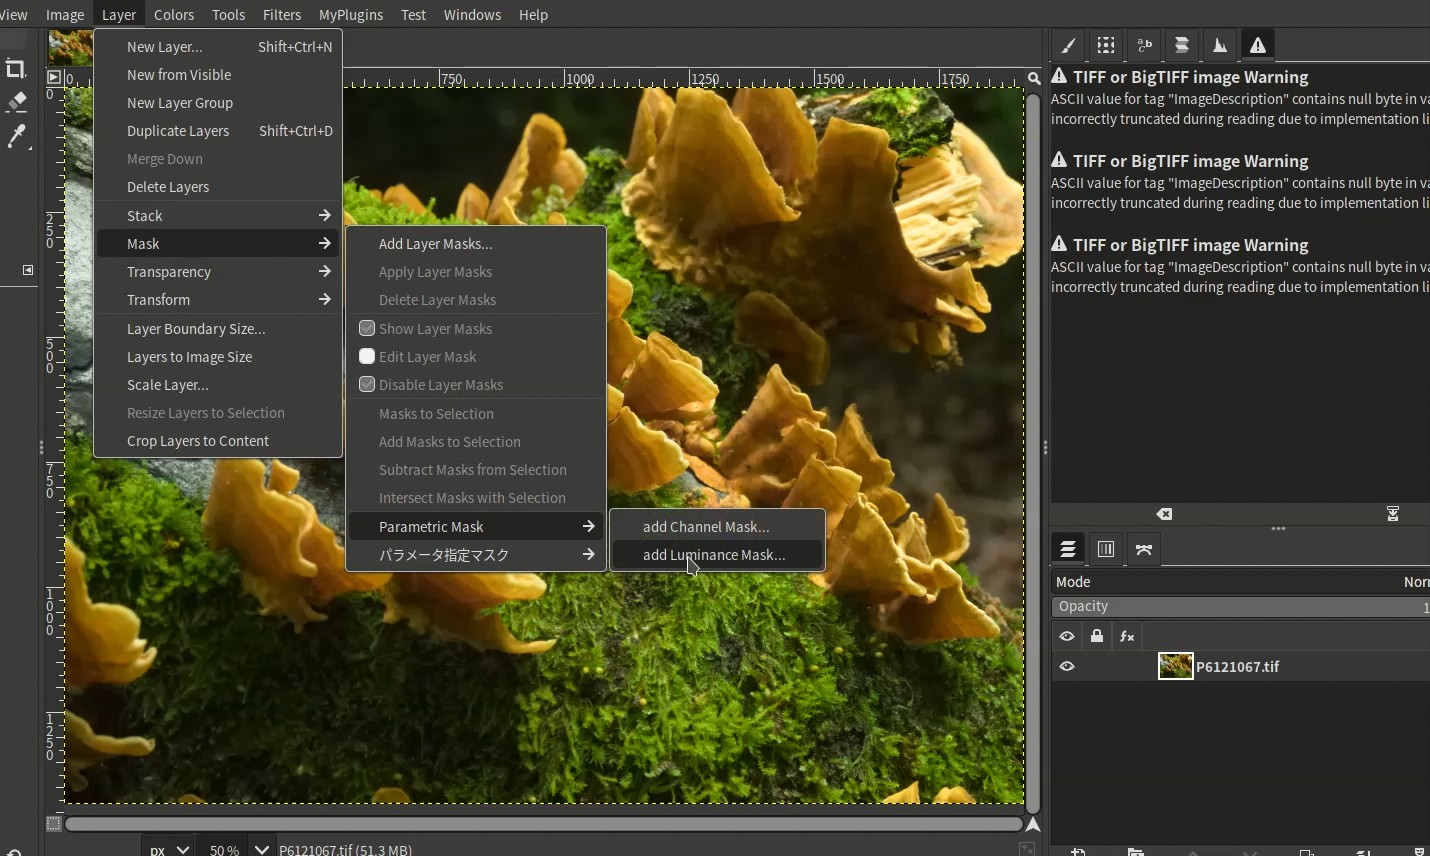
[Menu location]
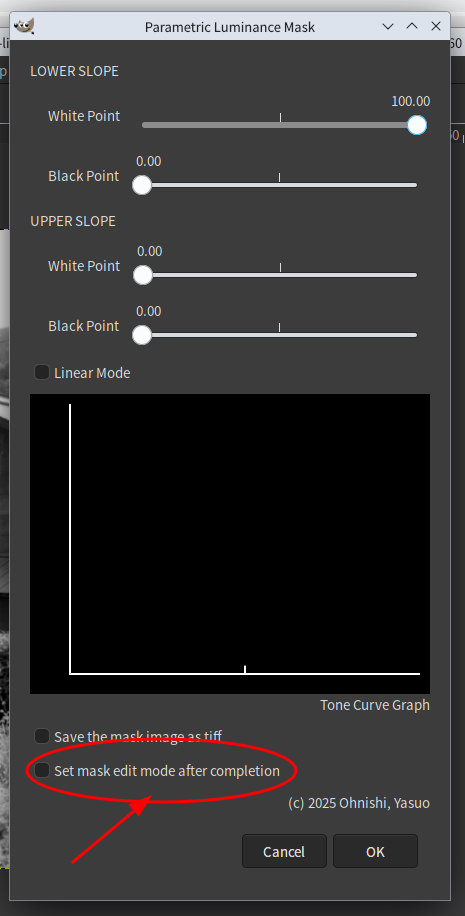
When you start the program, the following dialog appears.
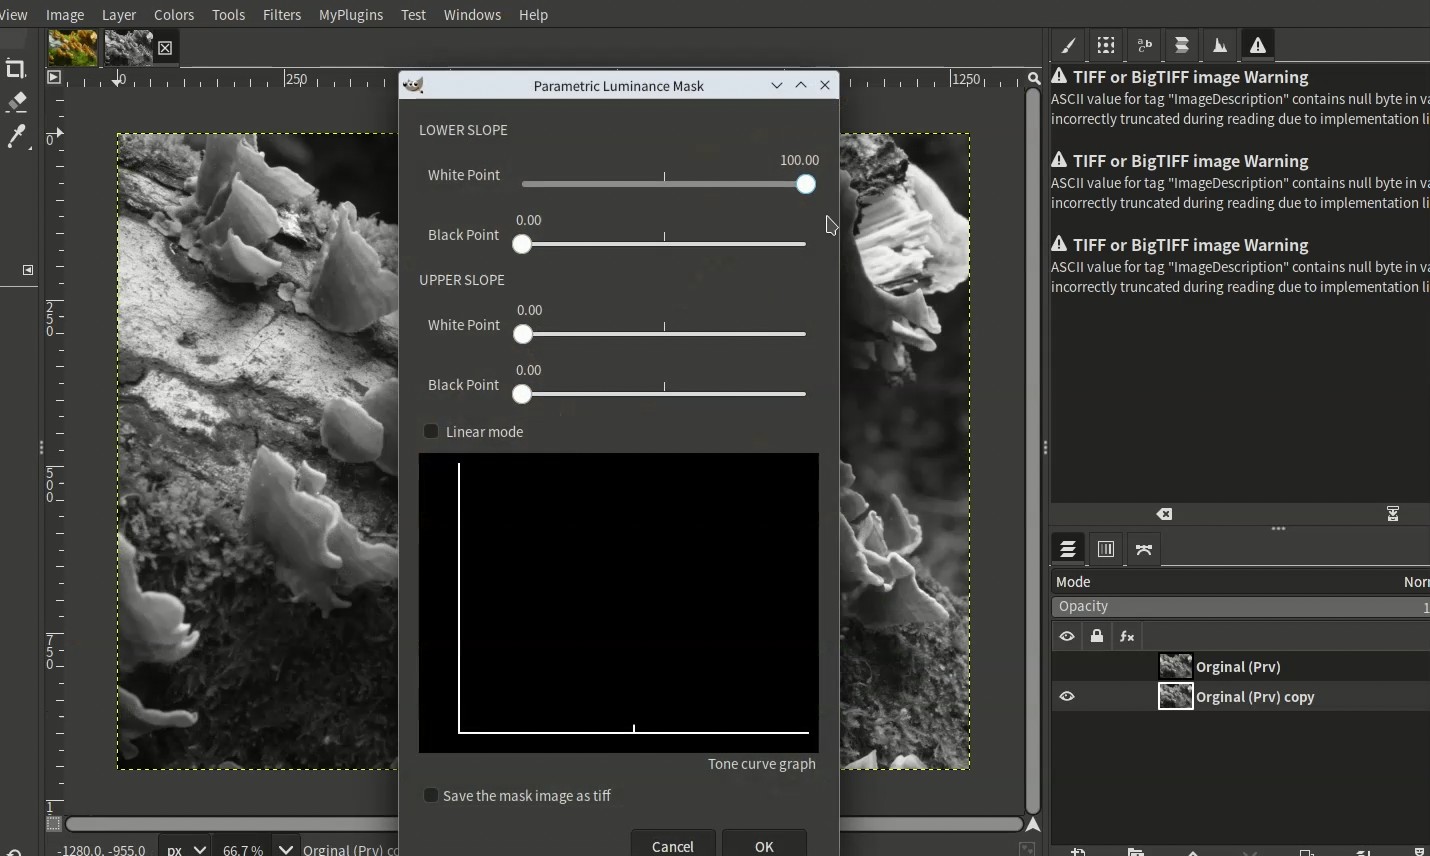
[When you start the program]
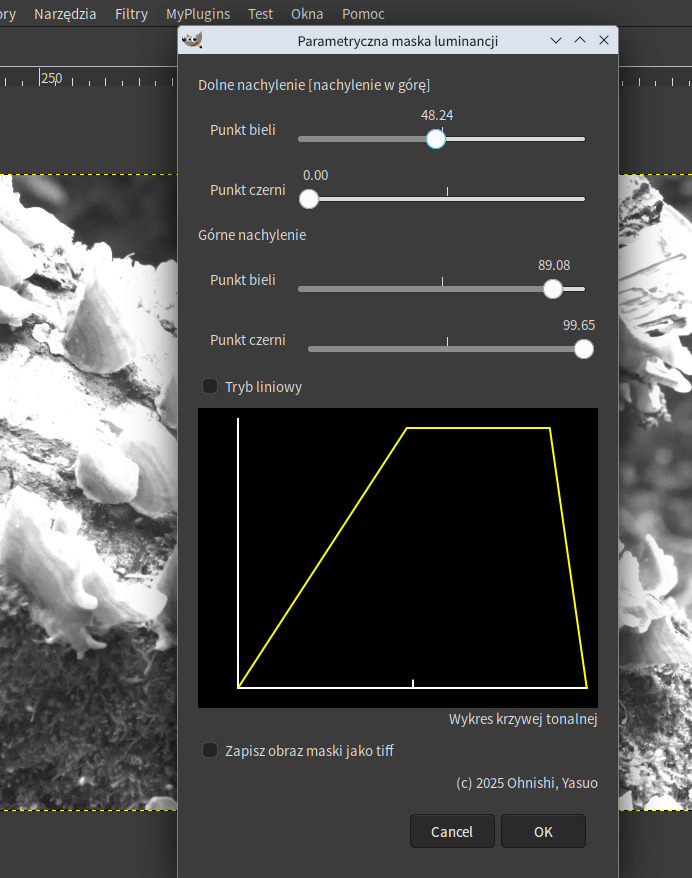
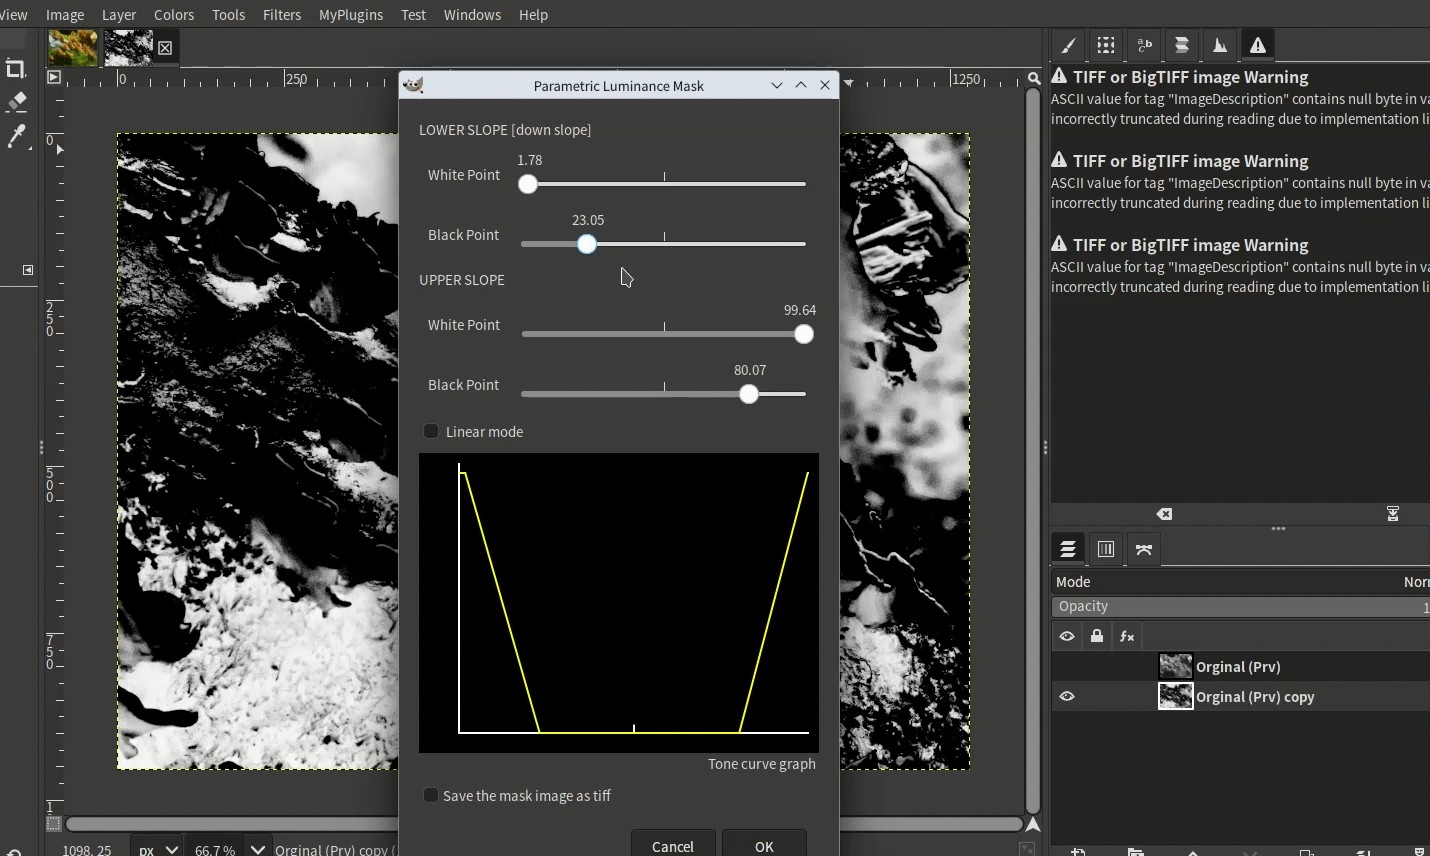
The dialog box has sliders for specifying the lower slope and upper slope, which are used to specify the white point and black point, respectively. When you move these sliders, the specific application curve is displayed in the graph below. The mask image is then previewed.
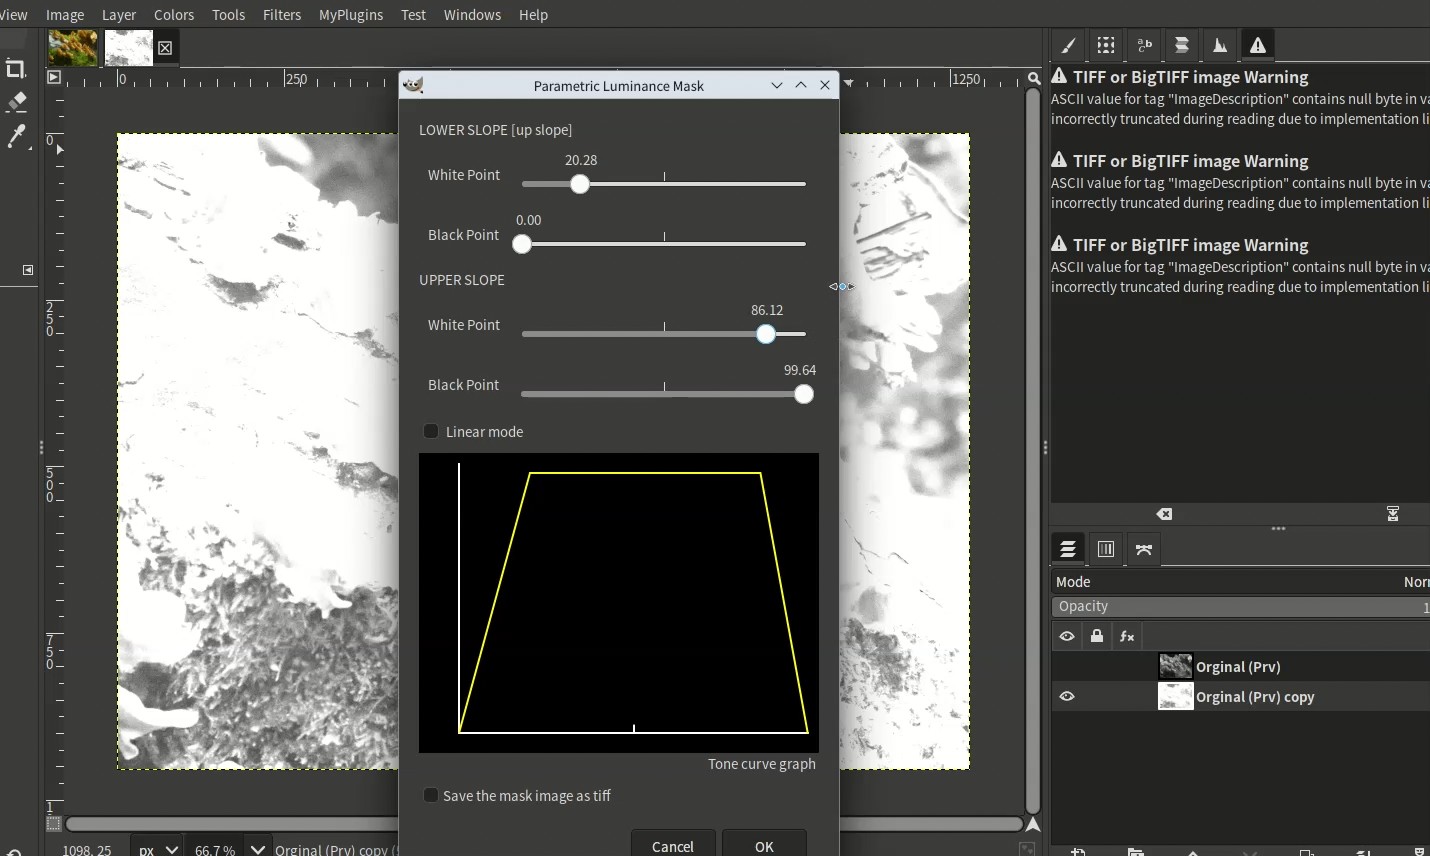
[Editing]
In the example above, a convex curve is applied. In this case, the lower slope rises and the upper slope descends. At this time, [up slope] is displayed next to the lower slope.
You can also specify a curve that causes the lower slope to descend, as shown below. Note that the lower slope must be set, but the upper slope does not necessarily have to be set. If you set the same value for the white point and black point of the upper slope, the upper slope setting will be disabled as shown below.
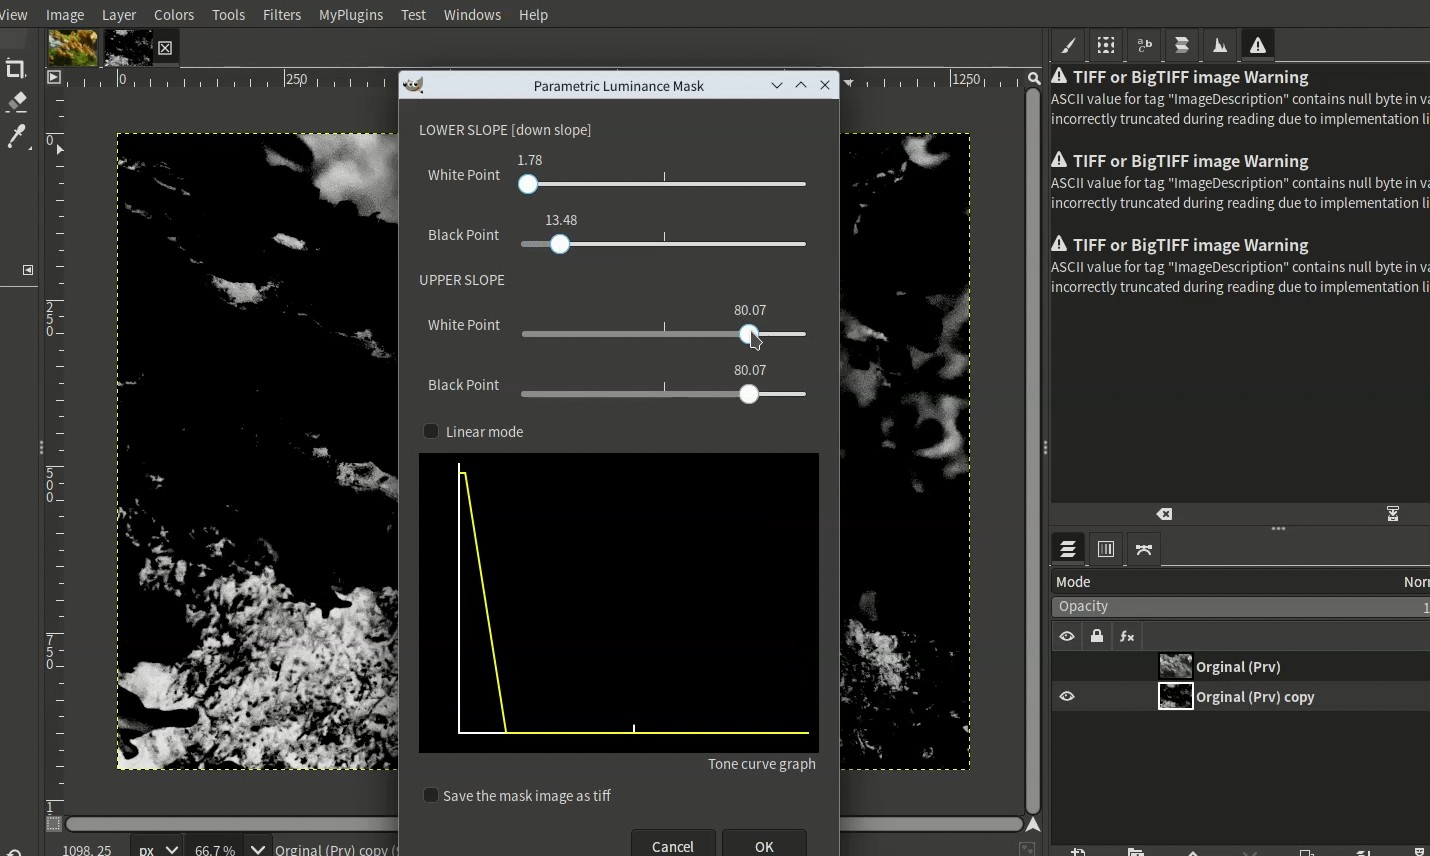
[When the lower slope is set to a downward slope]
When you move the upper slope slider, the upper slope becomes active, and a concave mask is specified. At this point, a mask is created that allows highlight and shadow areas to be transparent.
[Both ends are within the mask range]
When the lower slope is set to upward and the upper slope is disabled, a mask that only allows the bright areas to be transparent is created, as shown below.
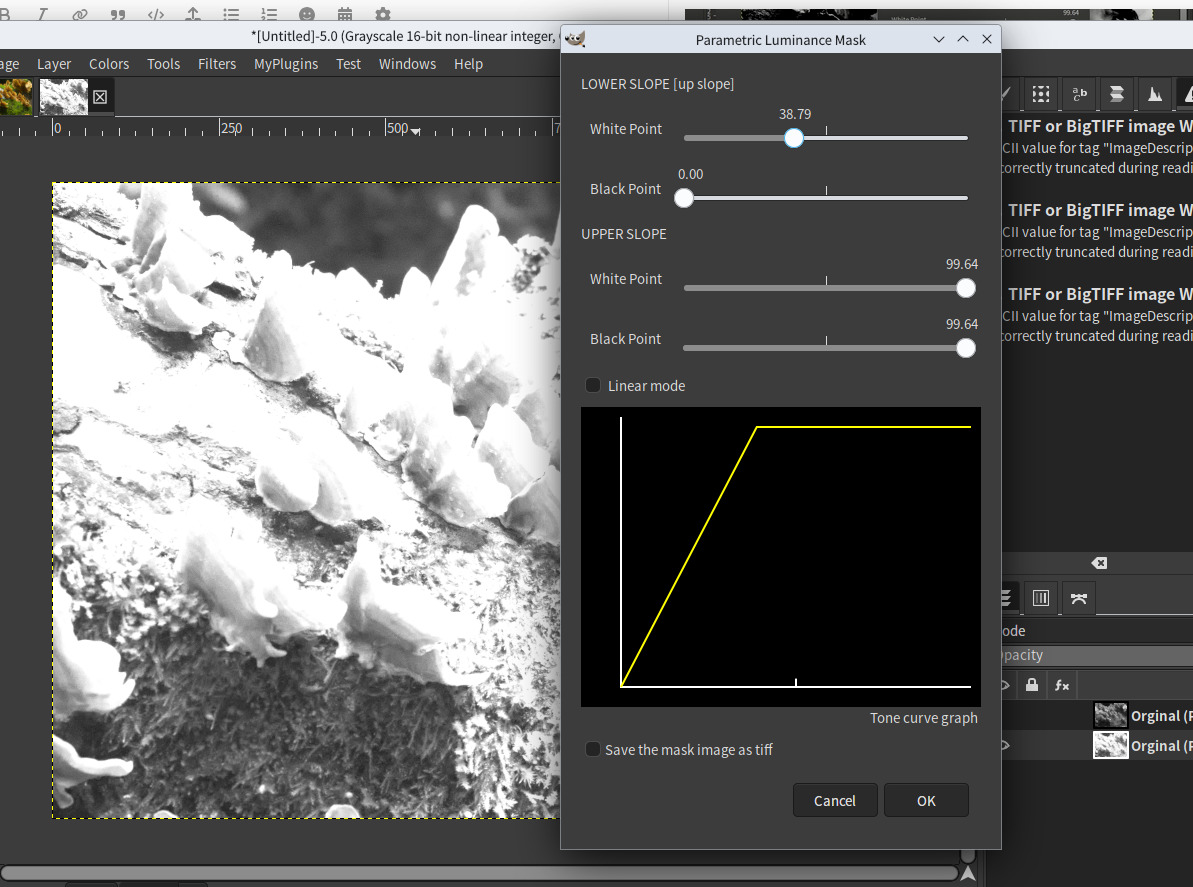
[Lower slope only]
When the [Linear mode] checkbox is selected, a mask calculated using linear values is created. By default, when this checkbox is not selected, values are calculated using perceptual values (sRGB values).

[Linear mode]
Additionally, checking the [Save mask as TIFF file] box below the plug-in saves the mask image as a TIFF file in the same directory as the original file.
[Finishing]
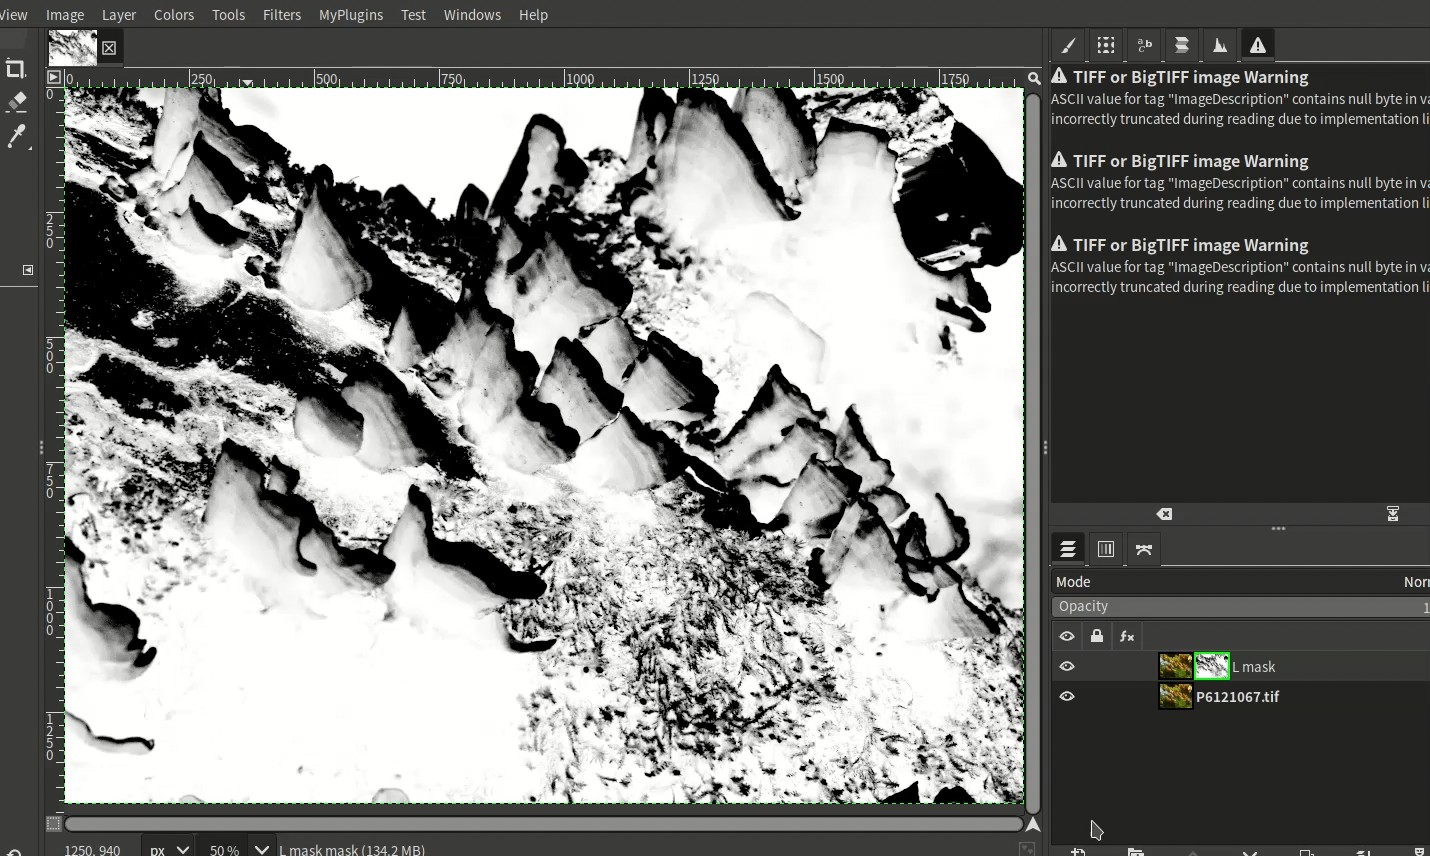
Clicking the OK button duplicates the specified layer of the original file, applies the created mask to that layer, and exits in Mask Display & Edit mode.
Continue editing the mask, and when finished, turn off mask display from the context menu.
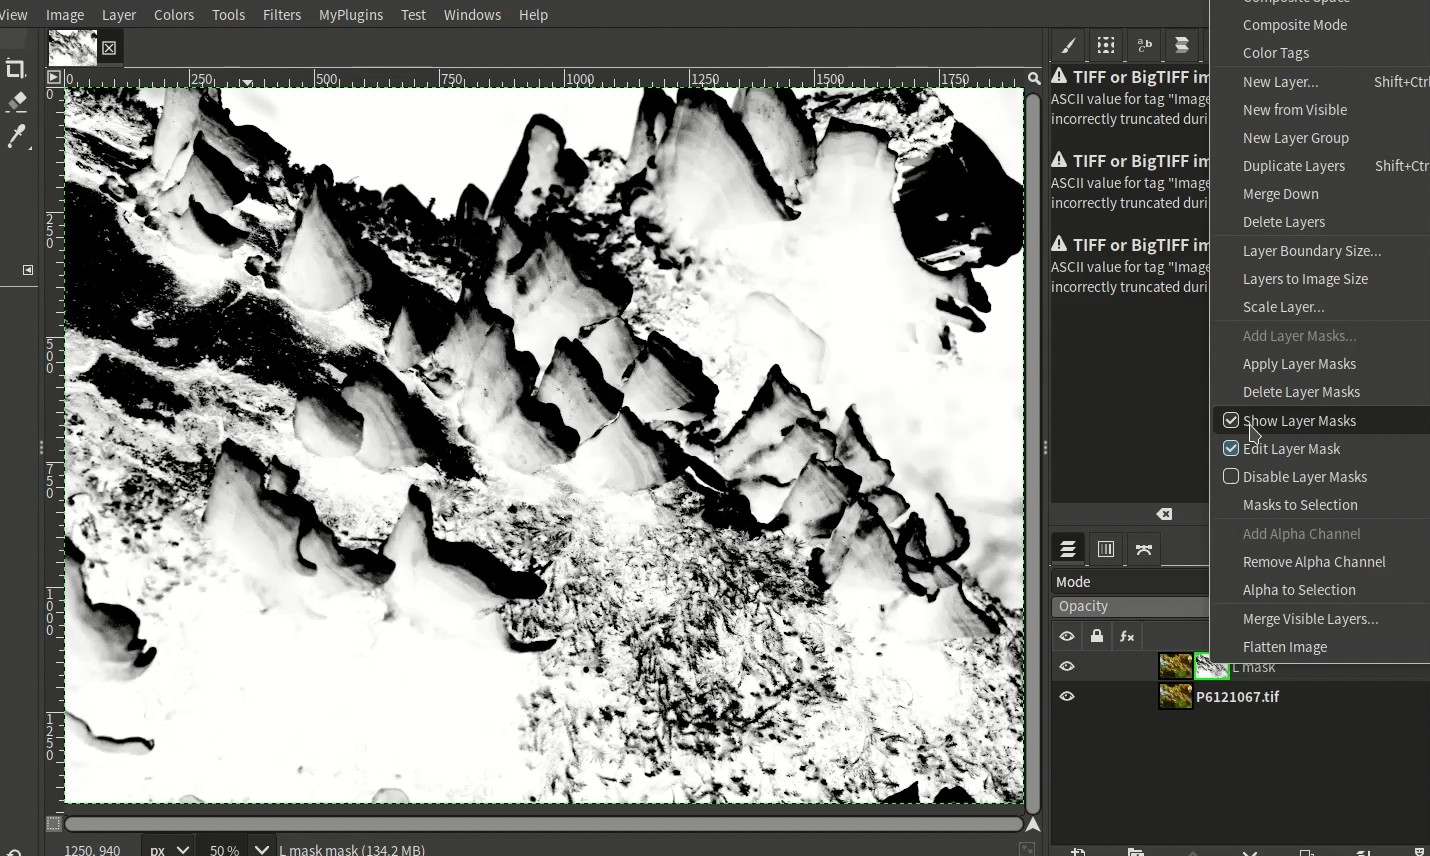
[Turn off layer mask display]
Then, perform edits such as tone curve or level correction on the layer with the mask applied.
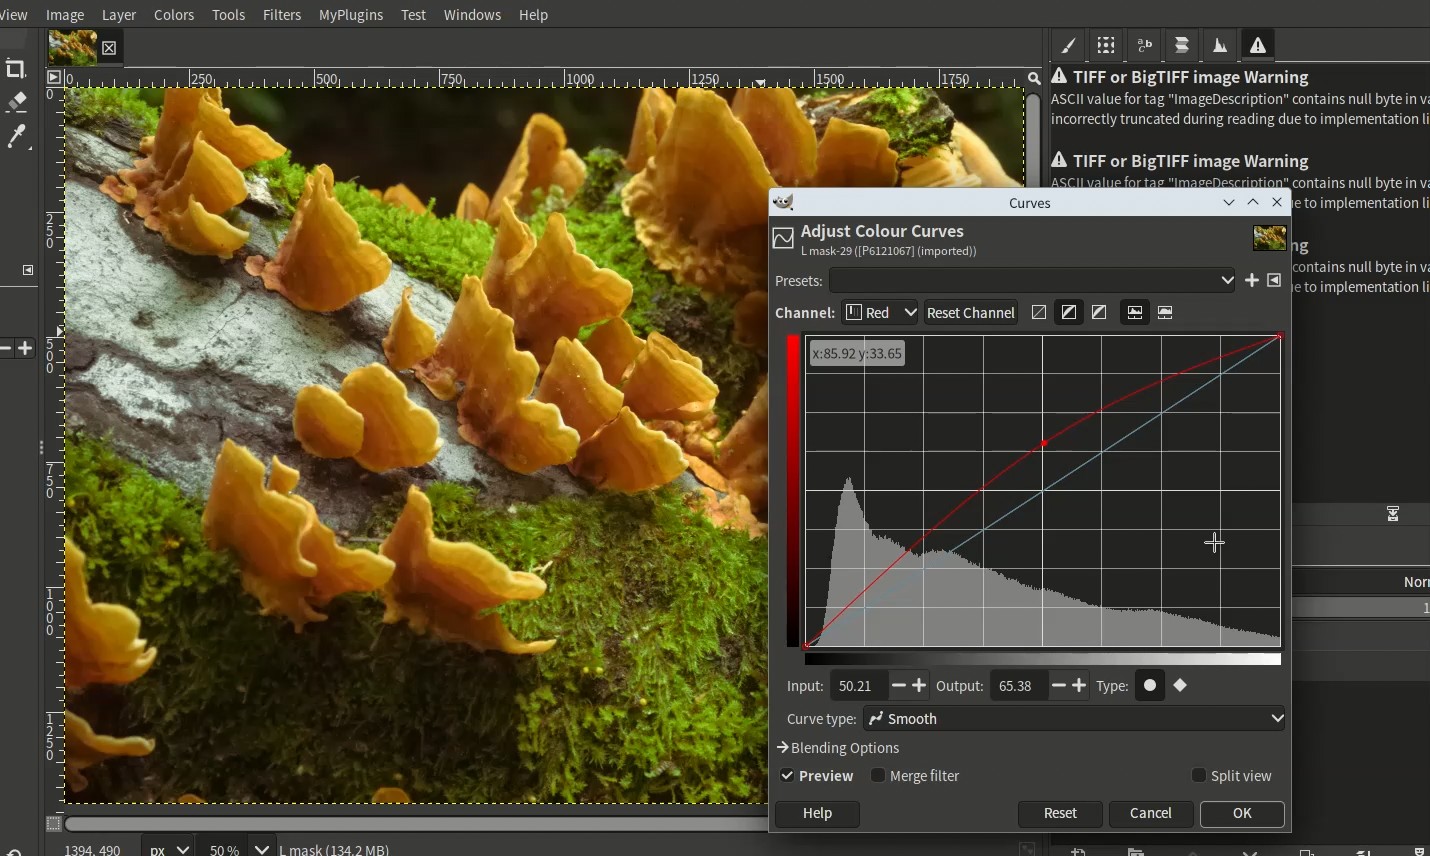
[Editing using a mask]
Download the file here.