I am a dedicated DT user as any regulars here would know. I love the sharpening capabilities of the diffuse or sharpen module. As part of my basic workflow I apply the preset for sharpen demosaicing: no AA filter to my images and for most images this is job done. But then I wonder what is the best strategy if I need more sharpening. Do I ditch this preset and pick something else like lens deblur preset or do I put lens deblur on top of the sharpen demosaicing preset. Maybe even some of the other sharpening options could be added on top of the sharpen demosaicing preset. Any opinions on this would be appreciated.
1 Like
I often bump the iterations of the no AA preset to 2 or even 3, but will also sometimes then lower the radius a smidge.
Otherwise, if I need more, I will either switch to perhaps the sharpness preset, or at another instance of DorS with a lens deblur or something else…
But that’s just my approach!
2 Likes
I also find adjusting the ‘edge threshold’ really useful to adjust what gets sharpened. Reducing this often does the trick for pictures that need more detail sharpening in areas of low contast.
2 Likes
I have 4 or 5 presets that I routinely use. I can 't recall how I came to create them. One thing I find so amazing is that they are all designed to do fairly strong sharpening but the don’t work consistently image to image and hence why I have the different ones…On one image my preset will be sharp and lovely and the next time some noise or edge artifacts and one of the other ones works… Its just the combination of settings that I used but regardless one of the 4 or 5 I use is usually quite good and opacity, iterations and the edge threshold can all usually play a roll if there is some tweaking necessary… I also often use the HDR preset of LC module…I tweak it for sure almost always but it can help to introduce some nice support for sharpening…I usually drop the opacity and play with the shadows slider that starts at zero…
For cameras that have an AA filter I always use “sharpen demosaicing: AA filter” and for cameras without an AA filter I always use “sharpen demosaicing: no AA filter”. These are applied via a Style that also includes Lens Correction/Denoise/Color Balance RGB. Combined with Contrast Equalizer that is all the sharpening that 98% of photos seem to require. If additional sharpening is required I always create a new instance of Diffuse or Sharpen that is added on top of the initial demosaic sharpening.
The main exceptions are macro and wildlife/birds which often require selective sharpening but that is also added on top of demosaic sharpening. For context the vast majority of photos I take are landscape/nature.
1 Like
I still do most of my sharpening with the Contrast EQ and a stock application of the Sharpen module.
Just start taking better pictures Terry… ![]() /s/
/s/
This has been my general methodology, too. Occasionally using the denoise & sharpen preset from the Contrast Eq module, and then dragging the mix slider. More often applying one of several presets I have created for the Sharpen module.
Since wildlife and especially birds are my go-to subject, I have been emboldened by this thread to take another look at the black magic that is the diffuse or sharpen module. There are now many more presets than when I first looked at it. Moreover the manual seems more comprehensive now. I take particular comfort from:
Calculus was ever my greatest weakness in mathematics - give me discrete, statistical, deterministic outcomes, and I’m much more comfortable! So I am thankful for the “For Dummies” section entitled “Starting with presets” and I will experiment starting here.
Does anyone have any presets for the Diffuse & Sharpen module that they have come up with (I did say developed, but that is just a groaner of a pun!) that seem to be good for wildlife as subject?
Presets for bird/wildlife sharpening really don’t work for me because every photo is unique and usually require some sort of masking. Once I mask an area is when I add sharpening. Even if I had a preset it would require tweaking so I find it just as easy to start from scratch.
Presets are most useful (for me) when they are applied to the entire photo.
The sharpen demosaicing presets seem to add more local contrast than I like, so I prefer one of the lens deblur modes and adjust the 3rd or 4th order speeds at 100% view to get the effect that I want. I’ve also found that an additional instance of D&S with only 3rd or 4th order speeds activated can help in some cases.
I also like to use another instance of lens deblur for output sharpening helps the final image.
1 Like
Not so much a preset, but selecting one of the mask options brings up a detail threshold slider. A positive % with this slider restricts the sharpening to the edge details found in feathers etc, but then ignores the noise in the smooth blue skies.
This slider is also good when heavy denoising is required as a small negative percentage can keep the details of the feathers sharp but soften the noise in smooth areas such as the sky behind the birds.
It is best to display the mask to get an idea of what you are doing.
3 Likes
Thanks, Terry … just the sort of nudging in the right direction I was looking for.
You can also try blending in difference mode and then as you add opacity or say lift the right side of the contrast eq graph you can visualize what you are sharpening and make your adjustments… then just revert to normal…
2 Likes
Hi, is there any ready-made slider layout in the D&S module that would allow me to get the sharpness of a photo even close to Rawtherapee? I’ve tried really all sorts of options and unfortunately the photo sharpening results are always much worse than in Rawtherapee, where you actually just turn on the tool and don’t move anything and the result is a much better sharpened photo than in DT.
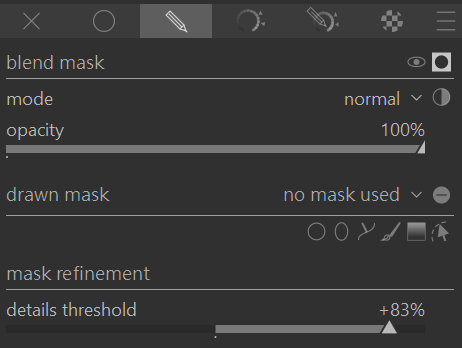
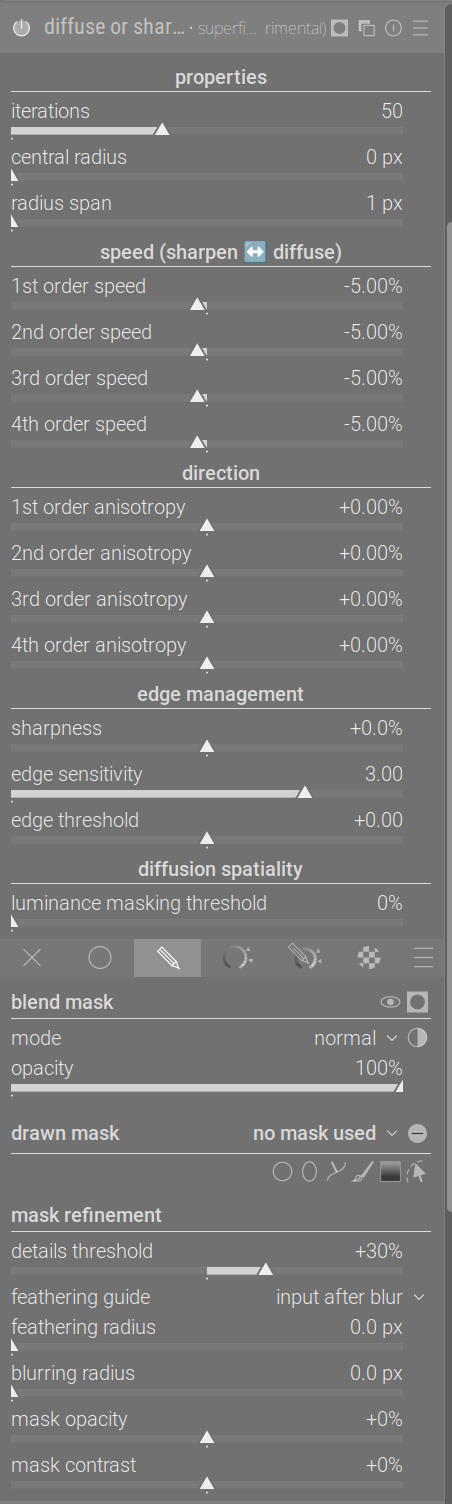
There was a looooong thread about it, someone (I’m sorry, I do not remember, who) came up with these settings (the detail threshold is only there to avoid sharpening the noise, adjust for each image while displaying the mask):
1 Like
Thanks, I will try out this setting.
I think it was meant to be as a second instance, after one with one of the post-demosaic sharpening presets.
1 Like
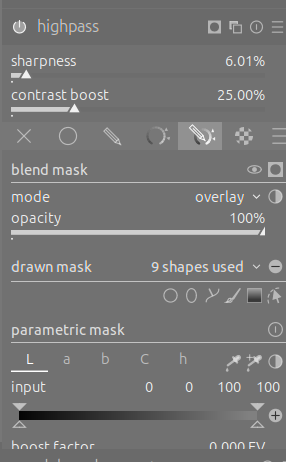
Currently I use highpass module with sharpening and contrast boost set to 25 each. I set the blending mode to “overlay”
That’s usually too much sharpening, but that’s on purpose.
I then look at things in the image I would like to sharpen the most, and reduce the 25% sharpening so that these things are sharpened the way I want it.
After that I apply a mask with brushstrokes on the things I’d like to sharpen. Usually I like to sharpen my foreground objects a tad, while leaving the background objects unsharpened.
Each brush stroke can have it’s opacity (CTRL+MOUSEWHEEL) and hardness (SHIFT+MOUSEWHEEL) set, offering a very flexible sharpening, varying to my hearts content.
It’s something I’ve just figured out, and I like it a lot. I’m not aware of any potential downsides to this method yet and I find it very fast and easy, giving good results.
No Sharpening:
Sharpened:

Masks:
1 Like
Actually each node of the brush stroke can as well and you can then really fine tune how your mask works…
Check out here…
At about the 30th min…

1 Like
Great - thanks!
if only each drawn mask could have it’s own parametric mask … then it would go from absolutely rocking to “rocking absurdly” ![]()
I hadn’t thought about that as an option, but I agree, although I presume it would be very challenging to code. However, multiple duplicate instances of the same module would allow you to achieve this when needed.
I teach DT to my students and I have listed five modules to sharpen images, including the highpass module. I wonder if I have missed any more modules? I love the way DT gives you so many options.
1 Like