Sometimes, this is due to an old XMP file being associated with that image. I usually solve it by resetting the history (which you can do from the darkroom directly – on the history stack, click on the bottom item, and then on the compress button).
I don’t have old XMPs. I have experienced this with new images, imported the first time into darktable.
I’ve seen this as well. I haven’t filed a ticket because I can’t reproduce it.
I just had it with a Sony file in the recent recover the clouds post…
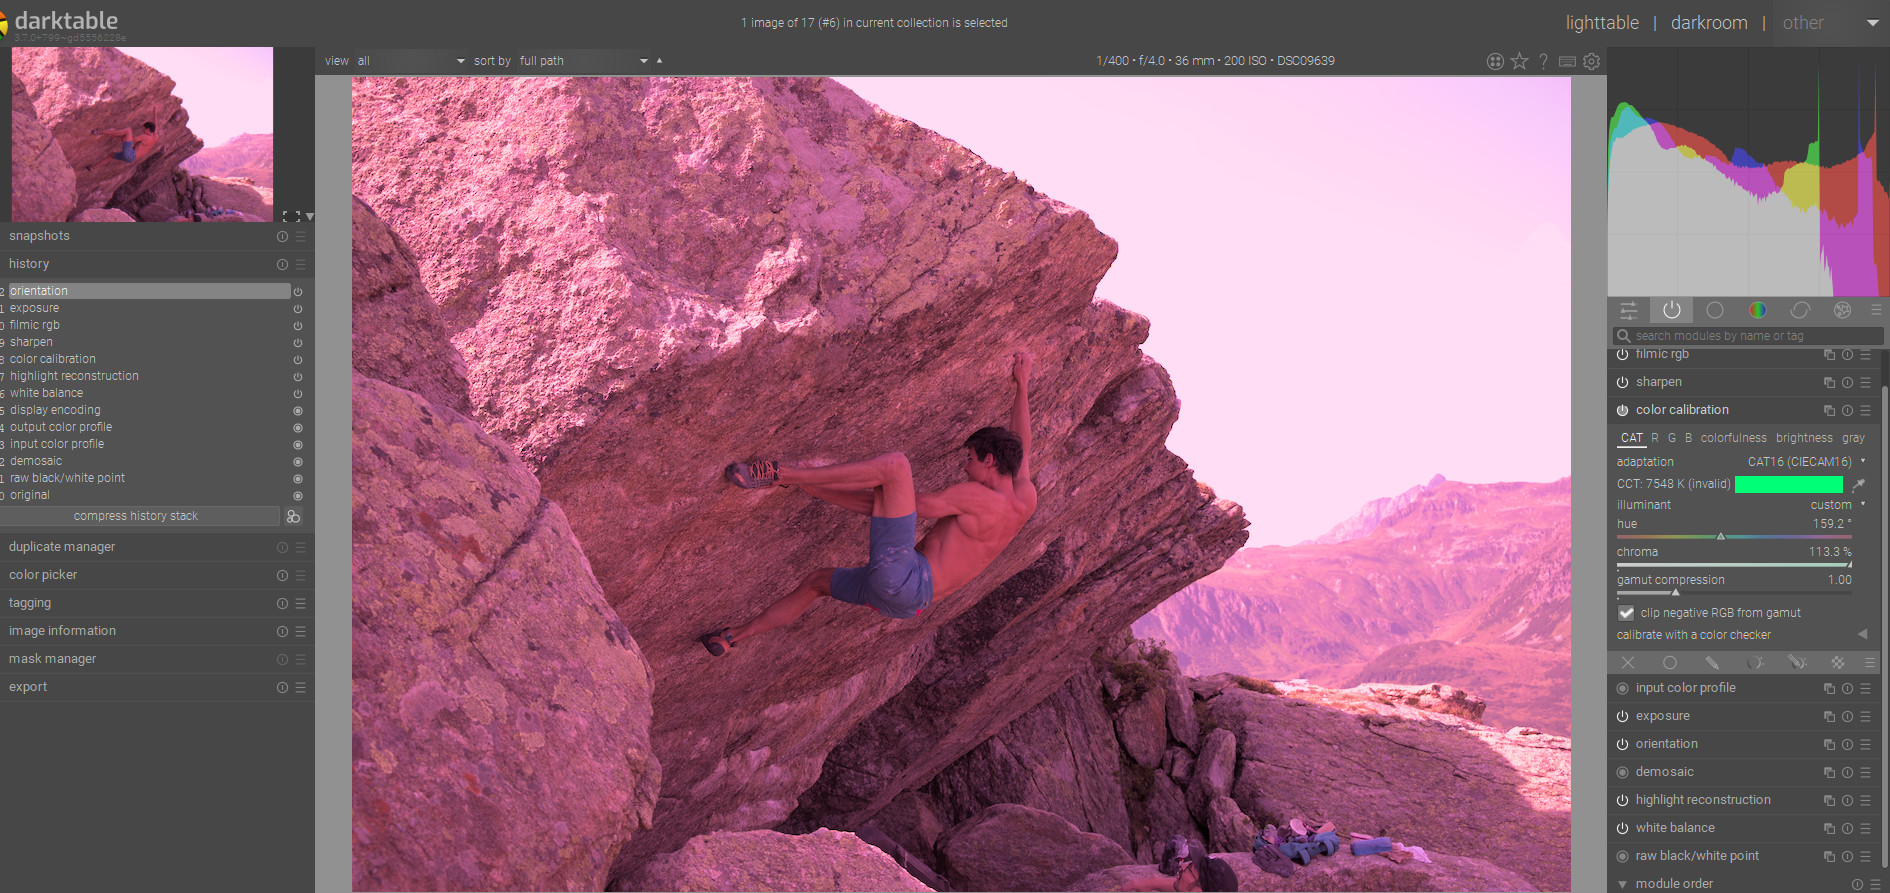
compressing on original fixes it and the error is introduced by the original state of the color calibration…note the extreme green illuminant…
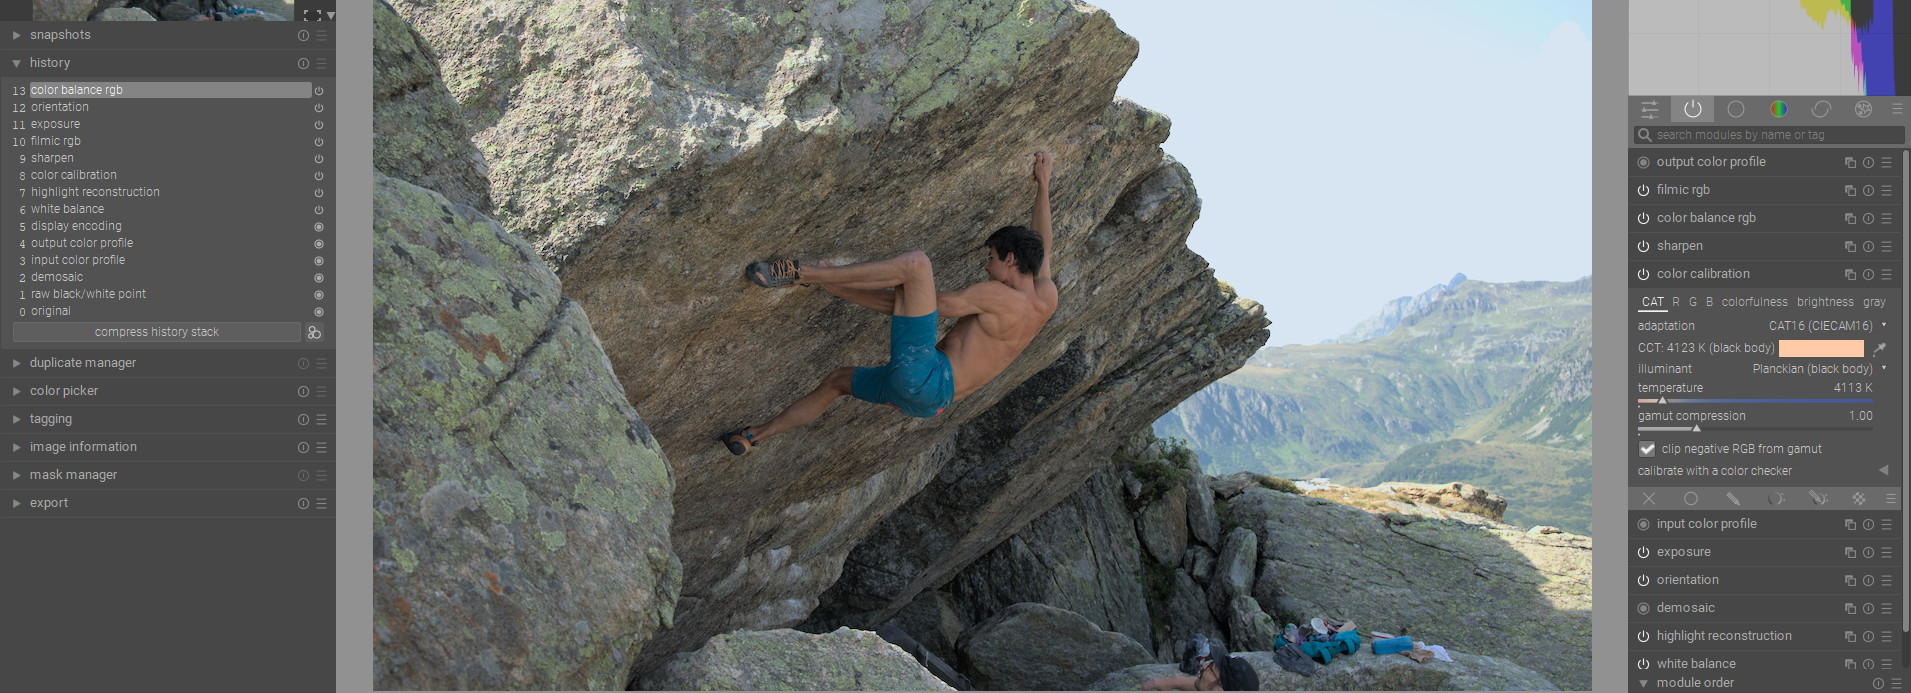
Notice after compressing…
Not reading the meta data right I guess on the initial load…
2 Likes
I just saw, that in the magenta tinted image under the CAT tab it said “invalid”, so the module basically just says: “I don’t have a clue, just what illuminant was present, so figure it out for yourself.” Resetting the module applies the camera white balance. I think, this might be the reason, why sometimes this color cast appears and sometimes it doesn’t.
Best wishes from Germany
Daniel
It should be determining roughly as shot in camera initially and in some cases it appears that it is not. Resetting it seems to do that correctly so it is something initially being misinterpreted…
Hmmm, not really. The color calibration has a selected color to correct. And there are multiple ways to select that color. Invalid here means that the selected color can’t be properly represented by the selected method / illuminant. So you are seeing an approximate value, but I can’t hardly imagine this being the reason for a strong color cast.
It looks like the color calibration module loads up Ina weird state, and from the moment you change something or reset it, it jumps back to being OK. There was another thread where someone had wrong colors, and it turned out the defaults for modern color workflow were not set correctly. Also a new image, a new import.
I didn’t encounter it myself, not even a single time (Sony mostly here) so I can’t really do a bug report :s.
1 Like
That’s it. I’ll make a point of checking out the CAT settings next time I encounter that problem
The illuminant by my understanding is roughly the light illuminating the scene, correct? If so, the CAT tab indicates, that green light has illuminated this rock-climbing scene (which was obviously not the case). Therefore it added the complimentary color of green, which is magenta. Thus leading to the strong color-cast. However the module “understood”, that it had misinterpreted the image and gave us the information: invalid.
I have experienced this behavior before (Pentax K-70 user), but never with such a severe colorcast.
The term invalid is used when the current illuminant doesn’t fit well enough the Planckian locus for known illuminants. Too far from the line to be accurate… Planckian locus - Wikipedia
Okay, but what does that mean to the real world user? I have to admit that I don’t fully understand what the color science behind the module does. But I know how the module is behaving.
Von meinem/meiner Galaxy gesendet
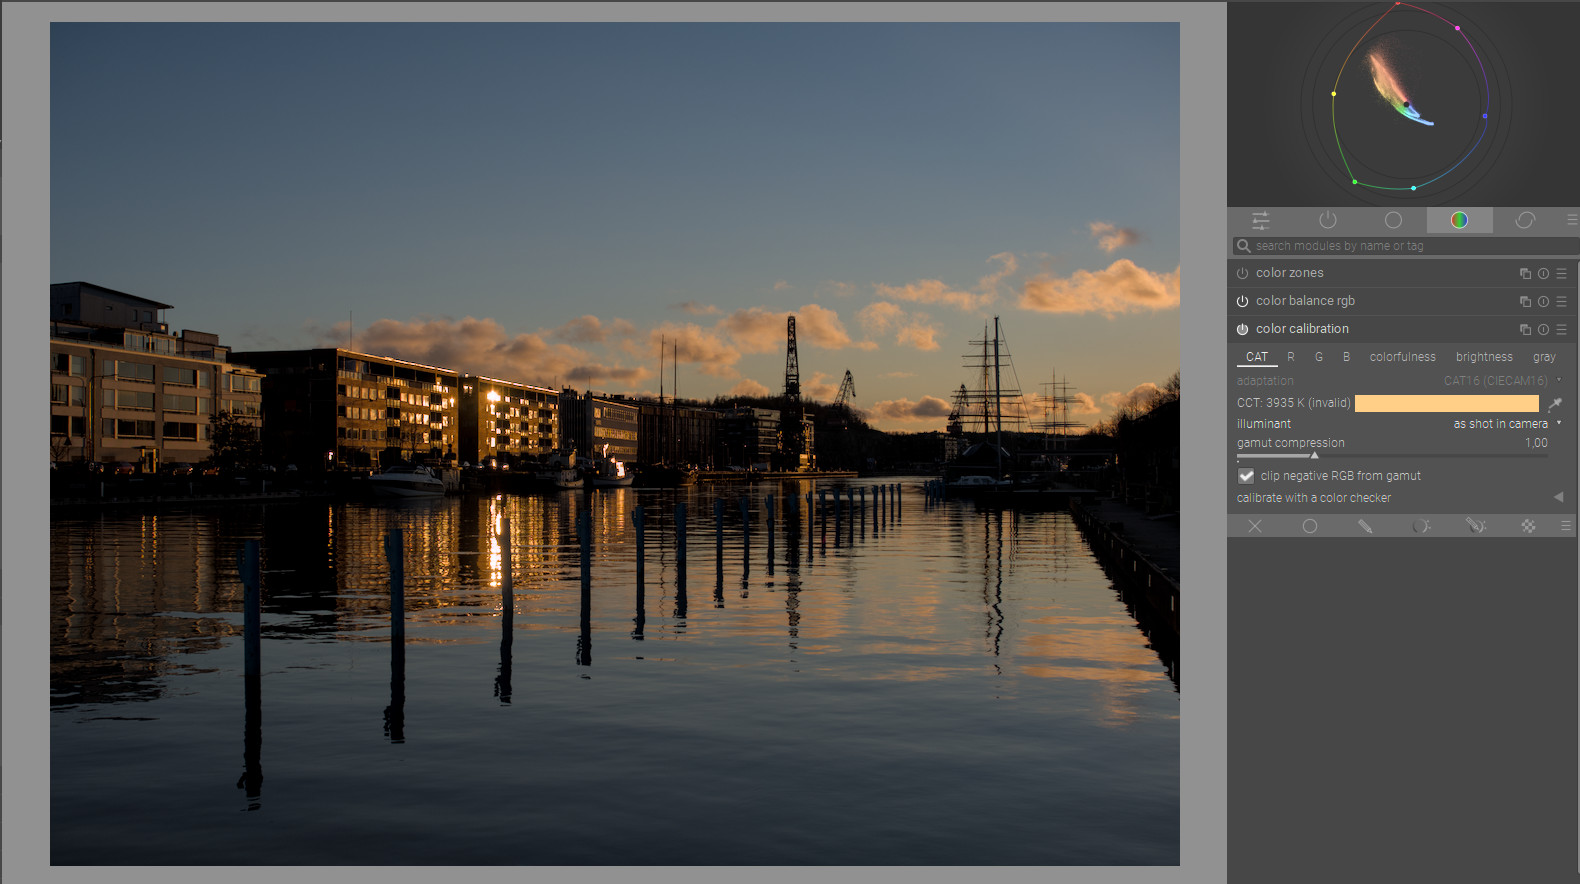
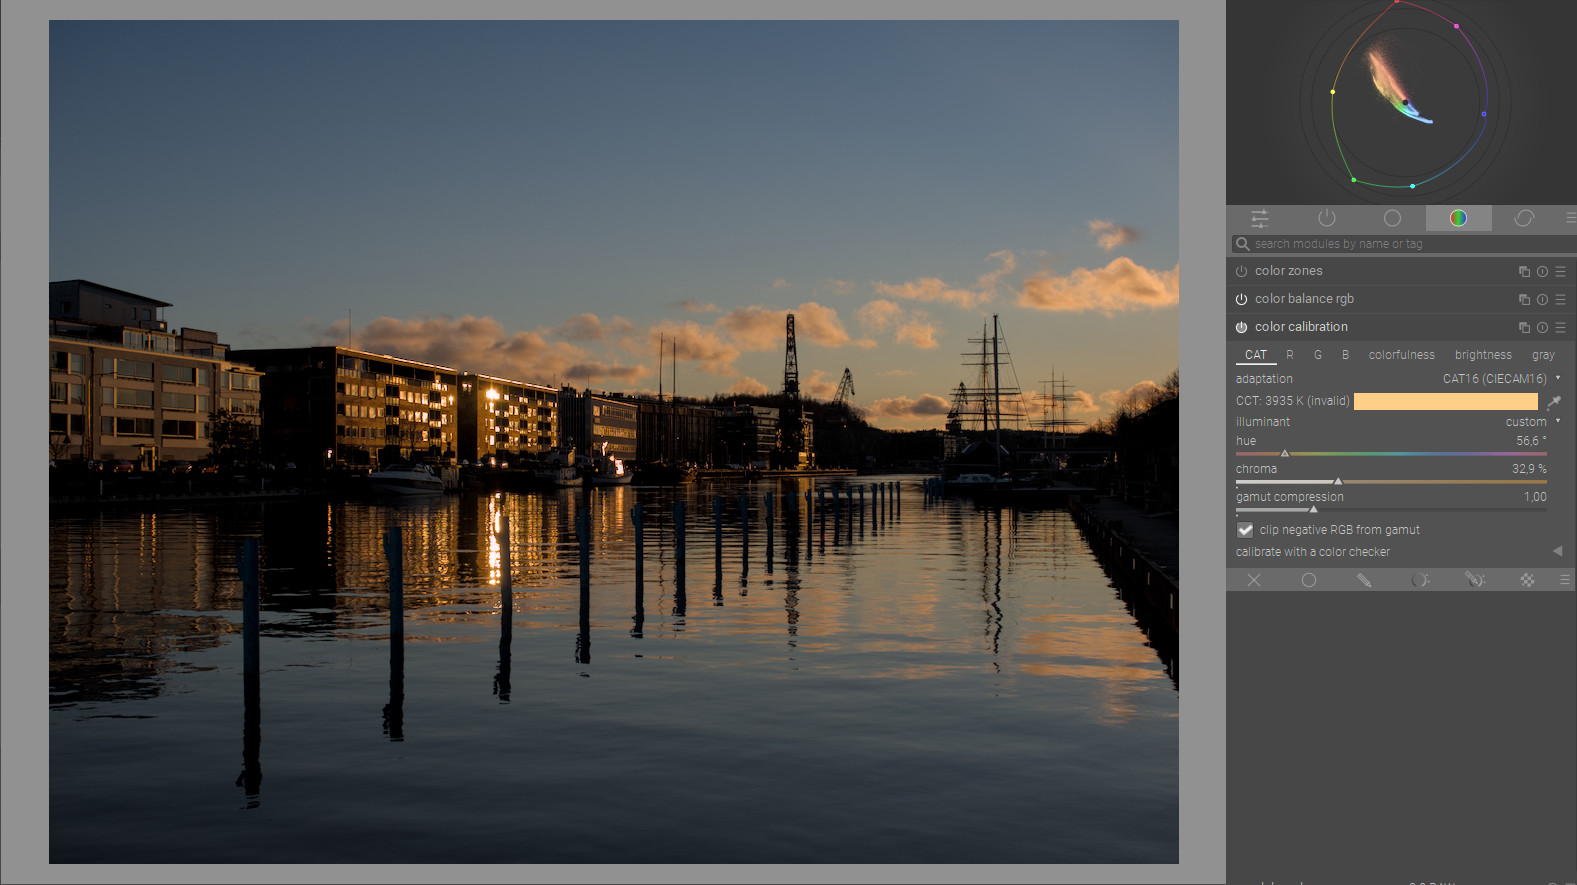
There has been some discussion about using the word invalid as it might invoke some concern. It just means the current illuminant is too far away to calculate an accurate CAT value that aligns with the Planckian locus (or essentially this). Basically the module works well but for example the K values are often meaningless…the best approach to using it IMO is to let it do its thing then assess. Then as a first adjustment if this does not work I activate the autopicker to in a way do an auto wb on the average image and/or then select a neutral element in the image. Then in the drop down of the module use custom to represent the illuminant in hue chroma. Dropping chroma to zero will essentially remove all correction applied by the module. So moving the chroma slider towards zero will reduce the correction applied by the module and increasing the chroma will increase the correction making it stronger…this sort of replaces the warmer cooler way of thinking…I think for the most part this will allow the desired WB in most cases.
A full and proper explanation is given here as well as a full demonstration of the module…around 23 min the point I was trying to explain above is discussed…

Is this reproducible? That is, if you delete the image’s XMP file and load it into the darkroom again, do you see the cast every time?
FWIW I have just seen the same on 3.7.0~git774.fa63cc2dad-1 running on Mint 20.2 cinnamon, Asus Zenbook i7 16 meg with Xe graphics. Fuji X-H1 with XF16-55mm. I was editing a couple of shots of my dog - nothing out of the ordinary or special etc. The first image behaved, the second almost identical shot gave this magenta cast. It’s not easily reproducible; I removed the offending image from the library, deleted the .xmp and re-imported. Behaved normally. Odd.
Not seen with earlier versions, for example 3.7.0~git733.c6830f6b2f-1_amd64.deb although care needed with this as I didn’t do many edits with …b2f-1.
Image attached, licensed under a Creative Commons Attribution-ShareAlike 4.0 International License.
DSCF2067.RAF (23.6 MB)
Like others have stated this is random, I haven’t found a way to reproduce it. At least to me when reopening the image (after discarding the current history stack) it opens normally.
For me it was with this particular image…I had opened it from the play raw forum and had just read the post about random magenta cast…so I used it as an example…
Resetting the color calibration module to defaults (note, this is not a normal reset, it’s the ‘reset to auto defaults’ that is under the control key in windows) would be enough I guess to get the picture back without having to do the whole import thing again.
‘white balance’ module set to ‘camera reference’, and the ‘color calibration’ module reset and then set to ‘pick from camera’ (or whatever it is called) should always work.
“Use the color-picker (to the right of the color patch) to select a neutral color from the image or, if one is unavailable, select the entire image. In this case, the algorithm finds the average color within the chosen area and sets that color as the illuminant.” This is what the manual says. If the module has averaged the colors in the image, it might have found quite a lot of green: the lichen on the rocks, the trees on the mountains beyond. I’m just guessing. Of course, could be the wrong input color profile settings, misreading the exif data and so on. However I find this erratic behavior reasonably comprehensible.
Opened the first time.

Applied camera settings (as shot in camera)

Reapplied “as shot in camera”
’
And discarding the history stack and reopening the image
This is about the same as the last one.
I will create an issue, even though I cannot reproduce it, but it is then documented.
[Edited, added the link to the issue.]
It’s not a big issue: usually switching to custom will represent the same parameters in a different way. custom is the less constrained representation (that’s not bound to an illuminant such as black body or daylight).
https://docs.darktable.org/usermanual/3.6/module-reference/processing-modules/color-calibration/
Read the section that begins with
To the left of the color patch is the CCT (correlated color temperature) approximation.’
at least up to and including
Switching between other modes, or from custom to any other mode, will not precisely preserve your settings from the previous mode due to rounding errors.
When the image comes up with bad colours, I usually simply reset the color calibration module (https://docs.darktable.org/usermanual/3.6/darkroom/processing-modules/module-header/).
1 Like