This is allegedly part of what Canon does with DLO
That particular cluster of grass for some reason is hard to reproduce but looking at other areas of the jpg they are actually much worse than the raw edits the water is blown and the structures have no detail when you zoom in also I was able to bring out the tufts and seeds on the grass with much more depth and texture so on that one spot that you picked it was at least for me not easy to match but the rest of the image could definitely be made superior in my opinion…
Actually the only tone mapping module give a look much like your jpg…low contrast and spatial extent will get you that dark muted look…AP is rolling over in his grave…not suggesting its use but it can produce that look…makes me wonder as I have seen this before if in camera uses something similar as part of their “recipe”
It might just be me, but I’ve never seen any difference in image quality when using AMAZE over PPG
Zoomed at 200%, you will see it. But, as I said, zooming-in at 200% over a 24 Mpix raw, when the final product will be seen at 2K × 150-200 DPI…
1 Like
The visible difference between different demosaicing algorithms also depends on the image, in some test images you can see a lot more colour artifacts in fine b/w detail with PPG or VNG4, Amaze avoids those artifacts.
Like so many things in dt, those different methods are tools. to use as needed, and according to personal preference. Even a tool that is technically not optimal can give the result you want, perhaps faster than the technically correct tool. One big factor, as @anon41087856 points out, is the final size of the image. And it’s not all that expensive to try them out for yourself.
2 Likes
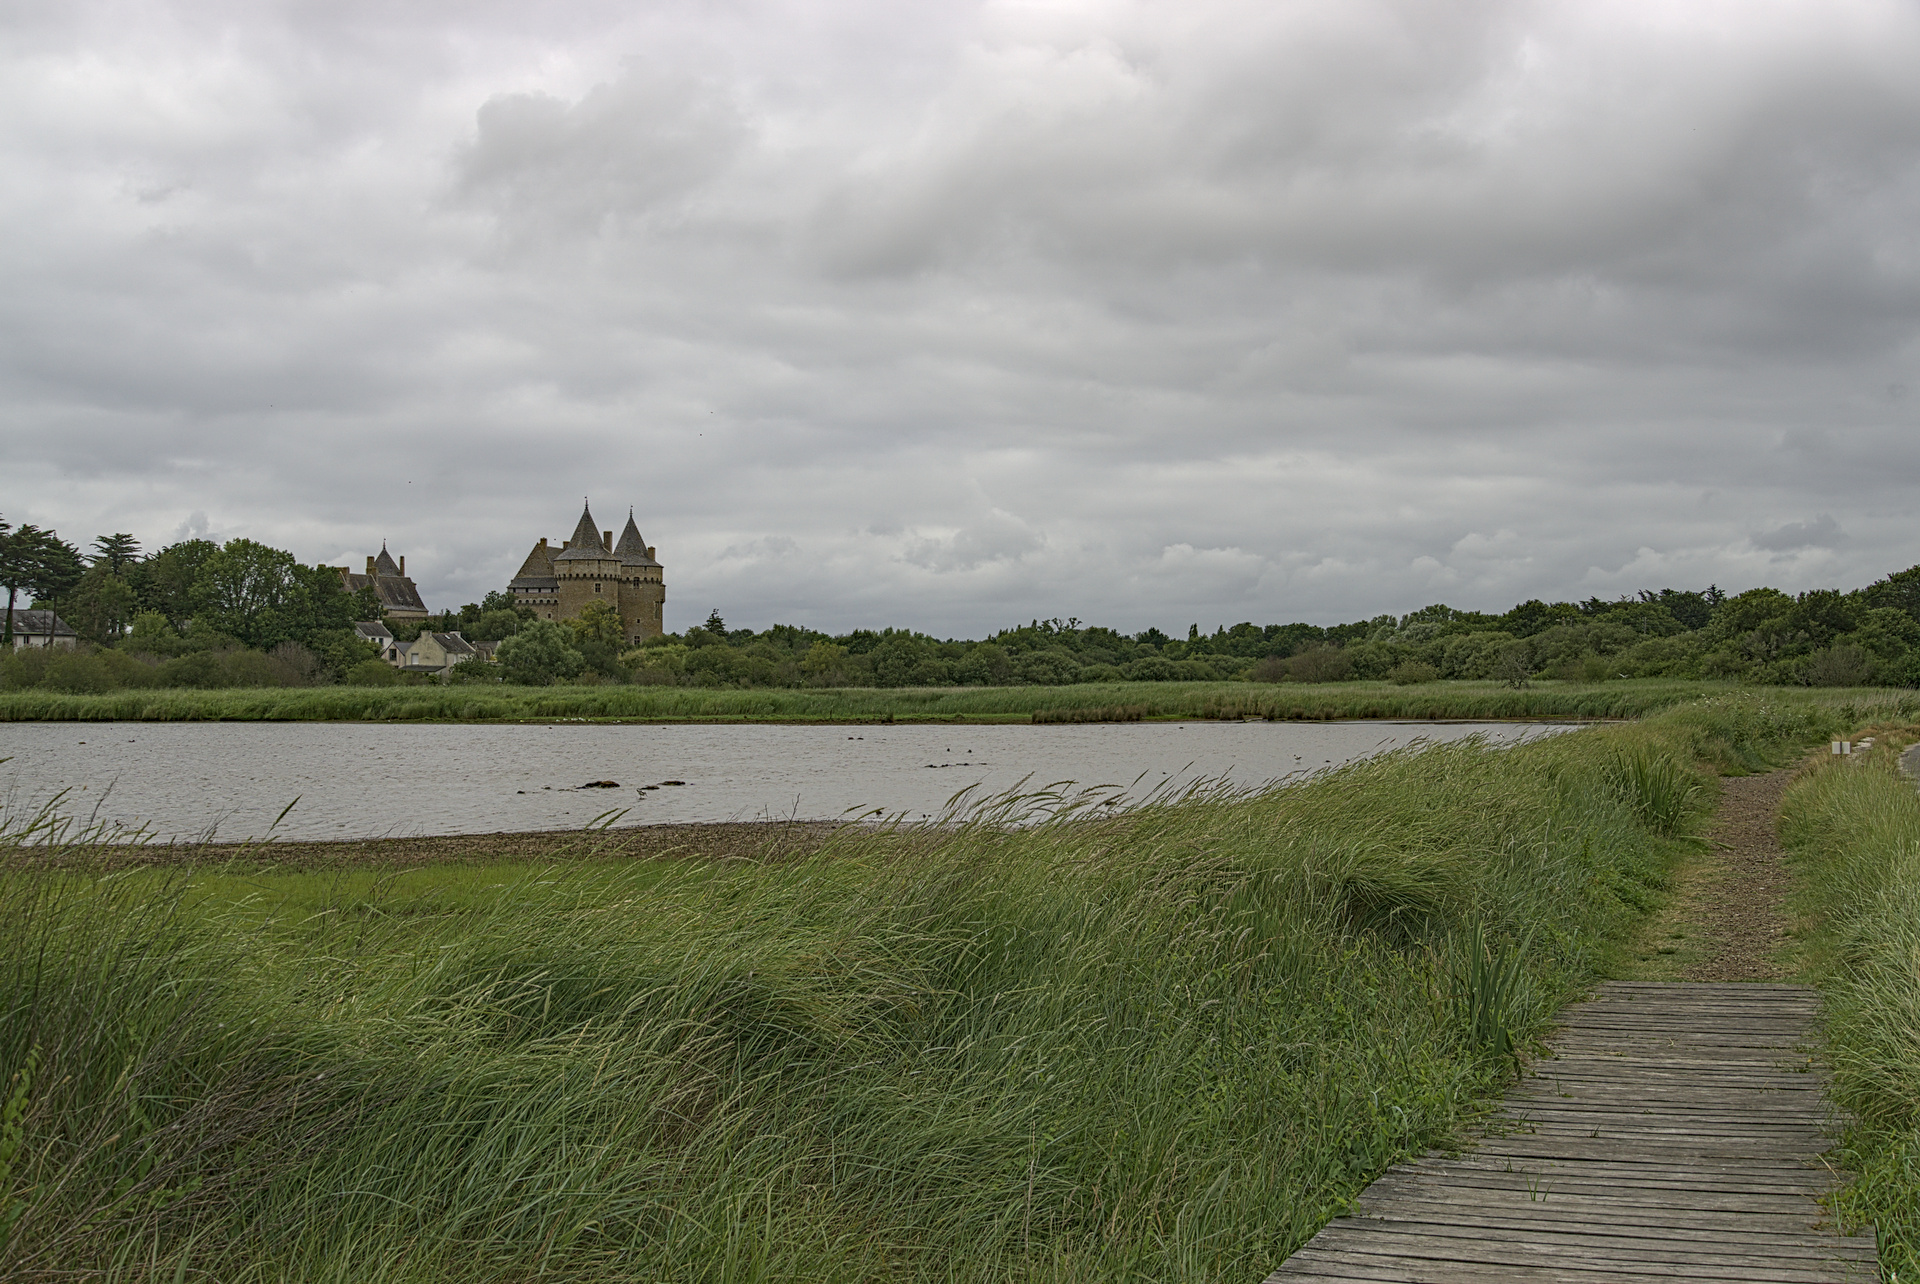
Yes, it is quite difficult to get the ooc jpg “sharpness”. However, for me it seems a little oversharpened. This is what I came up with, using all “dirty” tricks.
What is noticeable is that the noise reduction of the ooc takes away a lot of detail. For example in the walls of the castle, in the vegetation, in the water or in the structure of the wooden planks. The sky also suffers a lot in the original JPG.
DSC09835.ARW.xmp (7.8 KB)
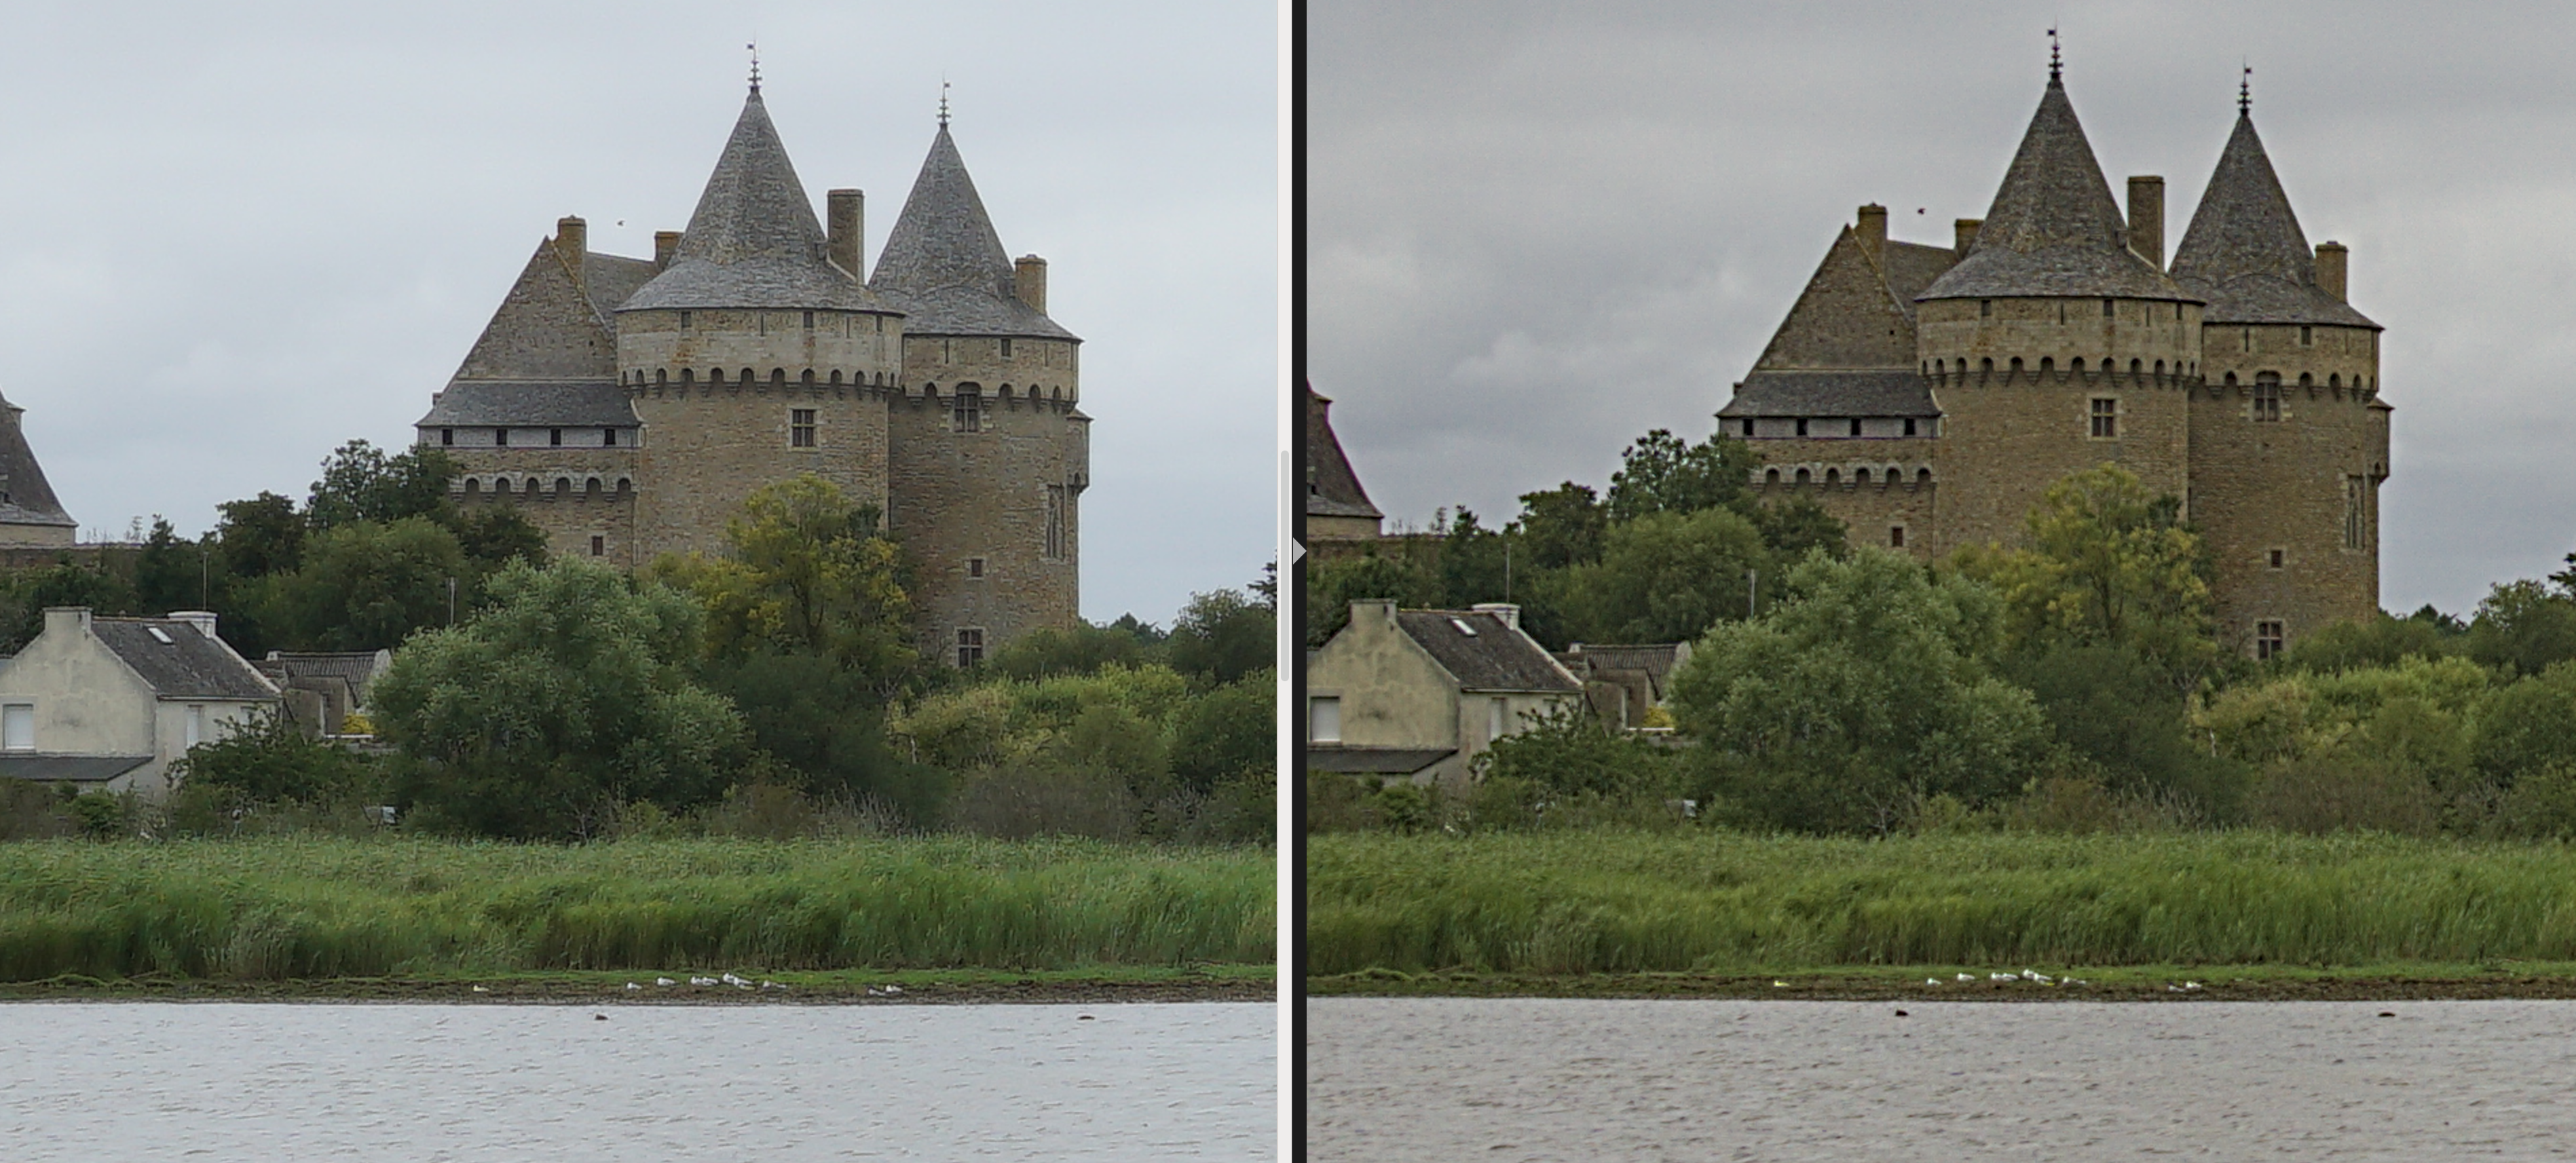

My edit on the right.
1 Like
On a related note, I’ve been using a combination of Sharpening and the Contrast Equalizer for my wildlife photos, where bringing out fine feather detail is critical. I thought I read someplace in this forum that the DT Equalizer reverts to unsharp masking if its limited to the upper band of spatial frequency. If that’s the case, is this combination of sharpening and equalizer redundant?
1 Like
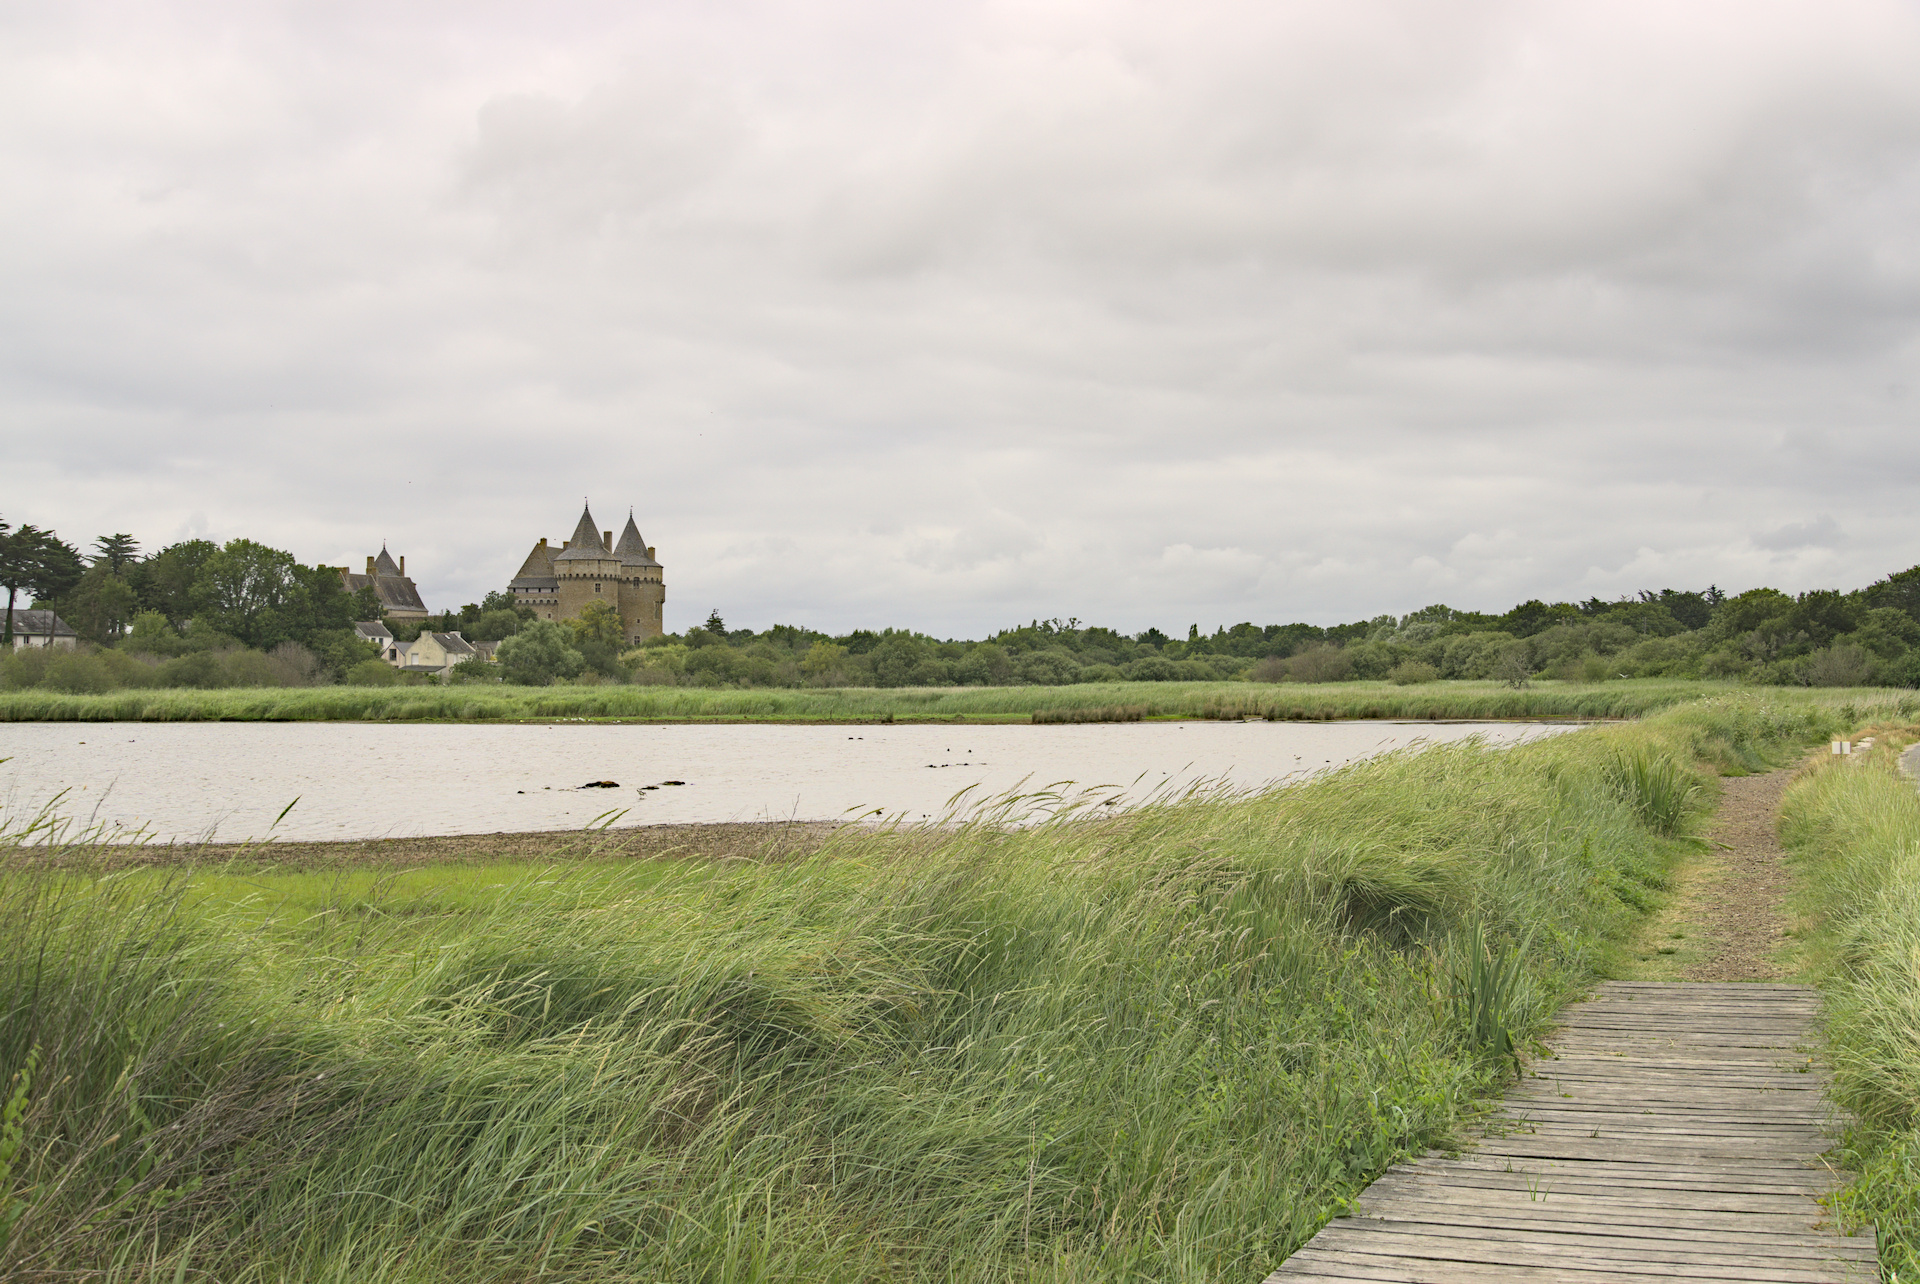
Here is my take.
To me this is plenty sharp, sharper than the jpeg and frankly speaking it’s too much for my taste, I prefer a smoother look.
I just put this example to show what DT can do.
I used the contract equalizer with the more aggressive preset I posted before and the RL output sharpening lua script.
DSC09835.ARW.xmp (14.3 KB)
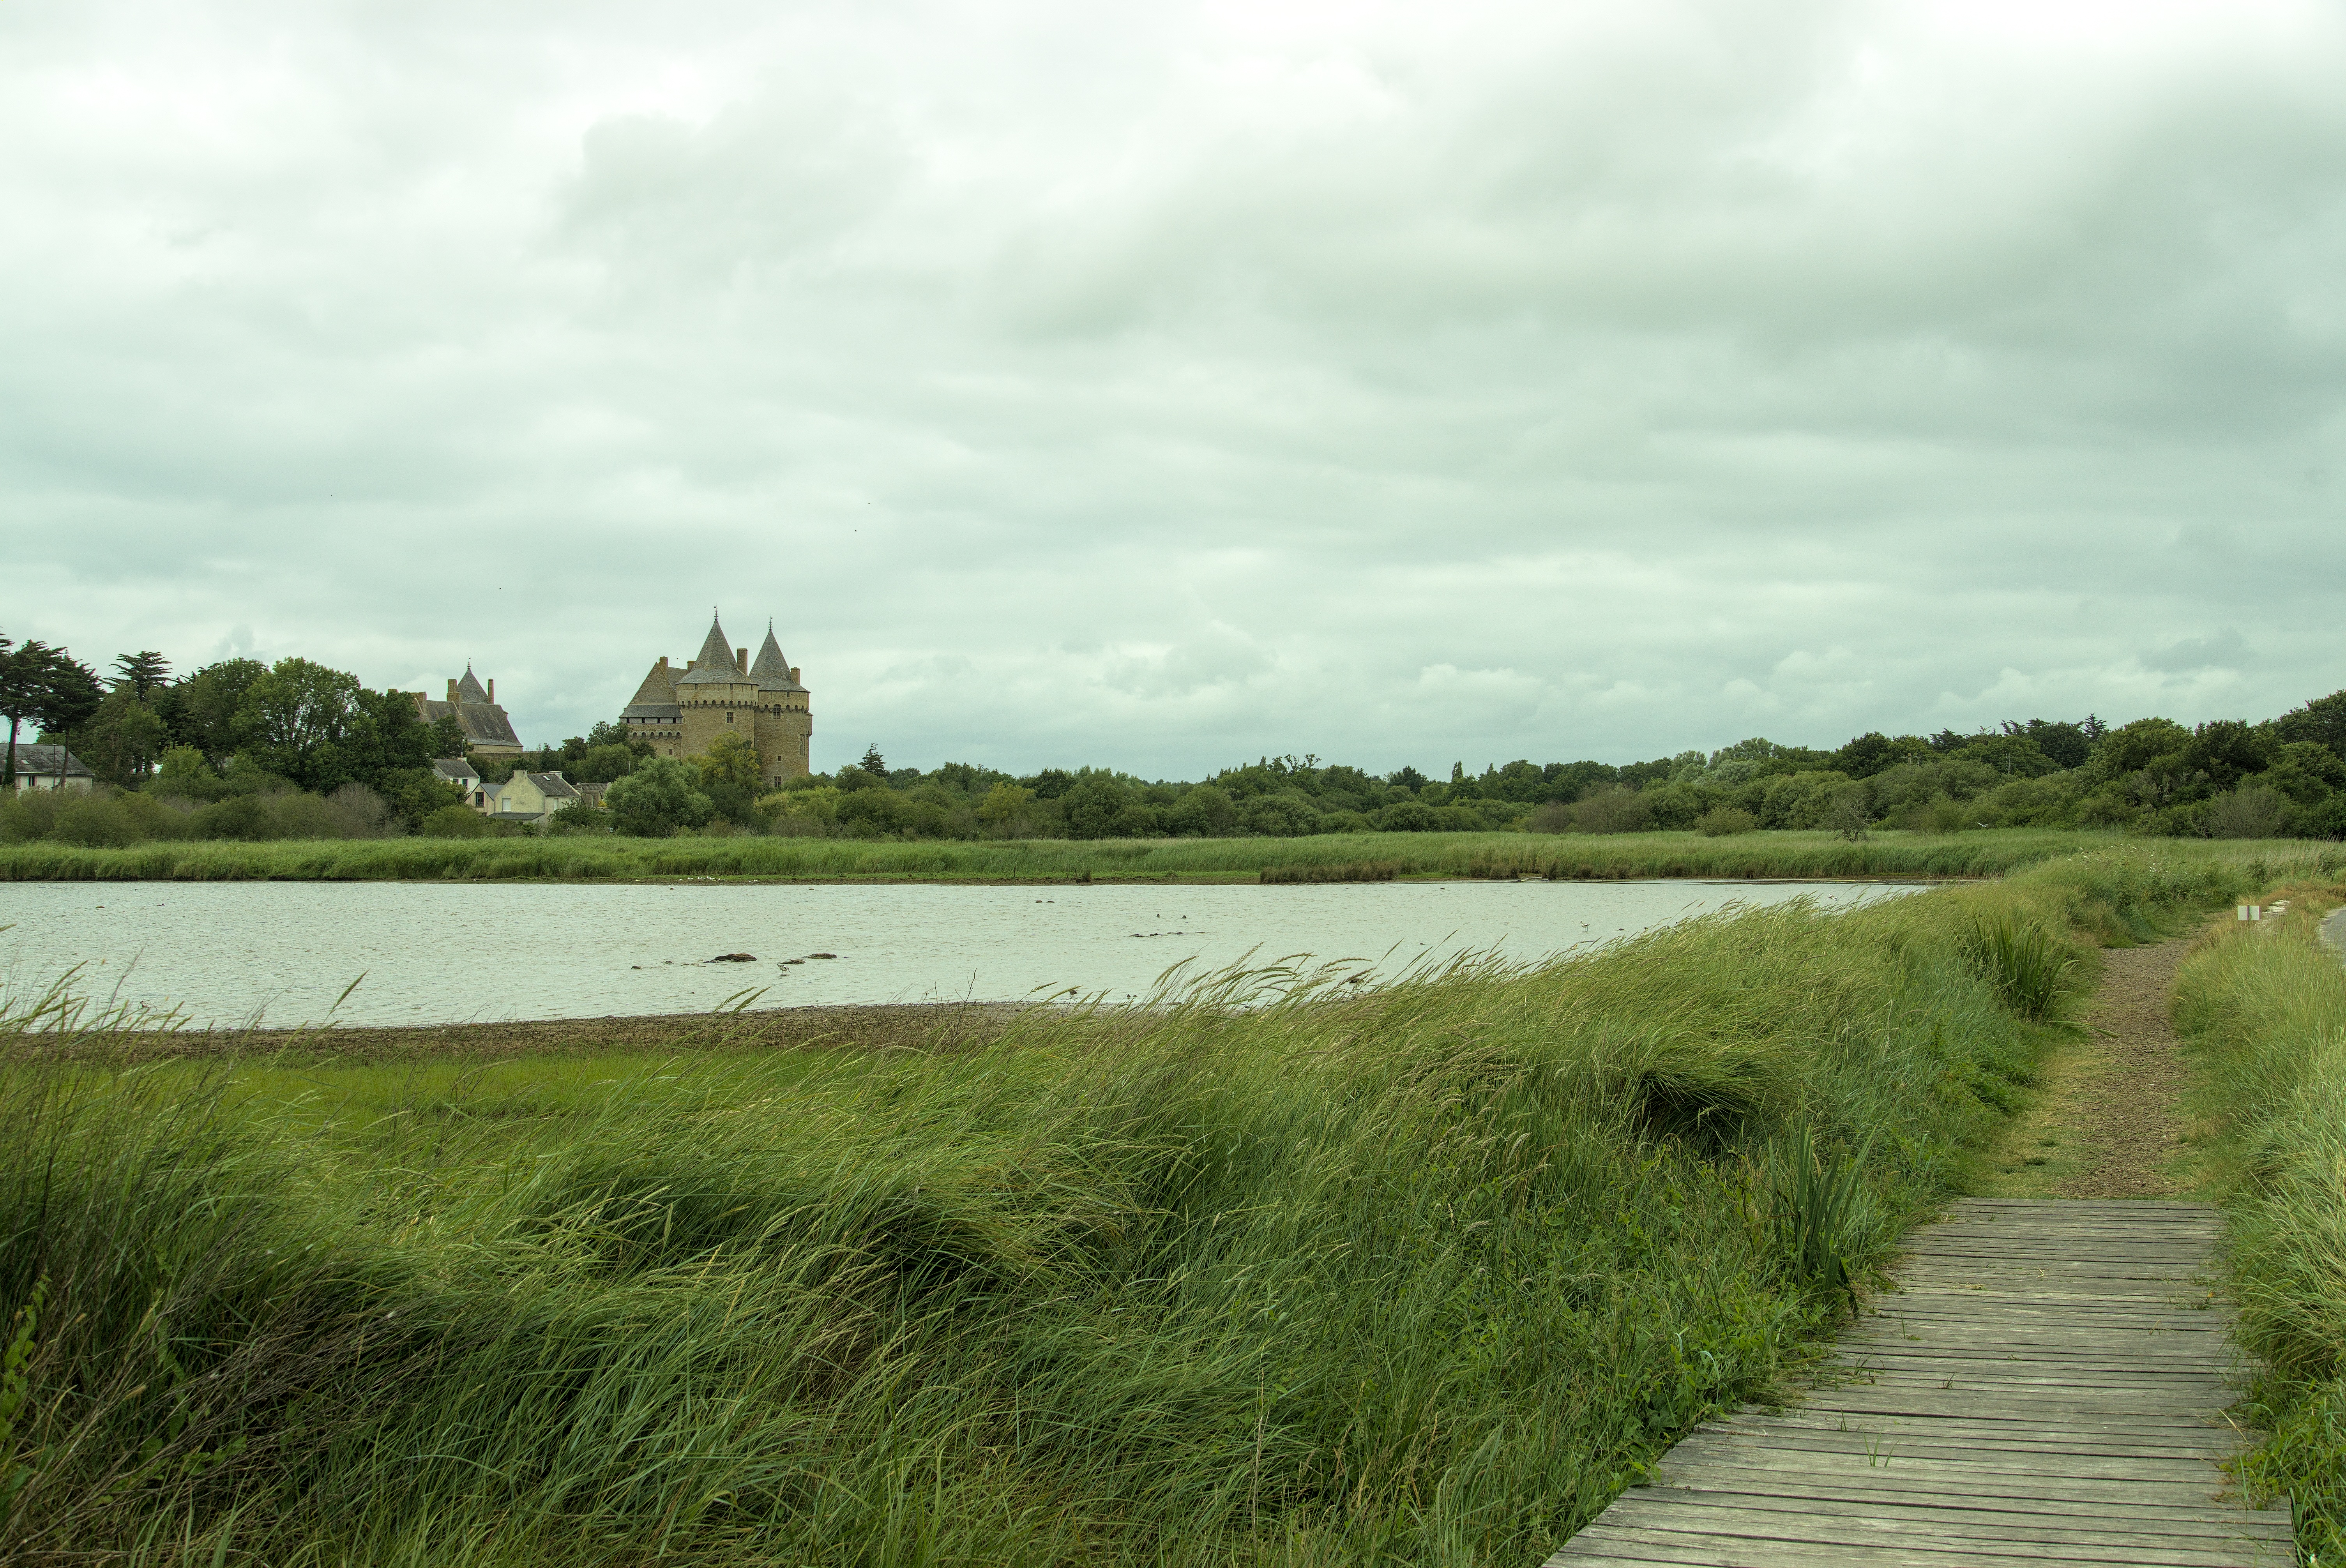
Here is a jpeg with 2k size

1 Like
That was a big big learning for me, to give the contrastEQ a limitation on both ends. The improvement is HUGE. Thank you.
One question: how to attenuate/define the L-input values (L-Mask)? Just oggling?
1 Like
Ciao!
In the dump above, mix is 1,000
Set it to a lower value – even negative values are allowed.
Have fun!
Claes in Lund, Sweden
Sorry I was not clear in my question. I meant, how to find the points for that “L-mask” (edited my post)
:-(((((((((((((((((((((((((((((((((((((((((((((((((((((((((
Scusi! Io stupido!
:-(((((((((((((((((((((((((((((((((((((((((((((((((((((((((
No no no, I was stupid, my question was unclear 
Only clever suggestion I have then is
that you turn on the mask, to see the areas
that are/will be affected.
Yeah that is what I am doing, but which areas are “unhealthy”, that is the question. Up to today I did not come to the idea, it cold have an effect, but I am playing around on some playraw and I am really flattered…
You want to avoid clipping (sharpening is about emphasising differences between neighbouring pixels). So, for a large contrast enhancement, you need to protect your shadows and highlights more. Look for loss of details in those areas. You may turn on clipping detection (at the bottom of the darkroom window) – but note that some modules that come later in the pipeline may foil it (e.g. if you use filmic to aggressively lift shadows and compress highlights, you won’t have pure blacks and pure whites, so no clipping indication will be shown, but you’ll still lose details).
3 Likes
As I understood the pipeline, except for a few aberrant modules (color mixer…) a module can do almost whatever it wants without causing clipping in the highlights.
Shadows is a bit different, values < 0 don’t play nice with certain math functions.
1 Like
Well, the idea is that sharpeners perception is mainly about midtones. You don’t want to sharpen shadows in order not to increase noise and highlights as their contrast is compressed anyway by filmic or base curve.
Marco
2 Likes