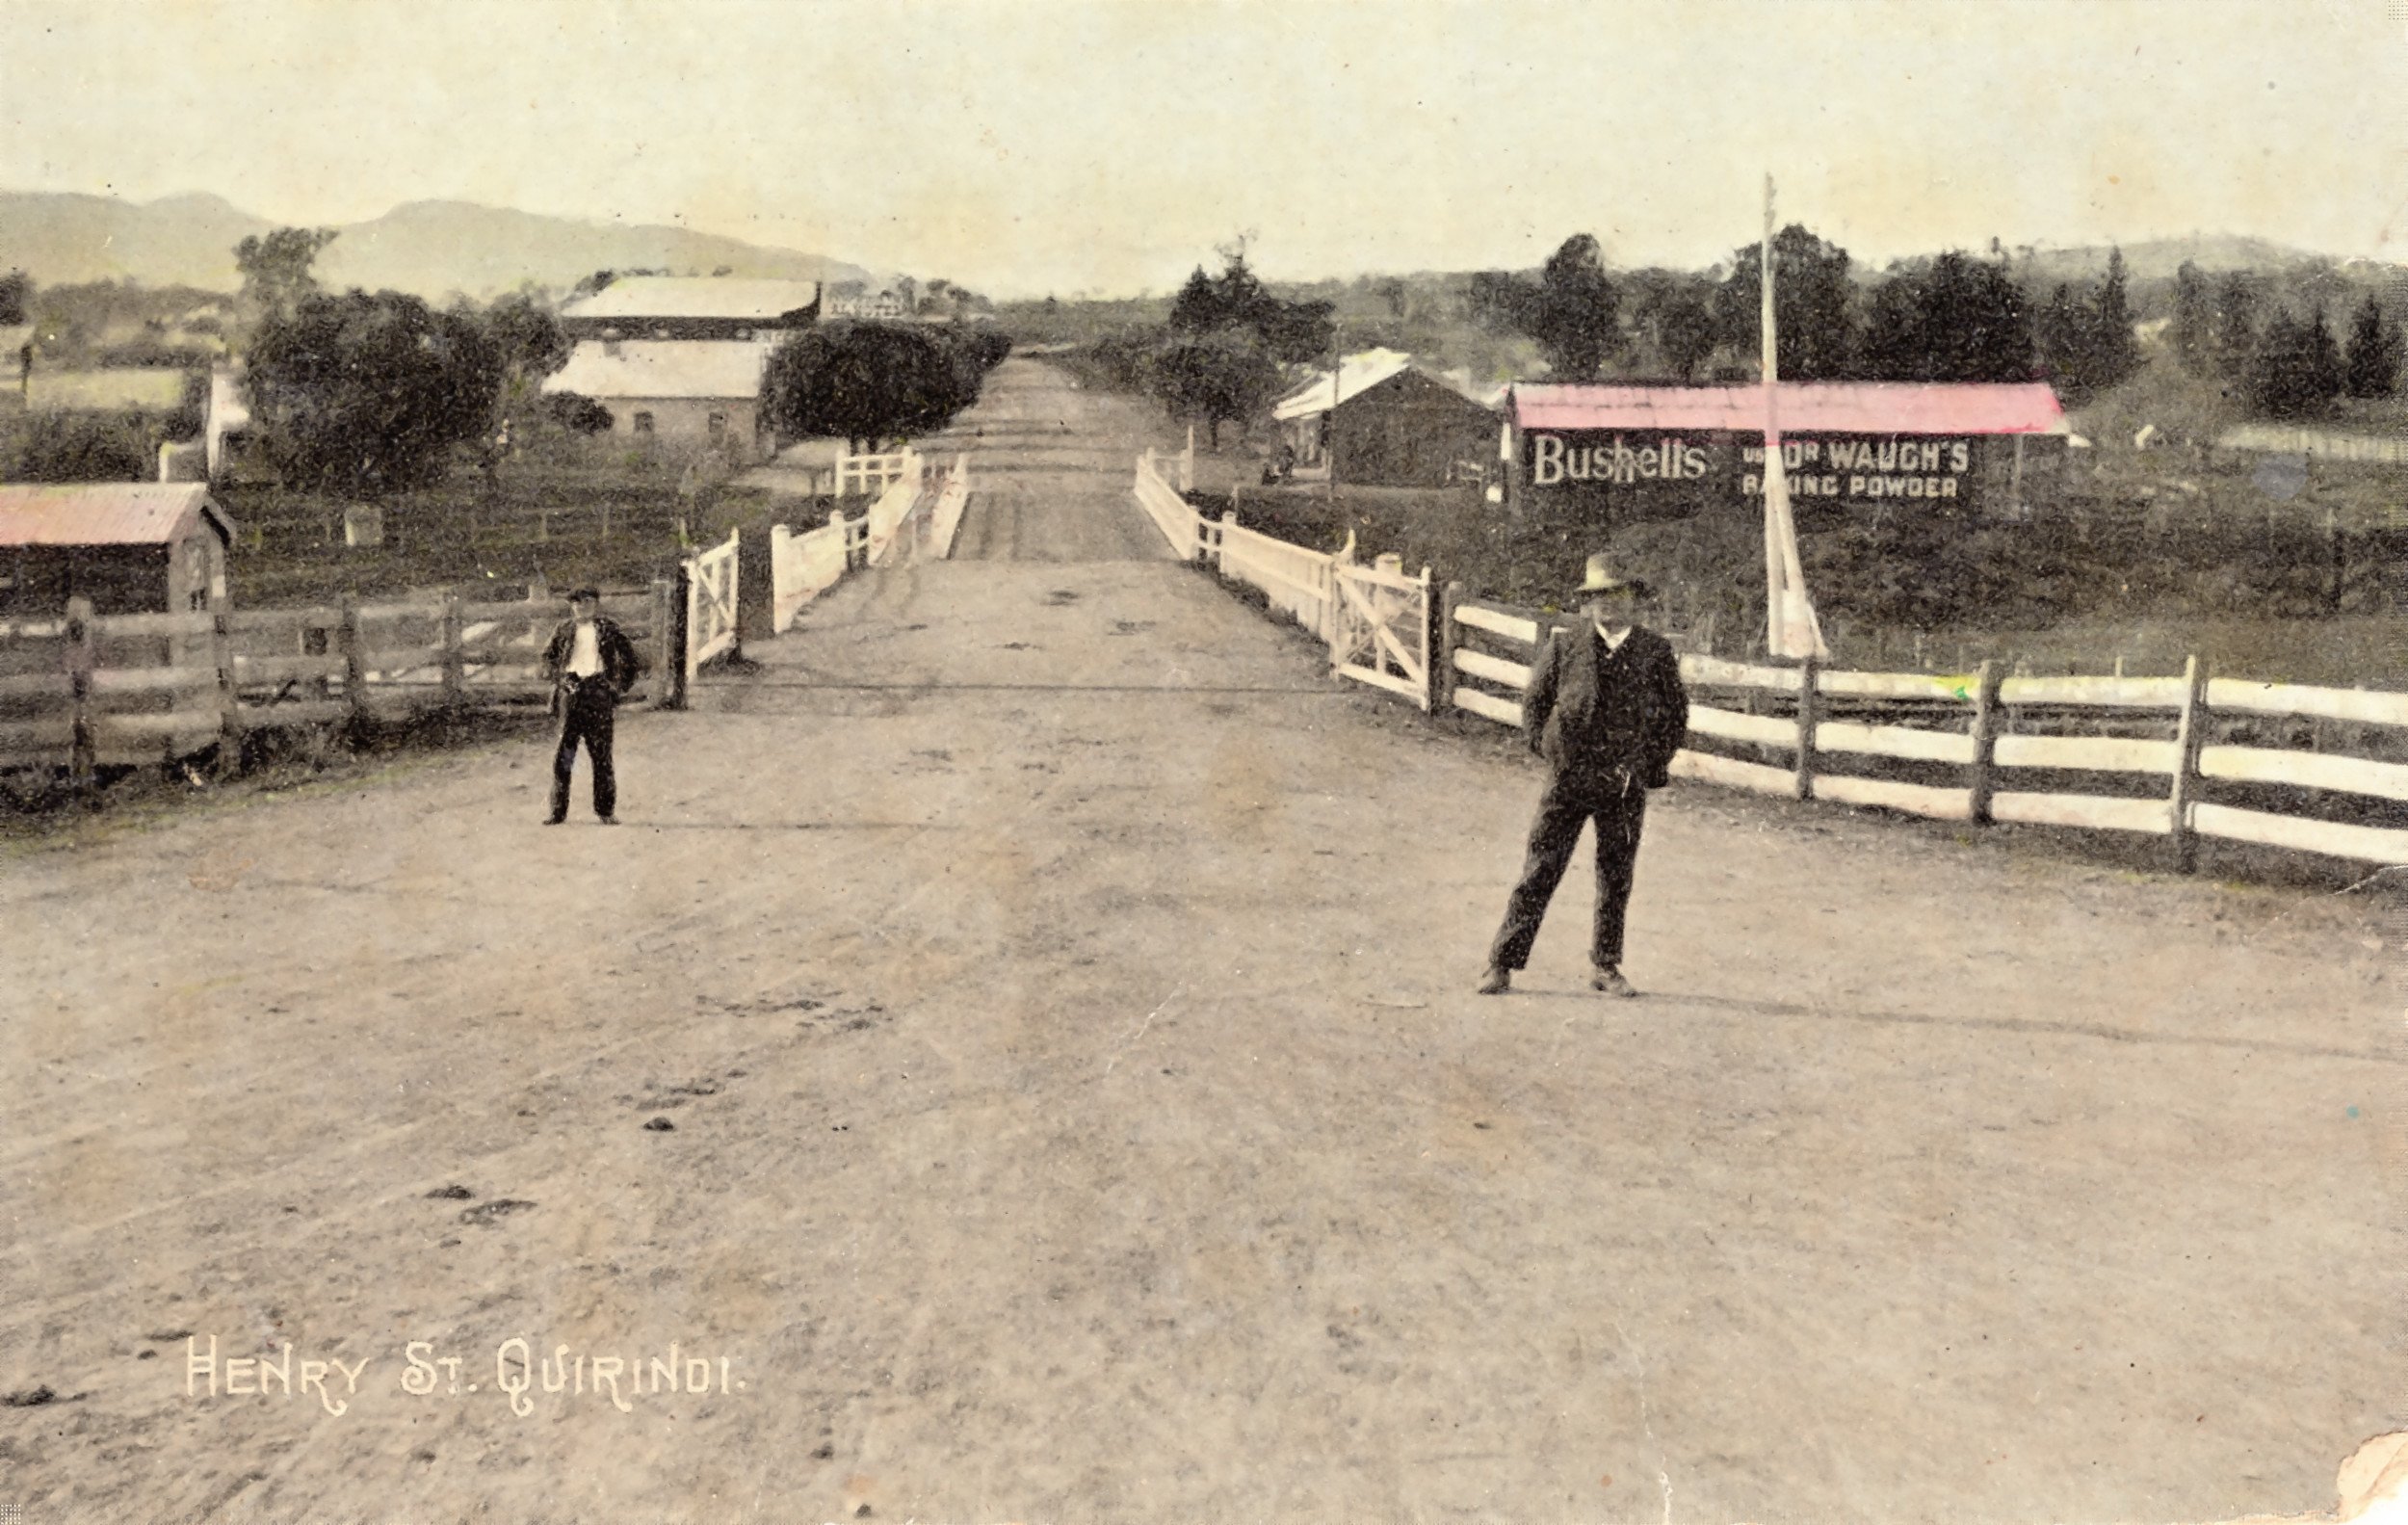
hello, I am trying to restore the attached old photo, it has a very prominent dot background pattern. I have tried wavelet decompose however the pattern seems to be attached to each layer. Does anyone have any suggestions? Much appreciated, Lee.
thank you, i have taught myself gimp over the last few months, so i’m a bit new to the terminology, what do you mean by downsampling? also, did you just apply a blur to the whole image, without decomposing each layer? Thank you heaps for helping
That’s not a photo :-), it is a scan of a printed image.
That raster || screen comes from the printing
process. There are several methods available to descreen an image. Since you use The Gimp,
go to Filters|G’MIC-Qt and search for descreen.
There you will find two valuable plug-ins to assist you.
The printed image was made by offset lithography or similar process that reduced the original photo to black (ink) or white (no ink, so the paper white). The metal plate for the ink was probably prepared from a “lith screen” photographic film. So the printed image has no shades of gray, in theory.
So when a person looked at the newspaper or magazine, the grayness of each small patch would come from mixing the black and white dots at the retina in the human eye. We can simulate this with a blur. ImageMagick “-blur 0x3” is a Gaussian blur with standard deviation of 3 pixels.
In practise, the ink has various thicknesses, so various opacities. Some white paper shows through the black ink. I have ignored that, but we might assume that each pixel should be either black or white, by thresholding:
magick "henry street quirindi011.tif" -threshold 50% -blur 0x3 b2.jpg
This may give more accurate grays, but has removed the colour.
Woah, thanks so much. That’s interesting. I inherited a lot of old postcards many years ago which I am trying to restore for prints, up to 20 x 30 inches. The thing is 25 years ago I had some printed professionally (30 x 20) and they are a much better picture than what the professional printers can produce today. Hence, I have been teaching myself Gimp over the last few months (I must have watched over 100 you tube videos). The thing I have been most stuck on is removing these dots without losing too much detail. Today I tried Fourier Transform a few times and descreening without much luck. I will try your suggestion. Thanks very much for your time, I’ve attached another one so you can see what I mean. They are all about 100 years old or more.
Thanks so much, your filters are awesome. I was just reading about your remove pattern filter, trying it now. Really appreciate your reply, your name comes up a lot when I google gimp.
We can ask: how much information does the image contain? A simple answer is: 5000x3166 pixels, 3 channels per pixel, 1 byte per channel per pixel, so we have 5000*3166*3 = 47.48 million bytes.
But most of that data is not derived from the original photograph, as taken by a photographer. Most of that data comes from the exact sizes and shapes of the black and white dots.
The black and white dots are at intervals around 8.8 pixels. So how many dots in the total image? 5000*3166/8.8/8.8 = 204416 dots. Perhaps each dot has 256 different level, so one byte per dot, so we really have only 204416 bytes of original data.
Put this another way, the real resolution is 5000/8.8 wide and 3166/8.8 high, 568x360 pixels. Blowing those up to 30x20 inches will look blurred. Various process can be used to create the impression of greater sharpness.
Personally, I think there is great charm in enlarged screened lithographed photos, without attempting to “correct” the screening.
That’s an interesting thought, after all the originals are over 100 years old. When I blow them up on the computer I can see that some of the dots actually form part of the pictures. I might try getting one of each printed for side by side comparison, with and without the screening. Thanks very much, so much valuable information on this forum.
For this I used Fitswork (free, only Windows, not FOSS). I used the FFT-1D frequency filter. Then wavelets. Then I trained a very simple neural network with a part of the original and an edited part. This simple neural network filter is thereafter used on the whole original with this result:
the process used to create the dots means more information is retained than you suggest.
For example an edge where completely black meets completely white is retained at original resolution.
Dots are not uniformly round. Instead they are affected by the original image. EG Dots on a smooth black to white gradient would be egg shaped. That is each black dots would be wider towards the dark end of the gradient and taper towards the lighter end.
Rather than each dot of the photo lith screen receiving a certain exposure and thus becoming a certain size, we should consider each grain of each dot. Hence each dot is not only a certain size but also a certain shape, and this shape variation depends on the original grayscale photo.
How much extra data would this represent over my simplistic estimate of 204416 bytes? Any guesses?