None of above but gave it shot anyway:

GIMP scaled 25% then cropped and GIMP NR filter plus G’MIC NR, I forget which. Contrast, brightness and 2 levels of USM applied. I just played.
None of above but gave it shot anyway:
GIMP scaled 25% then cropped and GIMP NR filter plus G’MIC NR, I forget which. Contrast, brightness and 2 levels of USM applied. I just played.
@anon8280290 usually we say a bit about what we have done and what tooling we’ve used.
OK will edit
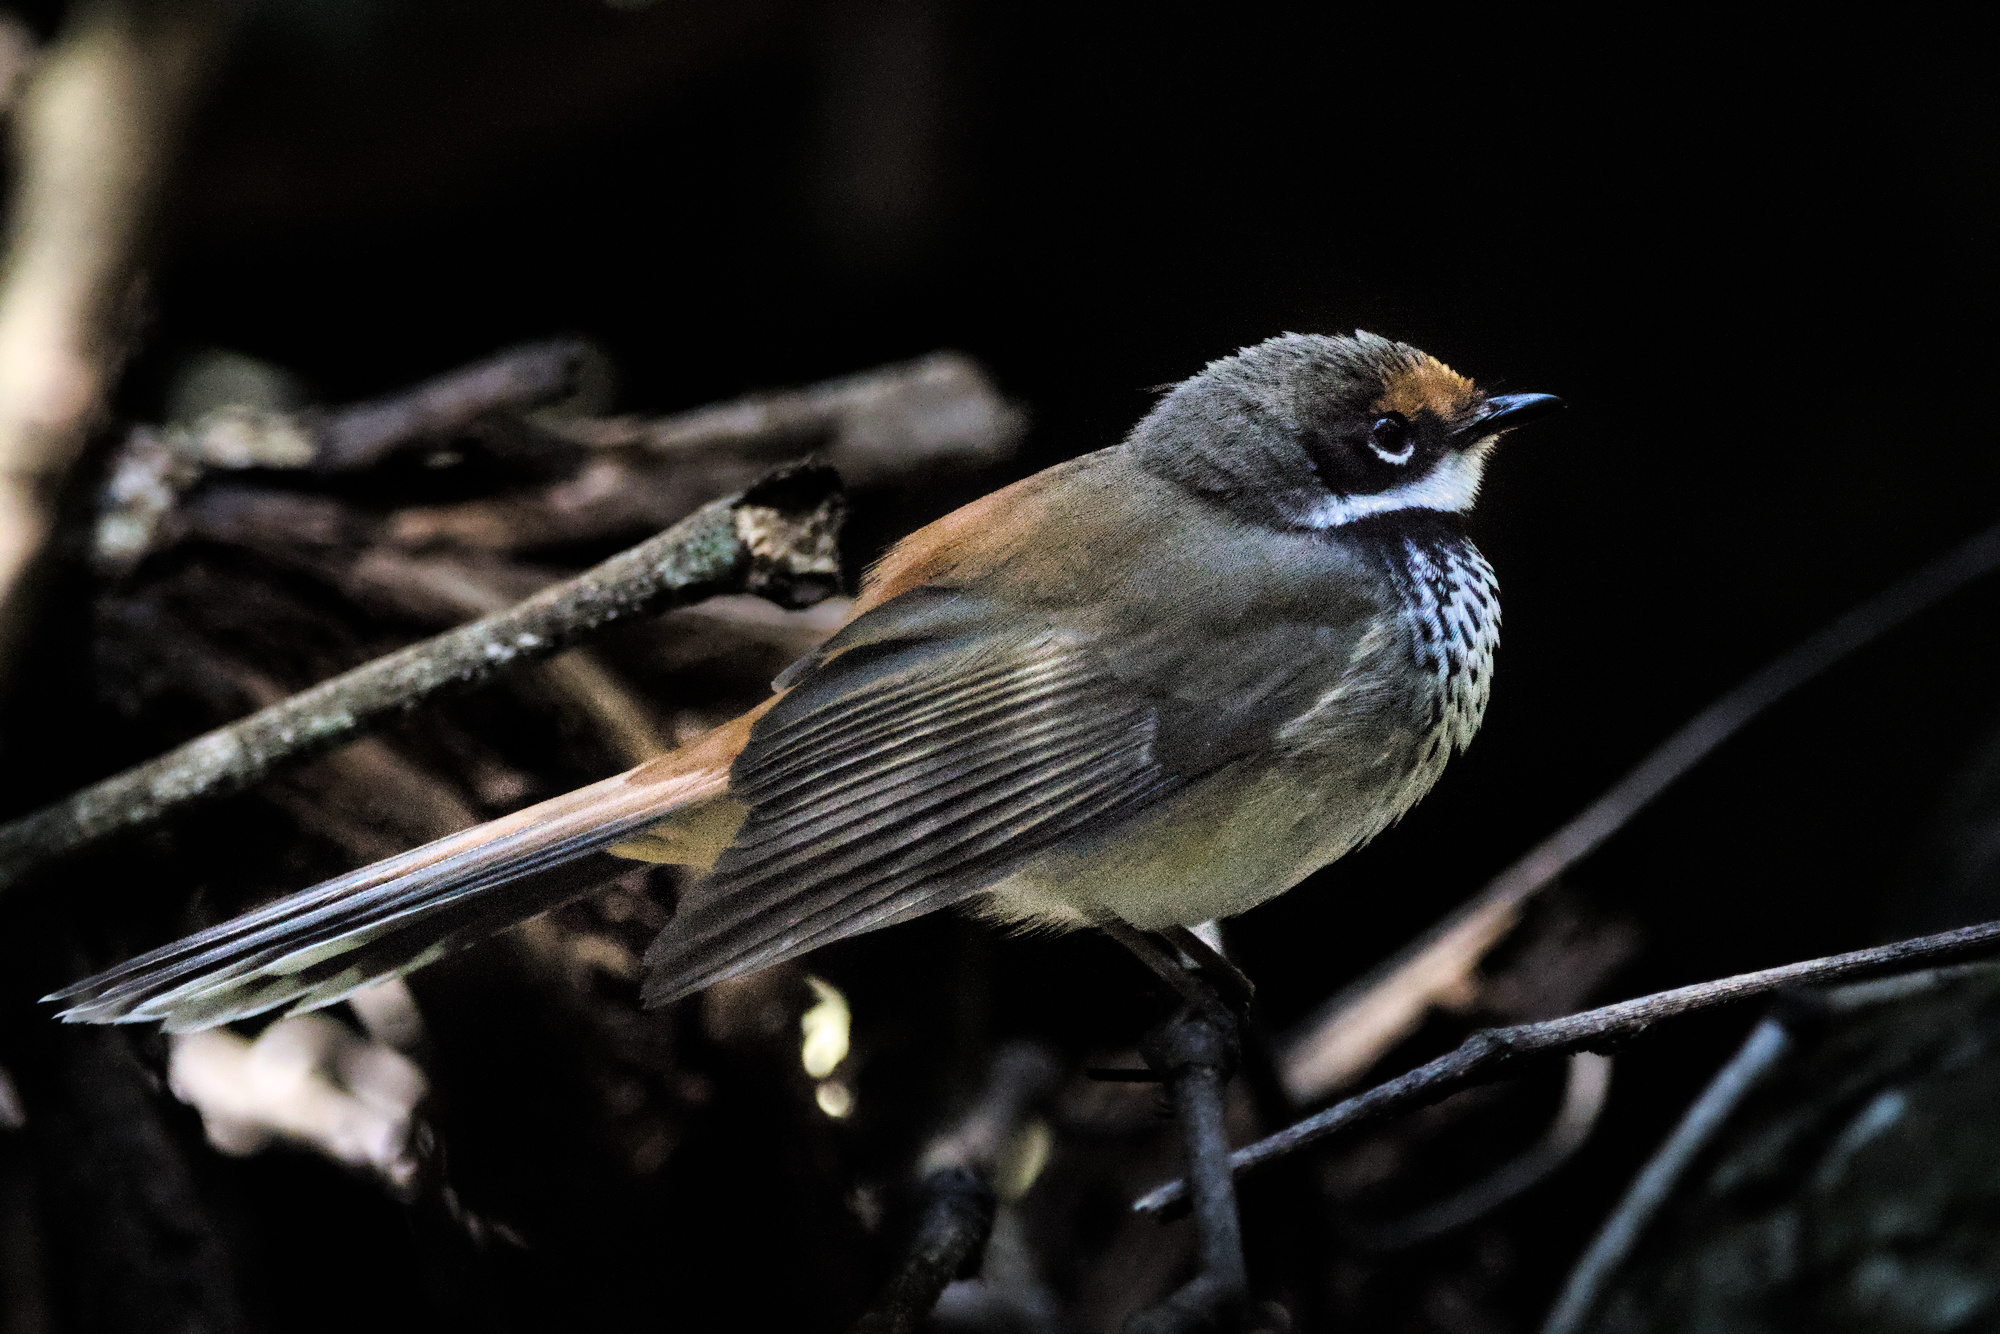
Hello, in fact I don’t have a precise setting, in general I slide the luminance slider to get a blurred photo without artifacts, and then I gradually bring out the details, until it suits me. In the case of this image I concentrated only on the bird, staying in “conservative mode” knowing that I was going to apply mask-guided smoothing to the rest of the image.
I hope @agriggio maintains his little gem Art for a long time to come.
Translated with DeepL.com (free version)
In response to @Leniwiec , who uploaded a version developed with DXO, I’m posting a version developed in auto mode with Neat Image (evaluation version), which I’ve just resized with Digikam. It’s certainly not open source, but it does very well in auto mode. I even find it better than DXO on this image (less smoothing) and it has the huge advantage of also being able to be installed on Linux.
There are a few out of the box approaches worth combining in cases like this
I didn’t waste any time in proper mask drawing and didn’t touch the black level:
2024-08-30_11-02-04.89_DSC0728.nef.xmp (33.9 KB)
Just concentrating on a general noise reduction. Not a partly one, but over the whole picture. This is the best I could achieve, without giving away to much details:
100% view:
Yes 100% luminance correction then bring back the detail seems to achieve the best noise reduction and detail in RT and ART. Seem to remember seeing some advice to do this somewhere and getting better results but this was a long time ago so I can’t remember where.
The image is quite good for that iso. One has to be very careful not to interfere too much with the fine details. I would rather leave some noise.
Here my try with raw and profiled denoise plus hot pixels (!).
Thanks for the opportunity to play with an interesting image!
Key ingredients for my edit:
looks better than mine. Will have a look at your XMP.
Ya it was good to know. I had not explored using it that way………Thx for the feedback….
RawTherapee 5.11 with noise reduction on and three ways of reduction via local adjustments.
Darkening the background lowers the noise and creates mood and atmosphere.
Very nice photo! Did you create a dark frame of that iso/shutter speed? If not, i typically find home-made (literally made while at home and editing, if i dont have a dark frame that matches up) i slow the shutter by a few clicks (1/60 photos get a 1/40 since the sensor/dsp isnt warmed up to get similar shot noise). This usually settles the speckling/grain at zip-code ISOs. My newest camera is a D810 (2014? 2015? Cant remember), so maybe not as important with newer gear.
My version in dt. For heavy denoising I use two steps: (1) wavelets with emphasis on color noise and (2) non-local means for dark areas (mask; removing spot noise). Furthermore I have used a mask for the bird to process bird and background separately. Hope you like it.
Hi , I’m posting here mostly because I wonder what’s happening with RawTherapee. I few years back I used , and liked it. Because I’m also using Adobe , I more and more depending on using local adjustment. I have access to Graduated filter - Elipse tool - Brush - Object masking - Color mask - Luminosity mask.
Some years ago there was local adjustment , but only as Beta in RT. I see that it has been included in 5.11 ![]() But that is only an elipse tool … unless I’m wrong. Any insider knowing if there is more coming , like a brush tool ?
But that is only an elipse tool … unless I’m wrong. Any insider knowing if there is more coming , like a brush tool ?
The lack of proper local adjustment make me frustrated ( and that’s why I don’t use it anymore) .
Since this is a Play RAW , I post an image done with Adobe
A further try, not so noise free as the Adobe render, but on the other hand it looks in my opinion more natural:
That’s not true, there are a number of ways to apply the local correction.