When editing single exposure images of The Milky Way what modules/settings do you use; or what online resources did you use to learn/practice your techniques?
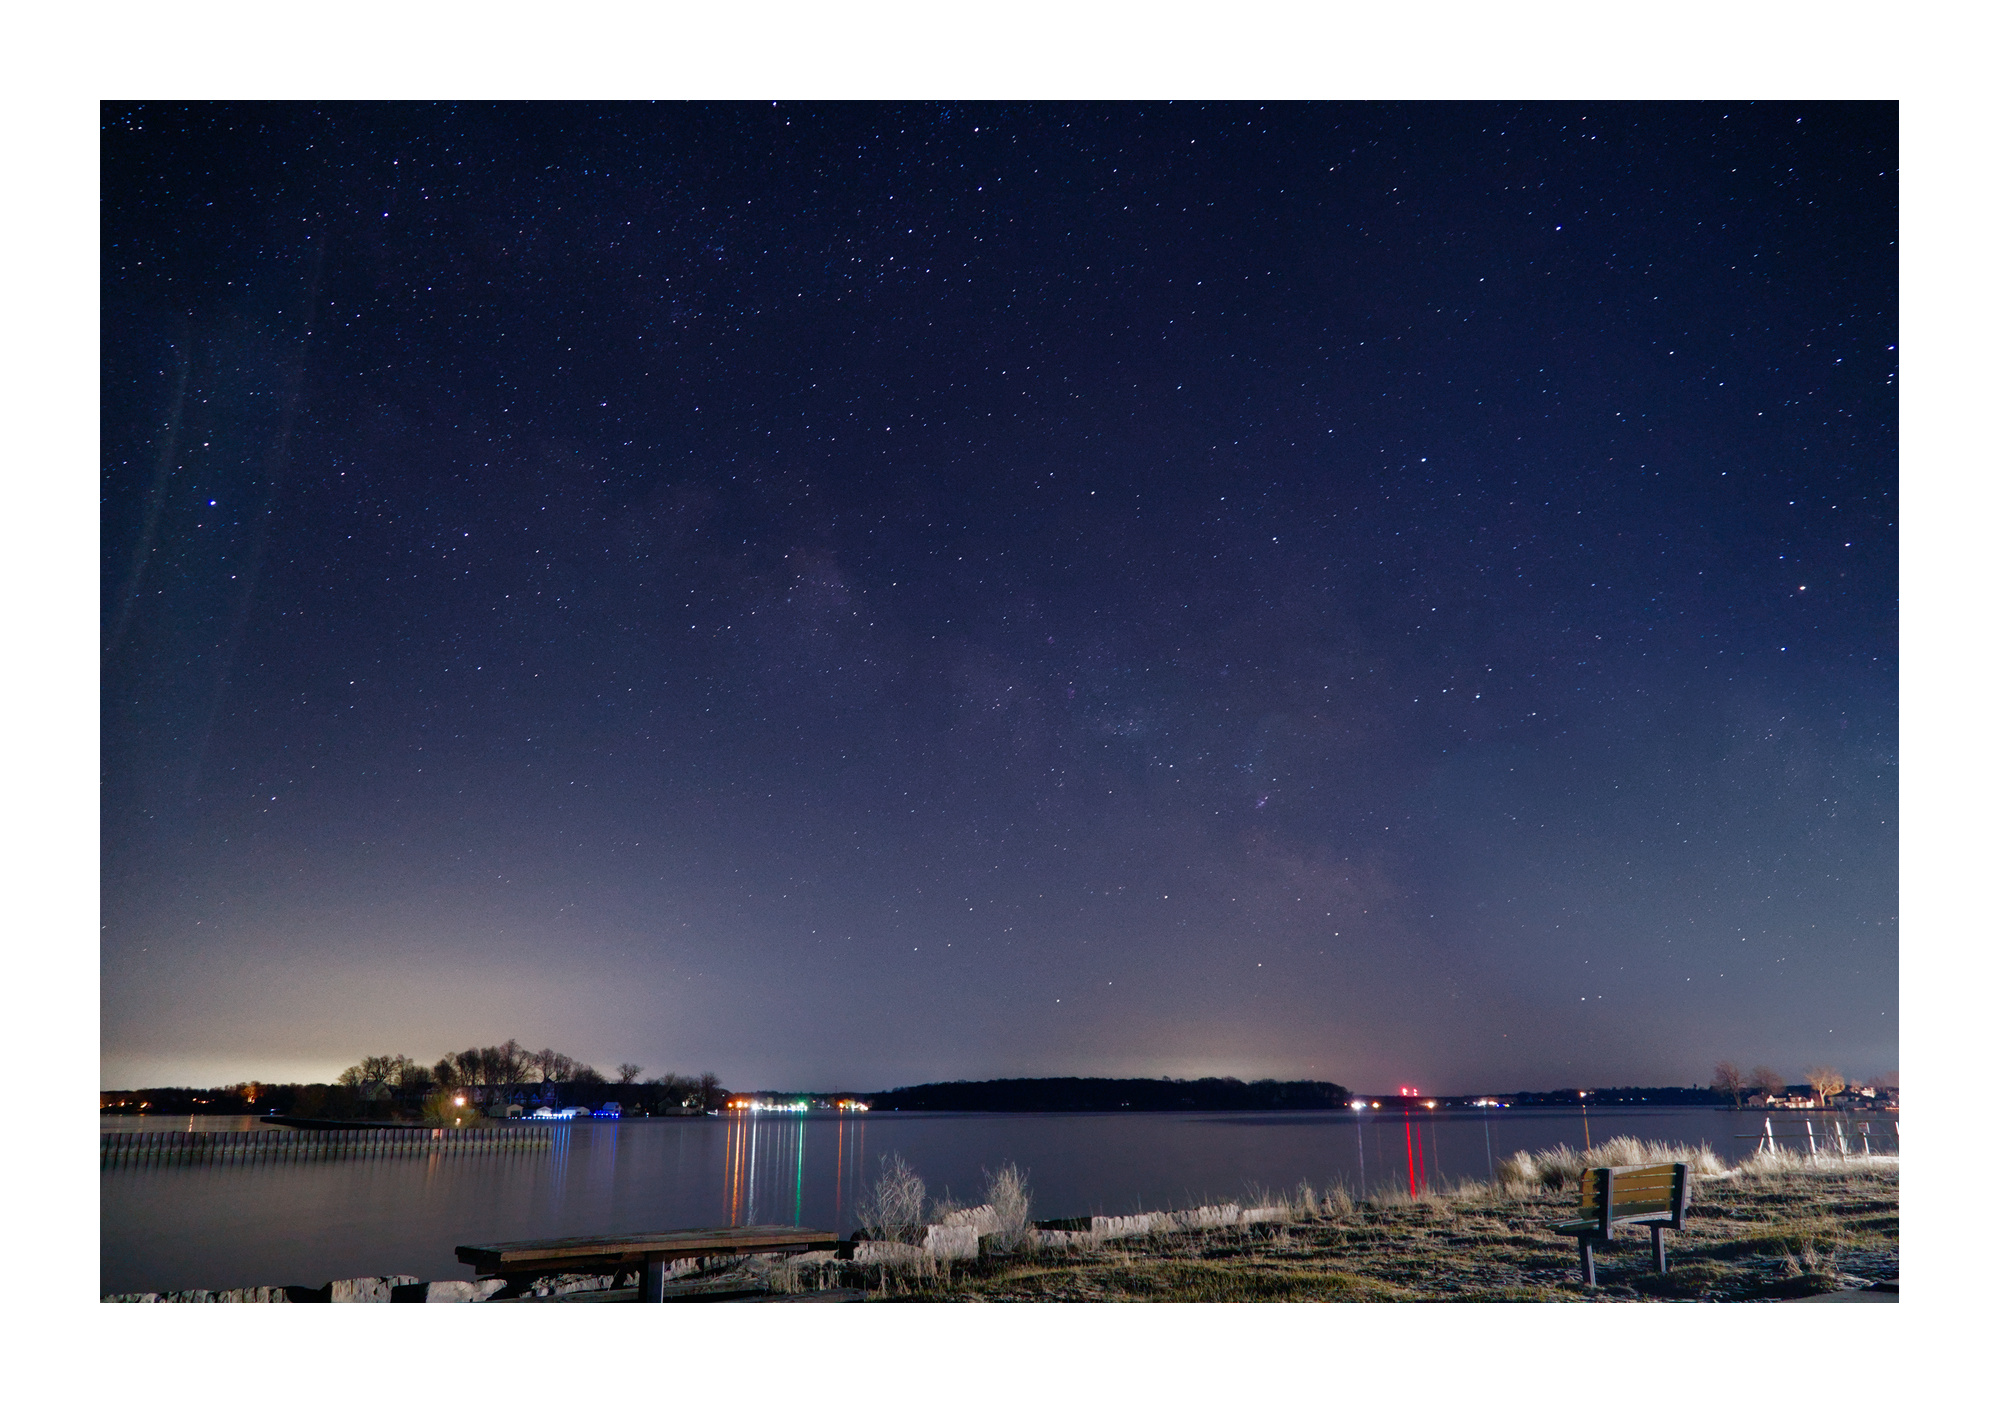
Also, with the below image, I know there is lens flare on the lower right from the building’s light, as well as on the upper left. Is the cloudy cluster inbetween The Milky Way, or more of the lens flare? I’ve included a second pic (screenshot) from Stellarium for the date/time of my image, and I believe this cloudy cluster in my image should be The Milky Way.
Members have my permission to edit my image as long as you provide the list of detailed editing steps you took AND the sidecar file in your response.
Thanks for your comments.
Apologies if I overkilled on the license info. I have zero experience Creative Commons or any licensing of my work.
God bless,
Genesius
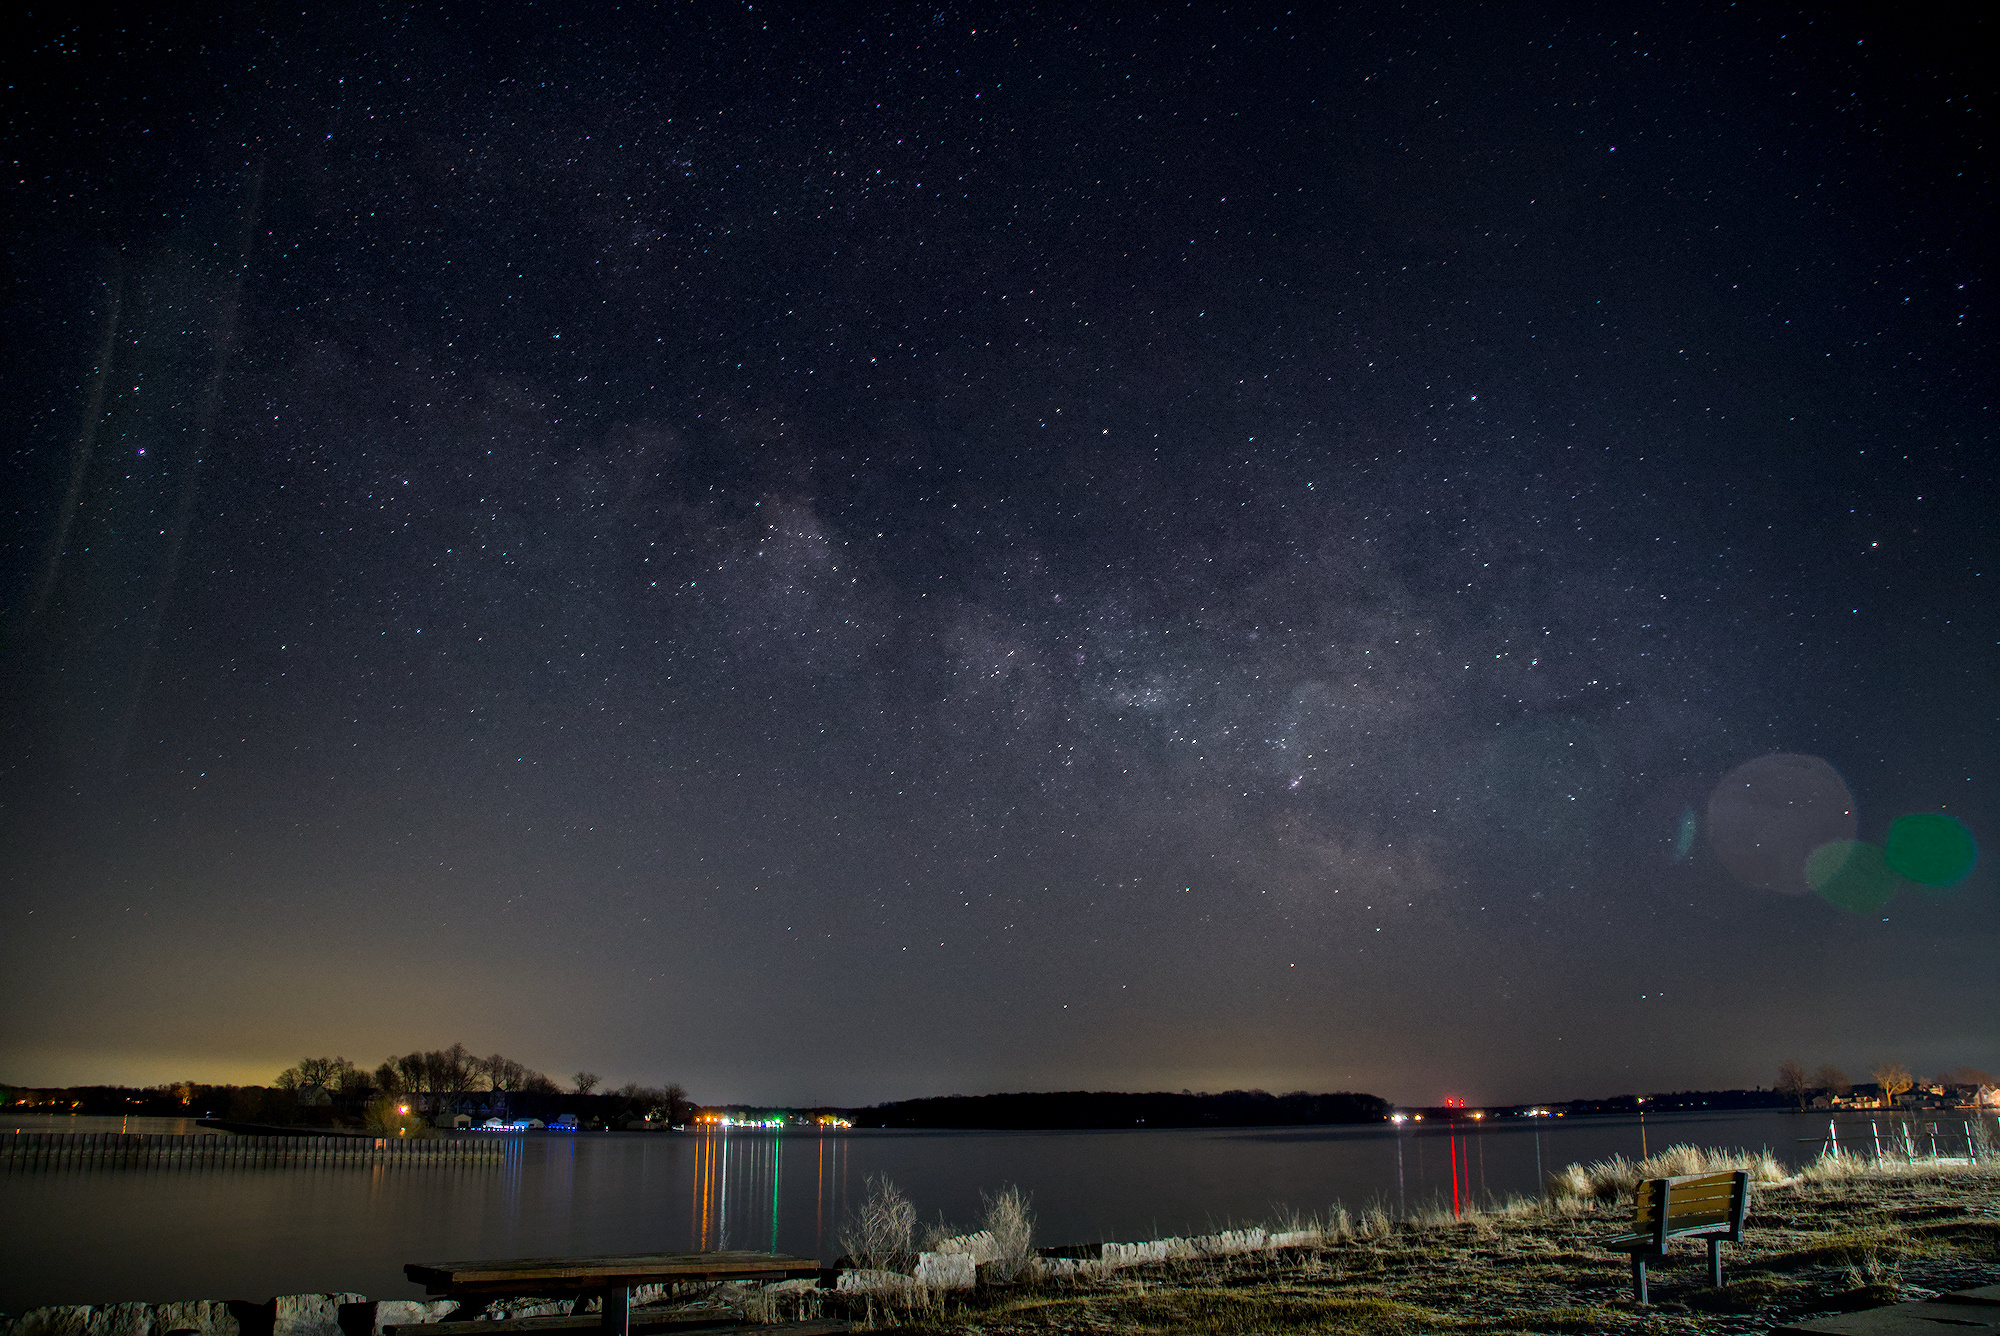
I’m not an astrophotography expert but here is my processing:
calibrated white balance with color calibration on the city light halo
adjusted global exposure (exposure and tone equalizer) and global contrast with sigmoid
tried to remove flare/halo with retouch (flare remove but false stars are cloned in this zone here )
for the sky : used color balance rgb with a mask, I’ve set the contrast gray fulcrum and increased the contrast a lot ; I increased the luminance in the “4 ways > global offset” so that I don’t have total blacks in the sky, also added a bit of blue.
for the foreground: used color balance rgb with a mask, I’ve set the contrast gray fulcrum and decreased the contrast ; then a bit of color grading to warm the colors here ;
I used a last color balance rgb for the global chroma and saturation settings, I tried to increase the colors in the sky
second instance of exposure but masked to have a smoother luminance gradient in the sky
Thanks @gigaturbo .
I’ll make a dup of my original and attach you RAW file to it. Then I’ll try your proc steps one-by-one and play around with them. I’ll probably crop the left side because of the lens flare (that is lens flare correct?). In some daylight images I feel lens flare can add some creative style to the pic. But in astro I feel it detracts.
Thanks again. I’ll post my updated image soon.
Enjoy your day and God bless.
Genesius
I know you said in your edited original post that you wanted
…however the tradition here with play_raw is mostly that the sidecar provides that list of steps. Sometimes a discussion of the particular fine-tuning of one module is warranted, but the point of sharing the sidecar is to allow you to load it yourself against the raw image you took, and step through each item of the history stack to observe “how it was done.”
So, maybe you will get more responses and thus more learning from this excellent community if you drop the first requirement.
Not sure if you have Affinity Photo…there are some great resources for that but I will say no more as we are in a FOSS forum and we are on a DT topic but I share with you or others if anyone has similar interests or you can google James Ritson…
Thanks @martin.scharnke .
I’m new to mirrorless (< 2 years), though I did some 35mm back in the ‘90’s auto everything, and some POS digital and smartphone photography. Been using DT (< 12 months). So this world, for the most part is new to me.
I understand your "Just sayin’" and take no offense.
Since I can’t run multiple instances of DT side-by-side, that is why I was asking for actual steps.
But I get it.
God bless,
Genesius
I am not able to edit my responses, but not my original post.
I am editing my request in this response.
Members have my permission to edit my image as long as you provide the sidecar file in your response.
I would appreciate the list of detailed editing steps you took as well, but this is NOT a requirement.
Please see @martin.scharnke response and my comment to why I am editing my post.
Thanks to all who have responded.
God bless,
Genesius
Please just duplicate your image (lighttable: action on selection: duplicate). Then load the sidecar file downloaded from this thread (lighttable: history stack: load sidecar file; set mode to overwrite). In this way you can compare multiple edits of your raw file and can inspect all settings in the darkroom.
DSC07666.ARW.xmp (8.4 KB)
Nothing very fancy.
Lens correction to eliminate the distortion
Exposure, sigmoid and tone equalizer iteratively.
Experimenting with denoise options - settled on the astrophoto denoise module
Experimented with sharpen options - the increase in local contrast this gives makes many more stars “appear” from this capture.