Shooting raw with the Google Pixel 6

I recently replaced my phone and decided to treat myself to the Google Pixel 6. Today, I decided to put the camera a bit to the test and see how the camera holds up. I’ve never had a phone camera that wasn’t super limited in terms of noise and despite the hype, I did not actually expect amazing results. However, I was wrong. This camera is simply fantastic. And I don’t mean the Google AI. Which is not bad but IMHO a little too opinionated and biased towards just a lot of blown out saturation and overly bright pictures. What I mean is that the raw photos you can shoot with this camera are of a surprisingly high quality for a phone camera.

Here’s a raw shot that I took using an Android app called Open Camera, which allows you to shoot raw and which I cannot recommend enough. I use syncthing to synchronize my phone with my two computers (a mac, and a linux laptop). So, jumping into Darktable is easy after I shoot some photos.

The camera itself is a 50 mega pixel camera. However, even in raw format, you only get 12.5. Basically it combines 4 pixels to create a single raw pixel. So, it’s less than half the resolution of my Fuji X-T30 which I have been shooting with for the last two years. 12.5 megapixels still adds up to a respectable 4064x3056 pixels. Which is of course plenty for most things you might want to do with a photo. I’d rather have good pixels than lots of pixels. Sadly, Open Camera does not give you any choice of which of the lenses to use. This phone actually has four separate cameras (1 front, and 3 on the back with different focal lengths & sensors).

IMG_20220507_221258.dng (23.9 MB)

Darktable edits:
IMG_20220507_221258.dng.xmp (7.9 KB)

These files are licensed Creative Commons, By-Attribution, Share-Alike.

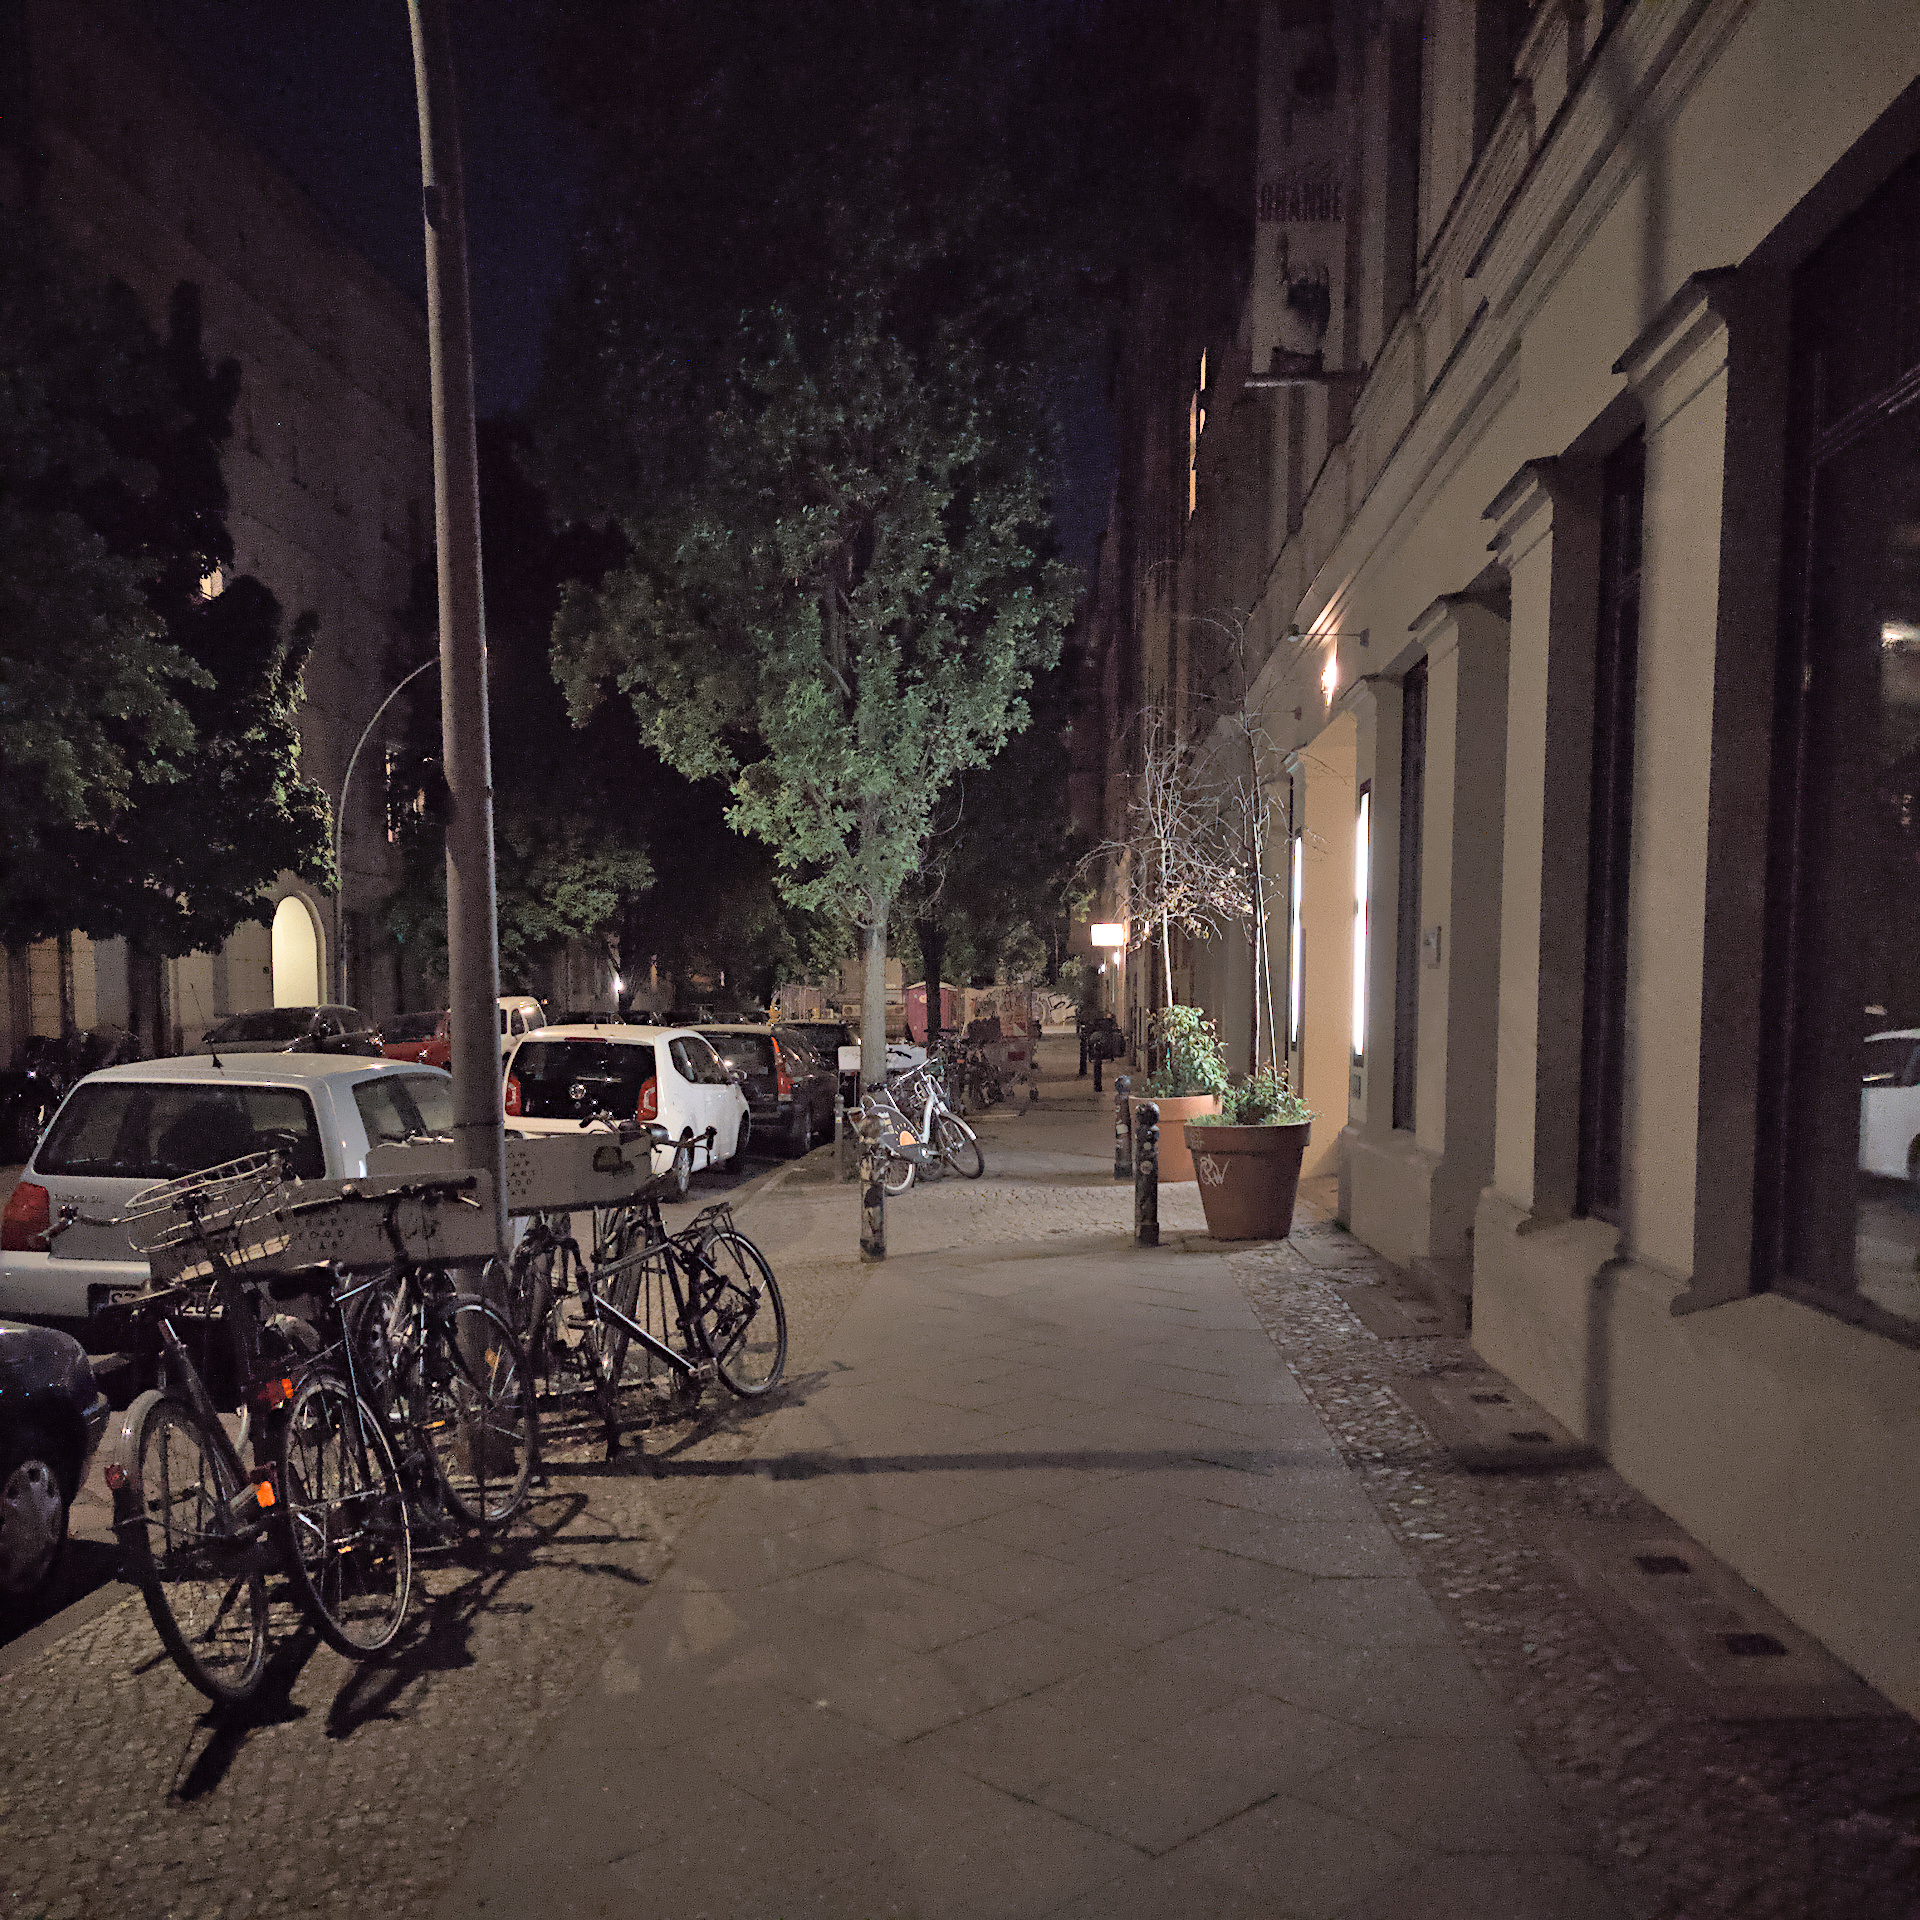
The scene is my street (Bergstrasse) in Berlin Mitte at night. It’s an alright moody shot with some street lights and light from windows. Nothing spectacular and not really my best in terms of composition. I was simply trying to get a few shots to play with.

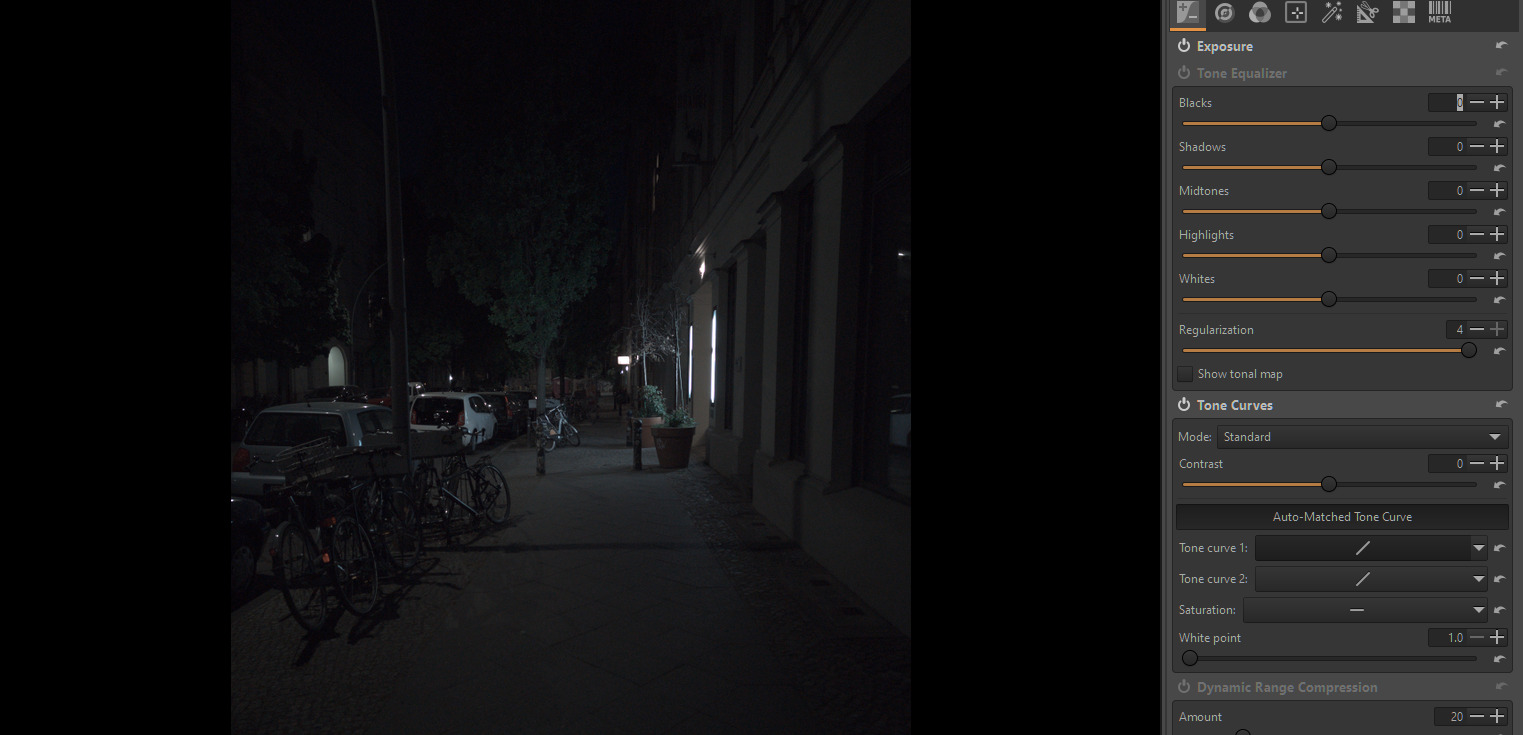
A few simple Darktable edits turned this into a pretty usable photo. The dng loads with rather washed out colors (my old Nokia had the same issue when shooting raw). But that’s easily fixed by simply boosting mid tone saturation by 50% in filmic. I also boosted the exposure quite a bit. It was way underexposed.

I was particularly impressed with the low noise levels. There is some of course but not a lot and especially not a lot of color noise. Those four combined pixels really cut down on that. I simply turned on profiled denoise and that got rid of what little noise there was. But even without that, the photo looks fine. The rest is just some default tweaks (contrast equalizer) that I have configured. I’ll need a default preset for the saturation thing, for sure. And a default exposure boost of 1 stop or so seems also desirable.

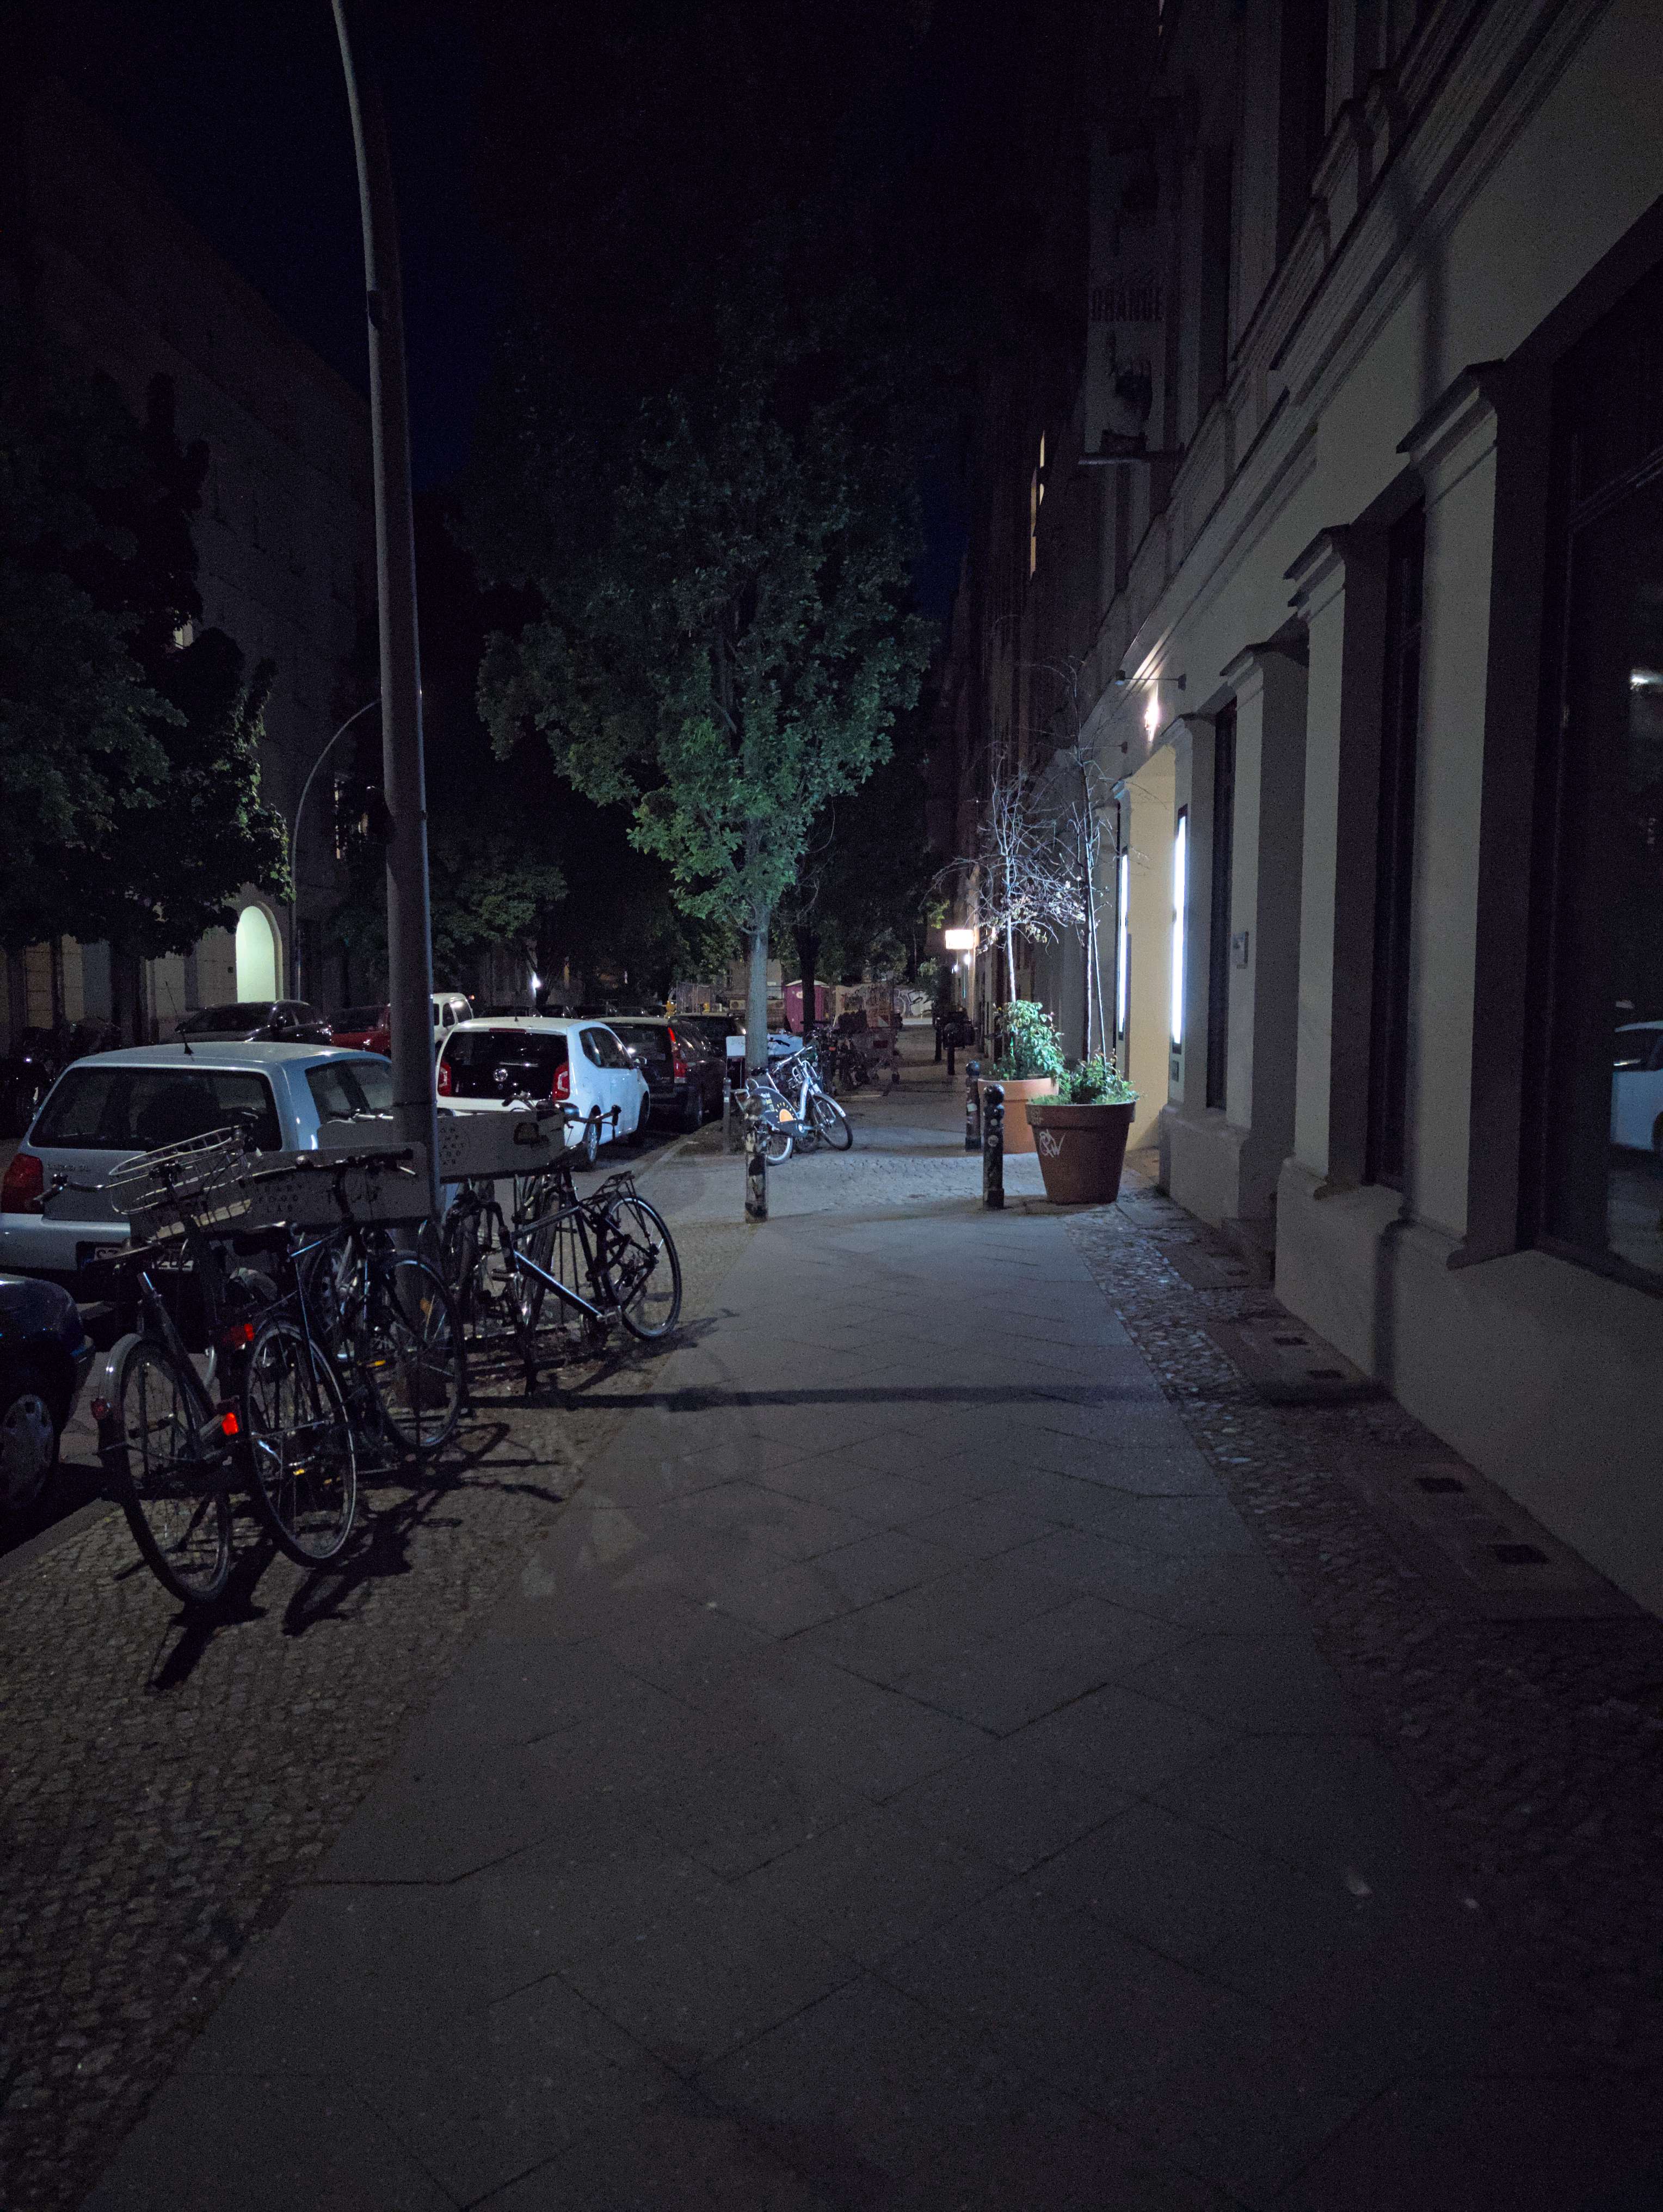
I’ve never owned a camara that can shoot a photo like this without a lot of noise. My Fuji is great and it would have produced a pretty photo for sure. But you’d be shooting at iso 3200 or even higher. At those iso levels, noise is a given. It’s not horrible of course but you lose a lot of detail with denoise. Open Camera shot this at 711, which is a weird iso value. But it seems to work. I need to watch the shutter speeds a bit but at 1/25 seconds, this seems pretty sharp. I’m guessing there’s some sort of stabilization happening.

The night site mode on this camera is amazing of course. And I actually shot a few with that mode to be able to compare with the Google AI. Those shots certainly do not disappoint. But now that I know how good the camera is by itself, that is actually much less impressive. I could probably get quite close with some more Darktable magic. And I actually like my night shots to be dark. I’m not really into HDR either and I find that look to be not very pleasing. The Pixel 6 does some hdr and it’s alright but not really my thing. I might use it in a pinch but ultimately, I like having more creative control.

This camera is simply excellent when you shoot raw. As this photo shows, it works very well under low light conditions. Which means it is going to be great under pretty much any light conditions. I love using my Fuji but this is a pretty nice backup camera to have in my pocket.


IMG_20220507_221258.dng.xmp (12.0 KB)


IMG_20220507_221258_01.dng.xmp (10.2 KB)

1 Like

open camera has a lot more controls but the DNG files from my 3aXL using the stock app are imo quite a bit nicer …and using gain maps really improved the image…

EDIT

If you search the forum for gainmaps…you will see a few threads. I think there is a user with a PR to add this support to DT… not sure of the status. That same user has a script called DNGpreprocess that will apply the gainmap and save a new DNG that you can use with DT.

Art supports it now…you go to the flatfield correction and hit embedded auto and it will apply the correction…

Smartphone DNG have a strong vignette and this is nicely corrected and the rest of the image is relit…

Here is one discussion

3 Likes


google.pixel.6.pp3 (15.6 KB) RawTherapee 5.8 Development

I only used the Base and Look table and not the embedded Tone curve from the colour profile that came with Adobe’s DNG converter (this one: Google Pixel 6 Rear Main Camera Adobe Standard.dcp).

BTW: I’m not sure if I’m allowed to provide this profile here for all to use, even though Adobe DNG Converter is free to download/use, so I refrain from doing so right now. @patdavid / @paperdigits: Am I/are we allowed to? Might be something that others are interested in as well.

EDIT: After reading Pat’s reply about adding this profile: the camera specific DCP used in the above edit

The cameras in phones are now capable of producing remarkable results when one considers the minute size of the sensors.
My try in GIMP after I created three different exposures from the RAW and blended them with Enfuse. (Always worth trying for high-contrast subjects, as it is so quick and easy.)

These DNG are different than the native ones shot in the google app. So for example I don’t think automatch curve works with these…it will on the ones in the native app. It looks like open camera is really using a tiff wrapped in the dng (contains no preview)…at least in a different way than the native app. Also I think but I would have to check that you can use embedded as the profile with the native DNG and get access to the Adobe base table and the look table and tone curve…this is likely the same as using the dng as a dcp also so you might not need the “Adobe” profile for these DNG like you might for another raw format…I forget who shared that with me but you can load the dng as a dcp to access that if you don’t have the dcp file… this won’t work with the open camera files again as they are closer to a tiff than the dng that google creates natively…

It seems to work in this case, I just did not like what it did to this image: Darker shadows are too crushed and highlights to harsh in this image (my opinion). This is the main reason I did not use it. This profile does have a nice Base and Look table, makes the colours just a tad warmer and probably more real.

One of the up sides of RawTherapee: Being able to use these external DCP profiles and selectively use the parts that are embedded. If you use darktable you need to create an icc from these dcp profiles if you want to use them, but I have no idea if you get the complete package (which would include the embedded tone curve). @ggbutcher talks about how right here. Never tried this myself, I want the flexibility that the DCP gives me when in RawTherapee.

I don’t have any experience with photographing using a mobile and apps and open camera so maybe I’m just lucky here that this specific Adobe DCP profile, even though it is for this specific mobile phone, works.

Ah I will check again I was using Art but in the past on my Pixel 3a the open camera images have no embedded preview and as such I never found that automatch tone curve would work… for sure you can get the adobe info using the embedded selection again at least in Art and comparing to the dcp or the image dng loaded as a dcp …it all looks the same…

The gainmaps are a nice image correction as well…nothing yet in DT but Art can apply them…takes away the harsh vignette in the images…wont see much in this image…but a daylight one will show that nicely …its done in the flat field in Art…not sure RT has it yet although there was mention of a fork…

Confirmed…automatch does not work for me for the OP image in ART

Confirming that for me the open camera DNG provided has no auto match response or option for embedded profile that you will see using the native camera app… my version of RT is not too old…

image

Oh, but automated does not work in RawTherapee either. You do need to use the Custom section in the Colour Management module. This will open up some extra options in ART (which are always displayed in RawTherapee). Both have Tone Curve and Look Table not selected out-of-the-box.

This from ART (Latest master):

Screenshot_2022-05-08_18-53-44

This is what I am talking about …for me embedded should give you that exact set of options…but it will not with the Open Camera DNG…also you can simply load the file it self as a DCP when you have a proper DNG but the one created by open camera is a deviation from the standard in some way… I will post versions of both from my pixel so you can see… I have conflated 2 issues… the curve and the color management… when comparing the DNG files…

Embedded should be enable…

Not here

Same with ART but when you use a native DNG…it will read those parameters directly…

image

I think I understand what you are saying but aren’t we now in the obscure(?) what’s actually inside a DNG territory?

I’m assuming that there’s a RAW inside, which needs a profile applied by the editor, and I get the feeling that you see it as a TIFF, which has the info embedded.

You might be right, having access to a Google phone, though. If this is the case I do wonder why Adobe provides a set of DCP profiles for this camera…

1 Like

I will have to go back and see but it seems RT might not be able to use the embedded in either DNG where as ART can for the native camera app DNG and also ART can apply the gain maps…

EDIT: Art will also normally use embedded data for lens corrections with these DNG but again will not using open camera

Not trying to dis the open camera app…as it has a crazy range of features compared to the native one…just pointing out that there are differences…

image

Exactly and likely the better question…

exiftool -a -u -s -g1 image.dng

Not sure about the Pixel 6, but for the older Pixel phones, the Google Camera app always creates a computational RAW stacked from multiple raw frames from the camera, and it embeds an Adobe DCP profile in its DNG files, ignoring any color profile that comes from the hardware’s camera driver. The Open Camera app takes a single raw frame from the camera and stores that in the DNG file, along with the color profile from the camera driver. It is possible to use any DNG shot with Google Camera as a DCP file in ART/RT to apply that profile to DNGs shot with a different app.

In all cases there should be a valid GainMap in the DNG file, and it is important to apply it to have accurate color over the entire image. I do have a PR open for Darktable to support this and need to make sure it’s all ready for 4.0.

3 Likes

Not the 6 but the 3aXL…but if anyone is interested in the difference …here are raw and jpg from each app…

IMG_20220508_125423.dng (23.3 MB)


PXL_20220508_165443575.dng (14.1 MB)

RAw/JPG Pixel

Open Camera DNG are washed out by comparison for me at least

Looking forward to that

Interesting…as you say the google DNG has the Adobe info embedded and so explains why ART can access that… Open camera is quite different and for some reason using D55…

opencamera.txt (3.9 KB)
google.txt (6.8 KB)