Sloppy Mess filter

A simple filter using Splits, mirroring and random rotations.
I called it Sloppy Mess because it’s what the default settings create :melting_face:
Multiple iterations look nice though.
I wanted to output the effect to a new layer but the default layer mode (Average) doesn’t exist in Gimp, and also it would need to rewrite the script because of iterations…
And I think i should remove some layer modes from the list (Shape stuff), since they don’t seem to make any difference…

Script (Hopefully without too many errors) :
#@gui Sloppy Mess : sloppymess, sloppymess_preview(0)*
#@gui : note = note("<small>Author: <i><a href="http://prawnsushi.free.fr">Prawnsushi</i></a>.      Latest Update: <i>2023/11/06</i>.</small>")
#@gui : sep = separator()
#@gui : note = note(<small><i>Slices</i></small>")
#@gui : Width (px) = int(1,1,2000)
#@gui : Axis (1x, 2y) = int(1,1,2)
#@gui : Mirror Axis (1x, 2y) = int(1,1,2)
#@gui : sep = separator()
#@gui : note = note(<small><i>Rotation</i></small>")
#@gui : Range Clockwise = int(35,0,90)
#@gui : Range Counter-Clockwise = int(-35,-90,0)
#@gui : Boundary Conditions = int(2,0,3)
#@gui : Center X(%) = int(0,0,100)
#@gui : Center Y(%) = int(0,0,100)
#@gui : sep = separator()
#@gui : Deform = int(3,0,20)
#@gui : sep = separator()
#@gui : Iterations = int(1,1,20)
#@gui : Blending =  choice(3,"add","alpha","and","average","blue","burn","darken","difference","divide","dodge","edges","exclusion","freeze","grainextract","grainmerge","green","hardlight","hardmix","hue","interpolation","lchlightness","lighten","lightness","linearburn","linearlight","luminance","multiply","negation","or","overlay","pinlight","red","reflect","saturation","screen","seamless","seamless_mixed","shapeareamax","shapeareamax0","shapeareamin","shapeareamin0","shapeaverage","shapeaverage0","shapemedian","shapemedian0","shapemin","shapemin0","shapemax","shapemax0","shapeprevalent","softburn","softdodge","softlight","stamp","subtract","value","vividlight","xor")
#@gui : Strength = float(100,0,100)
#@gui : sep = separator()


sloppymess:   skip "${1=1},${2=1},${3=1},${4=35},${5=-35},${6=2},${7=0},${8=0},${9=3},${10=1},${11=3},${12=100}"

m "BlendMode : $""=__mode" BlendMode "add","alpha","and","average","blue","burn","darken","difference","divide","dodge","edges","exclusion","freeze","grainextract","grainmerge","green","hardlight","hardmix","hue","interpolation","lchlightness","lighten","lightness","linearburn","linearlight","luminance","multiply","negation","or","overlay","pinlight","red","reflect","saturation","screen","seamless","seamless_mixed","shapeareamax","shapeareamax0","shapeareamin","shapeareamin0","shapeaverage","shapeaverage0","shapemedian","shapemedian0","shapemin","shapemin0","shapemax","shapemax0","shapeprevalent","softburn","softdodge","softlight","stamp","subtract","value","vividlight","xor"

wi={w}
he={h}

n 0,255

repeat $10
    if $2==1
        spins={w/$1}
        dir=x
        sli=y
    else
        spins={h/$1}
        dir=y
        sli=x
    fi

    if $3==1
        mir=x
    else
        mir=y
    fi

    +s. $dir,$spins
    repeat $spins
        l[{$>+1}]
            if $4||$5
                rotate {u($4,$5)},0,$6,$7%,$8%
            fi
            p={($>+1)%2}
            if $p==0
                mirror $mir
            fi
        done
    done

    a[^0] $dir
    +gradient_norm.
    negate.
    deform[^0] $9
    blend[^0] edges,1
    equalize.
    blend ${__mode{$11+1}},$12
done

equalize.


sloppymess_preview:
sloppymess $*

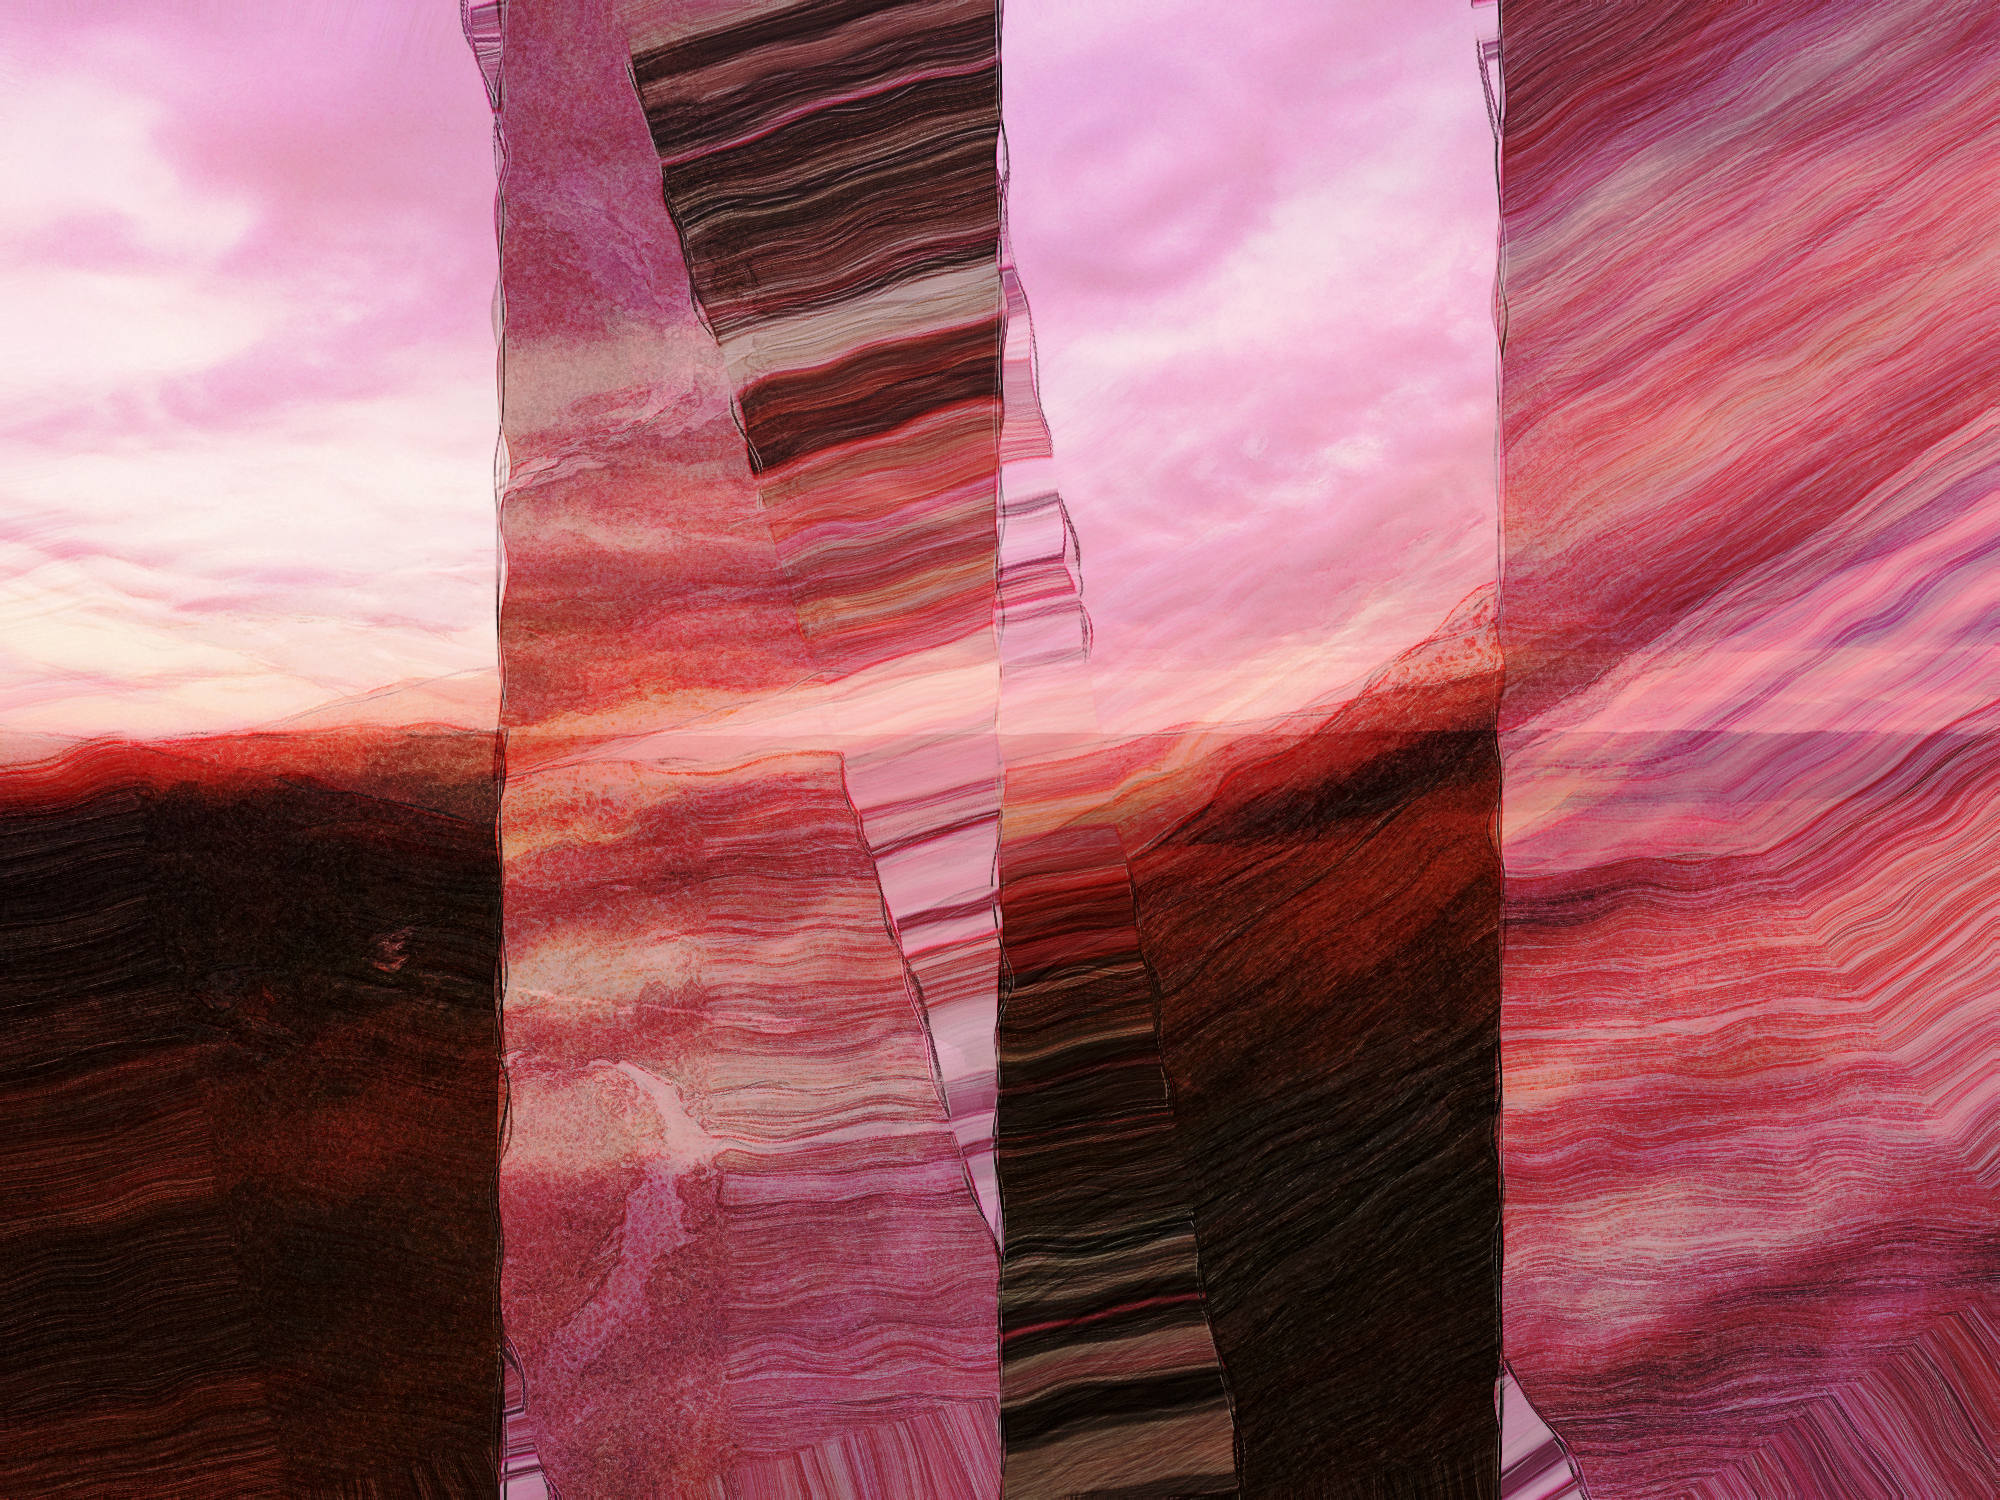
Here’s what it did to sample portrait9 :


Default settings.


Defaults settings, 3 iterations.


Width set to 100px, using Y axis, rotations to 0, blending to “Luminance” mode.


Changed Boundary Conditions to 0 and blending to “Value”.


Default settings but Width > 1000 and 6 iterations.

5 Likes

Interesting, I’ll edit it a little bit and put it in the gmic-community filters. Thanks @prawnsushi !

Here it is, in category Degradations/ :

I’ve done some modifications, so the filter can manage multiple input layers.
Also, I’ve put choice() widgets for the choice of the axes.

See code here :

Let me know is that is OK for you.

D.

2 Likes

Thanks for the inclusion :slight_smile:

I tend to use int() instead of choice() when there’s not too many choices but sure it doesn’t really blend with the other filters.

Thanks for the edit, i’ve learned a few new things too!
But I wanted to remove a few blending modes that don’t do much for this filter ( The Shape* category, i don’t even know what they really do anyway).
I guess i’ll have to use git if i want to modify it?

Also, is there a way to get the input image’s width and height and use it as the max size for slices, so that the slider stops at this value? I set a cap at 2000 but it doesn’t make any sense with an image smaller than 2000.

The best would be to set up a git account, and then do PRs (pull requests) when you want to modify a filter. This way, we keep the history of changes, and it’s really straightforward to include your changes.

Otherwise, you can copy/paste your filter code, as you did in your original post. But not the easiest route for me :slight_smile:

In that case, I suggest you use sliders that goes from 0 to 100 (expressed in %) instead. Keep in mind that if the user has multiple input layers with different sizes, having a slider that changes its max value would have no sense.

Yes obviously! Sorry you had to edit/reorder the script… i’m still a newbie : it was just a one-liner turned to script.
I have created a git account now.

I tried this but I don’t like it much since it’s not very accurate (if i want slices of 1px or 4px ?), so i’ll just leave it as is, or maybe increase the range to 5000, just in case someone wants to use it on a huge image?

Yes indeed, haven’t thought about that… but again I didn’t really want to make the filter work on multiple layers, just to output the result onto a new layer with name (on top of the original), set to whatever mode the user had selected (but some just don’t exist in Gimp, though they’re probably in Krita). Had it working but didn’t post it since it wasn’t happy with multiple iterations :stuck_out_tongue: Have to fix that later.
I’m adding a general angle direction now, a bit like the fx_wind effect, by rotating the image first, then cropping the result but again it’s not always accurate. For some angles it gets it right, and for some it doesn’t… sigh… :sweat_smile:
EDIT: I think i found out why : i was using rotate. -$13,0,0,50%,50% which already crops the image, whereas rotate -$13 doesn’t. In any case it seems better.

1 Like

That’s a great new filter, I LIKE IT… well done prawnsushi!

1 Like

Don’t worry, to be honest, I’m so happy to get a new filter contributor :slight_smile: , that I’m willing to help make the code cleaner (even if you plan to do only this filter, this is still a nice addition!).

Even in Krita, they don’t have all the blending modes available in G’MIC. We have very exotic modes, such as the shape*something family.

And I agree with @Mushy , that’s a very nice filter !

It’s true i’m more artist than coder… But it’s not my first filter actually, the first one is here but not finished yet (and a bigger mess of a script). And yes i think i will make more filters, it’s a nice hobby and it prevents me from buying guitars :stuck_out_tongue: Will have to look into github a bit though, never used it to be honest.

Thanks both! Nice to hear, especially when you know it was only a random one-liner to begin with.
I wonder what will come out of it?

Yes,and i don’t really understand what they do (and the shape0 variants?), except for shapeprevalent which you explained a previous post. In the end I’ll leave them in the list since they do some nice things with some images (chessboard for example).

Sorry to ask what I expect is a rather obvious question - but how can I get the new filter inG’MIC in GIMP on Windows? I installed the ‘latest dev’ version off the official G"MIC site but it’s not there…

Looking forward to trying it!

Hi,

you probably need to update the filter definitions.
I don’t use Gmic on windows but on Linux you can :

  • Tick the “internet” checkbox
  • Click on the arrow next to it, or press F5, or CTRL+R
  • Sloppy Mess will appear under the Degradations category

Have fun!

1 Like

Thanks! I’m a novice where GIMP and especially G’MIC even more so, and hadn’t done that. Doing it now…
… hmm. Getting an error:
image
It might be my internet connection.
It’s bedtime, so I’ll try it again tomorrow.

Thanks for your help!

Oh! It worked! I just tried once more… now I have Sloppy Mess. :smile:

1 Like

Nice, don’t forget to try multiple iterations, sometimes it’s all you need :slight_smile:
And if you get a white or black image try lowering the strentgh and/or iterations.

Awesome but not exactly sloppy. :slight_smile:

Haha, try this (after doing a gmic update) :
gmic run 'sp monalisa repeat 100 fx_sloppymess 270 w done d'

( Had to set the angle to 270. For some reason the CLI version is not rendering at the same angle than the GUI version… Don’t know why.

I’m only starting to get the hang of it… but a lot of fun.

Selfie:

And another… this one started out as a drone sunset…

2 Likes

This filter doesn’t seem to be working anymore (for me at least, in Windows 10)
G’mic 3.2.5 updated, in GIMP 2.10 and 2.99, CLI version also not working. -eek!-

Is there any specific error?

Sorry , my fault.
Please (net-)update your filters it should be back.

2 Likes